目录骨架屏用途Vue架构骨架屏思路大纲定义一个抽象组件获取插槽并初始化操作骨架屏循环slots操作类名操作vnode的静态类名使用方法传值效果如下完整地址骨架屏用途 作为
什么是抽象组件? 在渲染时会被跳过,只做运行时的操作的组件
    export default {
      name: 'GmSkeleton',
      abstract: true // 抽象组件的属性
    }
    render(h) {
      const slots = this.$slots.default || [h('')]
      this.$nextTick().then(() => {
        this.handlerPrefix(slots, this.showSpin ? this.addSkeletPrefix : this.removeSkeletPrefix)
      })

      return slots.length > 1 ? h('div', {
         staticClass: this.showSpin ? 'g-spinner' : ''
      }, slots) : slots
    }
这里我们将处理slots的方法放置在nextTick里面, 因为handlerPrefix里需要获取真实的DOM,nextTick是用来执行排序后的更新队列里的所有方法, 在执行render前, GMSkeleton组件的renderWatcher已被收集到更新队列里,所以此时定义nextTick CallBack函数里能获取到渲染后对应插槽里所有真实DOM,若是不了解nextTick原理,请移步你不知道的nextTick
    handlerComponent(slot, handler, init) {
      const originchildren = (((slot.componentInstance || {})._vnode || {}).componentOptions || {}).children
      const compchildren = ((slot.componentInstance || {})._vnode || {}).children
      !init && handler(slot)
      if (compchildren) this.handlerPrefix(compchildren, handler, false)
      if (originchildren) this.handlerPrefix(originchildren, handler, false)
    },
    handlerPrefix(slots, handler, init = true) {
      slots.forEach(slot => {
        var children = slot.children || (slot.componentOptions || {}).children || ((slot.componentInstance || {})._vnode || {}).children
        if (slot.data) {
          if (!slot.componentOptions) {
            !init && handler(slot)
          } else if (!this.$hoc_utils.getAbstractComponent(slot)) {
            ;(function(slot) {
              const handlerComponent = this.handlerComponent.bind(this, slot, handler, init)
              const insert = (slot.data.hook || {}).insert
              ;(slot.data.hook || {}).insert = () => { // 函数重构, 修改原有的组件hook, 并且保证insert只执行一次
                insert(slot)
                handlerComponent()
              }
              ;(slot.data.hook || {}).postpatch = handlerComponent
            }).call(this, slot)
          }
        }
        if (slot && slot.elm && slot.elm.nodeType === 3) {
          if (this.showSpin) {
            slot.memorizedtextContent = slot.elm.textContent
            slot.elm.textContent = ''
          } else {
            slot.elm.textContent = slot.memorizedtextContent || slot.elm.textContent || slot.text
          }
        }
        children && this.handlerPrefix(children, handler, false)
      })
    },
逐步分析:
    addSkeletPrefix(slot) {
      const rootVnode = slot.componentOptions ? (slot.componentInstance || {})._vnode || {} : slot;
      if (rootVnode.elm) {
        rootVnode.elm.classList.add(this.skeletPrefix)
      } else {
        ;(rootVnode.data || {}).staticClass += ` ${this.skeletPrefix}`
      }
    },
    removeSkeletPrefix(slot) {
      const rootVnode = slot.componentOptions ? (slot.componentInstance || {})._vnode || {} : slot;
      if (rootVnode.elm) {
        rootVnode.elm.classList && rootVnode.elm.classList.remove(this.skeletPrefix)
      } else if (rootVnode.data.staticClass) {
        rootVnode.data.staticClass = rootVnode.data.staticClass.replace(` ${this.skeletPrefix}`, '')
      }
    }
addSkeletePrefix用于添加gm-skeleton类名,而removeSkeletonPrefix则是用于删除gm-skeleton类名
  import Vue from 'vue'
  import GMSkeleton from 'path/to/GMSkeleton'

  Vue.use(GMSkeleton)
  <gm-skeleton>
    <Component />
    <div></div>
    <div><span>前端马丁</span></div>
  </gm-skeleton>
| 属性名 | 值 | 描述 |
|---|---|---|
| showSpin | Boolean | 是否开启骨架屏,默认为true |
| skeletPrefix | String | 骨架屏类名, 默认是gm-skeleton |
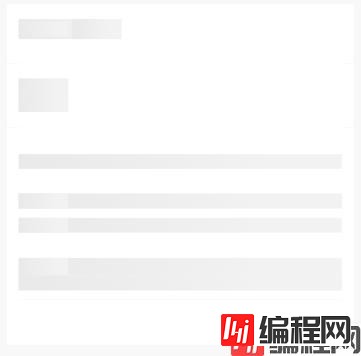
具体样式是根据开发者自己写的样式来生成的,通过gm-skeleton包裹,如上的使用方法,以下是一个简单的例子
80行代码实现Vue骨架屏
以上就是vue实现骨架屏的示例的详细内容,更多关于vue实现骨架屏的资料请关注编程网其它相关文章!
--结束END--
本文标题: vue实现骨架屏的示例
本文链接: https://www.lsjlt.com/news/124494.html(转载时请注明来源链接)
有问题或投稿请发送至: 邮箱/279061341@qq.com QQ/279061341
下载Word文档到电脑,方便收藏和打印~
2024-01-12
2023-05-20
2023-05-20
2023-05-20
2023-05-20
2023-05-20
2023-05-20
2023-05-20
2023-05-20
2023-05-20
回答
回答
回答
回答
回答
回答
回答
回答
回答
回答


官方手机版

微信公众号

商务合作


0