Python 官方文档:入门教程 => 点击学习
目录1.什么是ActiveRecord(AR)?2.通过AR实现CRUD1.1insert1.2update1.3Delete1.4select1.什么是ActiveRecord(A
ActiveRecord 是什么:
首先创建一张表。

创建一个SpringBoot工程,在pom文件中添加依赖。
        <dependency>
            <groupId>org.springframework.boot</groupId>
            <artifactId>spring-boot-starter</artifactId>
        </dependency>

        <dependency>
            <groupId>org.springframework.boot</groupId>
            <artifactId>spring-boot-starter-test</artifactId>
            <scope>test</scope>
        </dependency>

        <dependency>
            <groupId>Mysql</groupId>
            <artifactId>mysql-connector-java</artifactId>
            <scope>runtime</scope>
            <version>5.1.9</version>
        </dependency>

        <dependency>
            <groupId>com.baomidou</groupId>
            <artifactId>mybatis-plus-boot-starter</artifactId>
            <version>3.0.5</version>
        </dependency>
在核心配置文件中,配置数据库相关的连接信息。
#配置数据库的相关连接信息
spring.datasource.driver-class-name=com.mysql.jdbc.Driver
spring.datasource.url=jdbc:mysql://localhost:3306/springdb?useUnicode=true&characterEncoding=UTF-8&useJDBCCompliantTimezoneShift=true&useLegacyDatetimeCode=false&serverTimezone=GMT%2B8
spring.datasource.username=root
spring.datasource.passWord=12345678

#配置对应的日志信息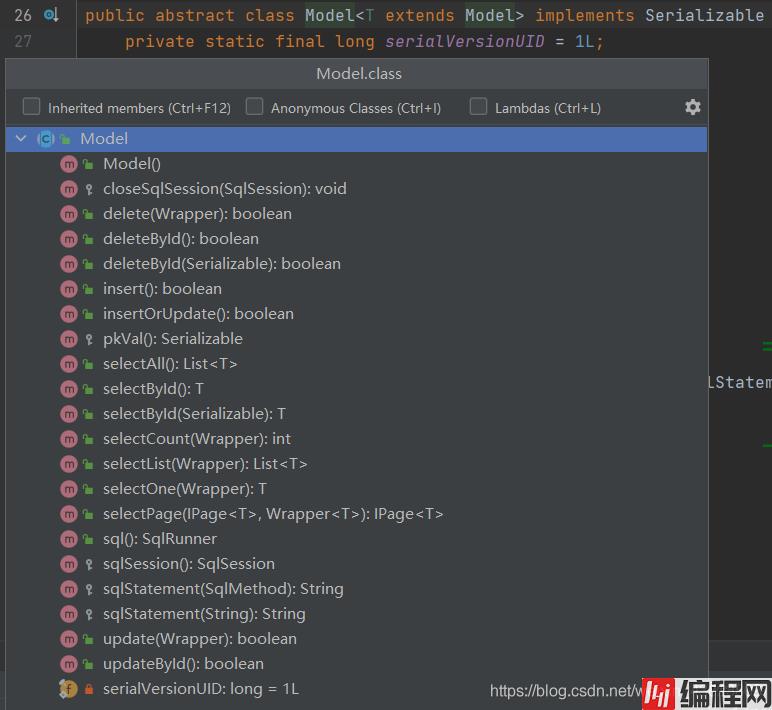
mybatis-plus.configuration.log-impl=org.apache.ibatis.logging.stdout.StdOutImpl创建一个实体类,要使用AR,那么实体类就必须继承MP框架中的Model这个类。
package com.szh.mybatisplus.entity;

import com.baomidou.mybatisplus.annotation.IdType;
import com.baomidou.mybatisplus.annotation.TableId;
import com.baomidou.mybatisplus.extension.activerecord.Model;


public class Dept extends Model<Dept> {

    @TableId(value = "id",type = IdType.AUTO)
    private Integer id;
    private String name;
    private String mobile;
    private Integer manager;

    //getter and setter
    //toString
}可以从Model类的源码中看到,这其中定义了大量关于CRUD操作的方法。
创建一个mapper接口。这里虽然不使用 mapper,但也需要定义这个它,MP 通过 mapper 获取到表的结构;不定义时,MP 报错无法获取表的结构信息。
package com.szh.mybatisplus.mapper;

import com.baomidou.mybatisplus.core.mapper.BaseMapper;
import com.szh.mybatisplus.entity.Dept;


public interface DeptMapper extends BaseMapper<Dept> {
}在SpringBoot项目的启动入口类上方,添加@MapperScan注解,确保可以扫描到MyBatis、MP下的相关注解。
package com.szh.mybatisplus;

import org.mybatis.spring.annotation.MapperScan;
import org.springframework.boot.SpringApplication;
import org.springframework.boot.autoconfigure.SpringBootApplication;

@SpringBootApplication
@MapperScan(value = "com.szh.mybatisplus.mapper")
public class Application {

    public static void main(String[] args) {
        SpringApplication.run(Application.class, args);
    }

}
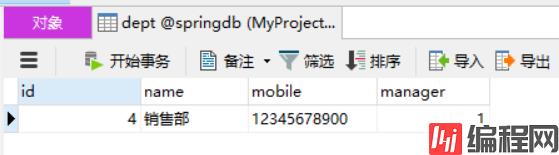
    @Test
    void testDeptInsert() {
        Dept dept=new Dept();
        dept.setName("销售部");
        dept.setMobile("12345678900");
        dept.setManager(1);

        //调用实体类对象自己的方法,完成对象自身到数据库的添加操作
        boolean flag=dept.insert();
        System.out.println("insert的结果:" + flag);
    }
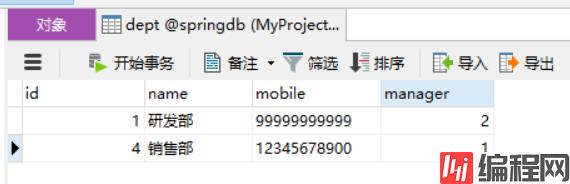
    @Test
    void testDeptUpdate() {
        Dept dept=new Dept();
        dept.setId(1);
        dept.setName("研发部");
        dept.setMobile("99999999999");
        dept.setManager(2);

        //调用实体类对象自己的方法,完成对象自身到数据库的更新操作
        boolean flag=dept.updateById();
        System.out.println("update的结果:" + flag);
    }
    @Test
    void testDeptDelete() {
        Dept dept=new Dept();
        boolean result = dept.deleteById(2);
        System.out.println("delete的结果:" + result);
    }
    @Test
    void testDeptDelete2() {
        Dept dept=new Dept();
        dept.setId(2);
        boolean result = dept.deleteById();
        System.out.println("delete的结果:" + result);
    }
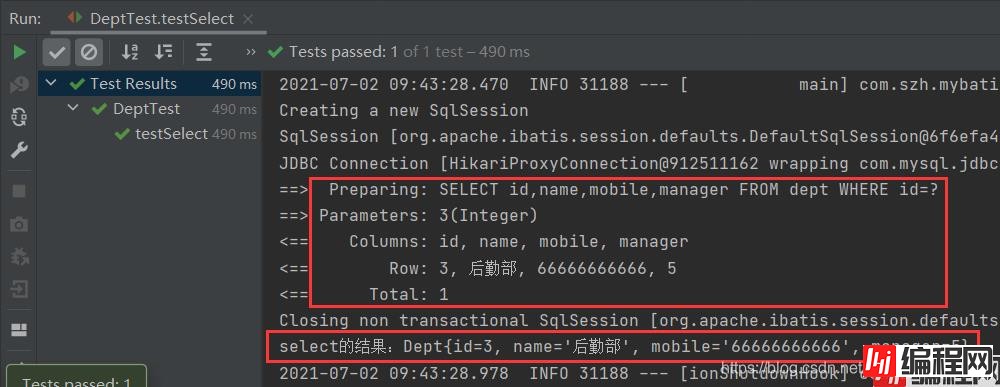
    @Test
    void testSelect() {
        Dept dept=new Dept();
        dept.setId(3);
        Dept dept1 = dept.selectById();
        System.out.println("select的结果:" + dept1);
    }
    @Test
    void testSelect2() {
        Dept dept=new Dept();
        Dept dept1 = dept.selectById(3);
        System.out.println("select的结果:" + dept1);
    }
    @Test
    void testSelect3() {
        Dept dept=new Dept();
        List<Dept> deptList=dept.selectAll();
        deptList.forEach( dept1 -> {
            System.out.println(dept1);
        });
    }
到此这篇关于MyBatis-Plus使用ActiveRecord(AR)实现CRUD的文章就介绍到这了,更多相关MyBatis-Plus实现CRUD内容请搜索编程网以前的文章或继续浏览下面的相关文章希望大家以后多多支持编程网!
--结束END--
本文标题: MyBatis-Plus使用ActiveRecord(AR)实现CRUD
本文链接: https://www.lsjlt.com/news/129843.html(转载时请注明来源链接)
有问题或投稿请发送至: 邮箱/279061341@qq.com QQ/279061341
下载Word文档到电脑,方便收藏和打印~
2024-03-01
2024-03-01
2024-03-01
2024-02-29
2024-02-29
2024-02-29
2024-02-29
2024-02-29
2024-02-29
2024-02-29
回答
回答
回答
回答
回答
回答
回答
回答
回答
回答


官方手机版

微信公众号

商务合作


0