Python 官方文档:入门教程 => 点击学习
目录1、swagger简介2、整合步骤1、Swagger简介 Swagger 是一个规范和完整的框架,用于生成、描述、调用和可视化 RESTful 风格的 WEB 服务。 官网: (
Swagger 是一个规范和完整的框架,用于生成、描述、调用和可视化 RESTful 风格的 WEB 服务。
主要作用是:
2. 接口的文档在线自动生成,降低后端开发人员编写接口文档的负担
3. 功能测试
spring已经将Swagger纳入自身的标准,建立了Spring-swagger项目,现在叫 Springfox。通过在项目中引入Springfox ,即可非常简单快捷的使用Swagger。
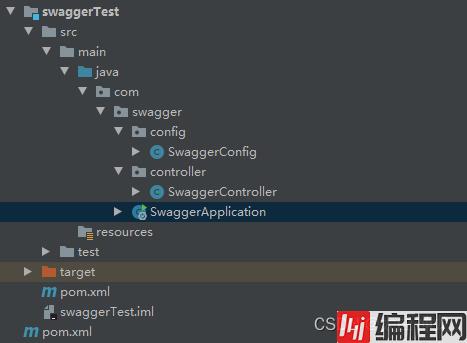
项目整体架构如下:
首先构建一个Maven项目,添加依赖,我本项目只是一个子模块,所以相应的版本都是依赖于父版本的,看不到版本号,swagger使用的是2.9.2版本
<dependencies>
        <dependency>
            <groupId>io.springfox</groupId>
            <artifactId>springfox-swagger2</artifactId>
        </dependency>
        <dependency>
            <groupId>io.springfox</groupId>
            <artifactId>springfox-swagger-ui</artifactId>
        </dependency>
        <dependency>
            <groupId>org.springframework.boot</groupId>
            <artifactId>spring-boot-starter</artifactId>
        </dependency>
        <dependency>
            <groupId>org.springframework.boot</groupId>
            <artifactId>spring-boot-starter-web</artifactId>
        </dependency>
        <dependency>
            <groupId>org.springframework</groupId>
            <artifactId>spring-webmvc</artifactId>
        </dependency>
</dependencies>
创建Swagger配置类SwaggerConfig
package com.swagger.config;
import org.springframework.boot.autoconfigure.condition.ConditionalOnProperty;
import org.springframework.context.annotation.Bean;
import org.springframework.context.annotation.Configuration;
import org.springframework.web.servlet.config.annotation.ResourceHandlerReGIStry;
import org.springframework.web.servlet.config.annotation.WebMvcConfigurer;
import springfox.documentation.builders.apiInfoBuilder;
import springfox.documentation.builders.PathSelectors;
import springfox.documentation.builders.RequestHandlerSelectors;
import springfox.documentation.service.ApiInfo;
import springfox.documentation.service.Contact;
import springfox.documentation.spi.DocumentationType;
import springfox.documentation.spring.web.plugins.Docket;
@Configuration
@ConditionalOnProperty(prefix = "swagger",value = {"enable"},havingValue = "true")
public class SwaggerConfig implements WebMvcConfigurer {
    @Bean
    public Docket buildDocket() {
        // 要扫描的API(Controller)基础包
        return new Docket(DocumentationType.SWAGGER_2)
                .apiInfo(buildApiInfo())
                .select()
                .apis(RequestHandlerSelectors.basePackage("com.swagger.controller"))
                .paths(PathSelectors.any())
                .build();
    }
    private ApiInfo buildApiInfo() {
        Contact contact = new Contact("开发者", "", "");
        return new ApiInfoBuilder()
                .title("测试‐应用API文档")
                .description("")
                .contact(contact)
                .version("1.0.0")
                .build();
    }

    @Override
    public void addResourceHandlers(ResourceHandlerRegistry registry) {
        registry
                .addResourceHandler("/**")
                .addResourceLocations("classpath:/static/");
        registry
                .addResourceHandler("swagger‐ui.html")
                .addResourceLocations("classpath:/META‐INF/resources/");
        registry
                .addResourceHandler("/webjars/**")
                .addResourceLocations("classpath:/META‐INF/resources/webjars/");
    }
}
在Controller层创建SwaggerController类方便测试,并添加swagger相应注解
package com.swagger.controller;
import io.swagger.annotations.Api;
import io.swagger.annotations.ApiImplicitParam;
import io.swagger.annotations.ApiOperation;
import org.springframework.web.bind.annotation.GetMapping;
import org.springframework.web.bind.annotation.RestController;
@Api(value = "测试平台 ",tags = "测试平台")
@RestController
public class SwaggerController {
    @ApiOperation("测试")
    @GetMapping(path = "/hello")
    public String hello(){
        return "hello";
    }
    @ApiOperation("测试2")
    @ApiImplicitParam(name = "name",value = "姓名",required = true,dataType = "string")
    @GetMapping("/hi")
    public String hi(String name){
        return "hi : "+name;
    }
}
常用Swagger注解如下:
创建启动类SwaggerApplication
package com.swagger;
import org.springframework.boot.SpringApplication;
import org.springframework.boot.autoconfigure.SpringBootApplication;
import springfox.documentation.swagger2.annotations.EnableSwagger2;
@SpringBootApplication
@EnableSwagger2     //开启swagger
public class SwaggerApplication {
    public static void main(String[] args) {
        SpringApplication.run(SwaggerApplication.class,args);
    }
}
启动SwaggerApplication ,访问http://localhost:8080/swagger-ui.html

即可以查看接口文档了......
路漫漫其修远兮,吾将上下而求索,希望此篇文章对大家有所帮助......
到此这篇关于springboot详解整合swagger方案的文章就介绍到这了,更多相关springboot swagger内容请搜索编程网以前的文章或继续浏览下面的相关文章希望大家以后多多支持编程网!
--结束END--
本文标题: springboot详解整合swagger方案
本文链接: https://www.lsjlt.com/news/153445.html(转载时请注明来源链接)
有问题或投稿请发送至: 邮箱/279061341@qq.com QQ/279061341
下载Word文档到电脑,方便收藏和打印~
2024-03-01
2024-03-01
2024-03-01
2024-02-29
2024-02-29
2024-02-29
2024-02-29
2024-02-29
2024-02-29
2024-02-29
回答
回答
回答
回答
回答
回答
回答
回答
回答
回答


官方手机版

微信公众号

商务合作


0