Python 官方文档:入门教程 => 点击学习
目录加载测试专用的属性运行结果使用外部bean对测试运行结果测速类启动WEB环境我们在测试类中运行结果加载测试专用的属性 点开@SpringBootTest源码中查看 可以在之后加
点开@SpringBootTest源码中查看
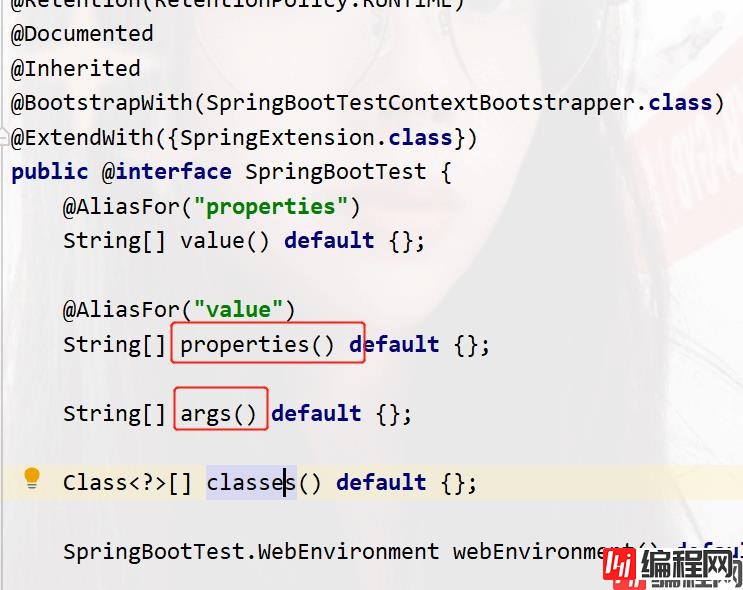
可以在之后加入临时配置, 也可以使用命令行args参数设置。设置的测试专用参数会覆盖配置文件中的。
package com;
import org.junit.jupiter.api.Test;
import org.springframework.beans.factory.annotation.Value;
import org.springframework.boot.test.context.SpringBootTest;
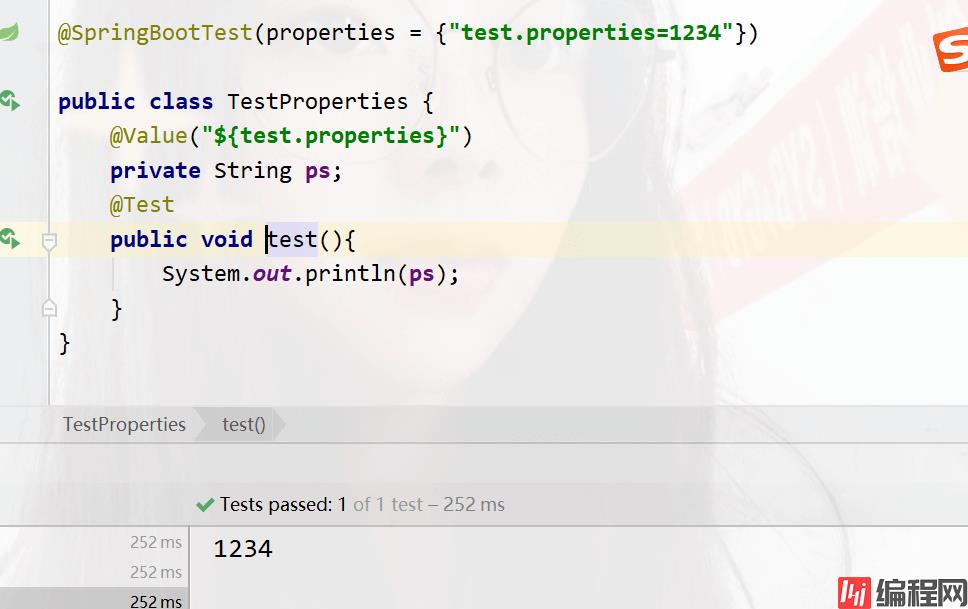
@SpringBootTest(args = {properties = {"test.properties=1234"})
public class TestProperties {
@Value("${test.properties}")
private String ps;
@Test
public void test(){
System.out.println(ps);
}
}
也可以使用命令行参数
args = {"--test.properties=4321"},
命令行参数的优先级比配置文件的高,所以当两者共存的时候,以命令行的为主
@SpringBootTest(args = {"--test.properties=4321"},properties = {"test.properties=1234"})
这个测试类设置的属性只对当前测试有效,影响小
package com.config;
import org.springframework.context.annotation.Bean;
import org.springframework.context.annotation.Configuration;
@Configuration//说明当前为配置类
public class TestBean {
    @Bean//创建bean
    public String mess(){
        return "this bean run ";
    }
}
在测试类下,使用@Import注解加载当前测试配置
package com.test;
import com.config.TestBean;
import org.junit.jupiter.api.Test;
import org.springframework.beans.factory.annotation.Autowired;
import org.springframework.boot.test.context.SpringBootTest;
import org.springframework.context.annotation.Import;
@SpringBootTest
@Import({TestBean.class})
public class TestBeanNow {
    @Autowired//注入bean对象
    public String mess;
    @Test
    public void test(){
        System.out.println(mess);
    }
}
在测试类中运行一般是不会启动服务器的,如下图。都是显示运行成功或失败的信息

我们Ctrl+b点进@SpringBootTest源码中查看,有一个关于web的

默认值是MOCK,mock:默认提供一个模拟的web环境,不会启动内嵌的服务器

第一个是以你配置文件指定的端口启动,如果没有就默认以8080启动
第二个mock:默认提供一个模拟的web环境,不会启动内嵌的服务器
第三个是不启动服务器
第四个是随机端口启动
我们测试随机端口启动
package com;
import org.junit.jupiter.api.Test;
import org.springframework.boot.test.context.SpringBootTest;
@SpringBootTest(webEnvironment = SpringBootTest.WebEnvironment.RANDOM_PORT)
public class WebTest {
    @Test
    public void test(){
    }
}运行了两次看端口结果,都是随机的

到此这篇关于SpringBoot测试配置属性与web启动环境超详细图解的文章就介绍到这了,更多相关SpringBoot测试配置属性内容请搜索编程网以前的文章或继续浏览下面的相关文章希望大家以后多多支持编程网!
--结束END--
本文标题: SpringBoot测试配置属性与web启动环境超详细图解
本文链接: https://www.lsjlt.com/news/169941.html(转载时请注明来源链接)
有问题或投稿请发送至: 邮箱/279061341@qq.com QQ/279061341
下载Word文档到电脑,方便收藏和打印~
2024-03-01
2024-03-01
2024-03-01
2024-02-29
2024-02-29
2024-02-29
2024-02-29
2024-02-29
2024-02-29
2024-02-29
回答
回答
回答
回答
回答
回答
回答
回答
回答
回答


官方手机版

微信公众号

商务合作


0