目录项目准备子项目配置主应用项目配置项目准备 1、基于amin-work-x项目作为原始项目,改造动态菜单为自定义菜单 2、分别在主应用项目(main)和子应用(children
1、基于amin-work-x项目作为原始项目,改造动态菜单为自定义菜单


2、分别在主应用项目(main)和子应用(childrenOne,childrenTwo)项目中安装microApp
npm i @micro-zoe/micro-app --save1,修改子项目mian.ts,添加与基座的交互配置和路由冲突解决
import { createApp } from "Vue";
import App from "./App.vue";
import { Router } from 'vue-router'
import router from "./router";
import "./utils/router";
import ElementPlus from "element-plus";
import "element-plus/dist/index.CSS";
import "dayjs/locale/zh-cn";
import zhCn from "element-plus/es/locale/lang/zh-cn";
import "@/icons/iconfont/iconfont.css";
import "@/icons/iconfont/iconfont.js";
import "@/styles/main.css";
import LayoutStore from "@/layouts";
import Http from "@/api/http";
import { reGISterComponents } from "./components";
import * as Icons from "@element-plus/icons";
import pinia from "./store/pinia";

import "./setting";
declare global {
  interface Window {
    microApp: any
    __MICRO_APP_NAME__: string
    __MICRO_APP_ENVIRONMENT__: string
    __MICRO_APP_BASE_ROUTE__: string
  }
}

// 与基座进行数据交互
function handleMicroData(router: Router) {
  // 是否是微前端环境
  if (window.__MICRO_APP_ENVIRONMENT__) {

    // 监听基座下发的数据变化
    window.microApp.aDDDataListener((data: Record<string, unknown>) => {
      console.log('child-vue3 addDataListener:', data)

      // 当基座下发path时进行跳转
      if (data.path && data.path !== router.currentRoute.value.path) {
        router.push(data.path as string)
      }
    })

    // 向基座发送数据
    setTimeout(() => {
      window.microApp.dispatch({ myname: 'tenant-app' })
    }, 3000)
  }
}


function fixBugForVueRouter4(router: Router) {

  // 判断主应用是main-vue3或main-vite,因为这这两个主应用是 vue-router4
  if (window.__MICRO_APP_ENVIRONMENT__) {
    //if (window.location.href.includes('/main-vue3') || window.location.href.includes('/main-vite')) {


    const realBaseRoute = window.__MICRO_APP_BASE_ROUTE__;//.replace(/^\/app-tenant-[^/]+/g, '')

    router.beforeEach(() => {
      if (typeof window.history.state?.current === 'string') {
        window.history.state.current = window.history.state.current.replace(new RegExp(realBaseRoute, 'g'), '')
      }
    })

    router.afterEach(() => {
      if (typeof window.history.state === 'object') {
        window.history.state.current = realBaseRoute + (window.history.state.current || '')
      }
    })
  }
}
const app = createApp(App);
Object.keys(Icons).forEach((it) => {
  app.component(it, (Icons as any)[it]);
});
registerComponents(app);
app.use(LayoutStore, {
  state: {
    layoutMode: "ltr",
  },
  actions: {
    onPersonalCenter() {
      router.push({ path: "/personal", query: { uid: 1 } });
    },
    onLoGout() {
      router.replace({ path: "/login", query: { redirect: "/" } }).then(() => {
        window.location.reload();
      });
    },
  },
});
app.use(pinia).use(router);
app.use(ElementPlus, {
  locale: zhCn,
});
app.use(http);
app.mount("#app");

handleMicroData(router)
fixBugForVueRouter4(router)
// 监听卸载操作
window.addEventListener('unmount', function () {
  //console.log("r4开始卸载", window.location, window.history, app)
  app?.unmount()
  //console.log('微应用child-vue3卸载了')
})
2,修改vue.config.js文件,配置publicPath、端口号、允许跨域

3,为保证子应用的路由在主应用中能直接使用,可在每个路由前添加子应用的路由标志

这一步可不操作,如果不添加,则需要在主应用添加菜单或者动态获取菜单时,根据其他标志,为路由手动加上当前子应用的标志,用于判断子应用来源
4、修改子应用路由问history模式
const router = createRouter({
  history: createWEBHistory(window.__MICRO_APP_BASE_ROUTE__||process.env.BASE_URL),
  routes: mapTwoLevelRouter([...constantRoutes, ...asyncRoutes]),
});1,在layout中添加子应用入口文件(src\layouts\microapp\app-one.vue)
<template>
  <div style="height: 100%">
    <micro-app
      name="appname-one"
      :url="url"
      baseroute="/app-main"
      :data="microAppData"
      @created="handleCreate"
      @beforemount="handleBeforeMount"
      @mounted="handleMount"
      @unmount="handleUnmount"
      @error="handleError"
      @datachange="handleDataChange"
      style="height: 100%"
    ></micro-app>
  </div>
</template>

<script lang="ts">
export default {
  name: "name-app",
  data() {
    return {
      url:
        process.env.node_ENV === "development"
          ? "http://localhost:4009/app-one"
          : "通过配置获取线上地址",
      microAppData: { msg: "来自基座的数据" },
    };
  },
  methods: {
    handleCreate(): void {
      console.log("child-vue3 创建了");
    },

    handleBeforeMount(): void {
      console.log("child-vue3 即将被渲染");
    },

    handleMount(): void {
      console.log("child-vue3 已经渲染完成");

      setTimeout(() => {
        // eslint-disable-next-line @typescript-eslint/ban-ts-comment
        // @ts-ignore
        this.microAppData = { msg: "来自基座的新数据" };
      }, 2000);
    },

    handleUnmount(): void {
      console.log("child-vue3 卸载了");
    },

    handleError(): void {
      console.log("child-vue3 加载出错了");
    },

    handleDataChange(e: CustomEvent): void {
      console.log("来自子应用 child-vue3 的数据:", e.detail.data);
    },
  },
};
</script>

<style></style>
2,在主应用中注册子应用路由

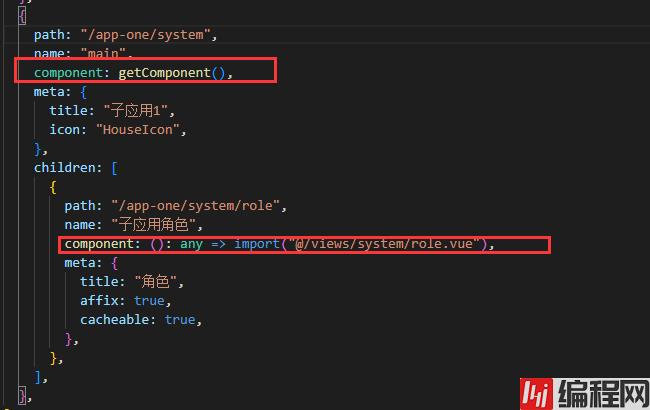
子应用的路由第一次指向主应用的layout,第二层指向上面新建的入口文件
3,修改主应用publicPath

此处的publicPath需与app-one中的baseroute保持一致
配置完成后,先后运行两个项目后,在主应用中手动添加一个子应用的的具体页面路由,就可以在主应用中打开子应用了,但是此时子应用的路由表覆盖了主应用。
为解决这个问题,需要在子应用中添加一个非layout布局的空页面,当子应用单独运行时,指向layout布局页面,如果是在微服务中使用,则指向空页面
src\layouts\EmptyLayout.vue
<template>
  <div class="empty-layout">
    <router-view> </router-view>
  </div>
</template>
<style lang="scss" scoped>
.empty-layout {
  height: 100%;
}
</style>
src\router\index.ts

到此这篇关于vue3+ts+MicroApp实战教程的文章就介绍到这了,更多相关vue3 ts MicroApp内容请搜索编程网以前的文章或继续浏览下面的相关文章希望大家以后多多支持编程网!
--结束END--
本文标题: vue3+ts+MicroApp实战教程
本文链接: https://www.lsjlt.com/news/170488.html(转载时请注明来源链接)
有问题或投稿请发送至: 邮箱/279061341@qq.com QQ/279061341
下载Word文档到电脑,方便收藏和打印~
2024-01-12
2023-05-20
2023-05-20
2023-05-20
2023-05-20
2023-05-20
2023-05-20
2023-05-20
2023-05-20
2023-05-20
回答
回答
回答
回答
回答
回答
回答
回答
回答
回答


官方手机版

微信公众号

商务合作


0