目录React获取state值并更新使用在视图层处理在model层处理react中state基本使用有状态组件和无状态组件state的基本使用setState修改状态从jsX中抽离事
react获取state的值并且修改分为两种情况:
//在 state 中饭设置初始值
state={
      name:'',
      age:''
 }
//通过 控制一个事件触发然后setState 去设置
setName=()=>{
    this.setState({
       name
    })
}view层
  //前端通过dispatch 去调用changeTab 接口
  onTabsChange = (key) => {
    this.props.dispatch({
      type: `${this.module}/changeTab`,
      payload: key
    });
  }
model层:
const moduleName = 'mayouchen';
let defaultState = {
  activeTabKey: "1"
};
export default {
  namespace: moduleName,
  state: {
    moduleName: moduleName,
    defaultState,
    ...defaultState
},
effects: {
 * changeTab({ payload, }, { call, put, select }) {
       // 更新  activeTabKey
       yield put({
         type:'updateActiveTabKey',
         payload
       });
      // 更新完  activeTabKey  就可以使用  activeTabKey 更新后的值
       yield put({type: 'getDataByTab'});
 },
  * getDataByTab({payload }, { call, put, select }) {
        let { activeTabKey } = yield select(state => state[moduleName]);
        //切换TAB调用不同接口
        if(activeTabKey == "1") {  //商户信息
          yield put({type:'businessInfORMation', payload: {}});
        } else if (activeTabKey == "2" ) {  //审批信息
          yield put({type:'approvalInformation', payload: {}})
        }else if (activeTabKey == "3" ) {
        }
    },
   * businessInformation ({payload, }, { call, put, select }) {
     const result = yield call(read, payload);
     if (result ) {
       let { data } = result ;
       yield put({ type: 'getBusinessInformationData', payload: {...data }});
     }
     else {
       message.error(`获取信息失败:${entityRes.globalError}`);
     }
  }
}
 reducers: {
     updateActiveTabKey(state, action) {
      return {
        ...state,
        activeTabKey: action.payload
      };
    }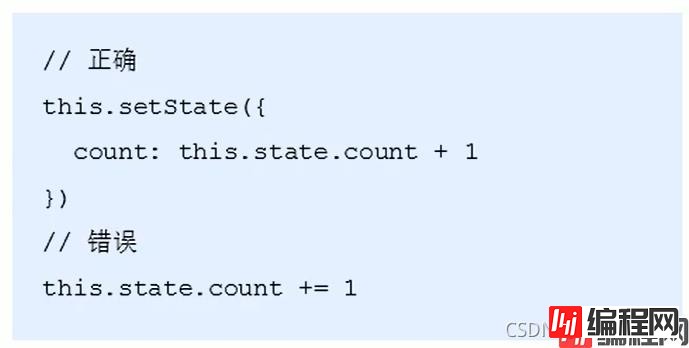
}比如计数器案例中,点击按钮让数值加1。0和1就是不同时刻的状态,而由0变为1就表示状态发生了变化。状态变化后,UI也要相应的更新。React中想要实现该功能,就要使用有状态组件来完成。

class App extends React.Component {
    // constructor() {
    //     super()
    //     // 初始化state
    //     this.state = {
    //         count: 0
    //     }
    // }
    // 简化语法初始化state  【推荐】
    state = {
        count: 0,
    }
    render() {
        return(
            <div>
                <h1>计数器:{this.state.count}</h1>
            </div>
        )
    }
}
// 渲染组件
ReactDOM.render(<App />, document.getElementById("root"))
class App extends React.Component {
    // 简化语法初始化state  【推荐】
    state = {
        count: 0,
    }
    render() {
        return(
            <div>
                <h1>计数器:{this.state.count}</h1>
                <button onClick = {() => {
                    this.setState({
                        count: this.state.count + 1
                    })
                }}>+1</button>
            </div>
        )
    }
}
// 渲染组件
ReactDOM.render(<App />, document.getElementById("root"))
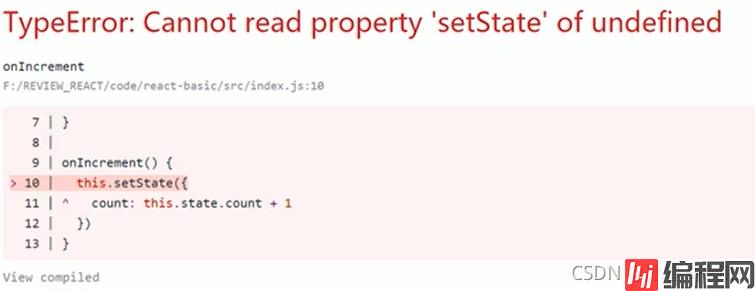
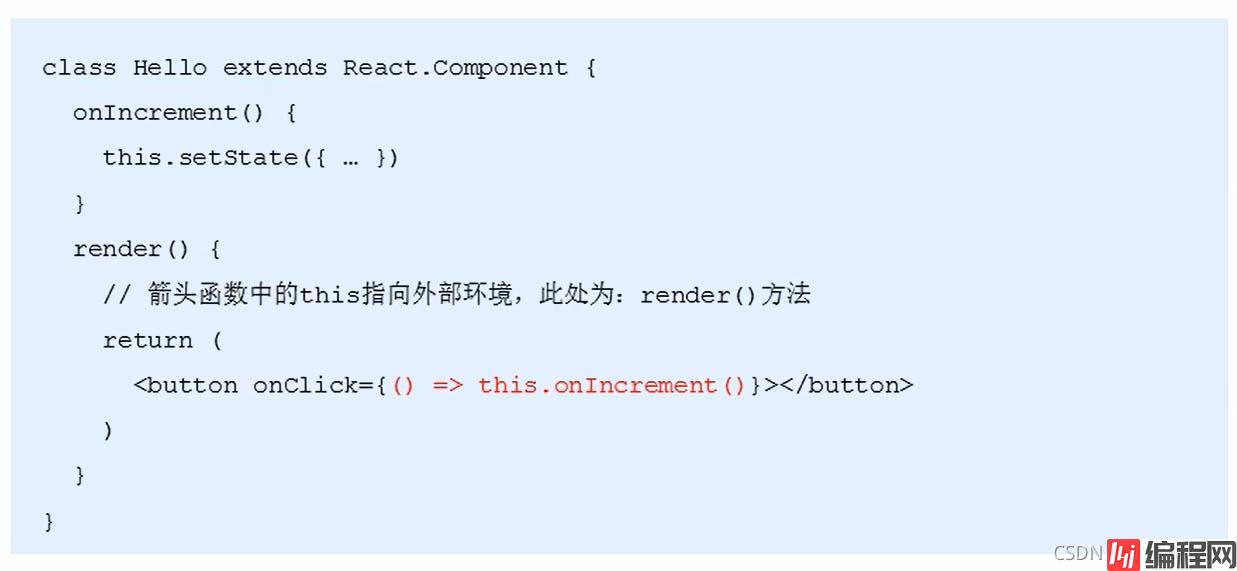
1. 箭头函数
2. Function.prototype.bind()
利用 ES5 中的 bind() 方法,将事件处理程序中的 this 与组件实例绑定到一起

class App extends React.Component {
    constructor() {
        super()
        this.state = {
            count: 0,
        }
        this.onIncrement = this.onIncrement.bind(this)
    }
    // 事件处理程序
    onIncrement() {
        console.log('事件处理程序中的this:', this)
        this.setState({
            count: this.state.count + 1
        })
    }
    render() {
        return(
            <div>
                <h1>计数器:{this.state.count}</h1>
                <button onClick = { this.onIncrement }>+1</button>
            </div>
        )
    }
}
// 渲染组件
ReactDOM.render(<App />, document.getElementById("root"))
3. class的实例方法

class App extends React.Component {
    state = {
        count: 0,
    }

    // 事件处理程序
    onIncrement = ()=> {
        console.log('事件处理程序中的this:', this)
        this.setState({
            count: this.state.count + 1
        })
    }
    render() {
        return(
            <div>
                <h1>计数器:{this.state.count}</h1>
                <button onClick = { this.onIncrement }>+1</button>
            </div>
        )
    }
}
// 渲染组件
ReactDOM.render(<App />, document.getElementById("root"))
以上为个人经验,希望能给大家一个参考,也希望大家多多支持编程网。
--结束END--
本文标题: react如何获取state的值并更新使用
本文链接: https://www.lsjlt.com/news/172050.html(转载时请注明来源链接)
有问题或投稿请发送至: 邮箱/279061341@qq.com QQ/279061341
下载Word文档到电脑,方便收藏和打印~
2024-01-12
2023-05-20
2023-05-20
2023-05-20
2023-05-20
2023-05-20
2023-05-20
2023-05-20
2023-05-20
2023-05-20
回答
回答
回答
回答
回答
回答
回答
回答
回答
回答


官方手机版

微信公众号

商务合作


0