目录介绍课程例子UI主界面代码运行效果介绍 TextClock是在Android 4.2(api 17)后推出的用来替代DigitalClock的一个控件。 TextClock可以以
TextClock是在Android 4.2(api 17)后推出的用来替代DigitalClock的一个控件。
TextClock可以以字符串格式显示当前的日期和时间,因此推荐在Android 4.2以后使用TextClock。
这个控件推荐在24进制的android系统中使用,TextClock提供了两种不同的格式, 一种是在24进制中显示时间和日期,另一种是在12进制中显示时间和日期。大部分人喜欢默认的设置。
可以通过调用:TextClock提供的is24HourModeEnabled()方法来查看,系统是否在使用24进制时间显示! 在24进制模式中:

它的使用非常简单。
我们通过5种格式来说明一下这个TextClock的使用。
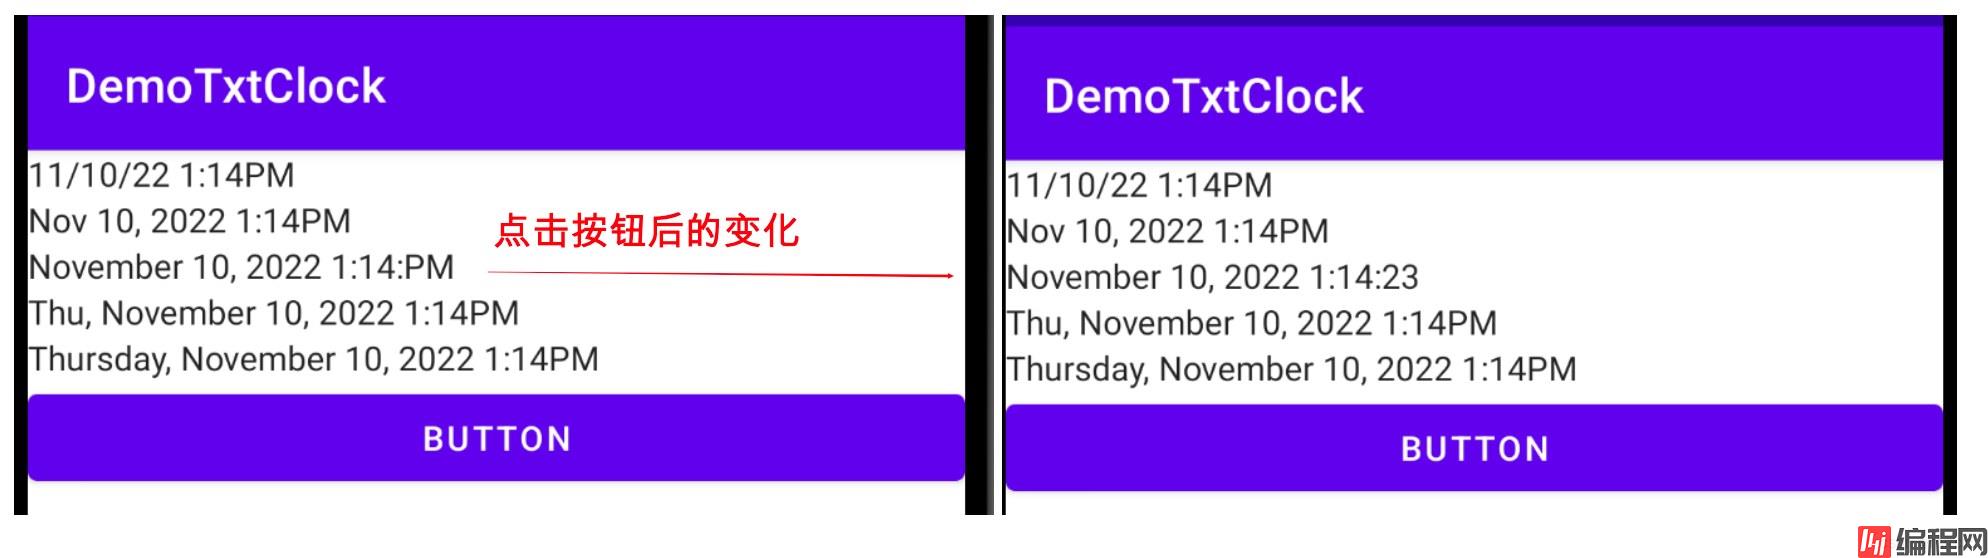
在例子中,我们做了一个按钮,这个按钮会对第3行的TextClock根据系统是否Enable24 Hour来把它的显示改成:24小时的显示格式。
<?xml version="1.0" encoding="utf-8"?>
<LinearLayout xmlns:android="Http://schemas.android.com/apk/res/android"
    xmlns:app="http://schemas.android.com/apk/res-auto"
    xmlns:tools="http://schemas.android.com/tools"
    android:layout_width="match_parent"
    android:layout_height="match_parent"
    android:orientation="vertical"
    tools:context=".MainActivity">
    <TextClock
        android:layout_width="wrap_content"
        android:layout_height="wrap_content"
        android:format12Hour="MM/dd/yy h:mmaa"/>
    <TextClock
        android:layout_width="wrap_content"
        android:layout_height="wrap_content"
        android:format12Hour="MMM dd, yyyy h:mmaa"/>
    <TextClock
        android:id="@+id/timeTextClock"
        android:layout_width="wrap_content"
        android:layout_height="wrap_content"
        android:format12Hour="MMMM dd, yyyy h:mm:aa"/>
    <TextClock
        android:layout_width="wrap_content"
        android:layout_height="wrap_content"
        android:format12Hour="E, MMMM dd, yyyy h:mmaa"/>
    <TextClock
        android:layout_width="wrap_content"
        android:layout_height="wrap_content"
        android:format12Hour="EEEE, MMMM dd, yyyy h:mmaa"/>

    <Button
        android:id="@+id/setTimeButton"
        android:layout_width="match_parent"
        android:layout_height="wrap_content"
        android:text="Button" />
</LinearLayout>package org.mk.android.demo.demotxtclock;
import androidx.appcompat.app.AppCompatActivity;
import android.os.Bundle;
import android.util.Log;
import android.view.View;
import android.widget.Button;
import android.widget.TextClock;
public class MainActivity extends AppCompatActivity {
private TextClock timeClock;
private Button setTimeButton;
@Override
protected void onCreate(Bundle savedInstanceState) {
super.onCreate(savedInstanceState);
setContentView(R.layout.activity_main);
setTimeButton = (Button) findViewById(R.id.setTimeButton);
timeClock = (TextClock) findViewById(R.id.timeTextClock);
setTimeButton.setOnClickListener(new OnClickListener());
}
private class OnClickListener implements View.OnClickListener {
@Override
public void onClick(View v) {
String clockFormatter = "MMMM dd, yyyy h:mm:ss";
if (timeClock.is24HourModeEnabled()) {
Log.i("app", ">>>>>>System has been enabled the 24Hour Model");
timeClock.setFormat24Hour(clockFormatter);
} else {
Log.i("app", ">>>>>>System has not been enabled the 24Hour " +
"Model");
timeClock.setFormat12Hour(clockFormatter);
}
}
}
}当我们点下了按钮后,可以看到界面上第三行的TextClock显示的值发生了变化,如下截图。
自己动一下手试试看效果吧。
到此这篇关于Android入门之TextClock的使用教程的文章就介绍到这了,更多相关Android TextClock内容请搜索编程网以前的文章或继续浏览下面的相关文章希望大家以后多多支持编程网!
--结束END--
本文标题: Android入门之TextClock的使用教程
本文链接: https://www.lsjlt.com/news/173072.html(转载时请注明来源链接)
有问题或投稿请发送至: 邮箱/279061341@qq.com QQ/279061341
下载Word文档到电脑,方便收藏和打印~
2024-01-21
2023-10-28
2023-10-28
2023-10-27
2023-10-27
2023-10-27
2023-10-27
回答
回答
回答
回答
回答
回答
回答
回答
回答
回答


官方手机版

微信公众号

商务合作


0