目录前言一、params和query使用方式二、实现代码1.index.js代码2.test.Vue代码3.testParams代码4.testParams代码5.效果总结前言 th
this.$router.push进行页面跳转时。携带参数有params和query两种方式。
query方式:
this. r o u t e r . p u s h ( p a t h : ′ t e s t Q u e r y ′ , q u e r y : t e s t Q u e r y : ′ t e s t Q u e r y ′ ) , 传 递 的 参 数 会 拼 接 在 跳 转 地 址 的 后 面 。 使 用 t h i s . router.push({path: 'testQuery',query: {testQuery:'testQuery'}}),传递的参数会拼接在跳转地址的后面。使用this. router.push(path:′testQuery′,query:testQuery:′testQuery′),传递的参数会拼接在跳转地址的后面。使用this.route.params.key取值
params方式:
this. r o u t e r . p u s h ( n a m e : ′ t e s t P a r a m s ′ , p a r a m s : t e s t P a r a m s : ′ t e s t P a r a m s ′ ) , 传 递 的 参 数 不 会 拼 接 在 跳 转 的 后 面 。 使 用 t h i s . router.push({name: 'testParams',params: {testParams:'testParams'}}),传递的参数不会拼接在跳转的后面。使用this. router.push(name:′testParams′,params:testParams:′testParams′),传递的参数不会拼接在跳转的后面。使用this.route.query.key取值
const router = new Router({
    routes: [
        {
            path:'/test',
            component: test,
        },
        {
            name: 'testParams',
            path:'/testParams',
            component: TestParams,
        },
        {
            path:'/testQuery',
            component: TestQuery,
        }
    ]
})<template>
<div class="test">
<button v-on:click="testParams">params</button>
<button v-on:click="testQuery">query</button>
</div>
</template>
<script>
export default {
name: "test",
data(){
return {
}
},
methods:{
testParams(){
this.$router.push({name: 'testParams',params: {testParams:'testParams'}});
},
testQuery(){
this.$router.push({path: 'testQuery',query: {testQuery:'testQuery'}});
}
}
}
</script><template>
<div id="testParams">
{{testParams}}
</div>
</template>
<script>
export default {
name: "TestParams",
data() {
return{
testParams: ''
}
},mounted() {
this.testParams = this.$route.params.testParams;
}
}
</script><template>
<div id="testQuery">
{{testQuery}}
</div>
</template>
<script>
export default {
name: "TestQuery",
data(){
return{
testQuery: ''
}
},mounted() {
this.testQuery = this.$route.query.testQuery;
}
}
</script>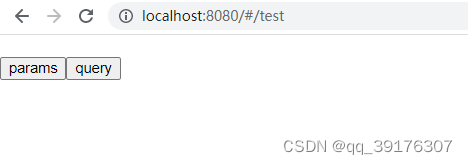


两种方式非常相似,区别在于两点:
1、是否在地址后面拼接参数。
2、因为动态路由也是传递params的,所以在 this.$router.push() 方法中 path是不能和params一起使用的,否则params将无效。需要用name来指定页面,一定要记得,在index.js中设置好那么属性。
到此这篇关于this.$router.push携带参数跳转页面的文章就介绍到这了,更多相关this.$router.push跳转页面内容请搜索编程网以前的文章或继续浏览下面的相关文章希望大家以后多多支持编程网!
--结束END--
本文标题: this.$router.push携带参数跳转页面的实现代码
本文链接: https://www.lsjlt.com/news/202830.html(转载时请注明来源链接)
有问题或投稿请发送至: 邮箱/279061341@qq.com QQ/279061341
下载Word文档到电脑,方便收藏和打印~
2024-01-12
2023-05-20
2023-05-20
2023-05-20
2023-05-20
2023-05-20
2023-05-20
2023-05-20
2023-05-20
2023-05-20
回答
回答
回答
回答
回答
回答
回答
回答
回答
回答


官方手机版

微信公众号

商务合作


0