本实例实现每隔5秒上传一次,通过服务器端获取手机上传过来的文件信息并做相应处理;采用Android+Struts2技术。 一、Android端实现文件上传 1)、新建一个An
本实例实现每隔5秒上传一次,通过服务器端获取手机上传过来的文件信息并做相应处理;采用Android+Struts2技术。
一、Android端实现文件上传
1)、新建一个Android项目命名为androidUpload,目录结构如下:

2)、新建FORMFile类,用来封装文件信息
package com.ljq.utils;
import java.io.File;
import java.io.FileInputStream;
import java.io.FileNotFoundException;
import java.io.InputStream;

public class FormFile {

  private byte[] data;
  private InputStream inStream;
  private File file;

  private String filname;

  private String parameterName;

  private String contentType = "application/octet-stream";
  public FormFile(String filname, byte[] data, String parameterName, String contentType) {
    this.data = data;
    this.filname = filname;
    this.parameterName = parameterName;
    if(contentType!=null) this.contentType = contentType;
  }
  public FormFile(String filname, File file, String parameterName, String contentType) {
    this.filname = filname;
    this.parameterName = parameterName;
    this.file = file;
    try {
      this.inStream = new FileInputStream(file);
    } catch (FileNotFoundException e) {
      e.printStackTrace();
    }
    if(contentType!=null) this.contentType = contentType;
  }
  public File getFile() {
    return file;
  }
  public InputStream getInStream() {
    return inStream;
  }
  public byte[] getData() {
    return data;
  }
  public String getFilname() {
    return filname;
  }
  public void setFilname(String filname) {
    this.filname = filname;
  }
  public String getParameterName() {
    return parameterName;
  }
  public void setParameterName(String parameterName) {
    this.parameterName = parameterName;
  }
  public String getContentType() {
    return contentType;
  }
  public void setContentType(String contentType) {
    this.contentType = contentType;
  }
}
3)、新建SocketHttpRequester类,封装上传文件到服务器代码
package com.ljq.utils;
import java.io.BufferedReader;
import java.io.InputStreamReader;
import java.io.OutputStream;
import java.net.InetAddress;
import java.net.Socket;
import java.net.URL;
import java.util.Map;

public class SocketHttpRequester {

  public static boolean post(String path, Map<String, String> params, FormFile[] files) throws Exception{
    final String BOUNDARY = "---------------------------7da2137580612"; //数据分隔线
    final String endline = "--" + BOUNDARY + "--\r\n";//数据结束标志
    int fileDataLength = 0;
    for(FormFile uploadFile : files){//得到文件类型数据的总长度
      StringBuilder fileExplain = new StringBuilder();
       fileExplain.append("--");
       fileExplain.append(BOUNDARY);
       fileExplain.append("\r\n");
       fileExplain.append("Content-Disposition: form-data;name=\""+ uploadFile.getParameterName()+"\";filename=\""+ uploadFile.getFilname() + "\"\r\n");
       fileExplain.append("Content-Type: "+ uploadFile.getContentType()+"\r\n\r\n");
       fileExplain.append("\r\n");
       fileDataLength += fileExplain.length();
      if(uploadFile.getInStream()!=null){
        fileDataLength += uploadFile.getFile().length();
       }else{
         fileDataLength += uploadFile.getData().length;
       }
    }
    StringBuilder textEntity = new StringBuilder();
    for (Map.Entry<String, String> entry : params.entrySet()) {//构造文本类型参数的实体数据
      textEntity.append("--");
      textEntity.append(BOUNDARY);
      textEntity.append("\r\n");
      textEntity.append("Content-Disposition: form-data; name=\""+ entry.geTKEy() + "\"\r\n\r\n");
      textEntity.append(entry.getValue());
      textEntity.append("\r\n");
    }
    //计算传输给服务器的实体数据总长度
    int dataLength = textEntity.toString().getBytes().length + fileDataLength + endline.getBytes().length;
    URL url = new URL(path);
    int port = url.getPort()==-1 ? 80 : url.getPort();
    Socket socket = new Socket(InetAddress.getByName(url.getHost()), port);
    OutputStream outStream = socket.getOutputStream();
    //下面完成HTTP请求头的发送
    String requestmethod = "POST "+ url.getPath()+" HTTP/1.1\r\n";
    outStream.write(requestmethod.getBytes());
    String accept = "Accept: image/gif, image/jpeg, image/pjpeg, image/pjpeg, application/x-shockwave-flash, application/xaml+xml, application/vnd.ms-xpsdocument, application/x-ms-xbap, application/x-ms-application, application/vnd.ms-excel, application/vnd.ms-powerpoint, application/msWord, *
  public static boolean post(String path, Map<String, String> params, FormFile file) throws Exception{
    return post(path, params, new FormFile[]{file});
  }
}
4)、新建MainActivity类,实现每隔5秒上传一次
package com.ljq.activity;
import java.io.File;
import java.util.HashMap;
import java.util.Map;
import android.app.Activity;
import android.os.Bundle;
import android.os.Environment;
import android.os.Handler;
import android.util.Log;
import com.ljq.utils.FormFile;
import com.ljq.utils.SocketHttpRequester;
public class MainActivity extends Activity {
  private File file;
  private Handler handler;
  private static final String TAG="MainActivity";
  @Override
  public void onCreate(Bundle savedInstanceState) {
    super.onCreate(savedInstanceState);
    setContentView(R.layout.main);
    Log.i(TAG, "onCreate");
    file = new File(Environment.getExternalStorageDirectory(), "123.rmvb");
    Log.i(TAG, "照片文件是否存在:"+file);
    handler=new Handler();
    handler.post(runnable);
  }
  Runnable runnable=new Runnable() {
    public void run() {
      Log.i(TAG, "runnable run");
      uploadFile(file);
      handler.postDelayed(runnable, 5000);
    }
  };

  public void uploadFile(File imageFile) {
    Log.i(TAG, "upload start");
    try {
      String requestUrl = "http://192.168.1.101:8083/upload/upload/execute.do";
      //请求普通信息
      Map<String, String> params = new HashMap<String, String>();
      params.put("username", "张三");
      params.put("pwd", "zhangsan");
      params.put("age", "21");
      params.put("fileName", imageFile.getName());
      //上传文件
      FormFile formfile = new FormFile(imageFile.getName(), imageFile, "image", "application/octet-stream");
      SocketHttpRequester.post(requestUrl, params, formfile);
      Log.i(TAG, "upload success");
    } catch (Exception e) {
      Log.i(TAG, "upload error");
      e.printStackTrace();
    }
    Log.i(TAG, "upload end");
  }
}
5)、修改清单文件
<?xml version="1.0" encoding="utf-8"?>
<manifest xmlns:android="http://schemas.android.com/apk/res/android"
   package="com.ljq.activity"
   android:versionCode="1"
   android:versionName="1.0">
  <application android:icon="@drawable/icon" android:label="@string/app_name">
    <activity android:name=".MainActivity"
         android:label="@string/app_name">
      <intent-filter>
        <action android:name="android.intent.action.MAIN" />
        <cateGory android:name="android.intent.category.LAUNCHER" />
      </intent-filter>
    </activity>
  </application>
  <uses-sdk android:minSdkVersion="4" />
  <uses-permission android:name="android.permission.INTERNET" />
</manifest>
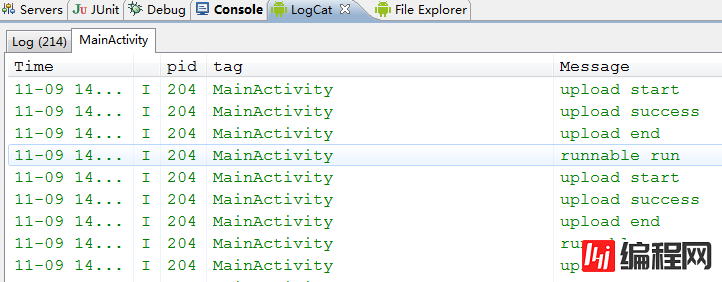
启动模拟器,运行如下:
二、服务器端用来获取Android端上传过来的文件信息
1)、新建一个WEB项目命名为upload,目录结构如下

注意:记得加入struts2 jar包,需加入的jar如下

2)、新建action类,命名为UploadAction,内容如下
package com.ljq.action;
import java.io.File;
import java.io.FileInputStream;
import java.io.FileOutputStream;
import java.io.IOException;
import javax.servlet.http.httpservletRequest;
import org.apache.struts2.ServletActionContext;
import com.opensymphony.xwork2.ActionSupport;

@SuppressWarnings("serial")
public class UploadAction extends ActionSupport {
  // 上传文件域
  private File image;
  // 上传文件类型
  private String imageContentType;
  // 封装上传文件名
  private String imageFileName;
  // 接受依赖注入的属性
  private String savePath;
  @Override
  public String execute() {
    HttpServletRequest request=ServletActionContext.getRequest();
    FileOutputStream fos = null;
    FileInputStream fis = null;
    try {
      System.out.println("获取Android端传过来的普通信息:");
      System.out.println("用户名:"+request.getParameter("username"));
      System.out.println("密码:"+request.getParameter("pwd"));
      System.out.println("年龄:"+request.getParameter("age"));
      System.out.println("文件名:"+request.getParameter("fileName"));
      System.out.println("获取Android端传过来的文件信息:");
      System.out.println("文件存放目录: "+getSavePath());
      System.out.println("文件名称: "+imageFileName);
      System.out.println("文件大小: "+image.length());
      System.out.println("文件类型: "+imageContentType);
      fos = new FileOutputStream(getSavePath() + "/" + getImageFileName());
      fis = new FileInputStream(getImage());
      byte[] buffer = new byte[1024];
      int len = 0;
      while ((len = fis.read(buffer)) != -1) {
        fos.write(buffer, 0, len);
      }
      System.out.println("文件上传成功");
    } catch (Exception e) {
      System.out.println("文件上传失败");
      e.printStackTrace();
    } finally {
      close(fos, fis);
    }
    return SUCCESS;
  }

  public String getSavePath() throws Exception{
    return ServletActionContext.getServletContext().getRealPath(savePath);
  }
  public void setSavePath(String savePath) {
    this.savePath = savePath;
  }
  public File getImage() {
    return image;
  }
  public void setImage(File image) {
    this.image = image;
  }
  public String getImageContentType() {
    return imageContentType;
  }
  public void setImageContentType(String imageContentType) {
    this.imageContentType = imageContentType;
  }
  public String getImageFileName() {
    return imageFileName;
  }
  public void setImageFileName(String imageFileName) {
    this.imageFileName = imageFileName;
  }
  private void close(FileOutputStream fos, FileInputStream fis) {
    if (fis != null) {
      try {
        fis.close();
        fis=null;
      } catch (IOException e) {
        System.out.println("FileInputStream关闭失败");
        e.printStackTrace();
      }
    }
    if (fos != null) {
      try {
        fos.close();
        fis=null;
      } catch (IOException e) {
        System.out.println("FileOutputStream关闭失败");
        e.printStackTrace();
      }
    }
  }
}
3)、配置struts.xml
<?xml version="1.0" encoding="UTF-8" ?>
<!DOCTYPE struts PUBLIC
  "-//Apache Software Foundation//DTD Struts Configuration 2.0//EN"
  "http://struts.apache.org/dtds/struts-2.0.dtd">
<struts>
  <!-- 该属性指定需要Struts2处理的请求后缀,该属性的默认值是action,即所有匹配*.action的请求都由Struts2处理。
    如果用户需要指定多个请求后缀,则多个后缀之间以英文逗号(,)隔开。 -->
  <constant name="struts.action.extension" value="do"/>
  <!-- 设置浏览器是否缓存静态内容,默认值为true(生产环境下使用),开发阶段最好关闭 -->
  <constant name="struts.serve.static.browserCache" value="false"/>
  <!-- 当struts的配置文件修改后,系统是否自动重新加载该文件,默认值为false(生产环境下使用),开发阶段最好打开 -->
  <constant name="struts.configuration.xml.reload" value="true"/>
  <!-- 开发模式下使用,这样可以打印出更详细的错误信息 -->
  <constant name="struts.devMode" value="true"/>
  <!-- 默认的视图主题 -->
  <constant name="struts.ui.theme" value="simple"/>
  <!--<constant name="struts.objectFactory" value="spring" />-->
  <!--解决乱码  -->
  <constant name="struts.i18n.encoding" value="UTF-8"/>
  <!-- 指定允许上传的文件最大字节数。默认值是2097152(2M) -->
  <constant name="struts.multipart.maxSize" value="22097152"/>
  <!-- 设置上传文件的临时文件夹,默认使用javax.servlet.context.tempdir -->
  <constant name="struts.multipart.saveDir " value="d:/tmp"/>
  <package name="upload" namespace="/upload" extends="struts-default">
    <action name="execute" class="com.ljq.action.UploadAction">
      <!-- 动态设置savePath的属性值 -->
      <param name="savePath">/image</param>
      <result name="success">/WEB-INF/page/message.jsp</result>
    </action>
  </package>
</struts>
4)、配置web.xml
<?xml version="1.0" encoding="UTF-8"?>
<web-app version="2.4" xmlns="http://java.sun.com/xml/ns/j2ee"
  xmlns:xsi="http://www.w3.org/2001/XMLSchema-instance"
  xsi:schemaLocation="http://java.sun.com/xml/ns/j2ee
  http://java.sun.com/xml/ns/j2ee/web-app_2_4.xsd">
  <filter>
    <filter-name>struts2</filter-name>
    <filter-class>
      org.apache.struts2.dispatcher.ng.filter.StrutsPrepareAndExecuteFilter
    </filter-class>
  </filter>
  <filter-mapping>
    <filter-name>struts2</filter-name>
    <url-pattern>/*</url-pattern>
  </filter-mapping>
  <filter>
    <filter-name>strutsCleanup</filter-name>
    <filter-class>
      org.apache.struts2.dispatcher.ActionContextCleanUp
    </filter-class>
  </filter>
  <filter-mapping>
    <filter-name>strutsCleanup</filter-name>
    <url-pattern>/*</url-pattern>
  </filter-mapping>
  <welcome-file-list>
    <welcome-file>index.jsp</welcome-file>
  </welcome-file-list>
</web-app>
运行结构如下:
获取Android端传过来的普通信息:
用户名:张三
密码:zhangsan
年龄:21
文件名:123.rmvb
获取Android端传过来的文件信息:
文件存放目录: D:\apache-Tomcat-6.0.18\webapps\upload\image
文件名称: 123.rmvb
文件大小: 3962649
文件类型: application/octet-stream
文件上传成功
--结束END--
本文标题: Android实现上传文件到服务器实例详解
本文链接: https://www.lsjlt.com/news/23468.html(转载时请注明来源链接)
有问题或投稿请发送至: 邮箱/279061341@qq.com QQ/279061341
下载Word文档到电脑,方便收藏和打印~
2024-05-13
2024-05-13
2024-05-11
2024-05-11
2024-05-10
2024-05-07
2024-04-30
2024-04-30
2024-04-30
2024-04-29
回答
回答
回答
回答
回答
回答
回答
回答
回答
回答


官方手机版

微信公众号

商务合作


0