这期内容当中小编将会给大家带来有关使用canvas怎么绘制一个烟花效果,文章内容丰富且以专业的角度为大家分析和叙述,阅读完这篇文章希望大家可以有所收获。目录结构目录结构大致如下我们将烟花分为两个阶段,一个是未炸开持续上升时期,另一个是炸开后
这期内容当中小编将会给大家带来有关使用canvas怎么绘制一个烟花效果,文章内容丰富且以专业的角度为大家分析和叙述,阅读完这篇文章希望大家可以有所收获。
目录结构
目录结构大致如下
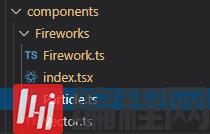
我们将烟花分为两个阶段,一个是未炸开持续上升时期,另一个是炸开后分散的时期。
其中Vector表示一个坐标,Particle表示一个烟花的亮点,Firewor表示烟花未炸开时持续上升的亮点。index.tsx就是组件了,绘制了canvas,并执行了动画。
Vector
这个坐标就很简单,后面涉及到位置的变更都可以使用它的add方法进行偏移操作
export default class Vector { constructor(public x: number, public y: number) {} add(vec2: {x: number; y: number}) { this.x = this.x + vec2.x; this.y = this.y + vec2.y; }}Particle
初始创建的时候给个坐标,后续每次更新的时候控制y坐标下落,gravity变量就是下落的值。timeSpan用于控制烟花展示的时长
import Vector from './Vector';export default class Particle { pos: Vector = null; vel: {x: number; y: number} = null; dead: boolean = false; start: number = 0; ctx: CanvasRenderinGContext2D = null; constructor(pos: {x: number; y: number}, vel: {x: number; y: number}, ctx: CanvasRenderingContext2D) { this.pos = new Vector(pos.x, pos.y); this.vel = vel; this.dead = false; this.start = 0; this.ctx = ctx; } update(time: number, gravity: number) { let timeSpan = time - this.start; if (timeSpan > 500) { this.dead = true; } if (!this.dead) { this.pos.add(this.vel); this.vel.y = this.vel.y + gravity; } } draw() { if (!this.dead) { this.drawDot(this.pos.x, this.pos.y, Math.random() > 0.5 ? 1 : 2); } } drawDot(x: number, y: number, size: number) { this.ctx.beginPath(); this.ctx.arc(x, y, size, 0, Math.PI * 2); this.ctx.fill(); this.ctx.closePath(); }}Firework
生成随机的hsl颜色,hsl(' + rndNum(360) + ', 100%, 60%);Firework每次上升的距离是一个递减的过程,我们初始设置一个上升的距离,之后每次绘制的时候,这个距离减gravity,当距离小于零的时候,说明该出现烟花绽放的动画了。
import Vector from './Vector';import Particle from './Particle';let rnd = Math.random;function rndNum(num: number) { return rnd() * num + 1;}export default class Firework { pos: Vector = null; vel: Vector = null; color: string = null; size: number = 0; dead: boolean = false; start: number = 0; ctx: CanvasRenderingContext2D = null; gravity: number = null; exParticles: Particle[] = []; exPLen: number = 100; rootShow: boolean = true; constructor(x: number, y: number, gravity: number, ctx: CanvasRenderingContext2D) { this.pos = new Vector(x, y); this.vel = new Vector(0, -rndNum(10) - 3); this.color = 'hsl(' + rndNum(360) + ', 100%, 60%)'; this.size = 4; this.dead = false; this.start = 0; this.ctx = ctx; this.gravity = gravity; } update(time: number, gravity: number) { if (this.dead) { return; } this.rootShow = this.vel.y < 0; if (this.rootShow) { this.pos.add(this.vel); this.vel.y = this.vel.y + gravity; } else { if (this.exParticles.length === 0) { for (let i = 0; i < this.exPLen; i++) { let randomR = rndNum(5); let randomX = -rndNum(Math.abs(randomR) * 2) + Math.abs(randomR); let randomY = Math.sqrt(Math.abs(Math.pow(randomR, 2) - Math.pow(randomX, 2))) * (Math.random() > 0.5 ? 1 : -1); this.exParticles.push(new Particle(this.pos, new Vector(randomX, randomY), this.ctx)); this.exParticles[this.exParticles.length - 1].start = time; } } let numOfDead = 0; for (let i = 0; i < this.exPLen; i++) { let p = this.exParticles[i]; p.update(time, this.gravity); if (p.dead) { numOfDead++; } } if (numOfDead === this.exPLen) { this.dead = true; } } } draw() { if (this.dead) { return; } this.ctx.fillStyle = this.color; if (this.rootShow) { this.drawDot(this.pos.x, this.pos.y, this.size); } else { for (let i = 0; i < this.exPLen; i++) { let p = this.exParticles[i]; p.draw(); } } } drawDot(x: number, y: number, size: number) { this.ctx.beginPath(); this.ctx.arc(x, y, size, 0, Math.PI * 2); this.ctx.fill(); this.ctx.closePath(); }}FireworkComponent
组件本身就很简单了,生成和绘制Firework。我们在这里面可以额外加一些文字
import React from 'react';import Firework from './Firework';import {autobind} from 'core-decorators';let rnd = Math.random;function rndNum(num: number) { return rnd() * num + 1;}interface PropTypes { onClick?: () => void;}@autobindclass FireworkComponent extends React.Component<PropTypes> { canvas: htmlCanvasElement = null; ctx: CanvasRenderingContext2D = null; snapTime: number = 0; fireworks: Firework[] = []; gravity: number = 0.1; componentDidMount() { this.canvas = document.querySelector('#fireworks'); this.canvas.width = window.innerWidth; this.canvas.height = window.innerHeight; this.ctx = this.canvas.getContext('2d'); this.init(); this.draw(); } init() { let numOfFireworks = 20; for (let i = 0; i < numOfFireworks; i++) { this.fireworks.push(new Firework(rndNum(this.canvas.width), this.canvas.height, this.gravity, this.ctx)); } } update(time: number) { for (let i = 0, len = this.fireworks.length; i < len; i++) { let p = this.fireworks[i]; p.update(time, this.gravity); } } draw(time?: number) { this.update(time); this.ctx.fillStyle = 'rgba(0,0,0,0.3)'; this.ctx.fillStyle = 'rgba(0,0,0,0)'; this.ctx.clearRect(0, 0, this.canvas.width, this.canvas.height); this.ctx.font = 'bold 30px cursive'; this.ctx.fillStyle = '#e91818'; let text = 'XX项目组给您拜个早年!'; let textWidth = this.ctx.measureText(text); this.ctx.fillText(text, this.canvas.width / 2 - textWidth.width / 2, 200); text = '在新年来临之际,祝您:'; textWidth = this.ctx.measureText(text); this.ctx.fillText(text, this.canvas.width / 2 - textWidth.width / 2, 260); text = '工作顺利,新春快乐!'; this.ctx.font = 'bold 48px STCaiyun'; this.ctx.fillStyle = 'orangered'; textWidth = this.ctx.measureText(text); this.ctx.fillText(text, this.canvas.width / 2 - textWidth.width / 2, 340); this.ctx.fillStyle = 'gray'; this.ctx.font = '18px Arial'; text = '点击任意处关闭'; textWidth = this.ctx.measureText(text); this.ctx.fillText(text, this.canvas.width - 20 - textWidth.width, 60); this.snapTime = time; this.ctx.fillStyle = 'blue'; for (let i = 0, len = this.fireworks.length; i < len; i++) { let p = this.fireworks[i]; if (p.dead) { p = this.fireworks[i] = new Firework( rndNum(this.canvas.width), this.canvas.height, this.gravity, this.ctx ); p.start = time; } p.draw(); } window.requestAnimationFrame(this.draw); } render() { return ( <canvas id="fireworks" onClick={this.props.onClick} style={{position: 'fixed', zIndex: 99, background: 'rgba(0,0,0, 0.8)'}} width="400" height="400"></canvas> ); }}export default FireworkComponent;上述就是小编为大家分享的使用canvas怎么绘制一个烟花效果了,如果刚好有类似的疑惑,不妨参照上述分析进行理解。如果想知道更多相关知识,欢迎关注编程网精选频道。
--结束END--
本文标题: 使用canvas怎么绘制一个烟花效果
本文链接: https://www.lsjlt.com/news/255825.html(转载时请注明来源链接)
有问题或投稿请发送至: 邮箱/279061341@qq.com QQ/279061341
下载Word文档到电脑,方便收藏和打印~
2024-05-14
2024-05-14
2024-05-14
2024-05-14
2024-05-14
2024-05-14
2024-05-14
2024-05-14
2024-05-14
2024-05-14
回答
回答
回答
回答
回答
回答
回答
回答
回答
回答


官方手机版

微信公众号

商务合作


0