这篇文章主要介绍了Vue项目如何创建首页发送axiOS请求的相关知识,内容详细易懂,操作简单快捷,具有一定借鉴价值,相信大家阅读完这篇Vue项目如何创建首页发送axios请求文章都会有所收获,下面我们一起来看看吧。这是个全新的Vue项目,引
这篇文章主要介绍了Vue项目如何创建首页发送axiOS请求的相关知识,内容详细易懂,操作简单快捷,具有一定借鉴价值,相信大家阅读完这篇Vue项目如何创建首页发送axios请求文章都会有所收获,下面我们一起来看看吧。
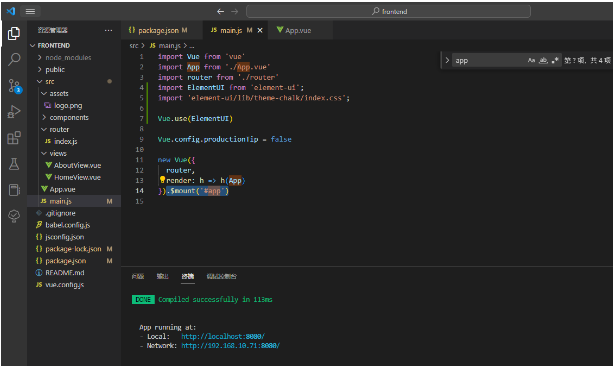
这是个全新的Vue项目,引入了ElementUI
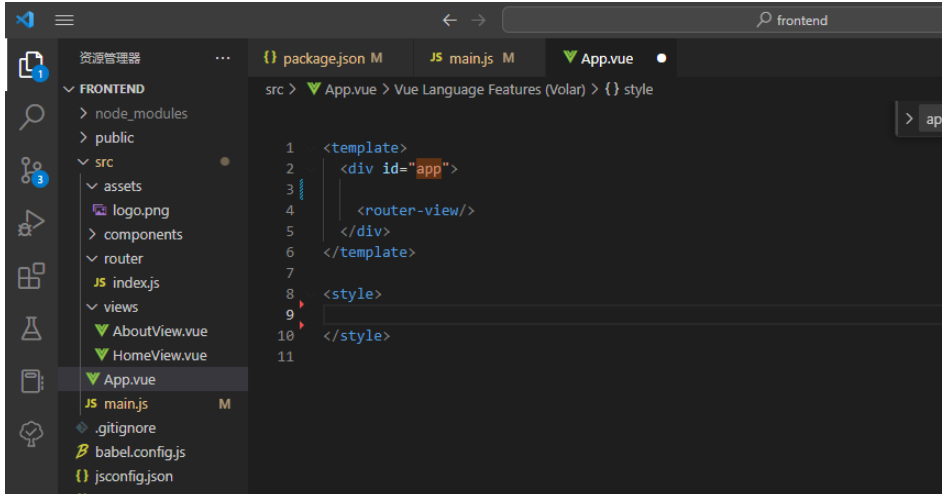
将App.vue里的内容干掉,剩如下
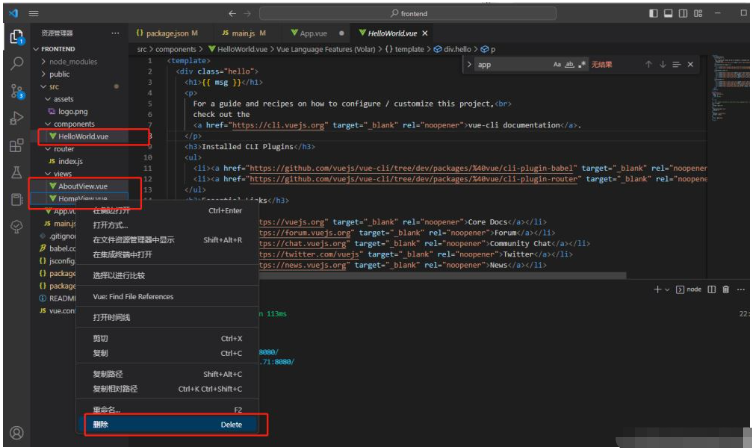
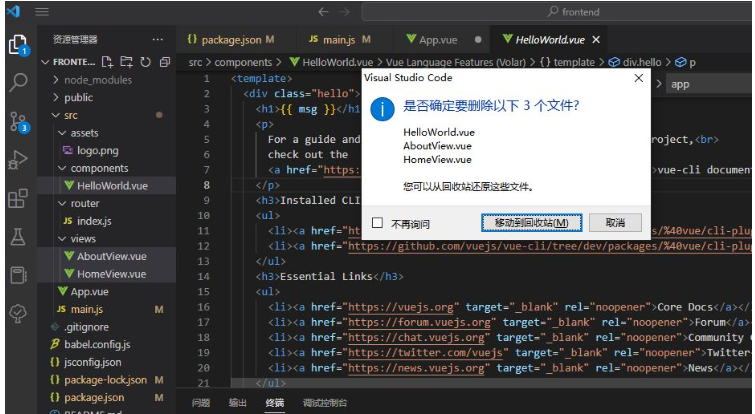
然后下面的三个文件也可以删掉了
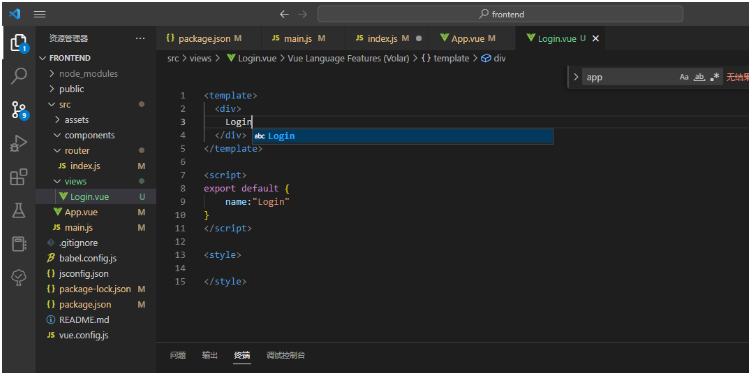
在views文件下新建Login.vue组件
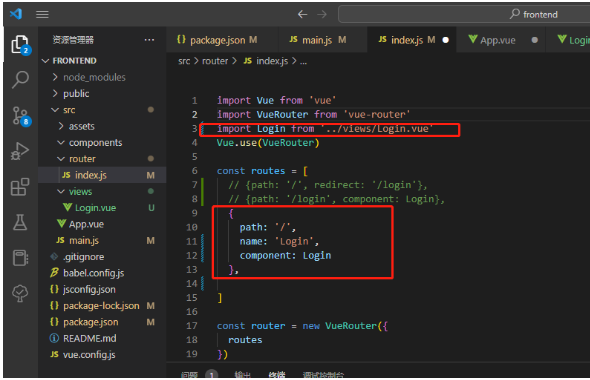
到router目录下的index.js
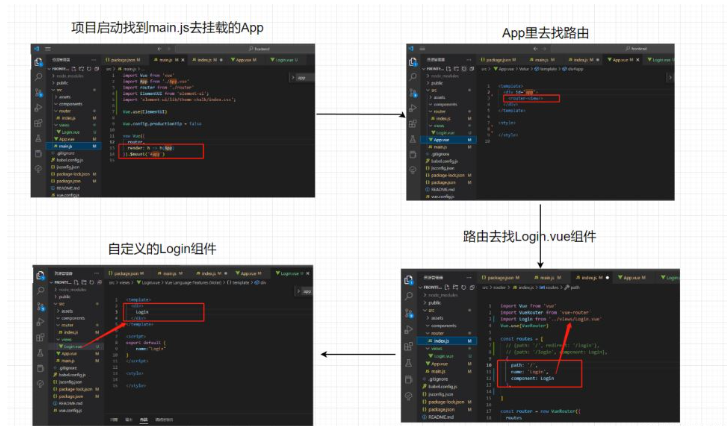
那么现在的流程大概是这样子的
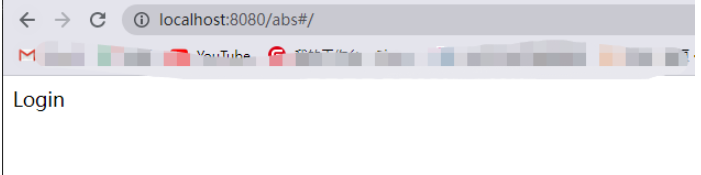
启动
写登陆页面
<template> <div> <el-fORM :ref="form" :model="loginForm" class="loginContainer"> <h4 class="loginTitle">系统登录</h4> <!-- auto-complete="false"自动补全 --> <el-form-item label=""> <el-input type="text" auto-complete="false" v-model="loginForm.username" placeholder="请输入用户名"></el-input> </el-form-item> <el-form-item label=""> <el-input type="text" auto-complete="false" v-model="loginForm.passWord" placeholder="请输入密码"></el-input> </el-form-item> <el-form-item label=""> <el-input type="text" auto-complete="false" v-model="loginForm.code" placeholder="点击图片更换验证码" ></el-input> <img :src="captchaUrl"/> </el-form-item> <el-checkbox v-model="checked" class="loginRemeber">记住我</el-checkbox> <el-button type="primary" >登录</el-button> </el-form> </div></template> <script>export default { name:"Login", data(){ return{ captchaUrl:'',//验证码图片链接 loginForm:{ username:'admin', password:'123456', code:'1234' }, checked:true } } }</script> <style> .loginContainer{ border-radius: 15px; background-clip: padding-box; margin:180px auto; width:350px; padding: 15px 35px 15px 35px; background: #a8dad5; border:1px solid #eaeaea; box-shadow: 0 0 25px #cac6c6; } .loginTitle{ margin: 0px auto 40px auto; text-align: center; } .loginRemeber{ text-align: left; margin:0px 0px 15px 0px; }</style>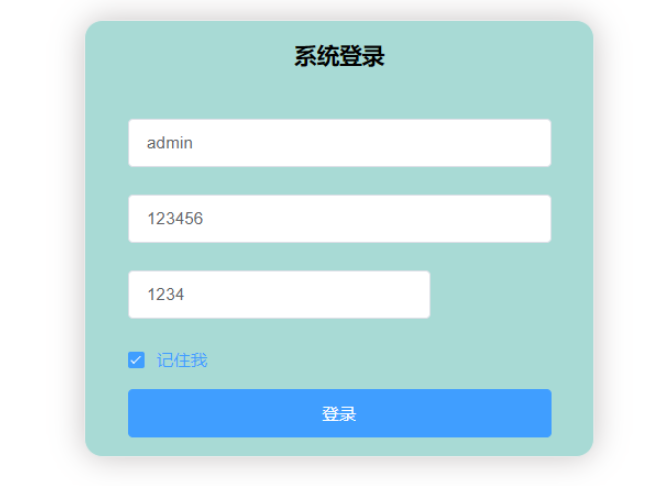
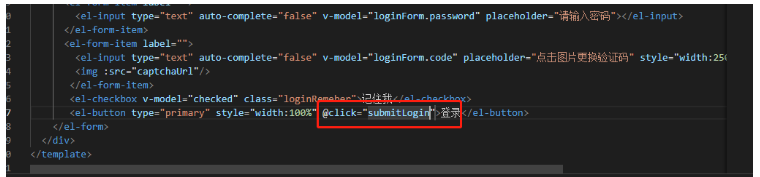
给登录按钮添加点击事件
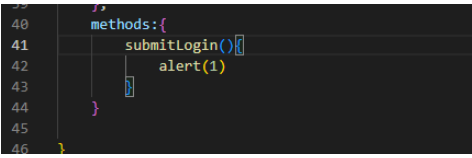
添加方法
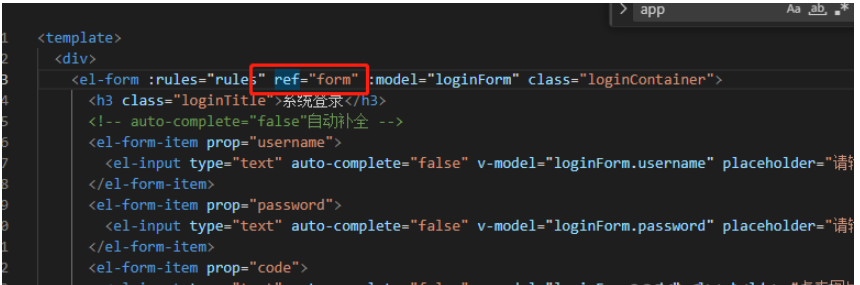
添加表单校验 暂时先吧:ref="form"去掉

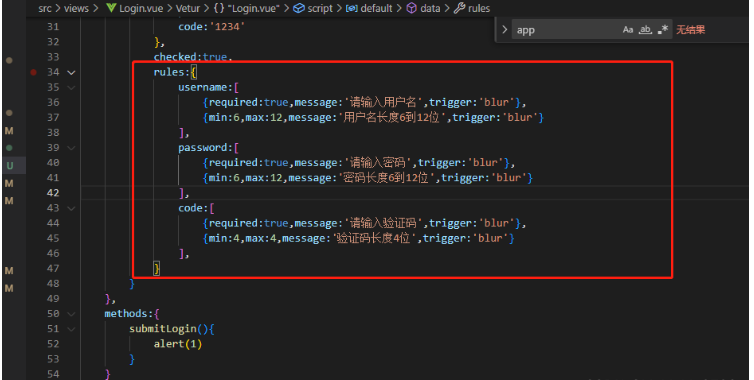
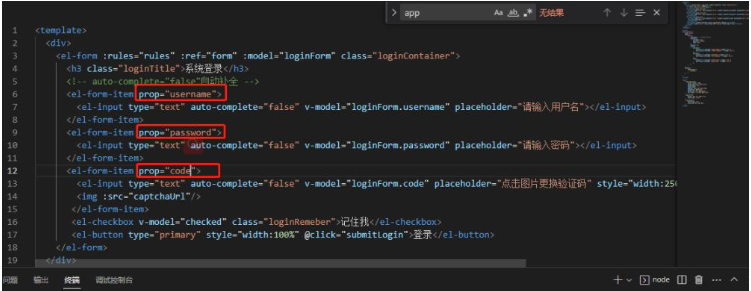
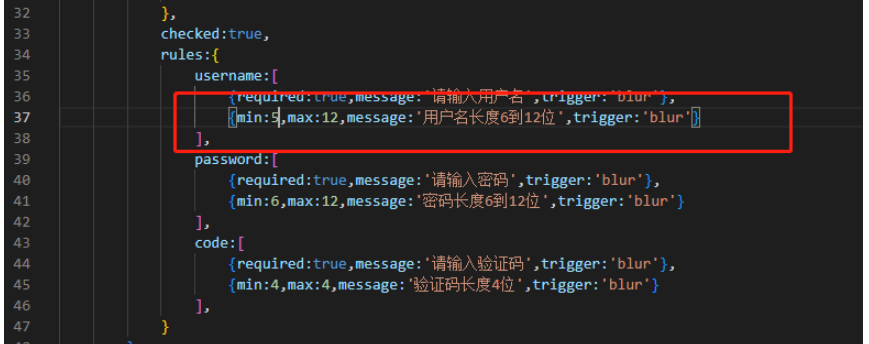
校验的username,password,code需要和上面的对应上 需要加prop属性
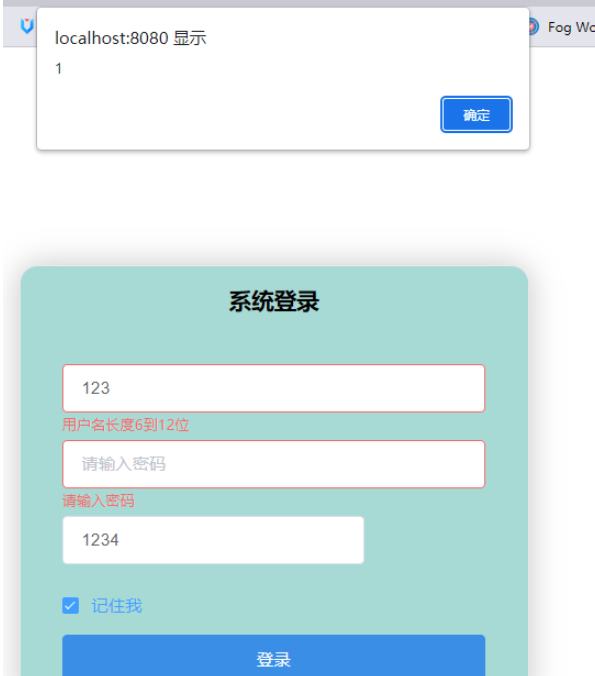
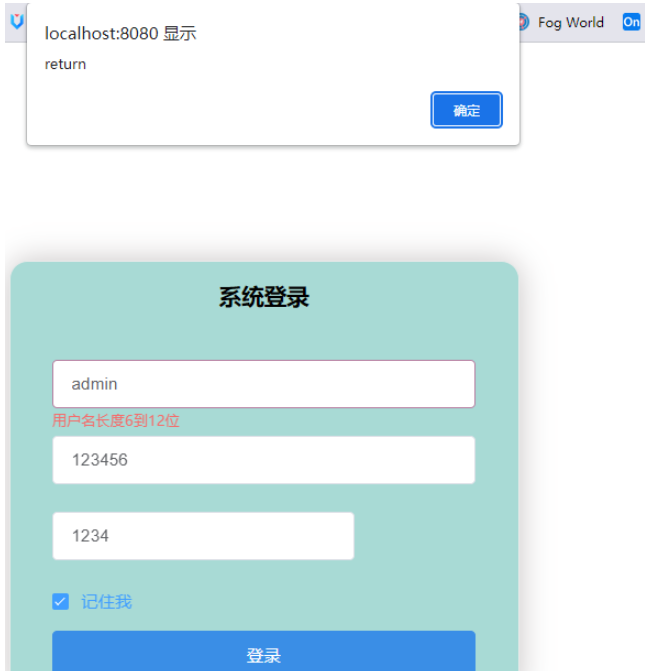
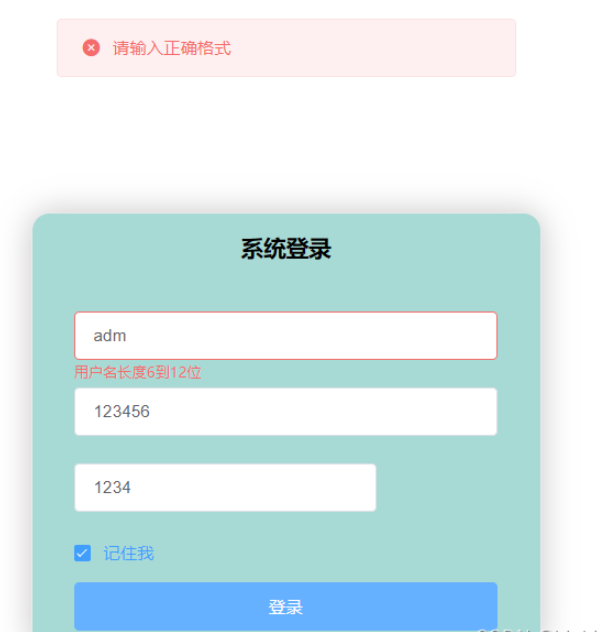
测试,校验规则是存在的,但是出现的问题是点击表单还是生效的
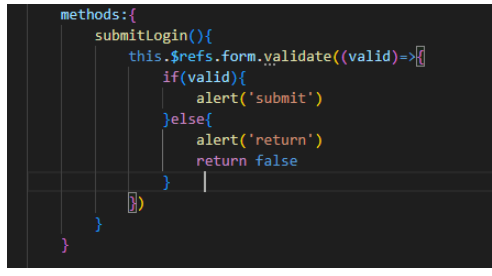
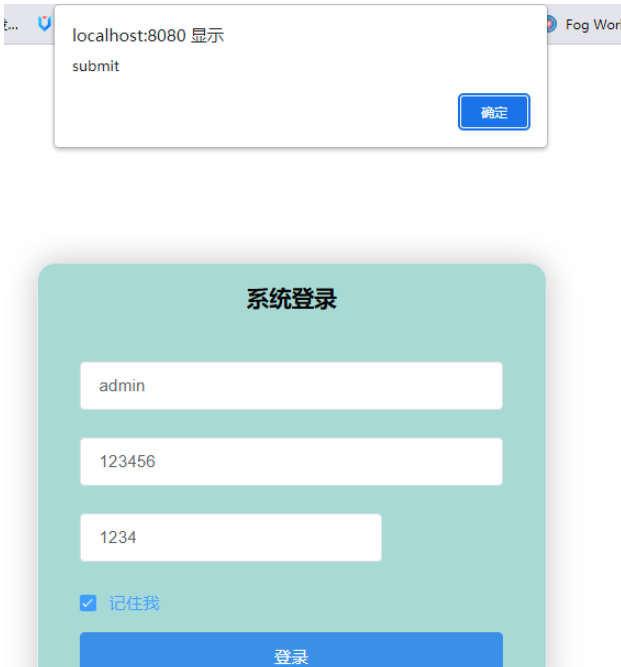
在点击登录时候添加表单校验
会自动根据我们自己定义的校验规则来校验,还是将用户名长度改成5位好了
用ElementUI的showMessage


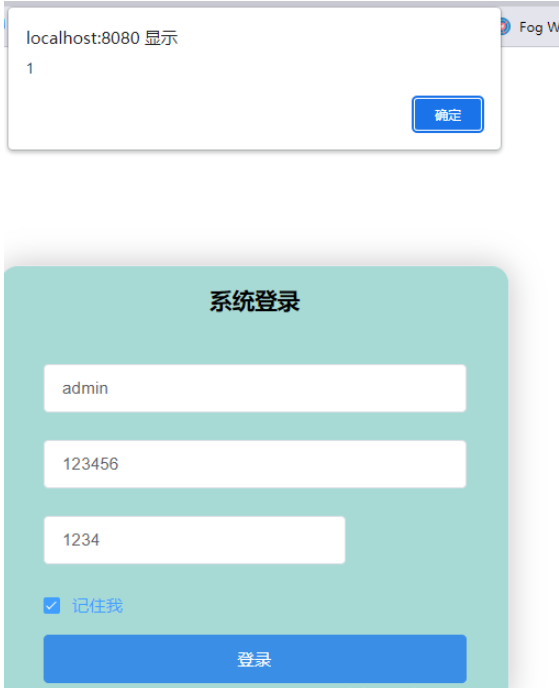
效果如下
接下来需要发送axios请求
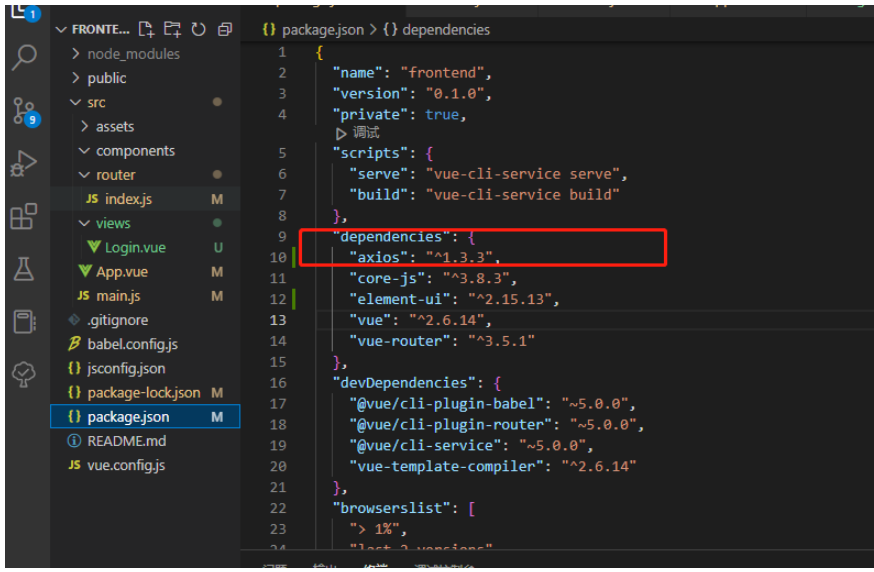
安装axios
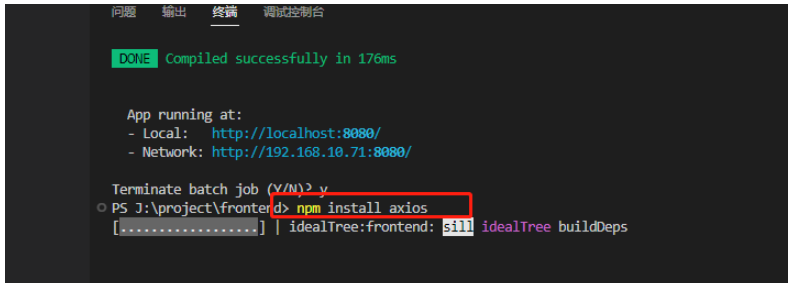
安装完成,可以在package.JSON文件看到
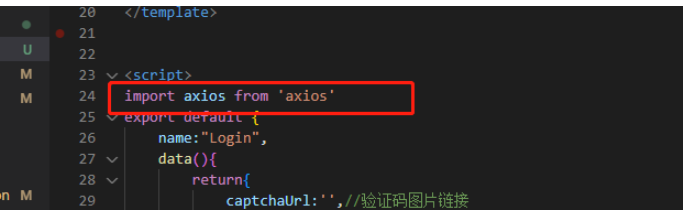
组件里引入
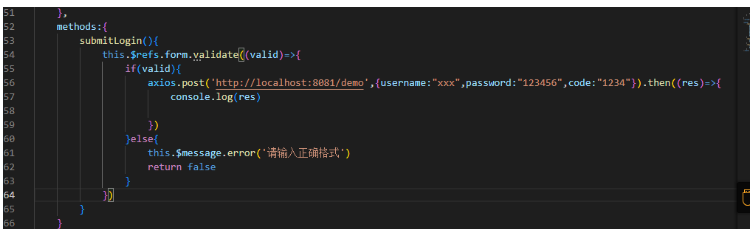
这里我随便建个后端,先进行演示,会出现跨域现象,这里跨域先不讲

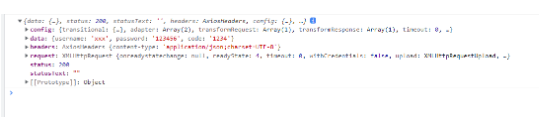
看下返回的信息里有什么
<template> <div> <el-form :rules="rules" ref="form" :model="loginForm" class="loginContainer"> <h4 class="loginTitle">系统登录</h4> <!-- auto-complete="false"自动补全 --> <el-form-item prop="username"> <el-input type="text" auto-complete="false" v-model="loginForm.username" placeholder="请输入用户名"></el-input> </el-form-item> <el-form-item prop="password"> <el-input type="text" auto-complete="false" v-model="loginForm.password" placeholder="请输入密码"></el-input> </el-form-item> <el-form-item prop="code"> <el-input type="text" auto-complete="false" v-model="loginForm.code" placeholder="点击图片更换验证码" ></el-input> <img :src="captchaUrl"/> </el-form-item> <el-checkbox v-model="checked" class="loginRemeber">记住我</el-checkbox> <el-button type="primary" @click="submitLogin">登录</el-button> </el-form> </div></template> <script>import axios from 'axios'export default { name:"Login", data(){ return{ captchaUrl:'',//验证码图片链接 loginForm:{ username:'admin', password:'123456', code:'1234' }, checked:true, rules:{ username:[ {required:true,message:'请输入用户名',trigger:'blur'}, {min:5,max:12,message:'用户名长度6到12位',trigger:'blur'} ], password:[ {required:true,message:'请输入密码',trigger:'blur'}, {min:6,max:12,message:'密码长度6到12位',trigger:'blur'} ], code:[ {required:true,message:'请输入验证码',trigger:'blur'}, {min:4,max:4,message:'验证码长度4位',trigger:'blur'} ], } } }, methods:{ submitLogin(){ this.$refs.form.validate((valid)=>{ if(valid){ axios.post('Http://localhost:8081/demo',{username:"xxx",password:"123456",code:"1234"}).then((res)=>{ console.log(res) }) }else{ this.$message.error('请输入正确格式') return false } }) } } }</script> <style> .loginContainer{ border-radius: 15px; background-clip: padding-box; margin:180px auto; width:350px; padding: 15px 35px 15px 35px; background: #a8dad5; border:1px solid #eaeaea; box-shadow: 0 0 25px #cac6c6; } .loginTitle{ margin: 0px auto 40px auto; text-align: center; } .loginRemeber{ text-align: left; margin:0px 0px 15px 0px; }</style>关于“Vue项目如何创建首页发送axios请求”这篇文章的内容就介绍到这里,感谢各位的阅读!相信大家对“Vue项目如何创建首页发送axios请求”知识都有一定的了解,大家如果还想学习更多知识,欢迎关注编程网精选频道。
--结束END--
本文标题: Vue项目如何创建首页发送axios请求
本文链接: https://www.lsjlt.com/news/349524.html(转载时请注明来源链接)
有问题或投稿请发送至: 邮箱/279061341@qq.com QQ/279061341
下载Word文档到电脑,方便收藏和打印~
2024-05-14
2024-05-14
2024-05-14
2024-05-14
2024-05-14
2024-05-14
2024-05-14
2024-05-14
2024-05-14
2024-05-14
回答
回答
回答
回答
回答
回答
回答
回答
回答
回答


官方手机版

微信公众号

商务合作


0