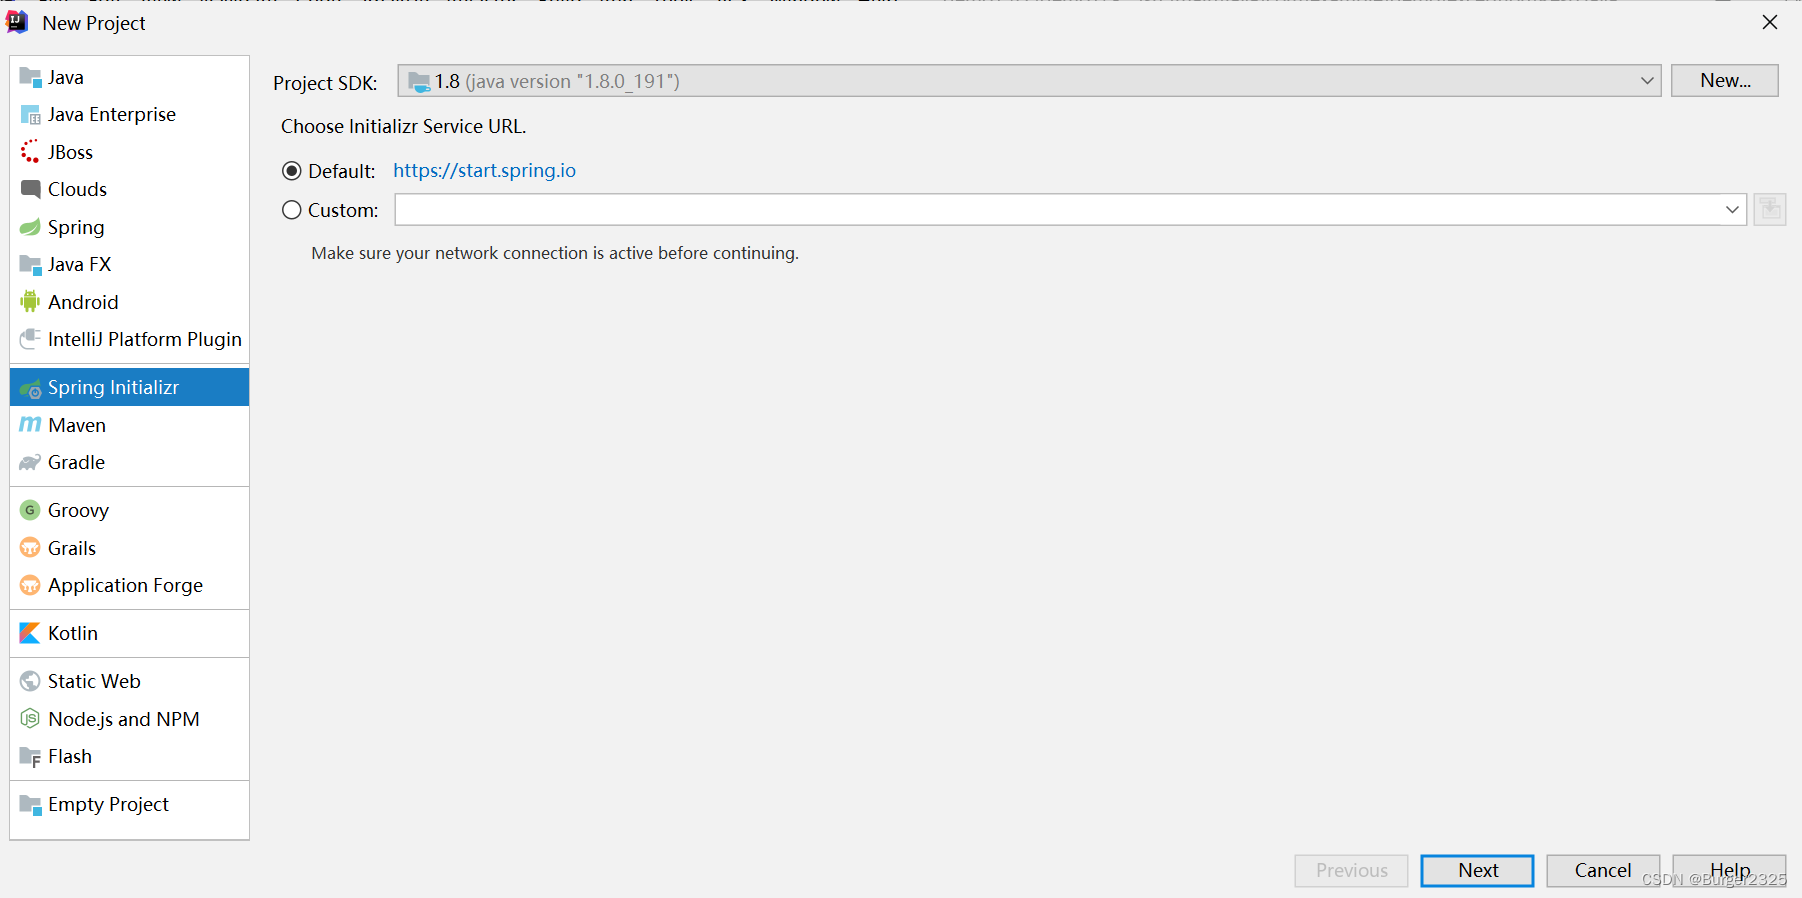
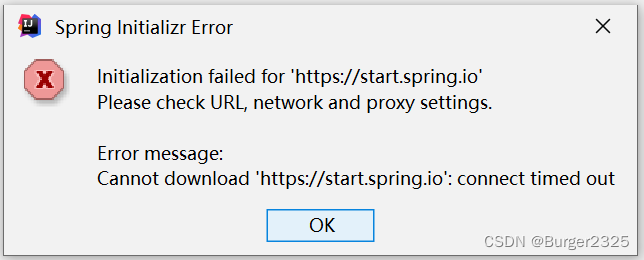
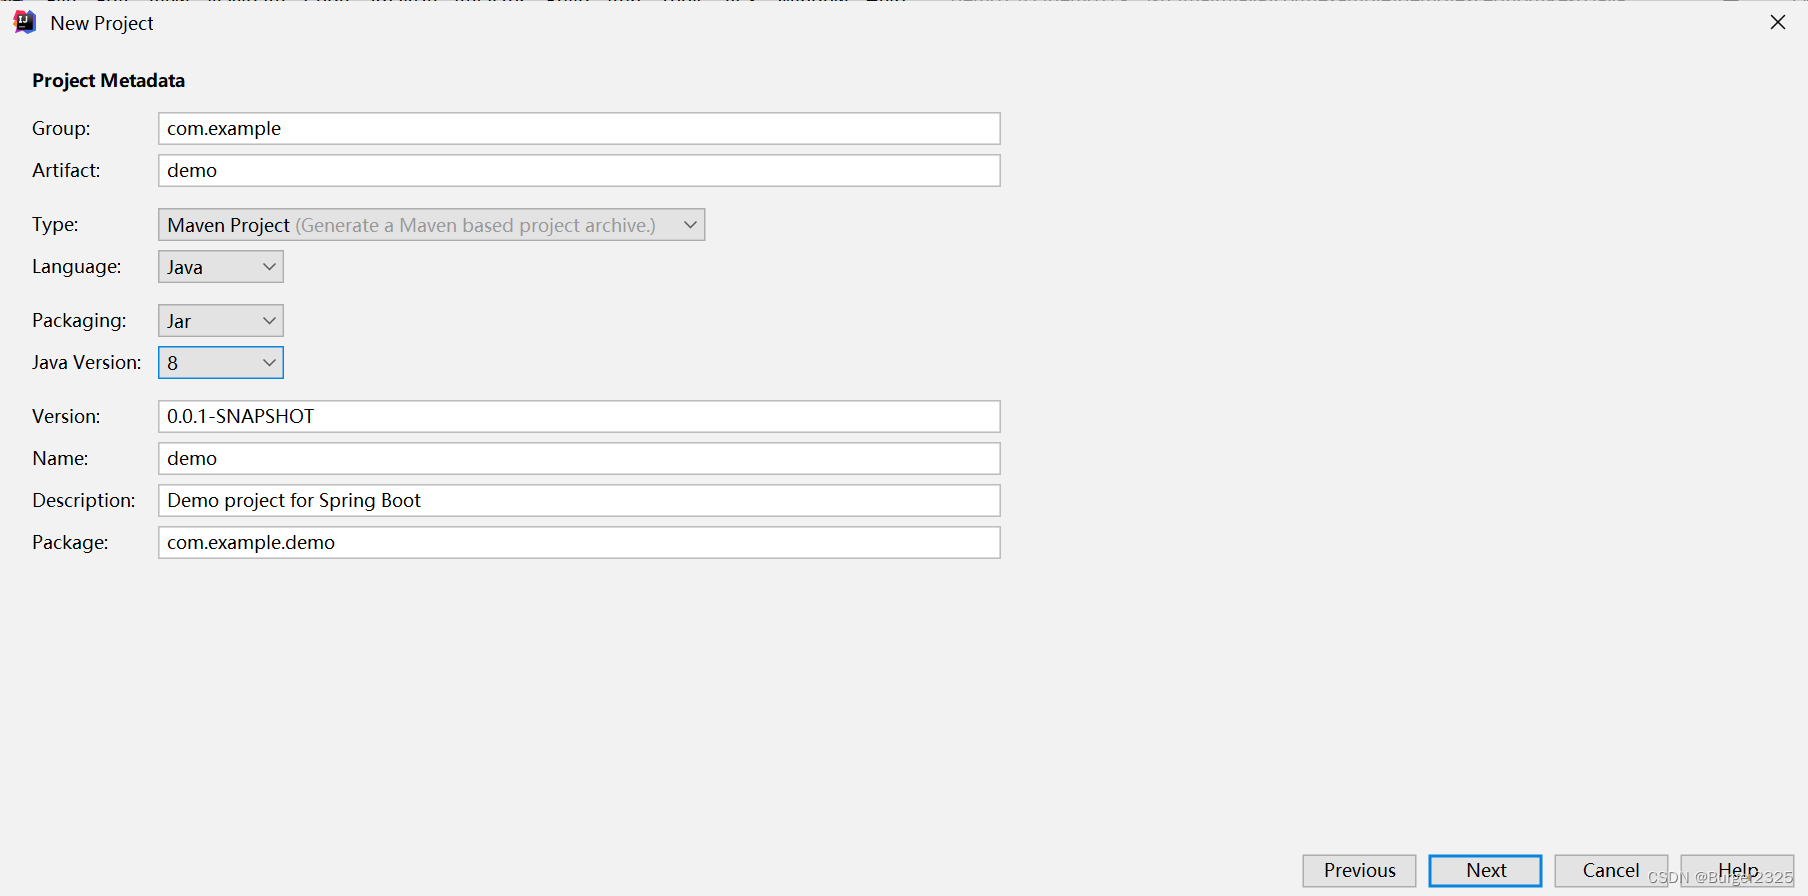
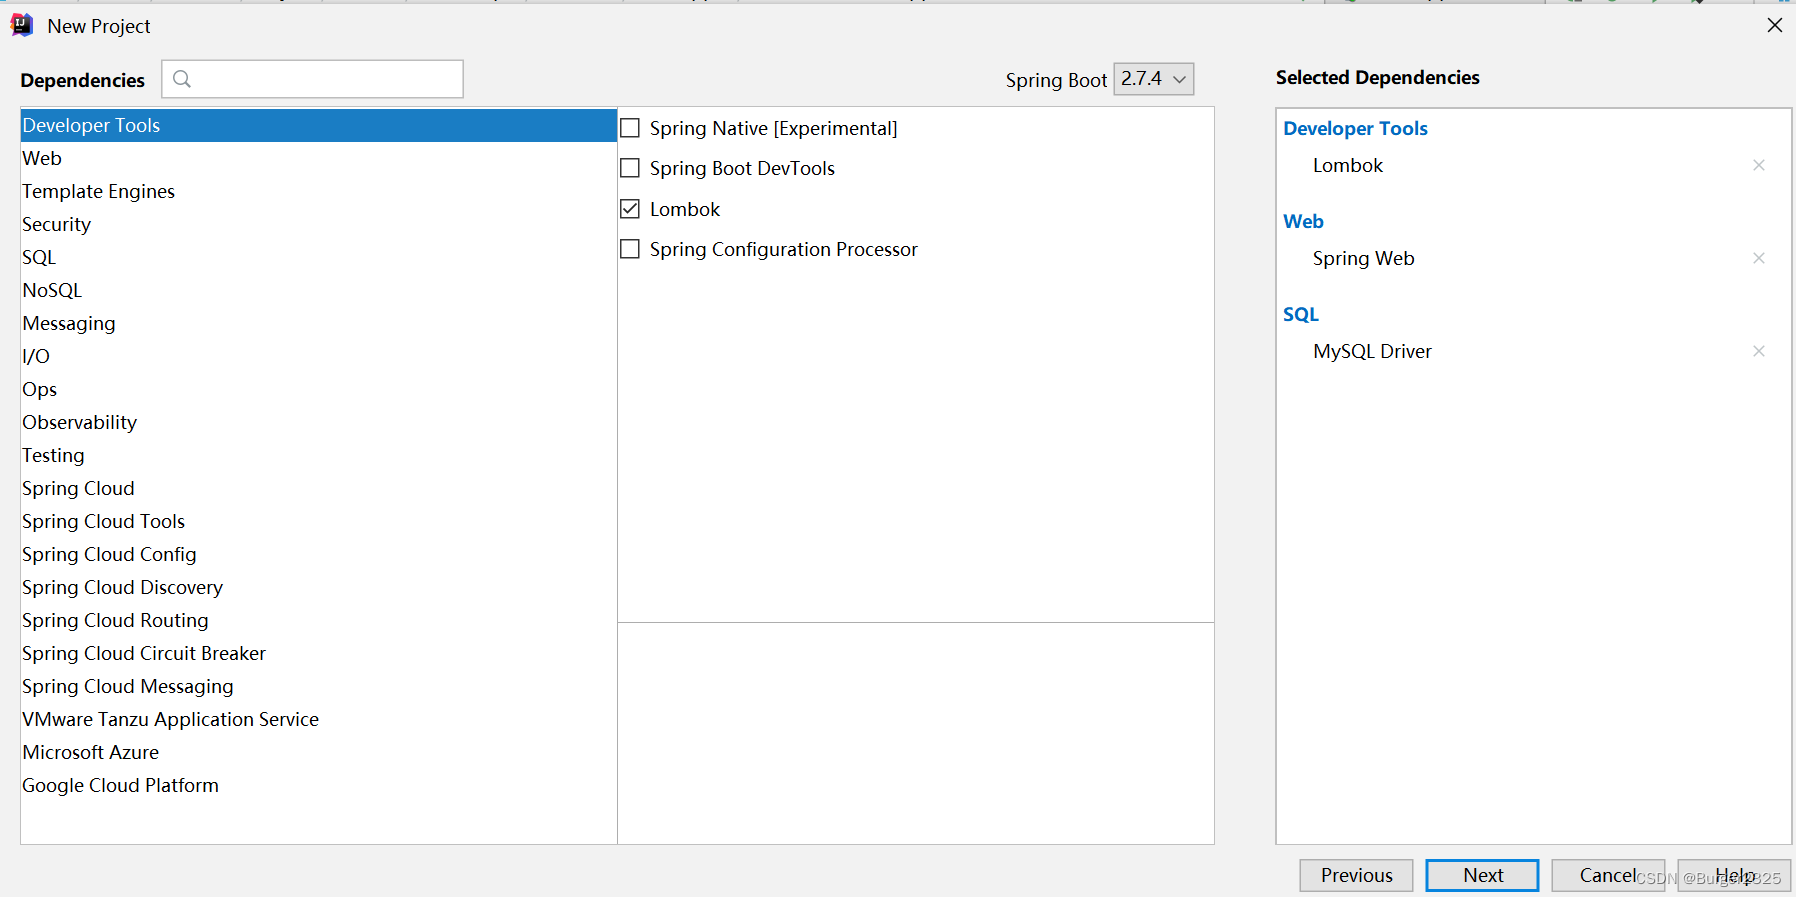
新建SpringBoot工程 若选择https://start.spring.io下一步失败 则选择Custom,输入:Https://start.aliyun.com后下一步 添加需要的依赖 添加其他依赖,全部依赖如下:

<dependencies> <dependency> <groupId>org.springframework.bootgroupId> <artifactId>spring-boot-starter-WEBartifactId> dependency> <dependency> <groupId>org.springframework.bootgroupId> <artifactId>spring-boot-starter-testartifactId> <scope>testscope> dependency> <dependency> <groupId>org.springframework.bootgroupId> <artifactId>spring-boot-starter-jdbcartifactId> dependency> <dependency> <groupId>MysqlgroupId> <artifactId>mysql-connector-javaartifactId> <scope>runtimescope> dependency> <dependency> <groupId>org.mybatisgroupId> <artifactId>mybatisartifactId> <version>3.4.6version> dependency> <dependency> <groupId>org.mybatis.spring.bootgroupId> <artifactId>mybatis-spring-boot-starterartifactId> <version>2.0.0version> dependency> <dependency> <groupId>org.projectlombokgroupId> <artifactId>lombokartifactId> <optional>trueoptional> dependency> dependencies>application.properties:改为application.yml
application.yml:
#端口号8080server: port: 8080#数据库名:mysql,用户名root,密码123456spring: datasource: username: root passWord: 123456 url: jdbc:mysql://localhost:3306/mysql?useUnicode=true&characterEncoding=UTF-8&useSSL=false&serverTimezone=Asia/Shanghai driver-class-name: com.mysql.cj.jdbc.Driver mybatis: mapper-locations: classpath:mapping StudentInfo getInfo(int id); void insertInfo(StudentInfo studentInfo); int deleteById(int id); int updateById(StudentInfo studentInfo); List<StudentInfo> selectAll();}import com.example.demo.entity.StudentInfo;import java.util.List;public interface StudentService { StudentInfo getStudentInfo(int id); StudentInfo insertInfo(StudentInfo studentInfo); int deleteById(int id); int updateById(StudentInfo studentInfo); List<StudentInfo> selectAll();}import com.example.demo.entity.StudentInfo;import com.example.demo.mapper.StudentMapper;import com.example.demo.service.StudentService;import org.springframework.beans.factory.annotation.Autowired;import org.springframework.stereotype.Service;import java.util.List;@Servicepublic class StudentServiceImpl implements StudentService { @Autowired(required = false) private StudentMapper studentMapper; @Override public StudentInfo getStudentInfo(int id){ return studentMapper.getInfo(id); } @Override public StudentInfo insertInfo(StudentInfo studentInfo){ studentMapper.insertInfo(studentInfo); return studentInfo; } @Override public int deleteById(int id){ return studentMapper.deleteById(id); } @Override public int updateById(StudentInfo studentInfo){ return studentMapper.updateById(studentInfo); } @Override public List<StudentInfo> selectAll(){ return studentMapper.selectAll(); }}DOCTYPE mapper PUBLIC "-//mybatis.org//DTD Mapper 3.0//EN" "http://mybatis.org/dtd/mybatis-3-mapper.dtd"><mapper namespace="com.example.demo.mapper.StudentMapper"> <select id="getInfo" resultType="com.example.demo.entity.StudentInfo"> select * from student where id=#{id} select> <insert id="insertInfo" parameterType="com.example.demo.entity.StudentInfo"> insert into student(id,sname,classId,birthday,email) values (#{id},#{sname},#{classId},#{birthday},#{email}); insert> <delete id="deleteById"> delete from student where id=#{id} delete> <update id="updateById" parameterType="com.example.demo.entity.StudentInfo"> update student set sname = #{sname},classId = #{classId}, birthday = #{birthday}, email = #{email} where id = #{id} update> <select id="selectAll" resultType="com.example.demo.entity.StudentInfo"> select * from student select>mapper>import com.example.demo.entity.StudentInfo;import com.example.demo.service.StudentService;import org.springframework.beans.factory.annotation.Autowired;import org.springframework.web.bind.annotation.PathVariable;import org.springframework.web.bind.annotation.RequestMapping;import org.springframework.web.bind.annotation.RestController;import java.util.List;@RestController@RequestMapping("/demo10")public class StudentController { @Autowired(required = false) private StudentService studentService; @RequestMapping("getInfo/{id}") public StudentInfo getInfo( @PathVariable int id){ return studentService.getStudentInfo(id); } @RequestMapping("/insert @RequestMapping("/delete") public String deleteInfo(int id){ int result = studentService.deleteById(id); if (result >= 1) { return "删除成功"; } else { return "删除失败"; } } @RequestMapping("/update @RequestMapping("/selectAll") public List<StudentInfo> ListStudent(){ return studentService.selectAll(); }}
URL:
localhost:8080/demo10/getInfo/1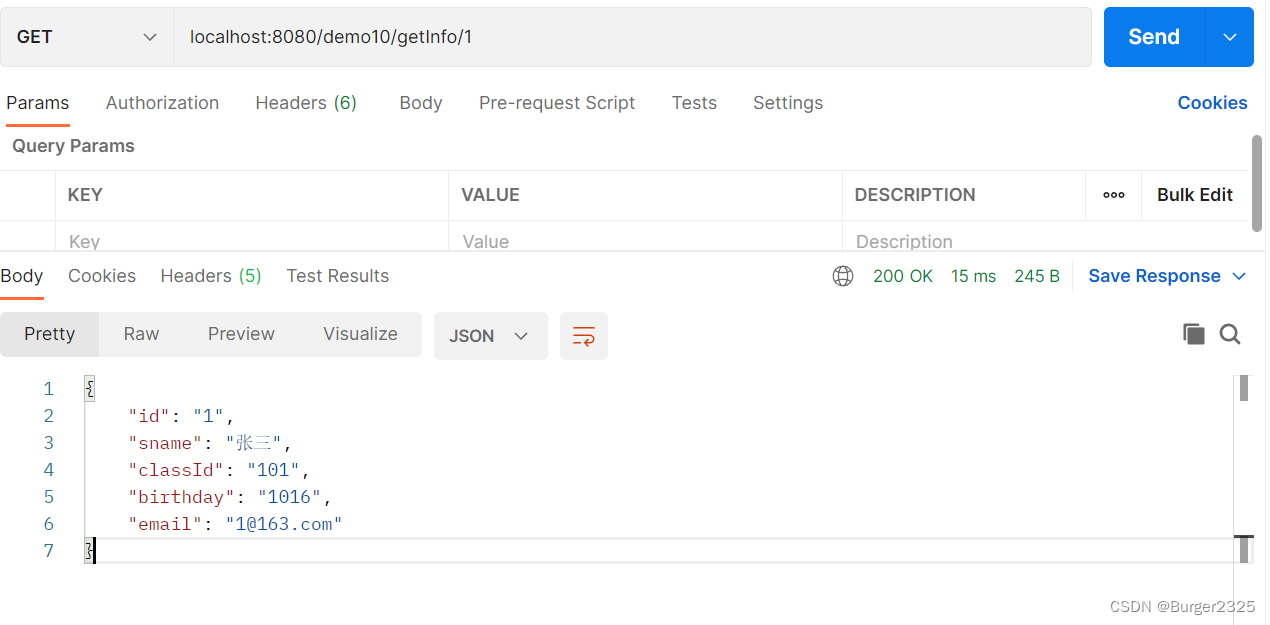
URL:
localhost:8080/demo10/insert/?id=5&sname=小明&classId=103&birthday=1231&email=5@163.com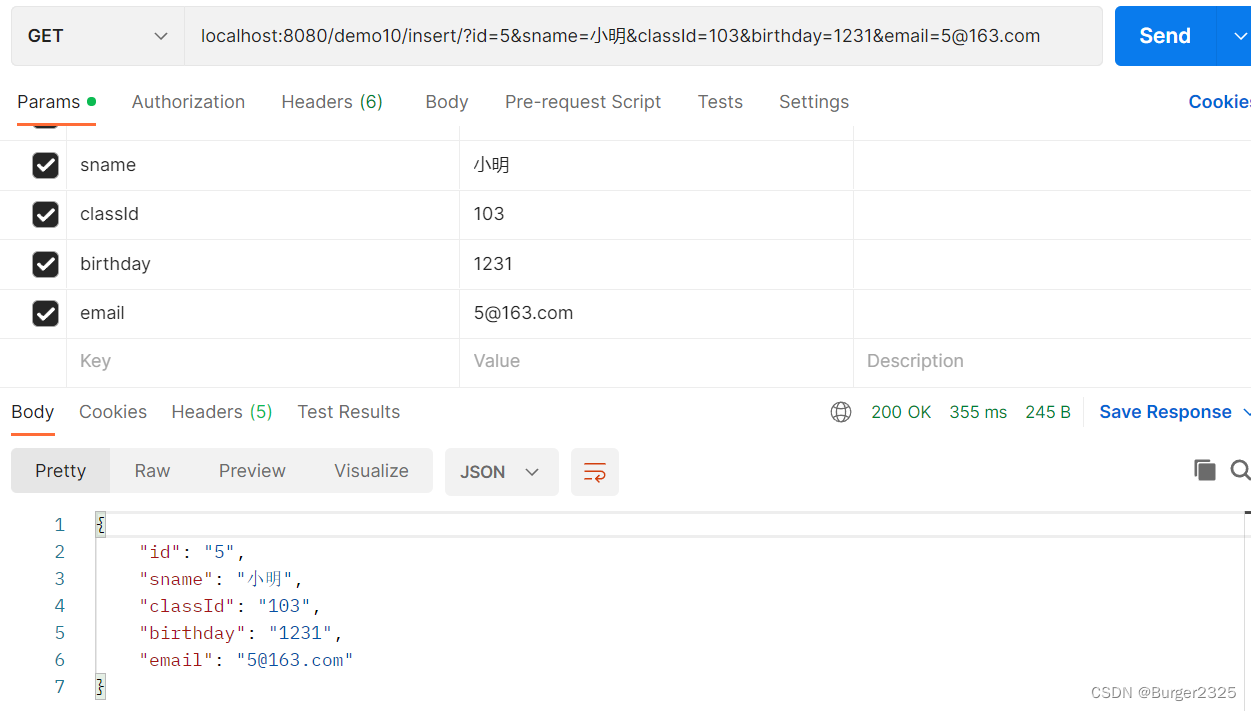
URL:
localhost:8080/demo10/delete?id=5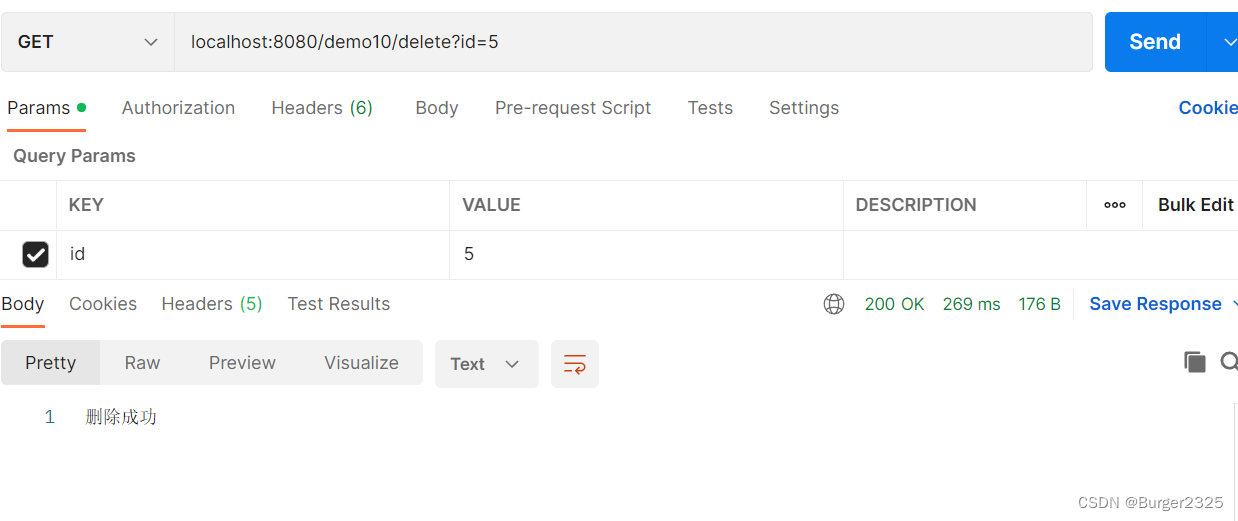
URL:
localhost:8080/demo10/update/?id=4&sname=小明&classId=103&birthday=1231&email=4@163.com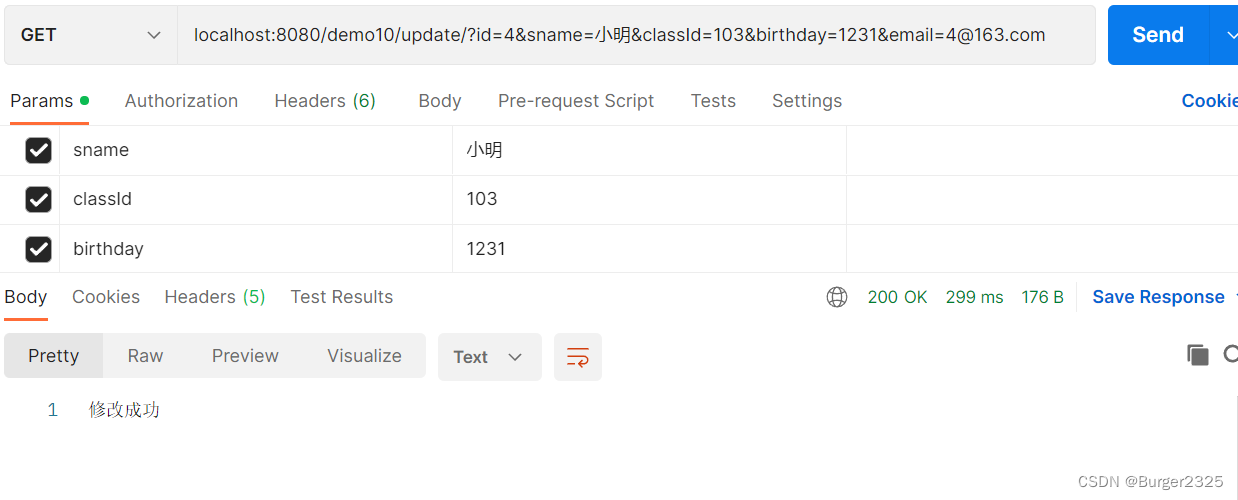
URL:
localhost:8080/demo10/selectAll
继续学习SpringBoot整合MybatisPlus?请移步SpringBoot整合MybatisPlus(详细)
对控制台输出效果不满意?可添加日志使内容更详细,请移步为SpringBoot项目添加日志:slf4j
来源地址:https://blog.csdn.net/m0_68681879/article/details/127276006
--结束END--
本文标题: SpringBoot整合MyBatis实现增删改查(简单,详细)
本文链接: https://www.lsjlt.com/news/375792.html(转载时请注明来源链接)
有问题或投稿请发送至: 邮箱/279061341@qq.com QQ/279061341
下载Word文档到电脑,方便收藏和打印~
2024-05-14
2024-05-14
2024-05-14
2024-05-14
2024-05-14
2024-05-14
2024-05-14
2024-05-14
2024-05-14
2024-05-14
回答
回答
回答
回答
回答
回答
回答
回答
回答
回答


官方手机版

微信公众号

商务合作


0