这篇文章主要介绍了js如何制作选项卡,具有一定借鉴价值,感兴趣的朋友可以参考下,希望大家阅读完这篇文章之后大有收获,下面让小编带着大家一起了解一下。具体内容如下<!doctype html&
这篇文章主要介绍了js如何制作选项卡,具有一定借鉴价值,感兴趣的朋友可以参考下,希望大家阅读完这篇文章之后大有收获,下面让小编带着大家一起了解一下。
具体内容如下
<!doctype html>
<html lang="en">
<head>
<meta charset="UTF-8">
<title>选项卡</title>
</head>
<style>
*{padding:0;margin:0;}
div#tabs{
width:600px;
height:400px;
margin:100px auto;
position:relative;
}
.tab{
width:100px;
height:50px;
position:absolute;
top:0;
}
input.tab{
z-index:11;
opacity:0;
cursor:pointer;
}
a.tab{
z-index:10;
text-align:center;
line-height:50px;
text-decoration:none;
color:black;
font-size:30px;
}
.tab1{
left:0px;
}
.tab2{
left:100px;
}
.tab3{
left:200px;
}
input.tab:hover+a{
background-color:#ccc;
}
input.tab:checked+a{
border:1px solid #ccc;
border-bottom:none;
background-color:white;
}
div#scroll{
position:absolute;
top:50px;
width:100%;
height:350px;
border:1px solid #ccc;
overflow:hidden;
}
div#scroll>div.content{
width:100%;
height:100%;
position:absolute;
top:0;
left:100%;
padding:15px;
transition:all 0.6s linear;
}
input.tab1:checked~div#scroll>div.content1,
input.tab2:checked~div#scroll>div.content2,
input.tab3:checked~div#scroll>div.content3{
left:0%;
}
</style>
<body>
<div id="tabs">
<input type="radio" name="tab" class="tab tab1" checked />
<a href="#" class="tab tab1">选项一</a>
<input type="radio" name="tab" class="tab tab2"/>
<a href="#" class="tab tab2">选项二</a>
<input type="radio" name="tab" class="tab tab3"/>
<a href="#" class="tab tab3">选项三</a>
<div id="scroll">
<div class="content content1">
哈哈111<br/>
哈哈111<br/>
哈哈111<br/>
哈哈111<br/>
哈哈111<br/>
</div>
<div class="content content2">
哈哈222<br/>
哈哈222<br/>
哈哈222<br/>
哈哈222<br/>
哈哈222<br/>
</div>
<div class="content content3">
哈哈333<br/>
哈哈333<br/>
哈哈333<br/>
哈哈333<br/>
哈哈333<br/>
</div>
</div>
</div>
</body>
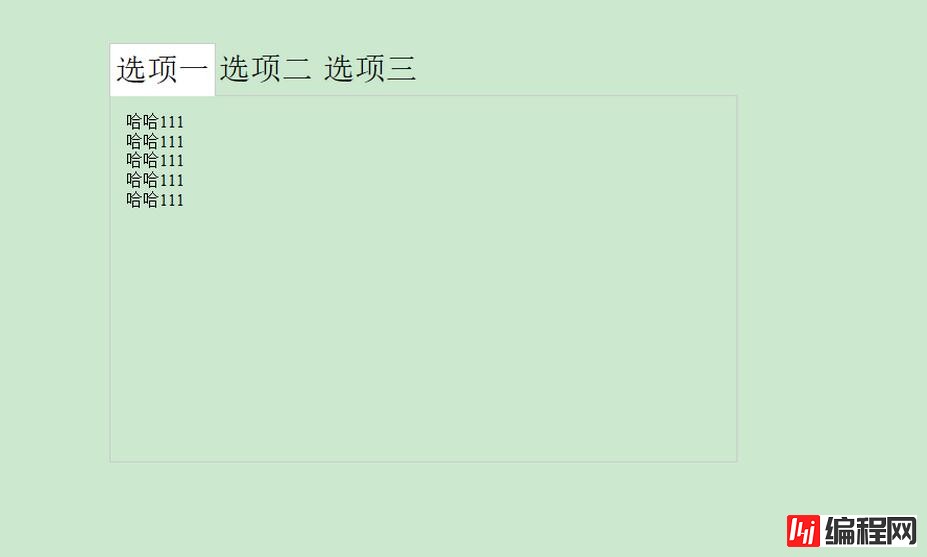
</html>效果图:
感谢你能够认真阅读完这篇文章,希望小编分享的“js如何制作选项卡”这篇文章对大家有帮助,同时也希望大家多多支持编程网,关注编程网node.js频道,更多相关知识等着你来学习!
--结束END--
本文标题: js如何制作选项卡
本文链接: https://www.lsjlt.com/news/67038.html(转载时请注明来源链接)
有问题或投稿请发送至: 邮箱/279061341@qq.com QQ/279061341
下载Word文档到电脑,方便收藏和打印~
2022-06-04
2022-06-04
2022-06-04
2022-06-04
2022-06-04
2022-06-04
2022-06-04
2022-06-04
2022-06-04
2022-06-04
回答
回答
回答
回答
回答
回答
回答
回答
回答
回答


官方手机版

微信公众号

商务合作


0