这篇文章给大家分享的是有关Jquery怎么实现拖拽排序效果的内容。小编觉得挺实用的,因此分享给大家做个参考,一起跟随小编过来看看吧。增强动态增加Div效果原来没有新建动作,分析代码后发现很容易增强~~<
这篇文章给大家分享的是有关Jquery怎么实现拖拽排序效果的内容。小编觉得挺实用的,因此分享给大家做个参考,一起跟随小编过来看看吧。
增强动态增加Div效果
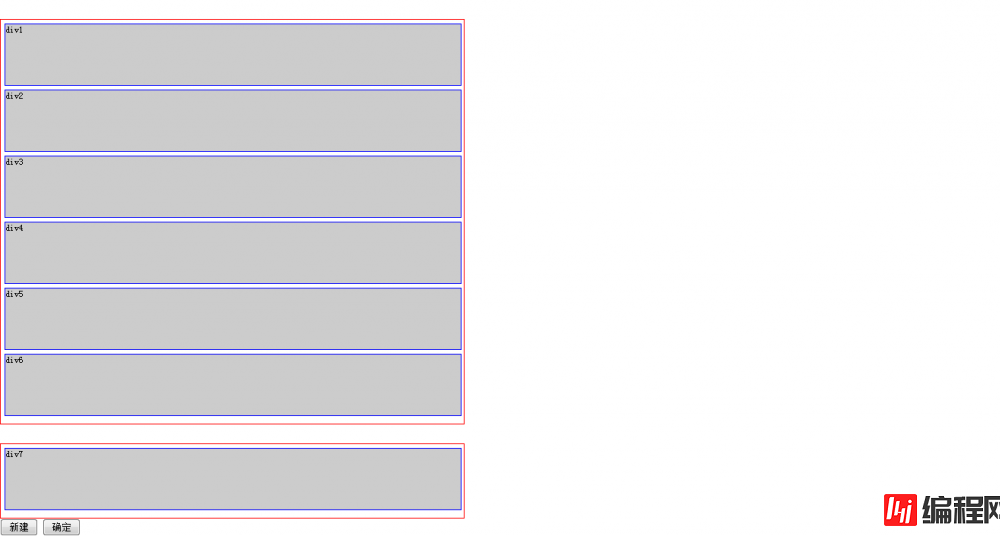
原来没有新建动作,分析代码后发现很容易增强~~
<!DOCTYPE html>
 <html>
 <head>
 <meta Http-equiv="Content-Type" content="text/html; charset=utf-8" />
 <title>测试的拖拽功能</title>
 <style type="text/CSS">
 body, div { margin: 0; paading: 0; font-size: 12px; }
 body { width:100%; margin: 0 auto; }
 ul, li { margin: 0; padding: 0; list-style: none; }
 .clear { clear: both; width: 1px; height: 0px; line-height: 0px; font-size: 1px; }
 .drag_module_box { width: 600px; height: auto; margin: 25px 0 0 0; padding: 5px; border: 1px solid #f00; }
 .drag_module_box1 { width: 600px; height: auto; margin: 25px 0 0 0; padding: 5px; border: 1px solid #f00; }
 .drag_module_main { position: static; width: 600px; height: 80px; margin-bottom: 5px; border: 1px solid blue; background: #ccc; }
 .drag_module_maindash { position: absolute; width: 600px; height: 80px; margin-bottom: 5px; border: 1px dashed blue; background: #ececec; opacity: 0.7; }
 .drag_module_hide { width: 600px; height: 80px; margin-bottom: 5px; }
 .drag_module_dash { position: sta;tic; width: 600px; height: 80px; margin-bottom: 5px; border: 1px dashed #f00; };
 </style>
 <script type="text/javascript" src="https://ajax.Googleapis.com/ajax/libs/jquery/1.7.2/jquery.min.js"></script>
 <script type="text/javascript">
 $(document).ready( function () {
  //来源:http://www.cnblogs.com/WEB-ed2/arcHive/2011/09/19/2181819.html
   var range = { x: 0, y: 0 };//鼠标元素偏移量
   var lastPos = { x: 0, y: 0, x1: 0, y1: 0 }; //拖拽对象的四个坐标
   var tarPos = { x: 0, y: 0, x1: 0, y1: 0 }; //目标元素对象的坐标初始化
   var theDiv = null, move = false;//拖拽对象 拖拽状态
   var theDivId =0, theDivHeight = 0, theDivHalf = 0; tarFirstY = 0; //拖拽对象的索引、高度、的初始化。
   var tarDiv = null, tarFirst, tempDiv; //要插入的目标元素的对象, 临时的虚线对象
  function loopbox(){ //循环初始化
     $(".drag_module_box").find(".drag_module_main").each(function(){
      console.log( 'find' );
       $(this).mousedown(function (event){
         //拖拽对象
         theDiv = $(this);
         //鼠标元素相对偏移量
         range.x = event.pageX - theDiv.offset().left;
         range.y = event.pageY - theDiv.offset().top;
         theDivId = theDiv.index();
         theDivHeight = theDiv.height();
         theDivHalf = theDivHeight/2;
         move = true;
         theDiv.attr("class","drag_module_maindash");
         // 创建新元素 插入拖拽元素之前的位置(虚线框)
         $("<div class='drag_module_dash'></div>").insertBefore(theDiv);
       });
     });
  }
  loopbox();
   $(".drag_module_box").mousemove(function(event) {
    console.log( 'mousemove' );
     if (!move) return false;
     lastPos.x = event.pageX - range.x;
     lastPos.y = event.pageY - range.y;
     lastPos.y1 = lastPos.y + theDivHeight;
     // 拖拽元素随鼠标移动
     theDiv.css({left: lastPos.x + 'px',top: lastPos.y + 'px'});
     // 拖拽元素随鼠标移动 查找插入目标元素
     var $main = $('.drag_module_main'); // 局部变量:按照重新排列过的顺序 再次获取 各个元素的坐标,
     tempDiv = $(".drag_module_dash"); //获得临时 虚线框的对象
     $main.each(function () {
       tarDiv = $(this);
       tarPos.x = tarDiv.offset().left;
       tarPos.y = tarDiv.offset().top;
       tarPos.y1 = tarPos.y + tarDiv.height()/2;
       tarFirst = $main.eq(0); // 获得第一个元素
       tarFirstY = tarFirst.offset().top + theDivHalf ; // 第一个元素对象的中心纵坐标
       //拖拽对象 移动到第一个位置
       if (lastPos.y <= tarFirstY) {
           tempDiv.insertBefore(tarFirst);
       }
       //判断要插入目标元素的 坐标后, 直接插入
       if (lastPos.y >= tarPos.y - theDivHalf && lastPos.y1 >= tarPos.y1 ) {
         tempDiv.insertAfter(tarDiv);
       }
     });
   }).mouseup(function(event) {
    console.log( 'mouseup' );
    if(theDiv==null) return false;
     theDiv.insertBefore(tempDiv); // 拖拽元素插入到 虚线div的位置上
     theDiv.attr("class", "drag_module_main"); //恢复对象的初始样式
     $('.drag_module_dash').remove(); // 删除新建的虚线div
     move=false;
   });
   $("#drag_module_insert").click(function(){
    $("#drag_module_box1").html($("#drag_module_box1").html()+$("#drag_module_box2").html());
    loopbox();
   });
   $("#drag_module_seque").click(function(){
    $(".drag_module_box").find(".drag_module_main").each(function(){
      console.log($(this).attr('id'));
    });
   });
 });
 </script>
 </head>
 <body>
 <div class="drag_module_box" id="drag_module_box1">
   <div class="drag_module_main" id="main1">div1</div>
   <div class="drag_module_main" id="main2">div2</div>
   <div class="drag_module_main" id="main3">div3</div>
   <div class="drag_module_main" id="main4">div4</div>
   <div class="drag_module_main" id="main5">div5</div>
   <div class="drag_module_main" id="main6">div6</div>
 </div>
 <div class="drag_module_box1" id="drag_module_box2">
  <div class="drag_module_main" id="main_first">div7</div>
 </div>
 <input type="button" value="新建" id="drag_module_insert"/>
 <input type="button" value="确定" id="drag_module_seque"/>
 </body>
 </html>
感谢各位的阅读!关于“jQuery怎么实现拖拽排序效果”这篇文章就分享到这里了,希望以上内容可以对大家有一定的帮助,让大家可以学到更多知识,如果觉得文章不错,可以把它分享出去让更多的人看到吧!
--结束END--
本文标题: jQuery怎么实现拖拽排序效果
本文链接: https://www.lsjlt.com/news/68568.html(转载时请注明来源链接)
有问题或投稿请发送至: 邮箱/279061341@qq.com QQ/279061341
下载Word文档到电脑,方便收藏和打印~
2024-01-12
2023-05-20
2023-05-20
2023-05-20
2023-05-20
2023-05-20
2023-05-20
2023-05-20
2023-05-20
2023-05-20
回答
回答
回答
回答
回答
回答
回答
回答
回答
回答


官方手机版

微信公众号

商务合作


0