这篇文章主要介绍小程序如何实现采集录音并上传到后台,文中介绍的非常详细,具有一定的参考价值,感兴趣的小伙伴们一定要看完!具体内容如下demo.wxml<view> <butto
这篇文章主要介绍小程序如何实现采集录音并上传到后台,文中介绍的非常详细,具有一定的参考价值,感兴趣的小伙伴们一定要看完!
具体内容如下
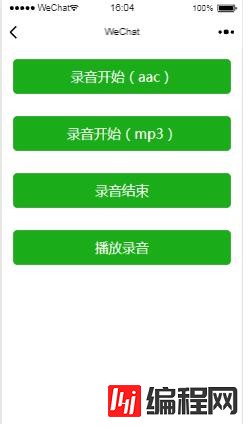
demo.wxml
<view>
 <button bindtap='startRecordMp3' type='primary'>录音开始(mp3)</button>
</view>
<view>
 <button bindtap='stopRecord' type='primary'>录音结束</button>
</view>
<view>
 <button bindtap='playRecord' type='primary'>播放录音</button>
</view>
<view>
 <button bindtap='sendRecord' type='primary'>播放录音</button>
</view>
demo.wxss
view{
 padding: 15px;
}demo.js
// pages/newMusic/index.js
const recorderManager = wx.getRecorderManager();
Page({

  data: {

  },


  tip: function (msg) {
    wx.showModal({
      title: '提示',
      content: msg,
      showCancel: false
    })
  }


  , startRecordMp3: function () {
    recorderManager.start({
      fORMat: 'mp3'
    });
  }


  , stopRecord: function () {
    recorderManager.stop()
  }


  , playRecord: function () {
    var that = this;
    var src = this.data.src;
    if (src == '') {
      this.tip("请先录音!")
      return;
    }
    this.innerAudiocontext.src = this.data.src;
    this.innerAudioContext.play()
  },

  onLoad: function (options) {
    var that = this;
    recorderManager.onError(function () {
      that.tip("录音失败!")
    });
    recorderManager.onStop(function (res) {
      that.setData({
        src: res.tempFilePath
      })
      console.log(res.tempFilePath)
      that.tip("录音完成!")
    });

    this.innerAudioContext = wx.createInnerAudioContext();
    this.innerAudioContext.onError((res) => {
      that.tip("播放录音失败!")
    })

  }

})
java后台接收
package com.azor.controller;
import java.text.SimpleDateFormat;
import java.util.Date;
import java.util.HashMap;
import java.util.Map;
import javax.servlet.Http.httpservletRequest;
import org.apache.commons.codec.binary.Base64;
import org.apache.commons.lang.StringUtils;
import org.slf4j.LoggerFactory;
import org.springframework.beans.factory.annotation.Autowired;
import org.springframework.core.env.Environment;
import org.springframework.WEB.bind.annotation.RequestMapping;
import org.springframework.web.multipart.MultipartFile;
import org.springframework.web.multipart.MultipartHttpServletRequest;
import com.azor.utils.HttpapiService;
import ch.qos.logback.classic.Logger;
import net.sf.JSON.JSONObject;
@RestController
@RequestMapping("/base_voice")
public class BaseController {
private static final Logger logger = (Logger) LoggerFactory.getLogger(BaseController.class);
private static String lineSeparator = System.getProperty("line.separator");
@Autowired
protected Environment env;
@Autowired
protected HttpAPIService httpAPIService;
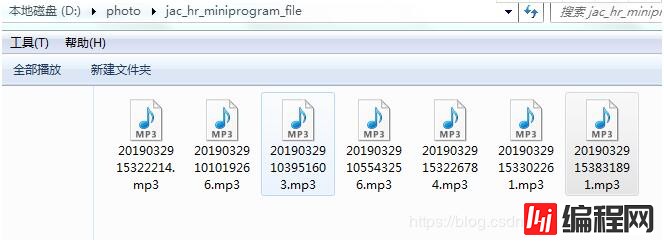
private final String FILE_SAVE_PATH = "D:/photo/jac_hr_miniprogram_file/";
protected Map<String, Object> dataMap = new HashMap<>();
protected Map<String, Object> postMap = new HashMap<>();
@RequestMapping("/file_upload")
public void saveFile(HttpServletRequest request, String url) throws Exception {
logger.info("文件上传开始" + lineSeparator);
// 1.获取从前台传过来得图片
MultipartHttpServletRequest req = (MultipartHttpServletRequest) request;
MultipartFile multipartFile = req.getFile("file");
// 2.获得文件扩展名
String extOfFile = getExtOfFile(multipartFile);
// 3.保存到本地
BufferedOutputStream bos = null;
String filename = null;
try {
File dir = new File(file_save_path);
if (!dir.exists()) {// 判断文件目录是否存在
dir.mkdirs();
}
filename = new SimpleDateFormat("yyyyMMddHHmmss").format(new Date()) + (int) (Math.random() * 1000) + "."
+ extOfFile;
bos = new BufferedOutputStream(new FileOutputStream(file_save_path + filename));
bos.write(multipartFile.getBytes());
} catch (Exception e) {
e.printStackTrace();
} finally {
if (bos != null) {
try {
bos.close();
} catch (IOException e) {
e.printStackTrace();
}
}
}
}
public String getExtOfFile(MultipartFile multipartFile) {
// 获取文件的 名称.扩展名
String oldName = multipartFile.getOriginalFilename();
String extensionName = "";
// 获取原来的扩展名
if ((oldName != null) && (oldName.length() > 0)) {
int dot = oldName.lastIndexOf('.');
if ((dot > -1) && (dot < (oldName.length() - 1))) {
extensionName = oldName.substring(dot+1);
}
}
return extensionName;
}
}效果
以上是“小程序如何实现采集录音并上传到后台”这篇文章的所有内容,感谢各位的阅读!希望分享的内容对大家有帮助,更多相关知识,欢迎关注编程网JavaScript频道!
--结束END--
本文标题: 小程序如何实现采集录音并上传到后台
本文链接: https://www.lsjlt.com/news/69692.html(转载时请注明来源链接)
有问题或投稿请发送至: 邮箱/279061341@qq.com QQ/279061341
下载Word文档到电脑,方便收藏和打印~
2024-01-12
2023-05-20
2023-05-20
2023-05-20
2023-05-20
2023-05-20
2023-05-20
2023-05-20
2023-05-20
2023-05-20
回答
回答
回答
回答
回答
回答
回答
回答
回答
回答


官方手机版

微信公众号

商务合作


0