Python 官方文档:入门教程 => 点击学习
最近在学习SpringBoot,session这个点一直困扰了我好久,今天把这些天踩的坑分享出来吧,希望能帮助更多的人。 一、pom.xml配置 <depend
最近在学习SpringBoot,session这个点一直困扰了我好久,今天把这些天踩的坑分享出来吧,希望能帮助更多的人。
<dependency>
    <groupId>org.springframework.boot</groupId>
    <artifactId>spring-boot-starter-data-Redis</artifactId>
</dependency>

<dependency>
    <groupId>org.springframework.session</groupId>
    <artifactId>spring-session-data-redis</artifactId>
</dependency>
#redis
spring.redis.host=127.0.0.1
spring.redis.port=6379
spring.redis.passWord=123456
spring.redis.pool.max-idle=8
spring.redis.pool.min-idle=0
spring.redis.pool.max-active=8
spring.redis.pool.max-wait=-1
#超时一定要大于0
spring.redis.timeout=3000
spring.session.store-type=redis
在配置redis时需要确保redis安装正确,并且配置notify-keyspace-events Egx,spring.redis.timeout设置为大于0,我当时这里配置为0时springboot时启不起来。
//拦截登录失效的请求
public class RedisSessionInterceptor implements HandlerInterceptor
{
    @Autowired
    private StringRedisTemplate redisTemplate;

    @Override
    public boolean preHandle(httpservletRequest request, HttpServletResponse response, Object handler) throws Exception
    {
        //无论访问的地址是不是正确的,都进行登录验证,登录成功后的访问再进行分发,404的访问自然会进入到错误控制器中
        HttpSession session = request.getSession();
        if (session.getAttribute("loginUserId") != null)
        {
            try
            {
                //验证当前请求的session是否是已登录的session
                String loginSessionId = redisTemplate.opsForValue().get("loginUser:" + (long) session.getAttribute("loginUserId"));
                if (loginSessionId != null && loginSessionId.equals(session.getId()))
                {
                    return true;
                }
            }
            catch (Exception e)
            {
                e.printStackTrace();
            }
        }

        response401(response);
        return false;
    }

    private void response401(HttpServletResponse response)
    {
        response.setCharacterEncoding("UTF-8");
        response.setContentType("application/JSON; charset=utf-8");

        try
        {
            response.getWriter().print(jsON.toJSONString(new ReturnData(StatusCode.NEED_LOGIN, "", "用户未登录!")));
        }
        catch (IOException e)
        {
            e.printStackTrace();
        }
    }

    @Override
    public void postHandle(HttpServletRequest request, HttpServletResponse response, Object handler, ModelAndView modelAndView) throws Exception
    {

    }

    @Override
    public void afterCompletion(HttpServletRequest request, HttpServletResponse response, Object handler, Exception ex) throws Exception
    {

    }
}
@Configuration
public class WEBSecurityConfig extends WebmvcConfigurerAdapter
{
    @Bean
    public RedisSessionInterceptor getSessionInterceptor()
    {
        return new RedisSessionInterceptor();
    }

    @Override
    public void addInterceptors(InterceptorReGIStry registry)
    {
        //所有已api开头的访问都要进入RedisSessionInterceptor拦截器进行登录验证,并排除login接口(全路径)。必须写成链式,分别设置的话会创建多个拦截器。
        //必须写成getSessionInterceptor(),否则SessionInterceptor中的@Autowired会无效
        registry.addInterceptor(getSessionInterceptor()).addPathPatterns("/api/**").excludePathPatterns("/api/user/login");
        super.addInterceptors(registry);
    }
}
@RestController
@RequestMapping(value = "/api/user")
public class LoginController
{
    @Autowired
    private UserService userService;

    @Autowired
    private StringRedisTemplate redisTemplate;

    @RequestMapping("/login")
    public ReturnData login(HttpServletRequest request, String account, String password)
    {
        User user = userService.findUserByAccountAndPassword(account, password);
        if (user != null)
        {
            HttpSession session = request.getSession();
            session.setAttribute("loginUserId", user.getUserId());
            redisTemplate.opsForValue().set("loginUser:" + user.getUserId(), session.getId());

            return new ReturnData(StatusCode.REQUEST_SUCCESS, user, "登录成功!");
        }
        else
        {
            throw new MyException(StatusCode.ACCOUNT_OR_PASSWORD_ERROR, "账户名或密码错误!");
        }
    }

    @RequestMapping(value = "/getUserInfo")
    public ReturnData get(long userId)
    {
        User user = userService.findUserByUserId(userId);
        if (user != null)
        {
            return new ReturnData(StatusCode.REQUEST_SUCCESS, user, "查询成功!");
        }
        else
        {
            throw new MyException(StatusCode.USER_NOT_EXIST, "用户不存在!");
        }
    }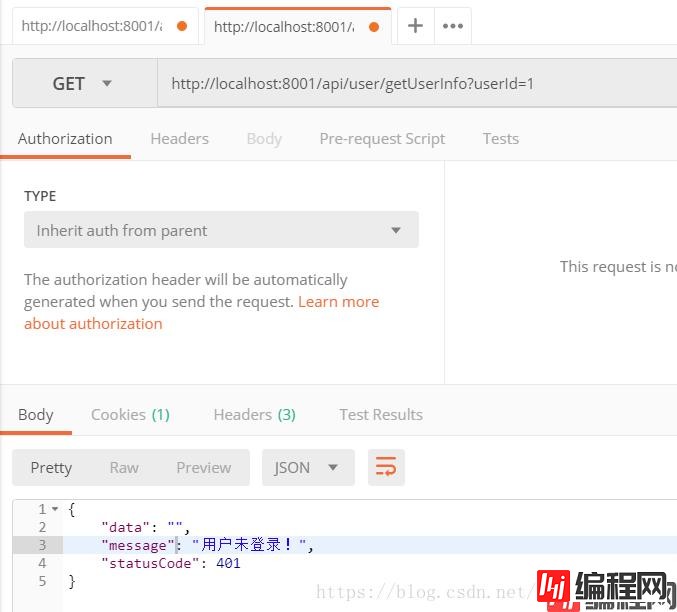
}我在浏览器上登录,然后获取用户信息,再在postman上登录相同的账号,浏览器再获取用户信息,就会提示401错误了,浏览器需要重新登录才能获取得到用户信息,同样,postman上登录的账号就失效了。
浏览器:


postman:
分布式session需要解决两个难点:1、正确配置redis让springboot把session托管到redis服务器。2、唯一登录。
redis需要能正确启动到出现如下效果才证明redis正常配置并启动

同时还要保证配置正确
@EnableCaching
@EnableRedisHttpSession(maxInactiveIntervalInSeconds = 30)//session过期时间(秒)
@Configuration
public class RedisSessionConfig
{
    @Bean
    public static ConfigureRedisAction configureRedisAction()
    {
        //让springSession不再执行config命令
        return ConfigureRedisAction.NO_OP;
    }
}springboot启动后能在redis上查到缓存的session才能说明整个redis+springboot配置成功!

1、用户登录时,在redis中记录该userId对应的sessionId,并将userId保存到session中。
HttpSession session = request.getSession();
session.setAttribute("loginUserId", user.getUserId());
redisTemplate.opsForValue().set("loginUser:" + user.getUserId(), session.getId());
2、访问接口时,会在RedisSessionInterceptor拦截器中的preHandle()中捕获,然后根据该请求发起者的session中保存的userId去redis查当前已登录的sessionId,若查到的sessionId与访问者的sessionId相等,那么说明请求合法,放行。否则抛出401异常给全局异常捕获器去返回给客户端401状态。
唯一登录经过我的验证后满足需求,暂时没有出现问题,也希望大家能看看有没有问题,有的话给我点好的建议!
到此这篇关于SpringBoot+SpringSession+Redis实现session共享及唯一登录示例的文章就介绍到这了,更多相关SpringBoot 唯一登录内容请搜索编程网以前的文章或继续浏览下面的相关文章希望大家以后多多支持编程网!
--结束END--
本文标题: SpringBoot+SpringSession+Redis实现session共享及唯一登录示例
本文链接: https://www.lsjlt.com/news/124955.html(转载时请注明来源链接)
有问题或投稿请发送至: 邮箱/279061341@qq.com QQ/279061341
下载Word文档到电脑,方便收藏和打印~
2024-03-01
2024-03-01
2024-03-01
2024-02-29
2024-02-29
2024-02-29
2024-02-29
2024-02-29
2024-02-29
2024-02-29
回答
回答
回答
回答
回答
回答
回答
回答
回答
回答


官方手机版

微信公众号

商务合作


0