Python 官方文档:入门教程 => 点击学习
1、简介 在Spring Boot进行项目开发的过程中,肯定会有这样一种场景,比如说事件上报,在开发时开发人员可能会模拟在代码中写入一个事件上报Url,然后当部署到生产环境时,该ur
在Spring Boot进行项目开发的过程中,肯定会有这样一种场景,比如说事件上报,在开发时开发人员可能会模拟在代码中写入一个事件上报Url,然后当部署到生产环境时,该url就需要从外部导入,一般通过修改配置文件的方式达到类似的目的。
在spring开发中经常涉及调用各种资源的情况,包含普通文件,网址,配置文件,系统环境变量等,这种情况可以使用Spring EL-Spring表达式语言实现资源的注入。

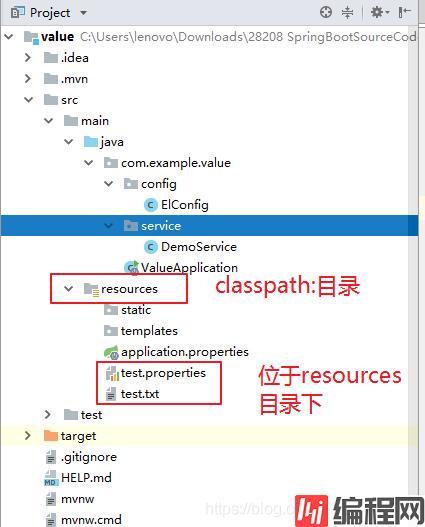
程序演示使用idea集成开发环境,演示@Value的使用,并通过注解@PropertySource可以注入自定义配置文件或者其他任意新建的文本文件。
注意:以下实践在Spring环境下是通用的,Spring Boot也是可用的的。
<?xml version="1.0" encoding="UTF-8"?>
<project xmlns="Http://Maven.apache.org/POM/4.0.0" xmlns:xsi="http://www.w3.org/2001/XMLSchema-instance"
         xsi:schemaLocation="http://maven.apache.org/POM/4.0.0 http://maven.apache.org/xsd/maven-4.0.0.xsd">
    <modelVersion>4.0.0</modelVersion>
    <parent>
        <groupId>org.springframework.boot</groupId>
        <artifactId>spring-boot-starter-parent</artifactId>
        <version>2.1.3.RELEASE</version>
        <relativePath/> <!-- lookup parent from repository -->
    </parent>
    <groupId>com.example</groupId>
    <artifactId>value</artifactId>
    <version>0.0.1-SNAPSHOT</version>
    <name>value</name>
    <description>Demo project for Spring Boot</description>

    <properties>
        <java.version>1.8</java.version>
    </properties>

    <dependencies>
        <dependency>
            <groupId>org.springframework.boot</groupId>
            <artifactId>spring-boot-starter-WEB</artifactId>
        </dependency>

        <dependency>
            <groupId>org.springframework.boot</groupId>
            <artifactId>spring-boot-starter-test</artifactId>
            <scope>test</scope>
        </dependency>
        <dependency>
            <groupId>commons-io</groupId>
            <artifactId>commons-io</artifactId>
            <version>2.3</version>
        </dependency>
    </dependencies>

    <build>
        <plugins>
            <plugin>
                <groupId>org.springframework.boot</groupId>
                <artifactId>spring-boot-maven-plugin</artifactId>
            </plugin>
        </plugins>
    </build>
</project>
其中
<dependency>
            <groupId>commons-io</groupId>
            <artifactId>commons-io</artifactId>
            <version>2.3</version>
        </dependency>
依赖可以简化文件相关的操作,本例中使用commons-io将file转换成字符串。
package com.example.value.service;
import org.springframework.beans.factory.annotation.Value;
import org.springframework.stereotype.Service;


@Service
public class DemoService {
    @Value("其他类的属性")
    private String another;
    public String getAnother() {
        return another;
    }

    public void setAnother(String another) {
        this.another = another;
    }
}
其中在上类中使用@Value注解注入了普通字符串“其他类的属性。”
package com.example.value.config;
import org.apache.commons.io.IOUtils;
import org.springframework.beans.factory.annotation.Autowired;
import org.springframework.beans.factory.annotation.Value;
import org.springframework.context.annotation.Bean;
import org.springframework.context.annotation.ComponentScan;
import org.springframework.context.annotation.Configuration;
import org.springframework.context.annotation.PropertySource;
import org.springframework.context.support.PropertySourcesPlaceholderConfigurer;
import org.springframework.core.env.Environment;
import org.springframework.core.io.Resource;


@Configuration
@ComponentScan("com.example.value.service") //扫包
@PropertySource("classpath:test.properties") //注意文件格式的指定
public class ElConfig {
    @Value("I Love You!") //1 注入普通字符串
    private String nORMal;

    @Value("#{systemProperties['os.name']}") //2 注入操作系统属性
    private String osName;

    @Value("#{ T(java.lang.Math).random() * 100.0 }") //3 注入表达式结果
    private double randomNumber;

    @Value("#{demoService.another}") //4  注入其他Bean的属性
    private String fromAnother;

    @Value("classpath:test.txt") //5  注入了文件资源
    private Resource testFile;

    @Value("http://www.baidu.com") //6   注入网页资源
    private Resource testUrl;

    @Value("${book.name}") //7   注入classpath:test.properties中资源项,注意美元符号$
    private String bookName;

    @Autowired
    private Environment environment; //7 属性也可以从environment中获取。

    @Bean //7
    public static PropertySourcesPlaceholderConfigurer propertyConfigure() {
        return new PropertySourcesPlaceholderConfigurer();
    }

    public void outputResource() {
        try {
            System.out.println(normal);
            System.out.println(osName);
            System.out.println(randomNumber);
            System.out.println(fromAnother);

            System.out.println(IOUtils.toString(testFile.getInputStream()));
            System.out.println(IOUtils.toString(testUrl.getInputStream()));
            System.out.println(bookName);
            System.out.println(environment.getProperty("book.author"));
            System.out.println(environment.getProperty("book.school"));
        } catch (Exception e) {
            e.printStackTrace();
        }
    }
}
注意:注入配置配件使用@PropertySource指定文件地址,若使用@Value注入,则要配置一个PropertySourcePlaceholderConfigure的Bean
package com.example.value;
import com.example.value.config.ElConfig;
import org.springframework.beans.factory.annotation.Autowired;
import org.springframework.boot.autoconfigure.SpringBootApplication;
import org.springframework.context.annotation.AnnotationConfigApplicationContext;

@SpringBootApplication
public class ValueApplication {
    @Autowired
    private ElConfig config;
    public static void main(String[] args) {
        AnnotationConfigApplicationContext context = new AnnotationConfigApplicationContext(ElConfig.class);
        ElConfig resourceService = context.getBean(ElConfig.class);

        resourceService.outputResource();
    }
}
2.6.1 test.txt
123334455
aaa
bbb
ccc
2.6.2 test.properties
book.author=sqh
book.name=spring boot
book.school=NJUSTI Love You! #直接注入字符串
windows 8.1 #注入了系统属性
87.12913167952843 # 注入了表达式结果
其他类的属性 # 其他类的属性
123334455 # test.txt
aaa
bbb
ccc
<!DOCTYPE html> # 注入了网页内容
<!--STATUS OK--><html> <head><meta http-equiv=content-type content=text/html;charset=utf-8><meta http-equiv=X-UA-Compatible content=IE=Edge><meta content=always name=referrer><link rel=stylesheet type=text/CSS href=http://s1.bdstatic.com/r/www/cache/bdorz/baidu.min.css><title>百度一下,你就知道</title></head> <body link=#0000cc> <div id=wrapper> <div id=head> <div class=head_wrapper> <div class=s_form> <div class=s_form_wrapper> <div id=lg> <img hidefocus=true src=//www.baidu.com/img/bd_loGo1.png width=270 height=129> </div> <form id=form name=f action=//www.baidu.com/s class=fm> <input type=hidden name=bdorz_come value=1> <input type=hidden name=ie value=utf-8> <input type=hidden name=f value=8> <input type=hidden name=rsv_bp value=1> <input type=hidden name=rsv_idx value=1> <input type=hidden name=tn value=baidu><span class="bg s_ipt_wr"><input id=kw name=wd class=s_ipt value maxlength=255 autocomplete=off autofocus></span><span class="bg s_btn_wr"><input type=submit id=su value=百度一下 class="bg s_btn"></span> </form> </div> </div> <div id=u1> <a href=http://news.baidu.com name=tj_trnews class=mnav>新闻</a> <a href=http://www.hao123.com name=tj_trhao123 class=mnav>hao123</a> <a href=http://map.baidu.com name=tj_trmap class=mnav>地图</a> <a href=http://v.baidu.com name=tj_trvideo class=mnav>视频</a> <a href=http://tieba.baidu.com name=tj_trtieba class=mnav>贴吧</a> <noscript> <a href=http://www.baidu.com/bdorz/login.gif?login&tpl=mn&u=http%3A%2F%2Fwww.baidu.com%2f%3fbdorz_come%3D1 name=tj_login class=lb>登录</a> </noscript> <script>document.write('<a href="http://www.baidu.com/bdorz/login.gif?login&tpl=mn&u='+ encodeURIComponent(window.location.href+ (window.location.search === "" ? "?" : "&")+ "bdorz_come=1")+ '" name="tj_login" class="lb">登录</a>');</script> <a href=//www.baidu.com/more/ name=tj_briicon class=bri style="display: block;">更多产品</a> </div> </div> </div> <div id=ftCon> <div id=ftConw> <p id=lh> <a href=http://home.baidu.com>关于百度</a> <a href=http://ir.baidu.com>About Baidu</a> </p> <p id=cp>©2017 Baidu <a href=http://www.baidu.com/duty/>使用百度前必读</a> <a href=http://jianyi.baidu.com/ class=cp-feedback>意见反馈</a> 京ICP证030173号 <img src=//www.baidu.com/img/gs.gif> </p> </div> </div> </div> </body> </html>spring boot # 配置文件中的三个值
sqh
NJUST
通过上述的方式,也附带的阐述了在Spring Boot中不使用application.properties配置文件,而是用其他任意的配置文件来放入程序配置的使用方法,可以看到@Value很灵活,也很方便,作者暂时比较常用的就是在applicaiton.properties中放入类似book.name这样的配置项而使用@Value("${book.name}")直接注入的方式。
在这篇文章中,我们会利用Spring的@PropertySource和@Value两个注解从配置文件properties中读取值,以及如何从配置文件中的值转换为List对象。
创建Spring配置Class
@Configurable
@ComponentScan(basePackages = "com.9leg.java.spring")
@PropertySource(value = "classpath:spring/config.properties")
public class AppConfigTest {
    @Bean
    public PropertySourcesPlaceholderConfigurer propertyConfigInDev() {
        return new PropertySourcesPlaceholderConfigurer();
    }
}
通过@PropertySource注解将properties配置文件中的值存储到Spring的 Environment中,Environment接口提供方法去读取配置文件中的值,参数是properties文件中定义的key值。上面是读取一个配置文件,如果你想要读取多个配置文件,请看下面代码片段:
@PropertySource(value = {"classpath:spring/config.properties","classpath:spring/news.properties"})在Spring 4版本中,Spring提供了一个新的注解——@PropertySources,从名字就可以猜测到它是为多配置文件而准备的。
@PropertySources({
@PropertySource("classpath:config.properties"),
@PropertySource("classpath:db.properties")
})
public class AppConfig {
 //something
}
另外在Spring 4版本中,@PropertySource允许忽略不存在的配置文件。先看下面的代码片段:
@Configuration
@PropertySource("classpath:missing.properties")
public class AppConfig {
 //something
}
如果missing.properties不存在或找不到,系统则会抛出异常FileNotFoundException。
Caused by: java.io.FileNotFoundException:
class path resource [missiong.properties] cannot be opened because it does not exist
幸好Spring 4为我们提供了ignoreResourceNotFound属性来忽略找不到的文件
@Configuration
 @PropertySource(value="classpath:missing.properties", ignoreResourceNotFound=true)
 public class AppConfig {
  //something
 }
  @PropertySources({
  @PropertySource(value = "classpath:missing.properties", ignoreResourceNotFound=true),
  @PropertySource("classpath:config.properties")
        })
最上面的AppConfigTest的配置代码等于如下的XML配置文件
<?xml version="1.0" encoding="UTF-8"?>
<beans xmlns="http://www.springframework.org/schema/beans"
        xmlns:xsi="http://www.w3.org/2001/XMLSchema-instance"
        xmlns:context="http://www.springframework.org/schema/context"
        xsi:schemaLocation="http://www.springframework.org/schema/beans http://www.springframework.org/schema/beans/spring-beans-4.0.xsd
    http://www.springframework.org/schema/context   http://www.springframework.org/schema/context/spring-context-4.0.xsd">

    <context:component-scan base-package="com.9leg.java.spring"/>
    <bean class="org.springframework.context.support.PropertySourcesPlaceholderConfigurer">
        <property name="ignoreUnresolvablePlaceholders" value="true"/>
        <property name="locations">
          <list>
            <value>classpath:spring/config.properties</value>
          </list>
        </property>
      </bean>
</beans>
创建properties配置文件
server.name=9leg,spring
server.id=10,11,12
server.jdbc=com.Mysql.jdbc.Driver
创建一个简单的服务
@Component(value = "mockConfigTest")
public class MockConfigTest {
    @Value("#{'${server.name}'.split(',')}")
    private List<String> servers;

    @Value("#{'${server.id}'.split(',')}")
    private List<Integer> serverId;

    @Value("${server.host:127.0.0.1}")
    private String noProKey;

    @Autowired
    private Environment environment;

    public void readValues() {
        System.out.println("Services Size : " + servers.size());
        for(String s : servers)
            System.out.println(s);
        System.out.println("ServicesId Size : " + serverId.size());
        for(Integer i : serverId)
            System.out.println(i);
        System.out.println("Server Host : " + noProKey);
        String property = environment.getProperty("server.jdbc");
        System.out.println("Server Jdbc : " + property);
    }

    public static void main(String[] args) {
        AnnotationConfigApplicationContext annotationConfigApplicationContext = new AnnotationConfigApplicationContext(AppConfigTest.class);
        MockConfigTest mockConfigTest = (MockConfigTest) annotationConfigApplicationContext.getBean("mockConfigTest");
        mockConfigTest.readValues();
    }
}
首先使用@Component注解声明,接着就是属性字段上的@Value注解,但在这里比较特殊,是通过split()方法,将配置文件中的9leg,spring分割后组成list对象。心细的同学可能注意到了server.host这个key并不存在配置文件中。是的,在这里使用的是默认值,即127.0.0.1,它的格式是这样的。
@value("${key:default}")
private String var;
然后注入了Environment,可以通过getProperty(key)来获取配置文件中的值。 运行main方法,来看下输出结果:
Services Size : 2
9leg
spring
ServicesId Size : 3
10
11
12
Server Host : 127.0.0.1
Server Jdbc : com.mysql.jdbc.Driver
最后要说一点,在main方法中请使用
new AnnotationConfigApplicationContext(AppConfigTest.class)来代替
new ClassPathXmlApplicationContext(“applicationContext.xml”)或者
new FileSystemXmlApplicationContext(“src/main/resources/applicationContext.xml”)以上为个人经验,希望能给大家一个参考,也希望大家多多支持编程网。
--结束END--
本文标题: 如何使用@Value和@PropertySource注入外部资源
本文链接: https://www.lsjlt.com/news/128210.html(转载时请注明来源链接)
有问题或投稿请发送至: 邮箱/279061341@qq.com QQ/279061341
下载Word文档到电脑,方便收藏和打印~
2024-03-01
2024-03-01
2024-03-01
2024-02-29
2024-02-29
2024-02-29
2024-02-29
2024-02-29
2024-02-29
2024-02-29
回答
回答
回答
回答
回答
回答
回答
回答
回答
回答


官方手机版

微信公众号

商务合作


0