Python 官方文档:入门教程 => 点击学习
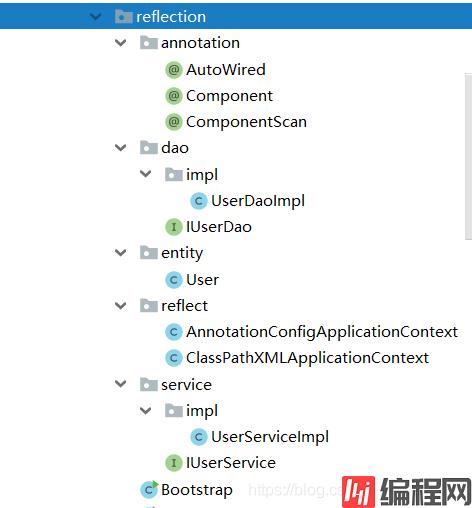
目录实现的功能:项目结构下面是程序的项目结构图:自定义注解容器实现测试实体类User的定义:实现的功能: 默认情况下将扫描整个项目的文件 可以使用@Componen
下面是自定义的三个注解: @AutoWired,@Component,@ComponentScan。
@Target(ElementType.FIELD)
@Retention(RetentionPolicy.RUNTIME)
public @interface AutoWired {
}
@Target(ElementType.TYPE)
@Retention(RetentionPolicy.RUNTIME)
public @interface Component {
}
@Target(ElementType.TYPE)
@Retention(RetentionPolicy.RUNTIME)
public @interface ComponentScan {
  String[] value();
}
其中AnnotationConfigApplicationContext和ClassPathXMLApplicationContext为核心的类,其中
AnnotationConfigApplicationContext类实现扫描文件和解析注解等功能。
package learn.reflection.reflect;
import learn.reflection.Bootstrap;
import learn.reflection.annotation.AutoWired;
import learn.reflection.annotation.Component;
import learn.reflection.annotation.ComponentScan;
import java.io.File;
import java.io.InputStream;
import java.lang.reflect.Field;
import java.util.HashMap;
import java.util.Map;
import java.util.Properties;
import java.util.Set;
public class AnnotationConfigApplicationContext<T>{
  //使用HaspMap存储Bean
  private HashMap<Class,Object> beanFactory=new HashMap<>();
  //获取Bean的方法
  public T getBean(Class clazz){
    return (T) beanFactory.get(clazz);
  }
  String path;//编译后的字节码存储路径

  public void initContextByAnnotation(){
    //编译后的项目根目录:D:/idea_workplace/javaAppliTechnology/target/classes/
    path = AnnotationConfigApplicationContext.class.getClassLoader().getResource("").getFile();
    //查看启动类Bootstrap是否有定义扫描包
    ComponentScan annotation = Bootstrap.class.getAnnotation(ComponentScan.class);
    if (annotation!=null){
      //有定义就只扫描自定义的
      String[] definedPaths = annotation.value();
      if (definedPaths!=null&&definedPaths.length>0){
        loadClassInDefinedDir(path,definedPaths);
      }
    }else{
      //默认扫描整个项目的目录
      System.out.println(path);
      findClassFile(new File(path));
    }
    assembleObject();
  }

  private void assembleObject(){
    Set<Map.Entry<Class, Object>> entries = beanFactory.entrySet();
    //扫描所有容器中的Bean
    for (Map.Entry<Class, Object> entry : entries) {
      Object value = entry.getValue();
      //获取所有属性
      Field[] fields = value.getClass().getDeclaredFields();
      for (Field field : fields) {
        //如果被@AutoWired注解修饰则进行赋值
        AutoWired annotation = field.getAnnotation(AutoWired.class);
        if (annotation!=null){
          try {
            field.setAccessible(true);
            field.set(value,beanFactory.get(field.getType()));
          } catch (IllegalAccessException e) {
            e.printStackTrace();
          }
        }
      }
    }
  }

  private void loadClassInDefinedDir(String path, String[] definedPaths){
    for (String definedPath : definedPaths) {
      //转换成绝对路径
      String s = definedPath.replaceAll("\\.", "/");
      String fullName=path+s;
      System.out.println(s);
      findClassFile(new File(fullName));
    }
  }

  private void findClassFile(File pathParent) {
    //路径是否是目录,子目录是否为空
    if (pathParent.isDirectory()) {
      File[] childrenFiles = pathParent.listFiles();
      if (childrenFiles == null || childrenFiles.length == 0) {
        return;
      }
      for (File childrenFile : childrenFiles) {
        if (childrenFile.isDirectory()) {
          //递归调用直到找到所有的文件
          findClassFile(childrenFile);
        } else {
          //找到文件
          loadClassWithAnnotation(childrenFile);
        }
      }
    }
  }

  private void loadClassWithAnnotation(File file) {
    //1.去掉前面的项目绝对路径
    String pathWithClass=file.getAbsolutePath().substring(path.length()-1);
    //2.将路径的“/”转化为“.”和去掉后面的.class
    if (pathWithClass.contains(".class")){
      String fullName = pathWithClass.replaceAll("\\\\", ".").replace(".class", "");

      try {
        Class<?> clazz = Class.forName(fullName);
        //3.判断是不是接口,不是接口才创建实例
        if (!clazz.isInterface()){
          //4.是否具有@Bean注解
          Component annotation = clazz.getAnnotation(Component.class);
          if (annotation!=null){
            //5.创建实例对象
            Object instance = clazz.newInstance();
            //6.判断是否有实现的接口
            Class<?>[] interfaces = clazz.getInterfaces();
            if (interfaces!=null&&interfaces.length>0){
              //如果是有接口就将其接口的class作为key,实例对象作为value
              System.out.println("正在加载【"+interfaces[0].getName()+"】 实例对象:"+instance.getClass().getName());
              beanFactory.put(interfaces[0],instance);
            }else{
              System.out.println("正在加载【"+clazz.getName()+"】 实例对象:"+instance.getClass().getName());
              beanFactory.put(clazz,instance);
            }
            //如果没有接口就将自己的class作为key,实例对象作为value
          }
        }
      } catch (Exception e) {
        e.printStackTrace();
      }
    }
  }
}
ClassPathXMLApplicationContext类实现解析xml配置文件,并装载组件到容器中。
package learn.reflection.reflect;
import java.net.URL;
import java.util.HashMap;
import java.util.Map;
import org.jdom2.Document;
import org.jdom2.JDOMException;
import org.jdom2.Element;
import org.jdom2.xpath.XPath;
import org.jdom2.input.SAXBuilder;
import java.io.File;
import java.io.IOException;
import java.net.URL;
import java.net.URISyntaxException;
import java.util.*;
import java.lang.reflect.Field;
import java.lang.reflect.Method;
import java.lang.reflect.InvocationTargetException;

public class ClassPathXMLApplicationContext{
  private File file;
  private Map<String,Object> map = new HashMap();
  public ClassPathXMLApplicationContext(String config_file) {
    URL url = this.getClass().getClassLoader().getResource(config_file);
    try {
      file = new File(url.toURI());
      XMLParsing();
    } catch (Exception e) {
      // TODO Auto-generated catch block
      e.printStackTrace();
    }
  }
  private void XMLParsing() throws Exception {
    SAXBuilder builder = new SAXBuilder();
    Document document = builder.build(file);
    Element root = document.getRootElement();
    List elementList = root.getChildren("bean");
    Iterator i = elementList.iterator();
    //读取bean节点的所有信息
    while (i.hasNext()) {
      Element bean = (Element) i.next();
      String id = bean.getAttributeValue("id");
      //根据class创建实例
      String cls = bean.getAttributeValue("class");
      Object obj = Class.forName(cls).newInstance();
      Method[] method = obj.getClass().getDeclaredMethods();
      List<Element> list = bean.getChildren("property");
      for (Element el : list) {
        for (int n = 0; n < method.length; n++) {
          String name = method[n].getName();
          String temp = null;
          //找到属性对应的setter方法进行赋值
          if (name.startsWith("set")) {
            temp = name.substring(3, name.length()).toLowerCase();
            if (el.getAttribute("name") != null) {
              if (temp.equals(el.getAttribute("name").getValue())) {
                method[n].invoke(obj, el.getAttribute("value").getValue());
              }
            }
          }
        }
      }
      map.put(id, obj);
    }
  }
  public Object getBean(String name) {
    return map.get(name);
  }
}
@Component
public class User {
  private String username;
  private String passWord;

  public User(String username, String password) {
    this.username = username;
    this.password = password;
  }
  public User() {
  }
  //省略getter,setter方法
  }
在UserServiceImpl类中添加@Component注解,并使用@AutoWired注解注入容器中的IUerDao接口的实现类UserDaoImpl。
@Component
public class UserServiceImpl implements IUserService {
  @AutoWired
  private IUserDao userDao;
  @Override
  public void login(User user) {
    System.out.println("调用UserDaoImpl的login方法");
    userDao.loginByUsername(user);
  }
}
UserDaoImpl类同样添加@Component注解
@Component
public class UserDaoImpl implements IUserDao {
  @Override
  public void loginByUsername(User user) {
    System.out.println("验证用户【"+user.getUsername()+"】登录");
  }
}
在beans.xml中配置注册User类,文件beans.xml的内容如下:
<?xml version="1.0" encoding="UTF-8"?>
<beans>
    <bean id="user" class="learn.reflection.entity.User">
        <property name="username" value="张三" />
        <property name="password" value="123" />
    </bean>
</beans>
下面同时使用 AnnotationConfigApplicationContext类和 ClassPathXMLApplicationContext类。
Bootstrap类作为启动类添加注解@ComponentScan,指定扫描learn.reflection.dao和learn.reflection.service这两个包。
@ComponentScan(value = {"learn.reflection.dao","learn.reflection.service"})
public class Bootstrap {
  public static void main(String[] args) {
    AnnotationConfigApplicationContext applicationContext = new AnnotationConfigApplicationContext();
    applicationContext.initContextByAnnotation();
    UserServiceImpl userService = (UserServiceImpl) applicationContext.getBean(IUserService.class);
    ClassPathXMLApplicationContext xmlApplicationContext = new ClassPathXMLApplicationContext("beans.xml");
    User user = (User) xmlApplicationContext.getBean("user");
    System.out.println(user);
    userService.login(user);
  }
}
运行Bootstrap类,程序运行结果如下:
learn/reflection/dao
正在加载【learn.reflection.dao.IUserDao】 实例对象:learn.reflection.dao.impl.UserDaoImpl
learn/reflection/service
正在加载【learn.reflection.service.IUserService】 实例对象:learn.reflection.service.impl.UserServiceImpl
User{username='张三', password='123'}
调用UserDaoImpl的login方法
验证用户【张三】登录
以上为个人经验,希望能给大家一个参考,也希望大家多多支持编程网。
--结束END--
本文标题: 使用Java反射模拟实现Spring的IoC容器的操作
本文链接: https://www.lsjlt.com/news/132646.html(转载时请注明来源链接)
有问题或投稿请发送至: 邮箱/279061341@qq.com QQ/279061341
下载Word文档到电脑,方便收藏和打印~
2024-03-01
2024-03-01
2024-03-01
2024-02-29
2024-02-29
2024-02-29
2024-02-29
2024-02-29
2024-02-29
2024-02-29
回答
回答
回答
回答
回答
回答
回答
回答
回答
回答


官方手机版

微信公众号

商务合作


0