Python 官方文档:入门教程 => 点击学习
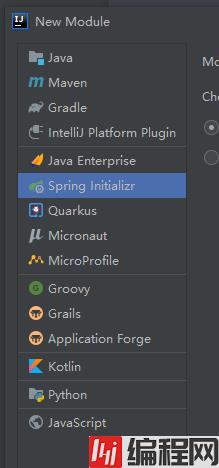
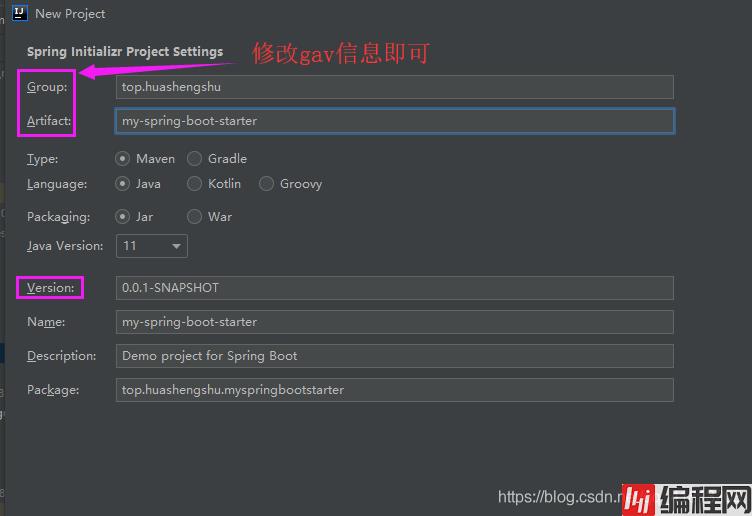
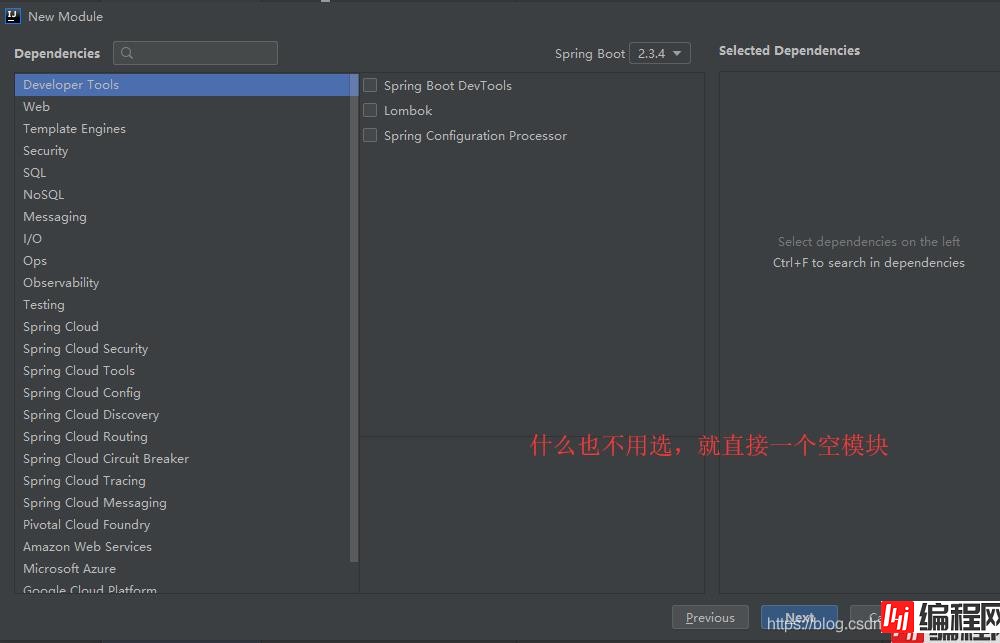
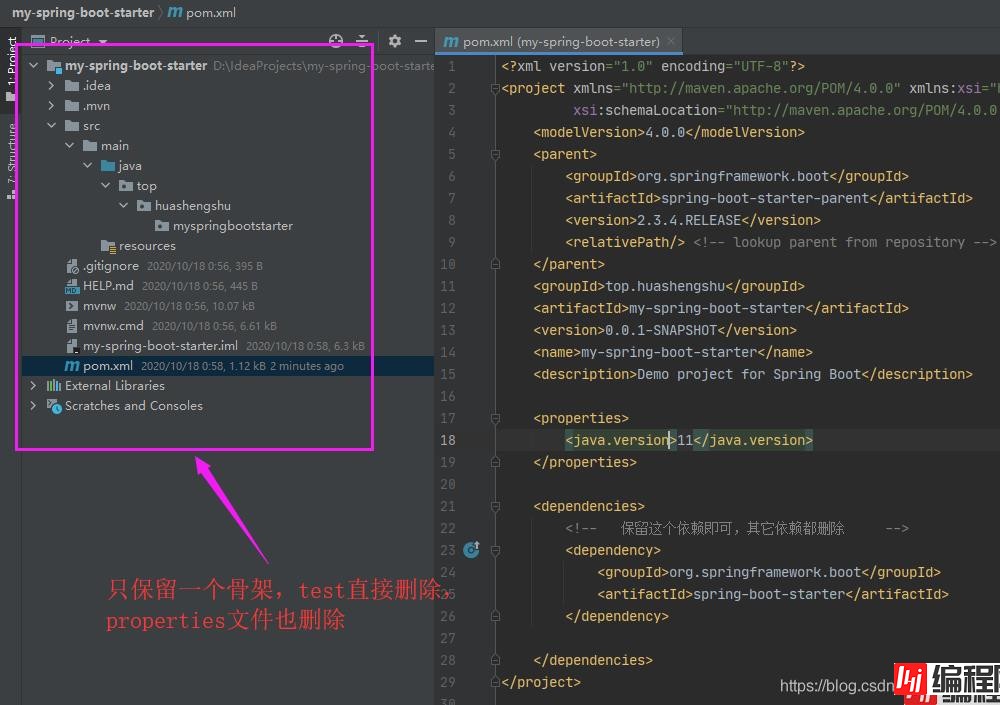
目录第一步、创建 xxx-spring-boot-starter 的spring Initializr模块第二步、删除不需要的内容(启动类、除下面spring-boot-starte
<dependency>
	<groupId>org.springframework.boot</groupId>
	<artifactId>spring-boot-starter</artifactId>
</dependency>
如下是完整的pom.xml
实际上如果当前starter需要引用其它依赖加入到dependences里面即可,这里只做演示项目
<?xml version="1.0" encoding="UTF-8"?>
<project xmlns="Http://maven.apache.org/POM/4.0.0" xmlns:xsi="http://www.w3.org/2001/XMLSchema-instance"
         xsi:schemaLocation="http://maven.apache.org/POM/4.0.0 https://maven.apache.org/xsd/maven-4.0.0.xsd">
    <modelVersion>4.0.0</modelVersion>
    <parent>
        <groupId>org.springframework.boot</groupId>
        <artifactId>spring-boot-starter-parent</artifactId>
        <version>2.3.4.RELEASE</version>
        <relativePath/> <!-- lookup parent from repository -->
    </parent>
    <groupId>top.huashengshu</groupId>
    <artifactId>my-spring-boot-starter</artifactId>
    <version>0.0.1-SNAPSHOT</version>
    <name>my-spring-boot-starter</name>
    <description>Demo project for Spring Boot</description>

    <properties>
        <java.version>11</java.version>
    </properties>

    <dependencies>
        <!--   保留这个依赖即可,其它依赖都删除     -->
        <dependency>
            <groupId>org.springframework.boot</groupId>
            <artifactId>spring-boot-starter</artifactId>
        </dependency>

    </dependencies>
</project>
项目结构截图
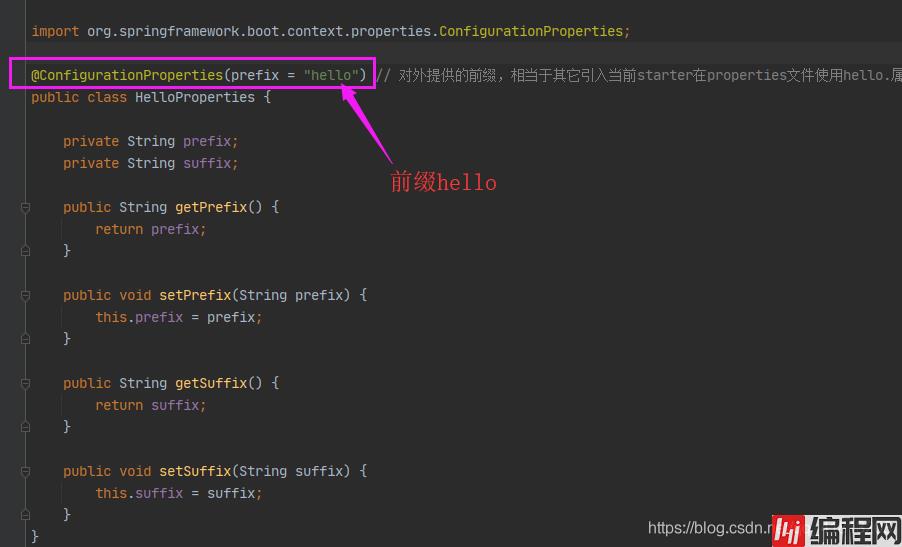
创建HelloProperties.java,直接复制下面代码,然后选择包进行粘贴,idea会自动创建对应类代码设置好包名
import org.springframework.boot.context.properties.ConfigurationProperties;

@ConfigurationProperties(prefix = "hello") // 对外提供的前缀,相当于其它引入当前starter在properties文件使用hello.属性即可对下面属性进行赋值
public class HelloProperties {

    private String prefix; // 成员属性,意思是前缀名
    private String suffix; // 成员属性,意思是后缀名

    public String getPrefix() {
        return prefix;
    }

    public void setPrefix(String prefix) {
        this.prefix = prefix;
    }

    public String getSuffix() {
        return suffix;
    }

    public void setSuffix(String suffix) {
        this.suffix = suffix;
    }
}
创建HelloService.java直接复制下面代码,选择包进行粘贴即可生成
public class HelloService {

    HelloProperties helloProperties;

    public HelloProperties getHelloProperties() {
        return helloProperties;
    }

    public void setHelloProperties(HelloProperties helloProperties) {
        this.helloProperties = helloProperties;
    }

    public String sayHello(String name){
        return helloProperties.getPrefix() +" "+name +" "+helloProperties.getSuffix();
    }
}
创建配置类(和前面一样复制粘贴即可)HelloServiceAutoConfiguration.java,将HelloService注入到ioc容器中
import org.springframework.beans.factory.annotation.Autowired;
import org.springframework.boot.autoconfigure.condition.ConditionalOnWEBApplication;
import org.springframework.boot.context.properties.EnableConfigurationProperties;
import org.springframework.context.annotation.Bean;
import org.springframework.context.annotation.Configuration;

@Configuration
@ConditionalOnWebApplication    // 条件配置类,该注解表示在web环境下才生效,相关的其它条件可以使用@ConditionXXX
@EnableConfigurationProperties(HelloProperties.class) // 表示HelloProperties作为配置类使用
public class HelloServiceAutoConfiguration {

    @Autowired
    HelloProperties helloProperties;	// 作为配置类目的就是想在sayHello方法返会的字符串加上前缀和后缀

    @Bean
    public HelloService helloService() { // 将HelloService注入到IOC容器
        HelloService service = new HelloService();
        service.setHelloProperties(helloProperties);
        return service;
    }
}
META-INF文件夹,并创建一个spring.factories文件如下面截图
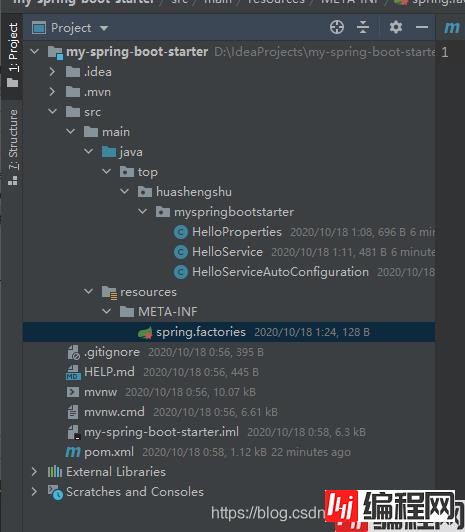
内容则是将@Configuration配置类加入,目的是将配置加入到外部的IOC容器中
org.springframework.boot.autoconfigure.EnableAutoConfiguration=
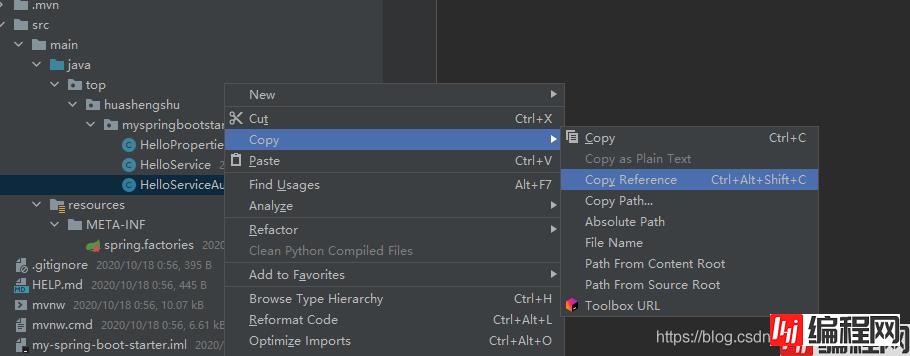
idea中右键copy–》copy reference,将复制的值填入上面=右边
注意:如果有多个AutoConfiguration则用逗号分开,还有回车小心前面的空格,最好没有其它字符。
例如:
org.springframework.boot.autoconfigure.EnableAutoConfiguration=\
top.huashengshu.mySpringBootstarter.HelloServiceAutoConfiguration,\
top.yumbo.music.starter.configuration.YumboMusicAutoConfiguration
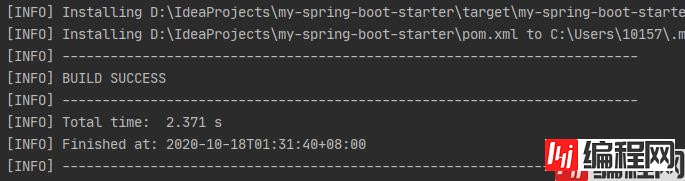
本地安装为例:

成功后即可
创建一个springboot项目
勾选web模块即可,然后加入自定义启动器的gav依赖
在启动类中加入内部类(这里为了方便演示不按照规范创建包)
如下示例代码
启动类
import org.springframework.beans.factory.annotation.Autowired;
import org.springframework.boot.SpringApplication;
import org.springframework.boot.autoconfigure.SpringBootApplication;
import org.springframework.web.bind.annotation.GetMapping;
import org.springframework.web.bind.annotation.RestController;
import top.huashengshu.myspringbootstarter.HelloService;

@SpringBootApplication
public class DemoApplication {

    @RestController
    public class HelloController {

        @Autowired
        HelloService helloService; // 注入HelloService

        @GetMapping("/hello") // 暴露一个/hello 请求路径对外提供服务
        public String hello(){
            return helloService.sayHello("zhang san"); // 返回带有前缀和后缀中间是 "zhang san"的字符串
        }

    }
    public static void main(String[] args) {
        SpringApplication.run(DemoApplication.class, args);
    }

}
properties文件
因为使用了@ConfigurationProperties(prefix = "hello")注解所以在当前项目的properties文件中使用hello前缀调用即可对成员属性赋值
如下
hello.prefix=HUASHENGSHU
hello.suffix=Hello World运行当前项目,访问/hello验证是否有效
如下:

说明自定义starter成功。
其它业务代码,根据自己的需求自己加入依赖,也就是说可以自己定义starter提供给其它人用!
到此这篇关于springboot自定义starter启动器的具体使用实践的文章就介绍到这了,更多相关springboot自定义starter启动器内容请搜索编程网以前的文章或继续浏览下面的相关文章希望大家以后多多支持编程网!
--结束END--
本文标题: springboot自定义starter启动器的具体使用实践
本文链接: https://www.lsjlt.com/news/134558.html(转载时请注明来源链接)
有问题或投稿请发送至: 邮箱/279061341@qq.com QQ/279061341
下载Word文档到电脑,方便收藏和打印~
2024-03-01
2024-03-01
2024-03-01
2024-02-29
2024-02-29
2024-02-29
2024-02-29
2024-02-29
2024-02-29
2024-02-29
回答
回答
回答
回答
回答
回答
回答
回答
回答
回答


官方手机版

微信公众号

商务合作


0