Python 官方文档:入门教程 => 点击学习
目录1、下载glassfish2、配置glassfish环境变量3、修改jdk环境变量4、测试glassfish是否可以正常启动5、在idea中创建一个jsF项目6.问题:部分标签元
idea2021最新激活方法
去官网下载glassfish4.1.1(最后发现glassfish5也行)
官网地址:GlassFish

https://javaee.GitHub.io/glassfish/
点击download

选择图中版本

下载完解压到自己指定的目录即可
将glassfish的bin目录添加到系统变量path中
将之前系统环境变量path里的jdk1.8的环境变量上移到第一个
注意:jdk一定要是1.8,并且必须移到第一个
在cmd里直接输入 asadmin start-domain ,出现下图所示即表明配置成功

再输入 asadmin stop-domain 可以停止glassfish
1.选择 java Enterprise, 点击next

2.勾选 WEB Profile,IDEA会自动帮你勾选其他所需要的框架(包括JSF),点击next

3.输入模块名,点击finish
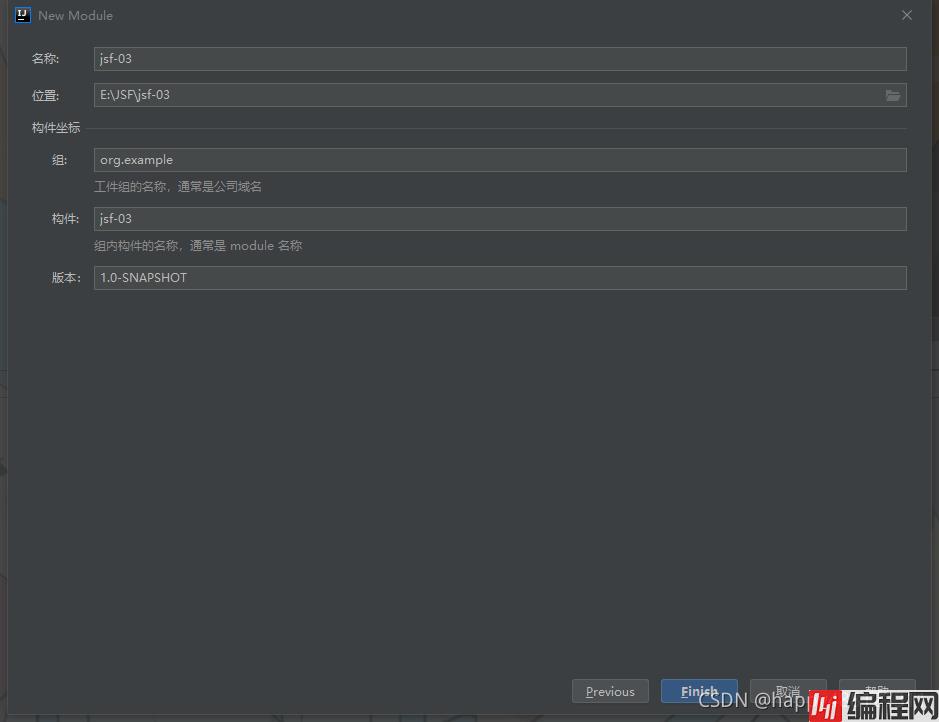
4.IDEA生成默认的项目结构

5.默认pom文件内容
<?xml version="1.0" encoding="UTF-8"?>
<project xmlns="Http://Maven.apache.org/POM/4.0.0"
         xmlns:xsi="http://www.w3.org/2001/XMLSchema-instance"
         xsi:schemaLocation="http://maven.apache.org/POM/4.0.0 http://maven.apache.org/xsd/maven-4.0.0.xsd">
    <modelVersion>4.0.0</modelVersion>

    <groupId>org.example</groupId>
    <artifactId>jsf-03</artifactId>
    <version>1.0-SNAPSHOT</version>
    <name>jsf-03</name>
    <packaging>war</packaging>

    <properties>
        <maven.compiler.target>1.8</maven.compiler.target>
        <maven.compiler.source>1.8</maven.compiler.source>
        <junit.version>5.6.2</junit.version>
    </properties>

    <dependencies>
        <dependency>
            <groupId>javax</groupId>
            <artifactId>javaee-web-api</artifactId>
            <version>8.0.1</version>
            <scope>provided</scope>
        </dependency>
        <dependency>
            <groupId>org.junit.jupiter</groupId>
            <artifactId>junit-jupiter-api</artifactId>
            <version>${junit.version}</version>
            <scope>test</scope>
        </dependency>
        <dependency>
            <groupId>org.junit.jupiter</groupId>
            <artifactId>junit-jupiter-engine</artifactId>
            <version>${junit.version}</version>
            <scope>test</scope>
        </dependency>
    </dependencies>

    <build>
        <plugins>
            <plugin>
                <groupId>org.apache.maven.plugins</groupId>
                <artifactId>maven-war-plugin</artifactId>
                <version>3.3.0</version>
            </plugin>
        </plugins>
    </build>
</project>
6.修改默认生成文件,不修改会报错
<faces-config xmlns="http://xmlns.jcp.org/xml/ns/javaee"
              xmlns:xsi="http://www.w3.org/2001/XMLSchema-instance"
              xsi:schemaLocation="http://xmlns.jcp.org/xml/ns/javaee
        http://xmlns.jcp.org/xml/ns/javaee/web-facesconfig_2_2.xsd"
              version="2.2">

</faces-config>7.在webapp目录下新建index.xhtml文件
<?xml version="1.0" encoding="UTF-8"?>
<!DOCTYPE html PUBLIC "-//W3C//DTD XHTML 1.0 Transitional//EN"
        "http://www.w3.org/TR/xhtml1/DTD/xhtml1-transitional.dtd">
<html xmlns="http://www.w3.org/1999/xhtml"
      xmlns:h="http://xmlns.jcp.org/jsf/html"
      xmlns:ui="http://xmlns.jcp.org/jsf/facelets"
      xmlns:f="http://xmlns.jcp.org/jsf/core">
<f:view>
    <h:outputLabel value="Hello, world"/>
</f:view>
</html>
8.配置运行环境
点击运行->编辑配置

9.点击左上角➕,选择glassfish,local

10.点击配置,找到自己解压的glassfish的根目录
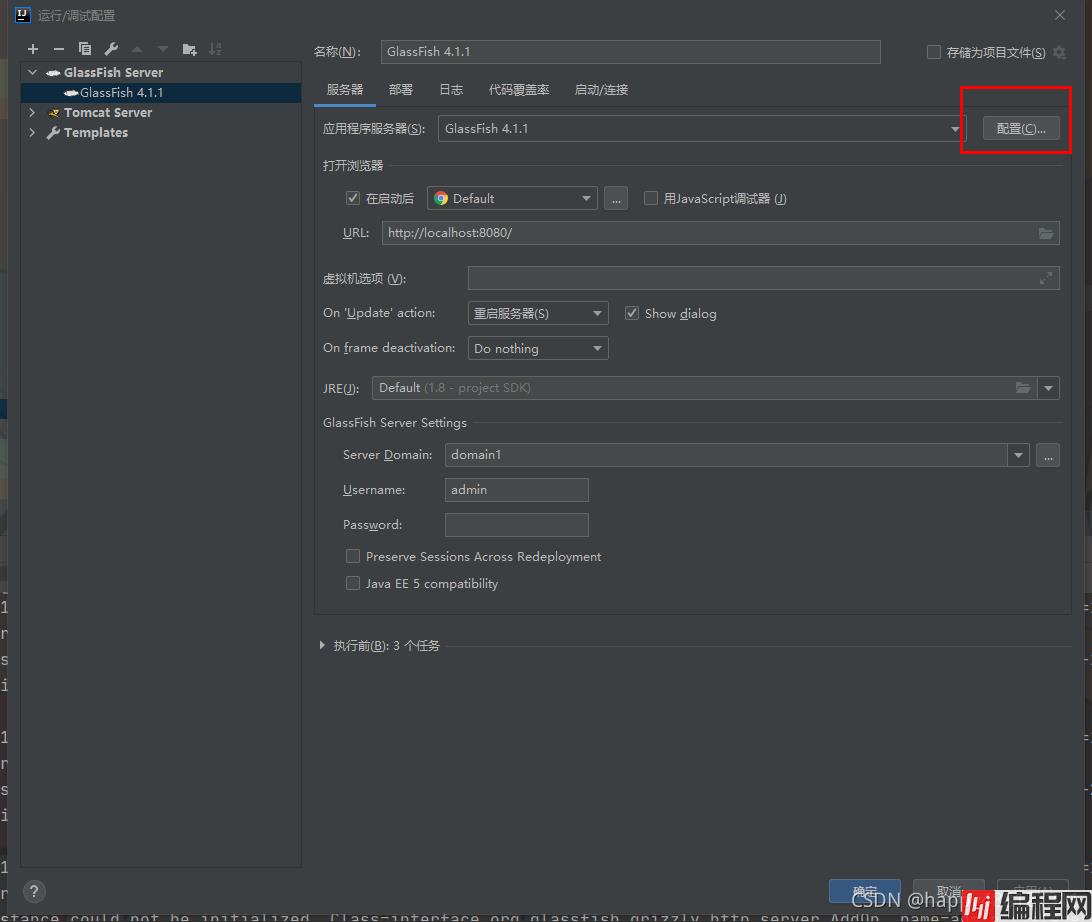
11.点击部署,点击➕,点击工件,选择war_explore结尾的

12.点击应用,点击服务器,修改默认生成的url

13.点击确定, 启动服务器,在浏览器里输入相应链接进行访问

1.页面代码如图所示
<?xml version="1.0" encoding="UTF-8"?>
<!DOCTYPE html PUBLIC "-//W3C//DTD XHTML 1.0 Transitional//EN" "http://www.w3.org/TR/xhtml1/DTD/xhtml1-transitional.dtd">
<html xmlns="http://www.w3.org/1999/xhtml" xml:lang="en" lang="en"
      xmlns:h="http://xmlns.jcp.org/jsf/html"
      xmlns:f="http://xmlns.jcp.org/jsf/core">
<head>
    MessagesTags
</head>
<h:head>
</h:head>
<h:body>
    <h:fORM>
        <h:panelGrid columns="1" width="60%">
            <f:facet name="header">Login</f:facet>
            <f:facet name="footer">
                <h:outputText value="快到中秋节了"/>
                <h:commandButton action="Layoutpage" value="Submit"/>
            </f:facet>
            <h:panelGroup>
                <h:outputText value="Enter ID:"/><h:inputText id="it1" required="true" requiredMessage="ynb"/>
                <h:message for="it1"/>
            </h:panelGroup>
            <h:panelGroup>
                <h:inputSecret required="true">
                    <h:outputLabel value="Enter PassWord"/>
                </h:inputSecret>
            </h:panelGroup>
        </h:panelGrid>
        <h:messages/>
    </h:form>
</h:body>
</html>
2.运行效果图
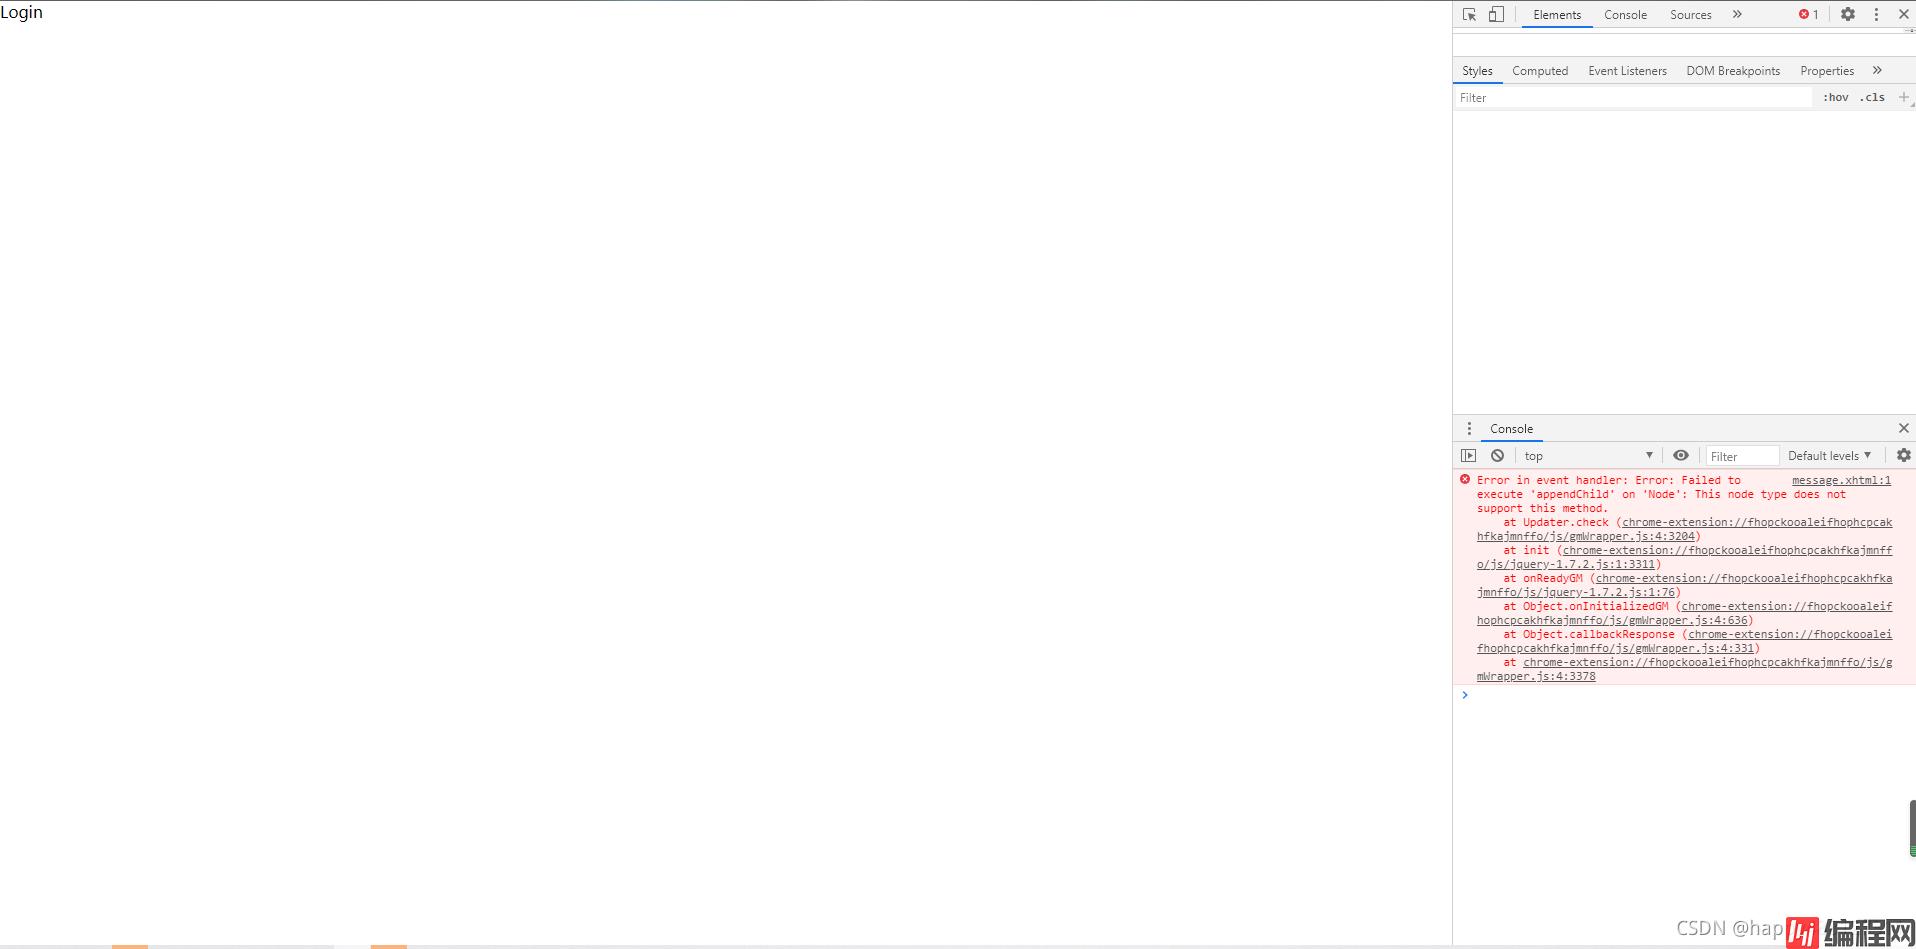
3.报错代码:
Error in event handler: Error: Failed to execute 'appendChild' on 'node': This node type does not support this method.
at Updater.check (chrome-extension://fhopckooaleifhophcpcakhfkajmnffo/js/gmWrapper.js:4:3204)
at init (chrome-extension://fhopckooaleifhophcpcakhfkajmnffo/js/Jquery-1.7.2.js:1:3311)
at onReadyGM (chrome-extension://fhopckooaleifhophcpcakhfkajmnffo/js/jquery-1.7.2.js:1:76)
at Object.onInitializedGM (chrome-extension://fhopckooaleifhophcpcakhfkajmnffo/js/gmWrapper.js:4:636)
at Object.callbackResponse (chrome-extension://fhopckooaleifhophcpcakhfkajmnffo/js/gmWrapper.js:4:331)
at chrome-extension://fhopckooaleifhophcpcakhfkajmnffo/js/gmWrapper.js:4:3378
4.原因,web.xml 文件配置错误
<?xml version="1.0" encoding="UTF-8"?>
<web-app xmlns:xsi="http://www.w3.org/2001/XMLSchema-instance" xmlns="http://xmlns.jcp.org/xml/ns/javaee" xsi:schemaLocation="http://xmlns.jcp.org/xml/ns/javaee http://xmlns.jcp.org/xml/ns/javaee/web-app_4_0.xsd" version="4.0">
    <display-name>JSF_SE_CH2_html01_0915</display-name>
    <servlet>
        <servlet-name>Faces Servlet</servlet-name>
        <servlet-class>javax.faces.webapp.FacesServlet</servlet-class>
        <load-on-startup>1</load-on-startup>
    </servlet>
    <servlet-mapping>
        <servlet-name>Faces Servlet</servlet-name>
        <url-pattern>/faces/*</url-pattern>
    </servlet-mapping>
    <context-param>
        <description>State saving method: 'client' or 'server' (=default). See JSF Specification 2.5.2</description>
        <param-name>javax.faces.STATE_SAVING_METHOD</param-name>
        <param-value>client</param-value>
    </context-param>
    <context-param>
        <param-name>javax.servlet.jsp.jstl.fmt.localizationContext</param-name>
        <param-value>resources.application</param-value>
    </context-param>
    <listener>
        <listener-class>com.sun.faces.config.ConfigureListener</listener-class>
    </listener>
    <welcome-file-list>
        <welcome-file>faces/index.xhtml</welcome-file>
    </welcome-file-list>
</web-app>
5.解决办法,将web.xml文件内容删除,只保留 <welcome-file-list> 即可
<?xml version="1.0" encoding="UTF-8"?>
<web-app xmlns:xsi="http://www.w3.org/2001/XMLSchema-instance" xmlns="http://xmlns.jcp.org/xml/ns/javaee" xsi:schemaLocation="http://xmlns.jcp.org/xml/ns/javaee http://xmlns.jcp.org/xml/ns/javaee/web-app_4_0.xsd" version="4.0">
    <display-name>JSF_SE_CH2_html01_0915</display-name>

    <welcome-file-list>
        <welcome-file>faces/index.xhtml</welcome-file>
    </welcome-file-list>
</web-app>
6.运行截图,至此,大功告成!

到此这篇关于IDEA 2020.2 部署JSF项目的文章就介绍到这了,更多相关IDEA 2020.2 部署JSF项目内容请搜索编程网以前的文章或继续浏览下面的相关文章希望大家以后多多支持编程网!
--结束END--
本文标题: IDEA 2020.2 部署JSF项目的详细过程
本文链接: https://www.lsjlt.com/news/135892.html(转载时请注明来源链接)
有问题或投稿请发送至: 邮箱/279061341@qq.com QQ/279061341
下载Word文档到电脑,方便收藏和打印~
2024-03-01
2024-03-01
2024-03-01
2024-02-29
2024-02-29
2024-02-29
2024-02-29
2024-02-29
2024-02-29
2024-02-29
回答
回答
回答
回答
回答
回答
回答
回答
回答
回答


官方手机版

微信公众号

商务合作


0