Python 官方文档:入门教程 => 点击学习
目录配置详情测试类debug流程总结配置详情 pom.xml dependency> <groupId>com.baomidou</groupId&
pom.xml
dependency>
     <groupId>com.baomidou</groupId>
     <artifactId>mybatis-plus-boot-starter</artifactId>
     <version>3.4.1</version>
 </dependency>
mapper
public interface GenTableMapper extends BaseMapper<GenTable> {
}@RunWith(springRunner.class)
@SpringBootTest(classes = GendemoApplication.class)
public class BlockqueueTestDemo {
@Autowired
GenTableMapper genTableMapper;
@Test
public void test(){
List<GenTable> genTables =
genTableMapper.selectList(new QueryWrapper<>());
}
}
1.发现 genTableMapper 是一个代理对象类型。
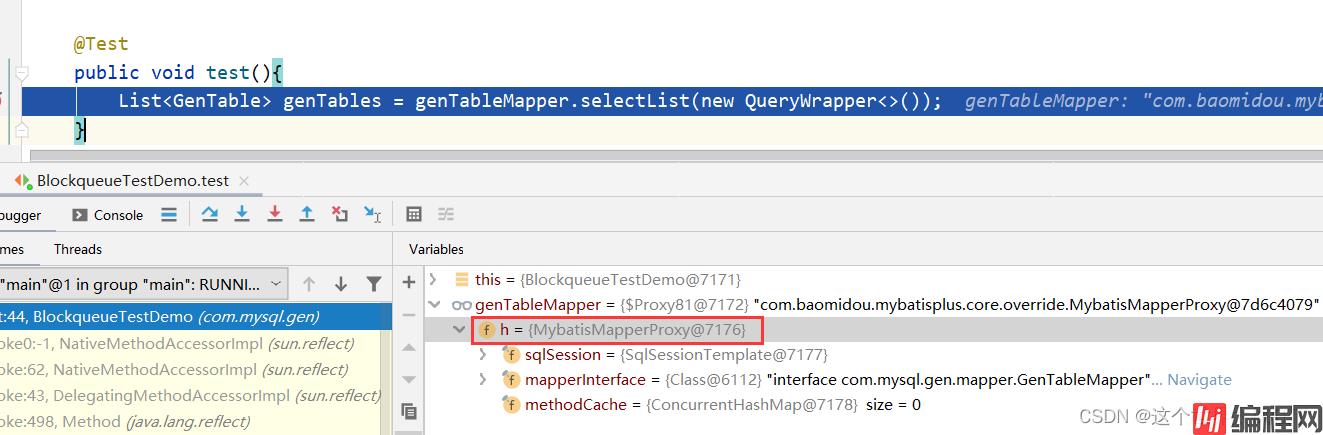
2.进入代理对象MybatisMapperProxy , 调用其invoke 方法,方法的Class类型为BaseMapper.selectList()

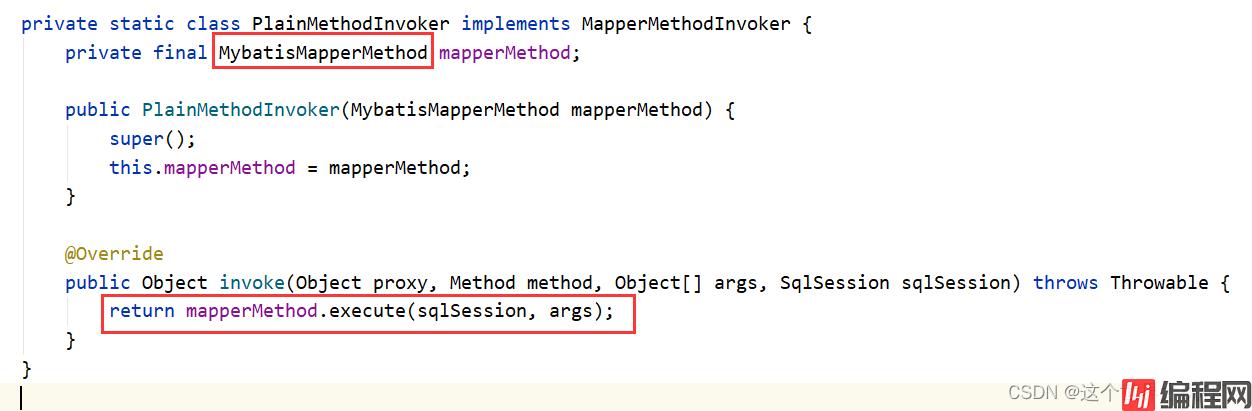
3.其中cachedInvoker()方法会返回一个PlainMethodInvoker ,它重写了MapperMethodInvoker 接口的invoke()方法

4.最终会调用MybatisMapperMethod的execute()方法
public class MybatisMapperMethod {
public Object execute(sqlSession sqlSession, Object[] args) {
Object result;
switch (command.getType()) {
case INSERT: {
Object param = method.convertArgsToSqlCommandParam(args);
result = rowCountResult(sqlSession.insert(command.getName(), param));
break;
}
case UPDATE: {
Object param = method.convertArgsToSqlCommandParam(args);
result = rowCountResult(sqlSession.update(command.getName(), param));
break;
}
case DELETE: {
Object param = method.convertArgsToSqlCommandParam(args);
result = rowCountResult(sqlSession.delete(command.getName(), param));
break;
}
case SELECT:
if (method.returnsVoid() && method.hasResultHandler()) {
executeWithResultHandler(sqlSession, args);
result = null;
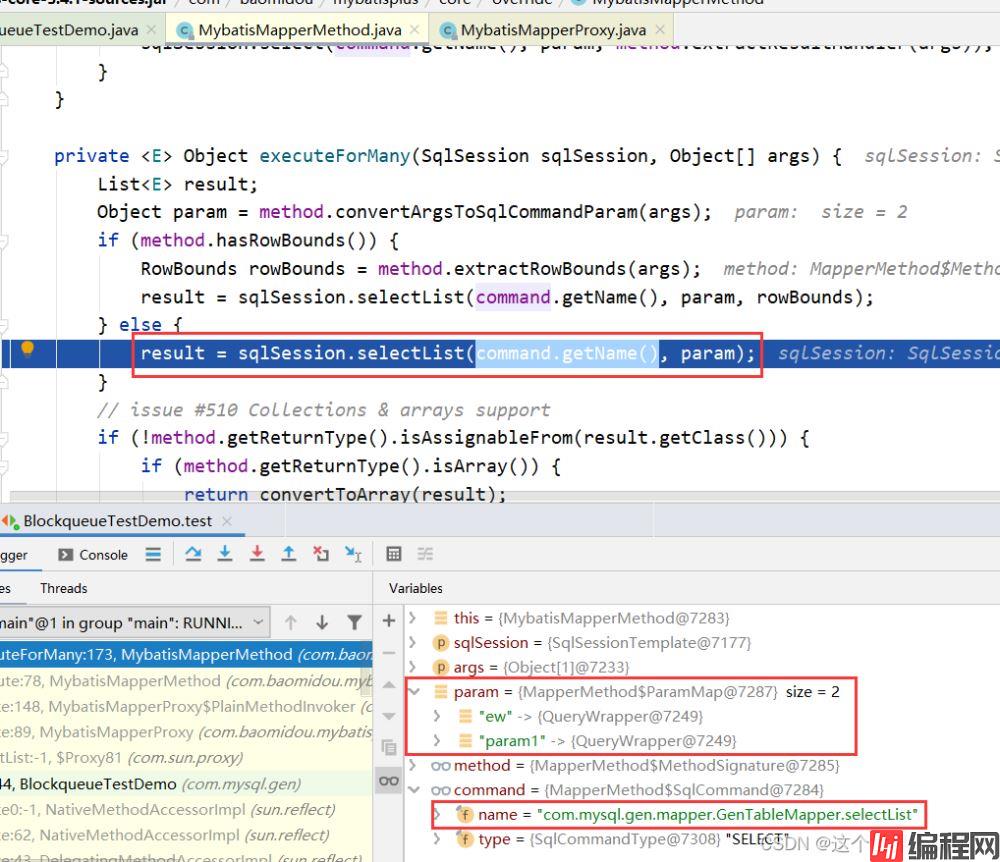
} else if (method.returnsMany()) {
result = executeFORMany(sqlSession, args);
} else if (method.returnsMap()) {
result = executeForMap(sqlSession, args);
} else if (method.returnsCursor()) {
result = executeForCursor(sqlSession, args);
} else {
Object param = method.convertArgsToSqlCommandParam(args);
// TODO 这里下面改了
if (IPage.class.isAssignableFrom(method.getReturnType())) {
result = executeForIPage(sqlSession, args);
// TODO 这里上面改了
} else {
result = sqlSession.selectOne(command.getName(), param);
if (method.returnsOptional()
&& (result == null || !method.getReturnType().equals(result.getClass()))) {
result = Optional.ofNullable(result);
}
}
}
break;
case FLUSH:
result = sqlSession.flushStatements();
break;
default:
throw new BindingException("Unknown execution method for: " + command.getName());
}
if (result == null && method.getReturnType().isPrimitive() && !method.returnsVoid()) {
throw new BindingException("Mapper method '" + command.getName()
+ " attempted to return null from a method with a primitive return type (" + method.getReturnType() + ").");
}
return result;
}
}
5.这是经过判断会进入executeForMany(sqlSession, args)方法,此时方法和参数都显示出来了。sqlSession的类型是SqlSessionTemplate , 为什么要注意这个 sqlSession的类型?因为SqlSession是一个接口,有很多实现类,有时候我们并不知道到底调用了哪个实现类的selectList()方法,这个时候我们看类型就知道了,就可以进入SqlSessionTemplate类,找到selectList()打上断点,debug就过来了。
6.利用同样的方法,又调用了DefaultSqlSession的selectList()方法。
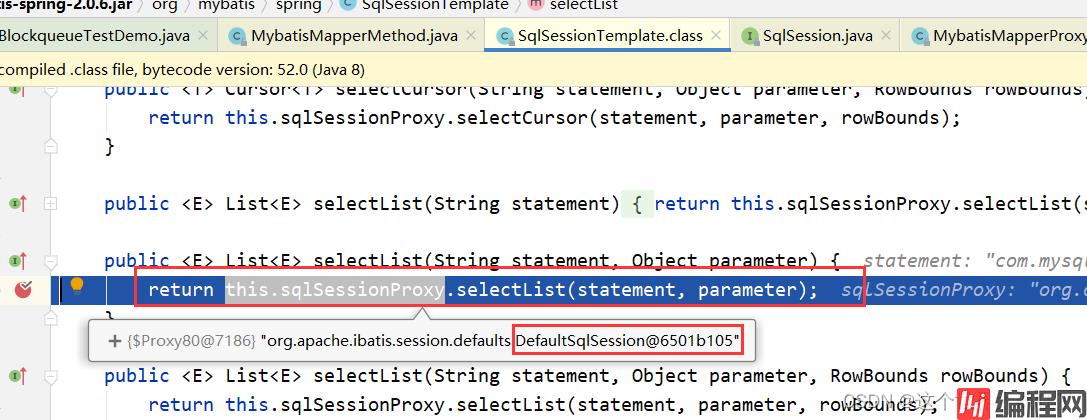
7.来到DefaultSqlSession的selectList() 方法中,此时已经进入到mybatis的源码范围了。executor的类型是MybatisCachingExecutor

8.此时要注意MybatisCachingExecutor 代理类的handler是一个Plugin

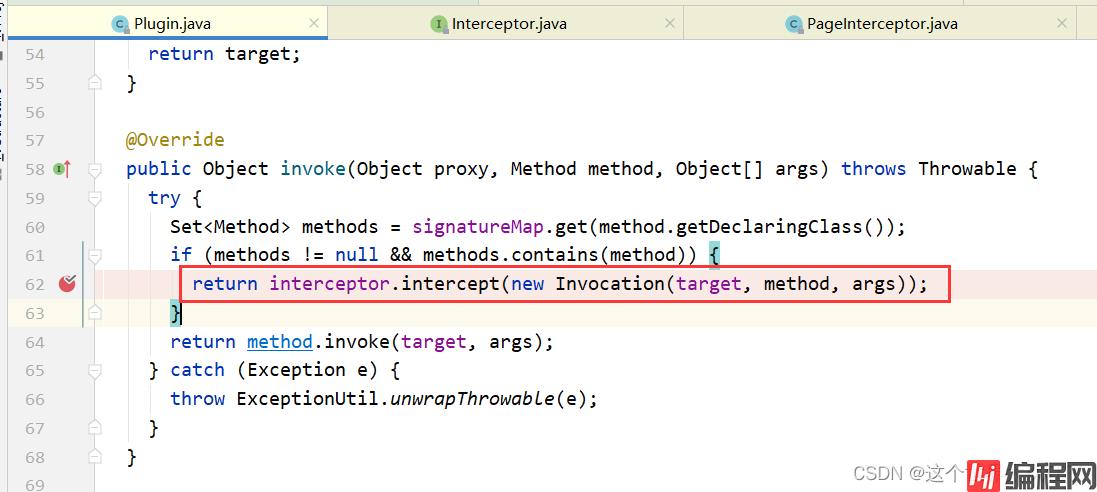
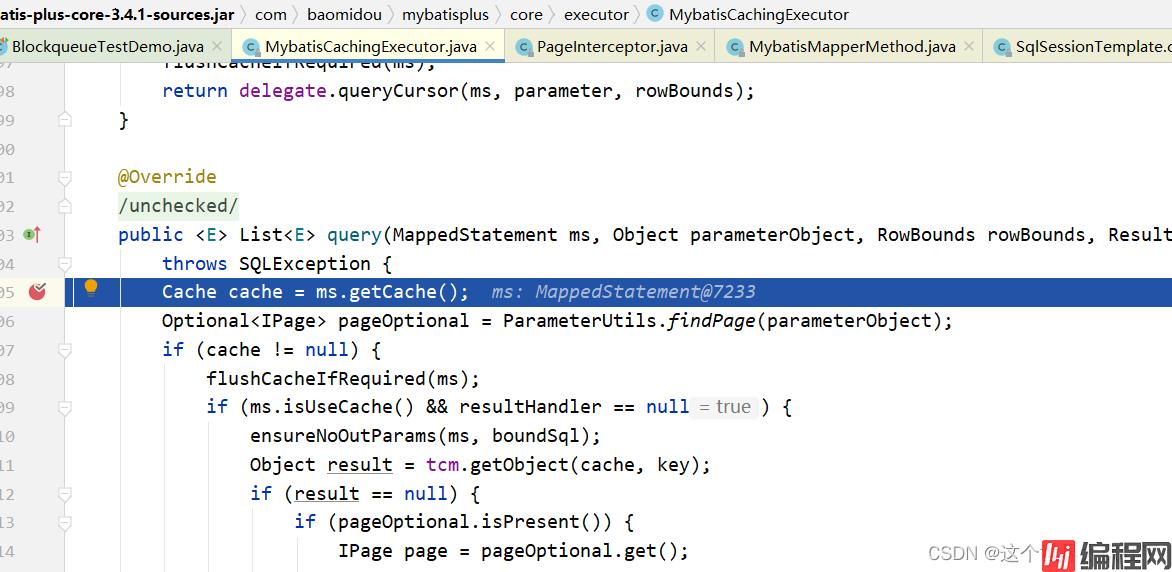
9.因为我使用到了分页插件,所以会来到com.GitHub.pagehelperPageInterceptor中

10.由MybatisCachingExecutor来执行查询
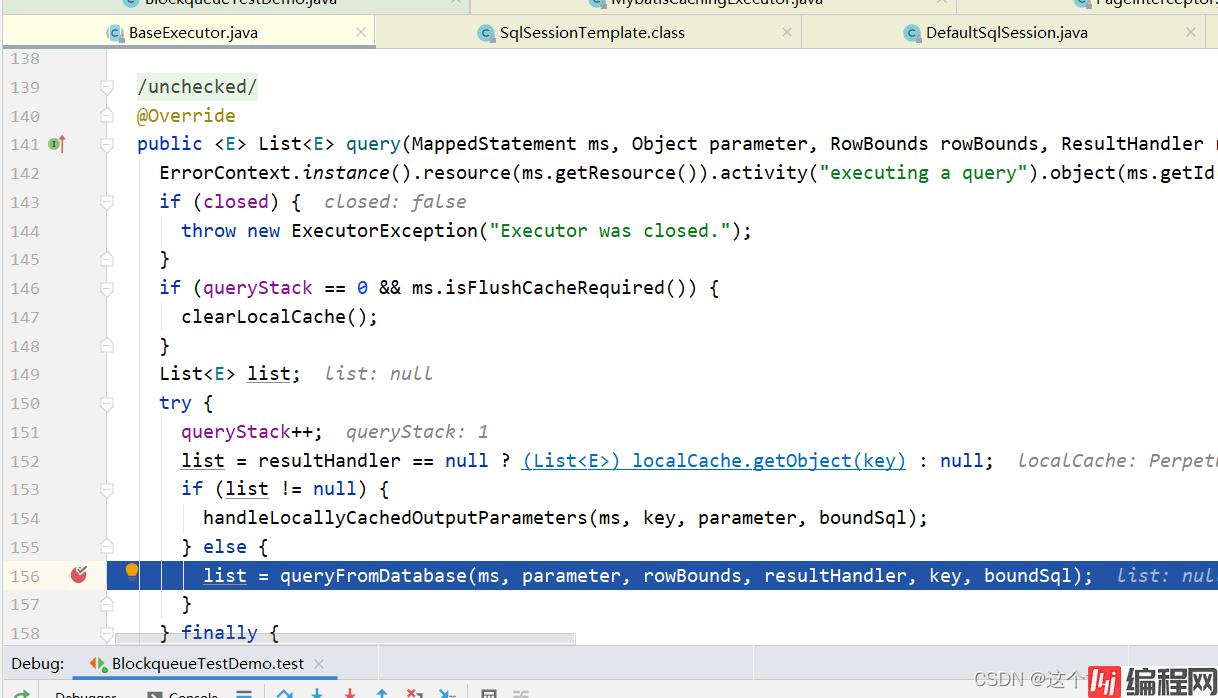
11.MybatisCachingExecutor 委派 BaseExecutor 执行查询
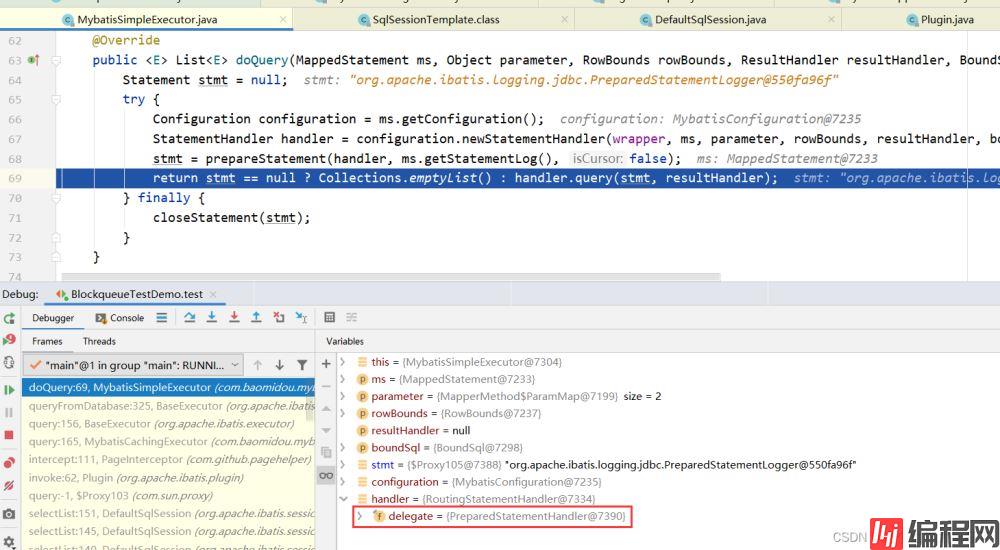
12.最终委派到PreparedStatementHandler来处理
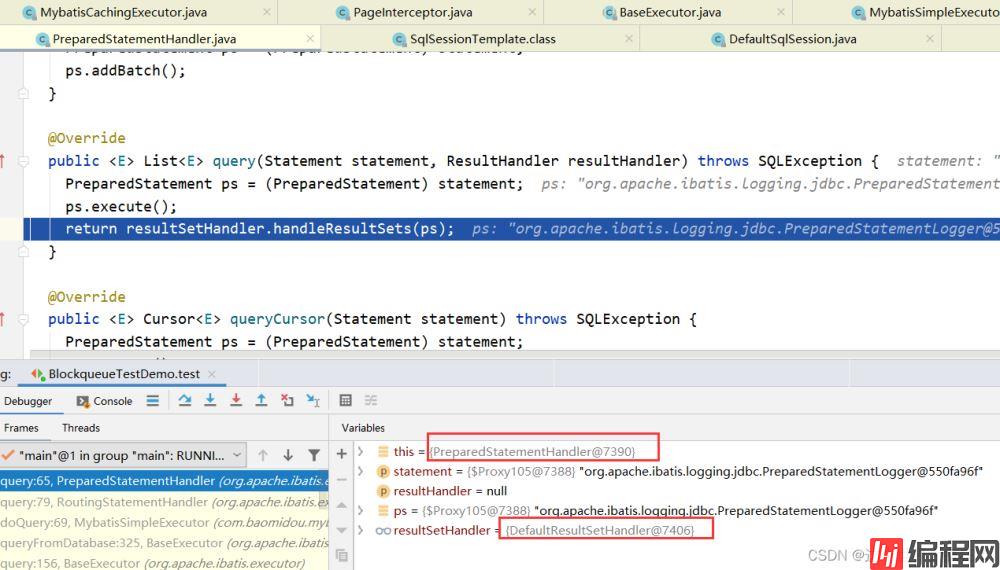
13.最后由DefaultResultSetHandler来封装结果集
@Override
  public List<Object> handleResultSets(Statement stmt) throws SQLException {
    ErrorContext.instance().activity("handling results").object(mappedStatement.getId());

    final List<Object> multipleResults = new ArrayList<>();
    int resultSetCount = 0;
    ResultSetWrapper rsw = getFirstResultSet(stmt);
    List<ResultMap> resultMaps = mappedStatement.getResultMaps();
    int resultMapCount = resultMaps.size();
    validateResultMapsCount(rsw, resultMapCount);
    while (rsw != null && resultMapCount > resultSetCount) {
      ResultMap resultMap = resultMaps.get(resultSetCount);
      handleResultSet(rsw, resultMap, multipleResults, null);
      rsw = getNextResultSet(stmt);
      cleanUpAfterHandlingResultSet();
      resultSetCount++;
    }
    String[] resultSets = mappedStatement.getResultSets();
    if (resultSets != null) {
      while (rsw != null && resultSetCount < resultSets.length) {
        ResultMapping parentMapping = nextResultMaps.get(resultSets[resultSetCount]);
        if (parentMapping != null) {
          String nestedResultMapid = parentMapping.getNestedResultMapId();
          ResultMap resultMap = configuration.getResultMap(nestedResultMapId);
          handleResultSet(rsw, resultMap, null, parentMapping);
        }
        rsw = getNextResultSet(stmt);
        cleanUpAfterHandlingResultSet();
        resultSetCount++;
      }
    return collapseSingleResultList(multipleResults);
}为什么要一层一层的封装?一层一层的委派?
这里面和缓存有关,有兴趣的可以自己了解一下。
下一篇打算记录一下 mybatis-plus 的自动配置过程,有兴趣的可以持续关注一下。
文中有错误的地方不吝赐教谢谢。
到此这篇关于mybatis-plus查询源码走读的文章就介绍到这了,更多相关mybatis-plus查询内容请搜索编程网以前的文章或继续浏览下面的相关文章希望大家以后多多支持编程网!
--结束END--
本文标题: mybatis-plus查询源码详解
本文链接: https://www.lsjlt.com/news/141070.html(转载时请注明来源链接)
有问题或投稿请发送至: 邮箱/279061341@qq.com QQ/279061341
下载Word文档到电脑,方便收藏和打印~
2024-03-01
2024-03-01
2024-03-01
2024-02-29
2024-02-29
2024-02-29
2024-02-29
2024-02-29
2024-02-29
2024-02-29
回答
回答
回答
回答
回答
回答
回答
回答
回答
回答


官方手机版

微信公众号

商务合作


0