一、前言 在实际的项目开发过程中,我们使用各种ORM框架可以使我们快捷的获取到数据,并且可以将获取到的数据绑定到对应的List<T>中,然后页面或者接口直接显示List&
在实际的项目开发过程中,我们使用各种ORM框架可以使我们快捷的获取到数据,并且可以将获取到的数据绑定到对应的List<T>中,然后页面或者接口直接显示List<T>中的数据。但是我们最终想要显示在视图或者接口中的数据和数据库实体之间可能存在着差异,一般的做法就是去创建一些对应的“模型”类,然后对获取到的数据再次进行处理,从而满足需求。
因此,如果便捷的实现数据库持久化对象与模型对象之间的实体映射,避免在去代码中手工实现这一过程,就可以大大降低开发的工作量。AutoMapper就是可以帮助我们实现实体转换过程的工具。
AutoMapper是一个OOM(Object-Object-Mapping)组件,从它的英文名字中可以看出,AutoMapper主要是为了实现实体间的相互转换,从而避免我们每次采用手工的方式进行转换。在没有OOM这类组件之前,如果我们需要实现实体之间的转换,只能使用手工修改代码,然后逐个赋值的方式实现映射,而有了OOM组件,可以很方便的帮助我们实现这一需求。看下面的一个例子。
首先创建一个ASP.net core webapi项目:

添加一个Student实体类:
namespace AutoMapperDemo.Model
{
    public class Student
    {
        public int ID { get; set; }

        public string Name { get; set; }

        public int Age { get; set; }

        public string Gender { get; set; }
    }
}
添加StudentDTO类,跟Student属性一致。
然后添加一个类,模拟一些测试数据:
using AutoMapperDemo.Model;
using System.Collections.Generic;

namespace AutoMapperDemo
{
    public class Data
    {
        public static List<Student> ListStudent { get; set; }

        public static List<Student> GetList()
        {
            ListStudent = new List<Student>();
            for (int i = 0; i < 3; i++)
            {
                Student student = new Student()
                {
                  ID=i,
                  Name=$"测试_{i}",
                  Age=20,
                  Gender="男"
                };
                ListStudent.Add(student);
            }

            return ListStudent;
        }
    }
}
添加Student控制器,通过Get方法获取所有的值:
using System.Collections.Generic;
using System.Threading.Tasks;
using AutoMapperDemo.Model;
using Microsoft.Aspnetcore.mvc;

namespace AutoMapperDemo.Controllers
{
    [Route("api/[controller]")]
    [ApiController]
    public class StudentController : ControllerBase
    {
        [HttpGet]
        public async Task<List<Student>> Get()
        {
            List<Student> list = new List<Student>();
            list = await Task.Run<List<Student>>(() =>
            {
                return Data.GetList();
            });
            return list;
        }
    }
}
使用Postman进行测试:
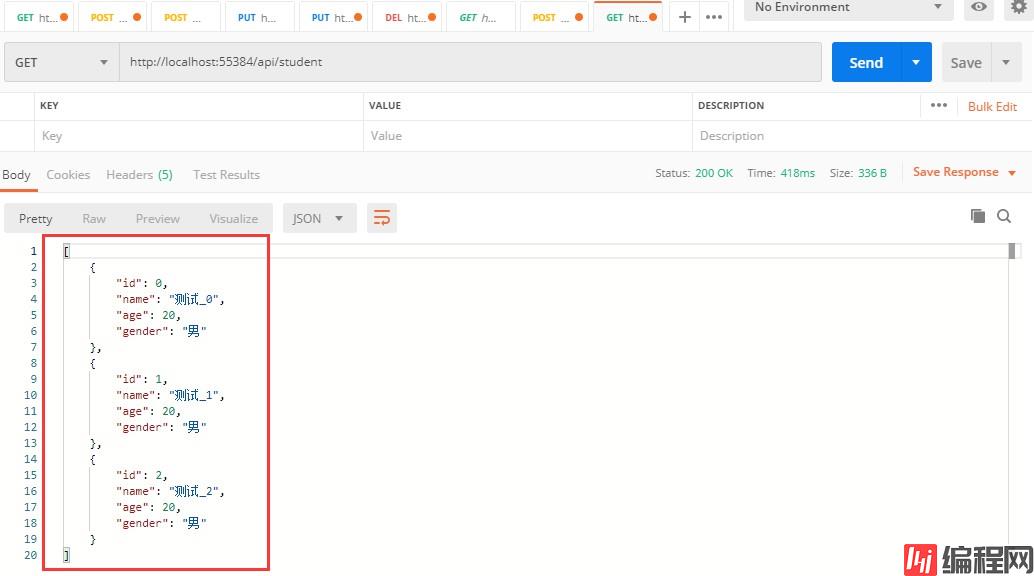
这样返回的数据直接就是数据库对应的实体类类型。这时需求改变了,我们要返回StudentDTO类型的数据,这时就需要修改代码:
using System.Collections.Generic;
using System.Threading.Tasks;
using AutoMapperDemo.DTO;
using AutoMapperDemo.Model;
using Microsoft.AspNetCore.Mvc;

namespace AutoMapperDemo.Controllers
{
    [Route("api/[controller]")]
    [ApiController]
    public class StudentController : ControllerBase
    {
        [HttpGet]
        public async Task<List<Student>> Get()
        {
            List<Student> list = new List<Student>();
            list = await Task.Run<List<Student>>(() =>
            {
                return Data.GetList();
            });


            return list;
        }

        [HttpGet("GetDTO")]
        public async Task<List<StudentDTO>> GetDto()
        {
            List<StudentDTO> list = new List<StudentDTO>();
            List<Student>  listStudent = await Task.Run<List<Student>>(() =>
            {
                return Data.GetList();
            });
            // 循环给属性赋值
            foreach (var item in listStudent)
            {
                StudentDTO dto = new StudentDTO();
                dto.ID = item.ID;
                dto.Name = item.Name;
                dto.Age = item.Age;
                dto.Gender = item.Gender;
                // 加入到集合中
                list.Add(dto);
            }

            return list;
        }
    }
}
还是使用Postman进行测试:

可以看到:这时返回的是DTO类型的数据。这种情况就是我们上面说的,需要手动修改代码,然后循环给对应的属性进行赋值。这里Student类只有4个属性,如果属性非常多,或者很多地方使用到了,如果还是采用这种方式进行赋值,那么就会很麻烦。假如以后其中的一个属性名称改变了,那么所有的地方也都需要修改,工作量就会很大。这时就需要使用AutoMapper解决。
首先引入AutoMapper包,直接在NuGet中引入:

这里选择安装AutoMapper.Extensions.Microsoft.DependencyInjection这个包。这个包主要是为了让我们可以通过依赖注入的方式去使用AutoMapper。
新建StudentProfile类,继承自AutoMapper的Profile类,在无参构造函数中,我们就可以通过 CreateMap 方法去创建两个实体间的映射关系。
using AutoMapper;
using AutoMapperDemo.DTO;
using AutoMapperDemo.Model;

namespace AutoMapperDemo.AutoMapper
{
    /// <summary>
    /// 继承自Profile类
    /// </summary>
    public class StudentProfile: Profile
    {
        /// <summary>
        /// 构造函数中实现映射
        /// </summary>
        public StudentProfile()
        {
            // Mapping
            // 第一次参数是源类型(这里是Model类型),第二个参数是目标类型(这里是DTO类型)
            CreateMap<Student, StudentDTO>();
        }
    }
}
这里的 Profile有什么用呢?services.AddAutoMapper他会自动找到所有继承了Profile的类然后进行配置。
然后修改Student控制器,通过构造函数使用AutoMapper的注入,并使用AutoMapper实现自动映射:
using System.Collections.Generic;
using System.Threading.Tasks;
using AutoMapper;
using AutoMapperDemo.DTO;
using AutoMapperDemo.Model;
using Microsoft.AspNetCore.Mvc;

namespace AutoMapperDemo.Controllers
{
    [Route("api/[controller]")]
    [ApiController]
    public class StudentController : ControllerBase
    {
        private readonly IMapper _mapper;

        /// <summary>
        /// 通过构造函数实现依赖注入
        /// </summary>
        /// <param name="mapper"></param>
        public StudentController(IMapper mapper)
        {
            _mapper = mapper;
        }

        [HttpGet]
        public async Task<List<Student>> Get()
        {
            List<Student> list = new List<Student>();
            list = await Task.Run<List<Student>>(() =>
            {
                return Data.GetList();
            });


            return list;
        }

        [HttpGet("GetDTO")]
        public async Task<List<StudentDTO>> GetDto()
        {
            List<StudentDTO> list = new List<StudentDTO>();
            List<Student>  listStudent = await Task.Run<List<Student>>(() =>
            {
                return Data.GetList();
            });
            //// 循环给属性赋值
            //foreach (var item in listStudent)
            //{
            //    StudentDTO dto = new StudentDTO();
            //    dto.ID = item.ID;
            //    dto.Name = item.Name;
            //    dto.Age = item.Age;
            //    dto.Gender = item.Gender;
            //    // 加入到集合中
            //    list.Add(dto);
            //}

            // 使用AutoMapper进行映射
            list = _mapper.Map<List<StudentDTO>>(listStudent);
            return list;
        }
    }
}
修改Startup类的ConfigureServices方法,添加AutoMapper:
public void ConfigureServices(IServiceCollection services)
{
    #region 使用AutoMapper
    // 参数类型是Assembly类型的数组 表示AutoMapper将在这些程序集数组里面遍历寻找所有继承了Profile类的配置文件
    // 在当前作用域的所有程序集里面扫描AutoMapper的配置文件
    services.AddAutoMapper(AppDomain.CurrentDomain.GetAssemblies());
    #endregion

    services.AddControllers();
}
再次使用Postman进行测试:

可以看到,这样也实现了我们的需求,而且还不需要进行手动映射。
上面的示例中,Student和StudentDTO类里面的属性名称都是一样的,如果属性名称不一样呢?我们把StudentDTO类里面的ID改为StudentID,然后修改映射代码:
using AutoMapper;
using AutoMapperDemo.DTO;
using AutoMapperDemo.Model;
namespace AutoMapperDemo.AutoMapper
{
/// <summary>
/// 继承自Profile类
/// </summary>
public class StudentProfile: Profile
{
/// <summary>
/// 构造函数中实现映射
/// </summary>
public StudentProfile()
{
// Mapping
// 第一次参数是源类型(这里是Model类型),第二个参数是目标类型(这里是DTO类型)
// CreateMap<Student, StudentDTO>();
// 使用自定义映射 Student类的ID映射到StudentDTO类的StudentID
CreateMap<Student, StudentDTO>()
.ForMember(destinationMember: des => des.StudentID, memberOptions: opt => { opt.MapFrom(mapExpression: map => map.ID); });
}
}
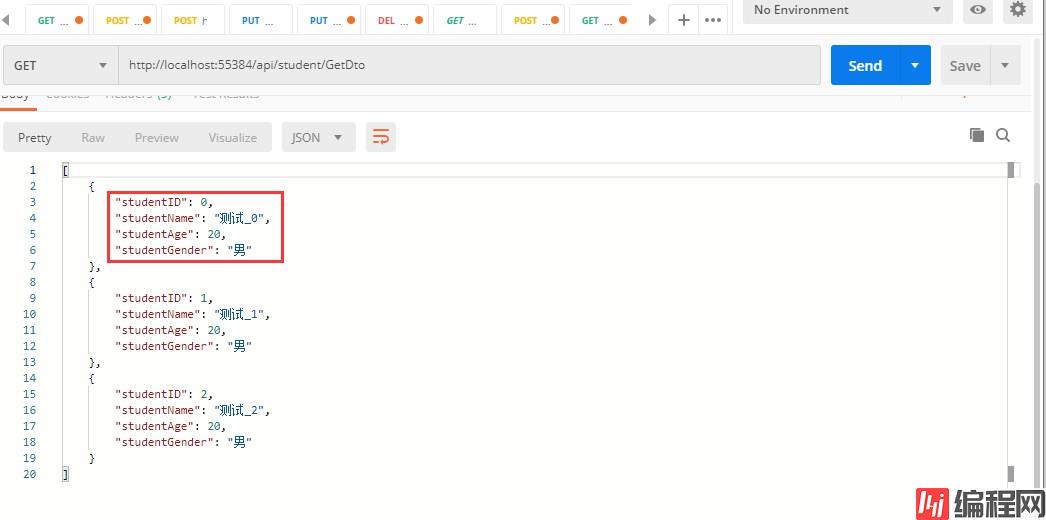
}再次使用Postman进行测试:

这样就实现了自定义映射。这里是映射了一个字段,如果是多个字段不同呢? 修改StudentDTO类:
namespace AutoMapperDemo.DTO
{
    public class StudentDTO
    {
        public int StudentID { get; set; }

        public string StudentName { get; set; }

        public int StudentAge { get; set; }

        public string StudentGender { get; set; }
    }
}
然后修改映射配置类:
using AutoMapper;
using AutoMapperDemo.DTO;
using AutoMapperDemo.Model;

namespace AutoMapperDemo.AutoMapper
{
    /// <summary>
    /// 继承自Profile类
    /// </summary>
    public class StudentProfile: Profile
    {
        /// <summary>
        /// 构造函数中实现映射
        /// </summary>
        public StudentProfile()
        {
            // Mapping
            // 第一次参数是源类型(这里是Model类型),第二个参数是目标类型(这里是DTO类型)
            // CreateMap<Student, StudentDTO>();

            // 使用自定义映射 Student类的ID映射到StudentDTO类的StudentID
            //CreateMap<Student, StudentDTO>()
            //    .ForMember(destinationMember: des => des.StudentID, memberOptions: opt => { opt.MapFrom(mapExpression: map => map.ID); });

            // 对多个属性进行自定义映射
            CreateMap<Student, StudentDTO>()
                .ForMember(destinationMember: des => des.StudentID, memberOptions: opt => { opt.MapFrom(mapExpression: map => map.ID); })
                .ForMember(destinationMember: des => des.StudentName, memberOptions: opt => { opt.MapFrom(mapExpression: map => map.Name); })
                .ForMember(destinationMember: des => des.StudentAge, memberOptions: opt => { opt.MapFrom(mapExpression: map => map.Age); })
                .ForMember(destinationMember: des => des.StudentGender, memberOptions: opt => { opt.MapFrom(mapExpression: map => map.Gender); });
        }
    }
}
在使用Postman进行测试:
这样就实现了多个属性的自定义映射。
上面的实例中是从Student映射到StudentDTO,那么可以从StudentDTO映射到Student吗?答案是肯定的,只需要在映射的最后使用ReverseMap()方法即可:
using AutoMapper;
using AutoMapperDemo.DTO;
using AutoMapperDemo.Model;

namespace AutoMapperDemo.AutoMapper
{
    /// <summary>
    /// 继承自Profile类
    /// </summary>
    public class StudentProfile: Profile
    {
        /// <summary>
        /// 构造函数中实现映射
        /// </summary>
        public StudentProfile()
        {
            // Mapping
            // 第一次参数是源类型(这里是Model类型),第二个参数是目标类型(这里是DTO类型)
            // CreateMap<Student, StudentDTO>();

            // 使用自定义映射 Student类的ID映射到StudentDTO类的StudentID
            //CreateMap<Student, StudentDTO>()
            //    .ForMember(destinationMember: des => des.StudentID, memberOptions: opt => { opt.MapFrom(mapExpression: map => map.ID); });

            // 对多个属性进行自定义映射
            CreateMap<Student, StudentDTO>()
                .ForMember(destinationMember: des => des.StudentID, memberOptions: opt => { opt.MapFrom(mapExpression: map => map.ID); })
                .ForMember(destinationMember: des => des.StudentName, memberOptions: opt => { opt.MapFrom(mapExpression: map => map.Name); })
                .ForMember(destinationMember: des => des.StudentAge, memberOptions: opt => { opt.MapFrom(mapExpression: map => map.Age); })
                .ForMember(destinationMember: des => des.StudentGender, memberOptions: opt => { opt.MapFrom(mapExpression: map => map.Gender); })
                // ReverseMap表示双向映射
                .ReverseMap();
        }
    }
}
我们修改Data,里面增加一个Add方法,可以将Student添加到集合中:
using AutoMapperDemo.Model;
using System.Collections.Generic;

namespace AutoMapperDemo
{
    public class Data
    {
        public static List<Student> ListStudent { get; set; }

        static Data()
        {
            ListStudent = new List<Student>();
            for (int i = 0; i < 3; i++)
            {
                Student student = new Student()
                {
                    ID = i,
                    Name = $"测试_{i}",
                    Age = 20,
                    Gender = "男"
                };
                ListStudent.Add(student);
            }
        }

        public static List<Student> GetList()
        {
            return ListStudent;
        }

        public static void Add(Student entity)
        {
            ListStudent.Add(entity);
        }
    }
}
修改Student控制器,添加一个Post方法,传入的参数的StudentDTO类型:
using System.Collections.Generic;
using System.Threading.Tasks;
using AutoMapper;
using AutoMapperDemo.DTO;
using AutoMapperDemo.Model;
using Microsoft.AspNetCore.Mvc;

namespace AutoMapperDemo.Controllers
{
    [Route("api/[controller]")]
    [ApiController]
    public class StudentController : ControllerBase
    {
        private readonly IMapper _mapper;

        /// <summary>
        /// 通过构造函数实现依赖注入
        /// </summary>
        /// <param name="mapper"></param>
        public StudentController(IMapper mapper)
        {
            _mapper = mapper;
        }

        [HttpGet]
        public async Task<List<Student>> Get()
        {
            List<Student> list = new List<Student>();
            list = await Task.Run<List<Student>>(() =>
            {
                return Data.GetList();
            });


            return list;
        }

        [HttpGet("GetDTO")]
        public async Task<List<StudentDTO>> GetDto()
        {
            List<StudentDTO> list = new List<StudentDTO>();
            List<Student>  listStudent = await Task.Run<List<Student>>(() =>
            {
                return Data.GetList();
            });
            //// 循环给属性赋值
            //foreach (var item in listStudent)
            //{
            //    StudentDTO dto = new StudentDTO();
            //    dto.ID = item.ID;
            //    dto.Name = item.Name;
            //    dto.Age = item.Age;
            //    dto.Gender = item.Gender;
            //    // 加入到集合中
            //    list.Add(dto);
            //}

            // 使用AutoMapper进行映射
            list = _mapper.Map<List<StudentDTO>>(listStudent);
            return list;
        }

        [HttpPost]
        public async Task<List<Student>> Post([FromBody]StudentDTO entity)
        {
            List<Student> list = new List<Student>();
            // 将StudentDTO反向映射为Student类型
            Student student = _mapper.Map<Student>(entity);
            // 添加到集合中
            Data.Add(student);
            // 返回增加后的数组,这里返回Student
            list = await Task.Run<List<Student>>(() =>
            {
                return Data.GetList();
            });


            return list;
        }
    }
}
使用Postman进行测试:

返回结果:
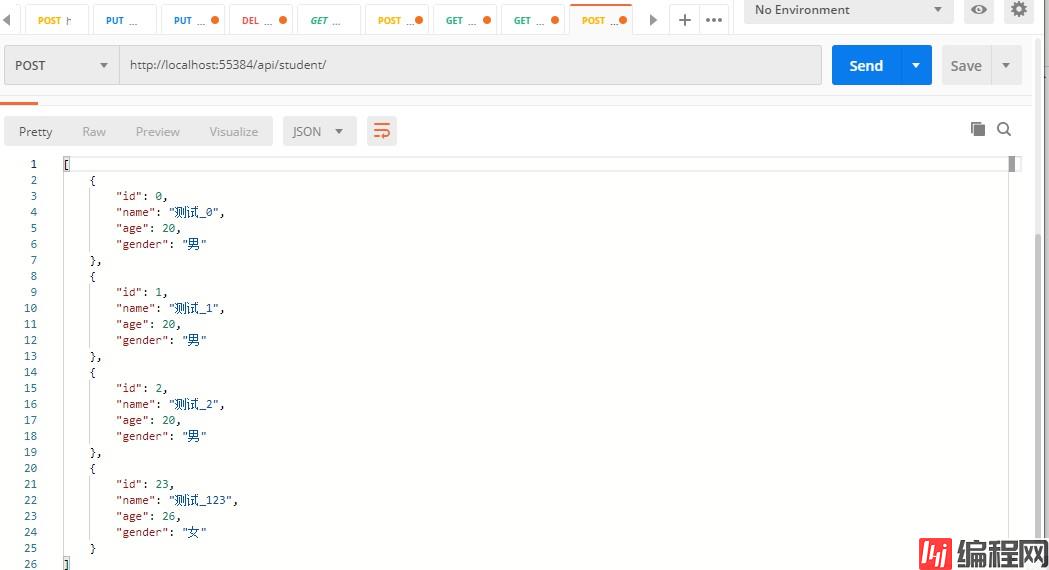
这样就实现了映射的反转。
具体其它API功能,参考AutoMapper官网:https://automapper.readthedocs.io/en/latest/index.html
到此这篇关于ASP.net core使用AutoMapper实现实体映射的文章就介绍到这了。希望对大家的学习有所帮助,也希望大家多多支持编程网。
--结束END--
本文标题: ASP.NETCore使用AutoMapper实现实体映射
本文链接: https://www.lsjlt.com/news/143924.html(转载时请注明来源链接)
有问题或投稿请发送至: 邮箱/279061341@qq.com QQ/279061341
下载Word文档到电脑,方便收藏和打印~
2023-05-21
2023-05-21
2023-05-21
2023-05-21
2023-05-20
2023-05-20
2023-05-20
2023-05-20
2023-05-20
2023-05-20
回答
回答
回答
回答
回答
回答
回答
回答
回答
回答


官方手机版

微信公众号

商务合作


0