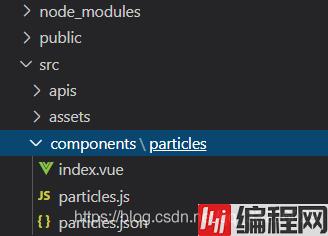
目录第一步:引入 particles.js第二步:找到 node_modules 内的 particles.js第三步:项目 components 下创建 particles 目录第
不知道大家有没有被particles恶心过,反正这东西是教育了我一下午时间。
起初我想直接用 vue-particles 这个插件去做,但我惊讶的发现,好像不顶用。
vue-particles 内部用了 require 这个api,vue3已经全面弃用了require,去拥抱 commonJSes6 了,改动了一个地方,其他地方也会出问题。
npm i particles.js
or
yarn add particles.js把它弄出来 :
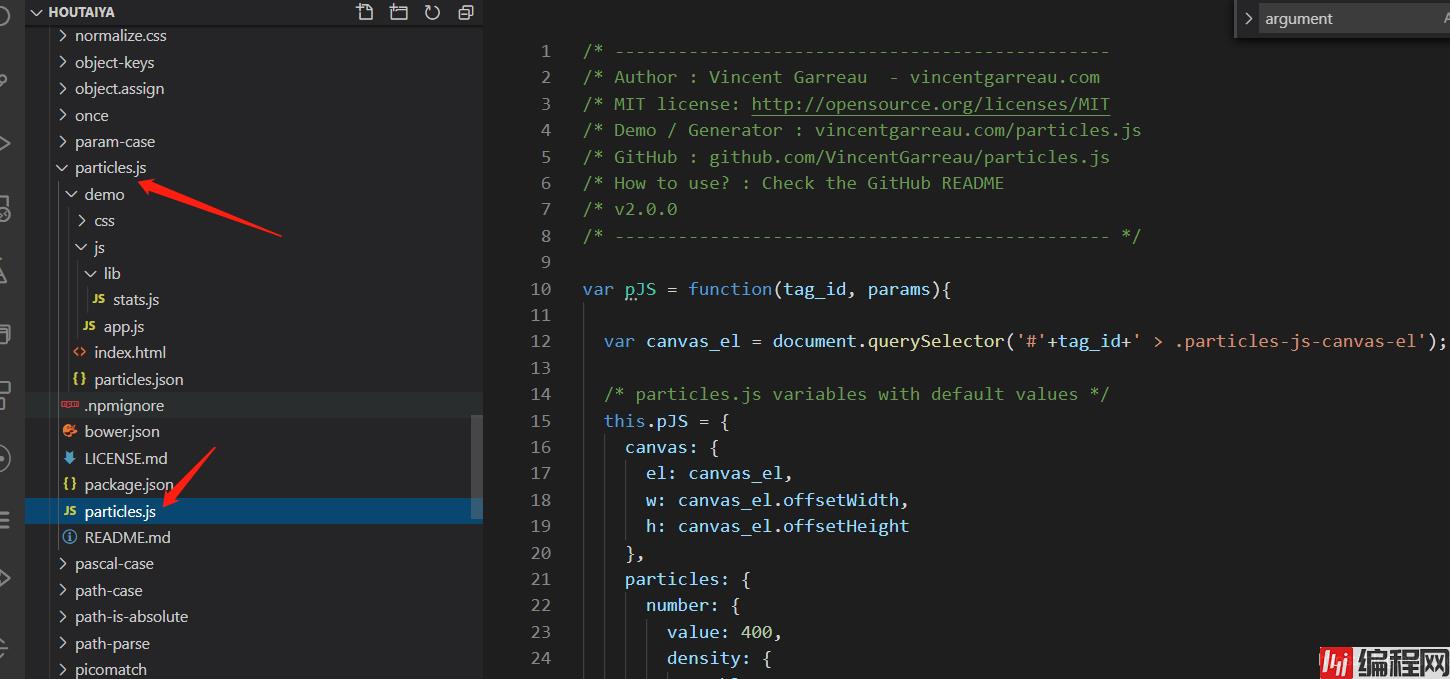
弄出来后可以用 npm uninstall particles.js 将依赖去除
将找到的 particles.js 放进去后,在其同级目录创建 index.vue 与 particles.json:
<template>
  <div class="particles-js-box">
    <div id="particles-js"></div>
  </div>
</template>
<script>
import particlesJs from "./particles.js";
import particlesConfig from "./particles.json";
export default {
data() {
return {};
},
mounted() {
this.init();
},
methods: {
init() {
particlesJS("particles-js", particlesConfig);
document.body.style.overflow = "hidden";
},
},
};
</script><style scoped>
.particles-js-box {
position: fixed;
width: 100%;
height: 100%;
top: 0;
left: 0;
z-index: 1;
}
#particles-js {
background-color: #2d3a4b;
width: 100%;
height: 100%;
}
</style>{
"particles": {
"number": {
"value": 60,
"density": {
"enable": true,
"value_area": 800
}
},
"color": {
"value": "#ffffff"
},
"shape": {
"type": "circle",
"stroke": {
"width": 0,
"color": "#000000"
},
"polyGon": {
"nb_sides": 5
},
"image": {
"src": "img/GitHub.svg",
"width": 100,
"height": 100
}
},
"opacity": {
"value": 0.5,
"random": false,
"anim": {
"enable": false,
"speed": 1,
"opacity_min": 0.1,
"sync": false
}
},
"size": {
"value": 3,
"random": true,
"anim": {
"enable": false,
"speed": 40,
"size_min": 0.1,
"sync": false
}
},
"line_linked": {
"enable": true,
"distance": 150,
"color": "#ffffff",
"opacity": 0.4,
"width": 1
},
"move": {
"enable": true,
"speed": 4,
"direction": "none",
"random": false,
"straight": false,
"out_mode": "out",
"bounce": false,
"attract": {
"enable": false,
"rotateX": 100,
"rotateY": 1200
}
}
},
"interactivity": {
"detect_on": "Window",
"events": {
"onhover": {
"enable": true,
"mode": "grab"
},
"onclick": {
"enable": true,
"mode": "push"
},
"resize": true
},
"modes": {
"grab": {
"distance": 140,
"line_linked": {
"opacity": 1
}
},
"bubble": {
"distance": 400,
"size": 40,
"duration": 2,
"opacity": 8,
"speed": 3
},
"repulse": {
"distance": 200,
"duration": 0.4
},
"push": {
"particles_nb": 4
},
"remove": {
"particles_nb": 2
}
}
},
"retina_detect": true
}1、1416行 - 1427行 替换为:
Object.deepExtend = function f(destination, source) {
  for (var property in source) {
    if (source[property] && source[property].constructor &&
     source[property].constructor === Object) {
      destination[property] = destination[property] || {};
      f(destination[property], source[property])
    } else {
      destination[property] = source[property];
    }
  }
  return destination;
};
2、最后一行添加:
export default window.particlesJS <template>
<div>
<particles></particles>
</div>
</template><script>
import Particles from '@/components/particles/index.vue'
export default {
components: {
"particles":Particles
}
};
</script>以上七步足矣! 这些仅为个人经验,希望能给大家一个参考,也希望大家多多支持编程网。
--结束END--
本文标题: 关于vue3使用particles粒子特效的问题
本文链接: https://www.lsjlt.com/news/150393.html(转载时请注明来源链接)
有问题或投稿请发送至: 邮箱/279061341@qq.com QQ/279061341
下载Word文档到电脑,方便收藏和打印~
2024-01-12
2023-05-20
2023-05-20
2023-05-20
2023-05-20
2023-05-20
2023-05-20
2023-05-20
2023-05-20
2023-05-20
回答
回答
回答
回答
回答
回答
回答
回答
回答
回答


官方手机版

微信公众号

商务合作


0