Python 官方文档:入门教程 => 点击学习
目录环境准备核心代码测试参考资料环境准备 创建 Maven 项目创建服务器远程连接Tools------Delployment-----Browse Remote Host 设置如
创建 Maven 项目创建服务器远程连接
Tools------Delployment-----Browse Remote Host
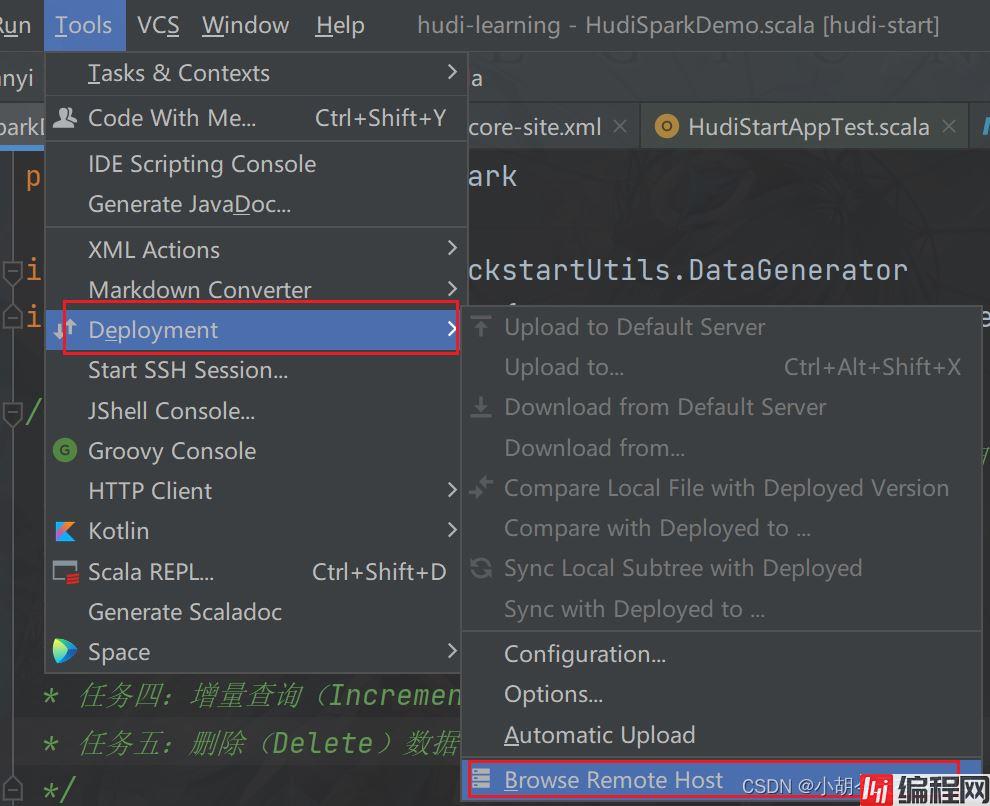
设置如下内容:
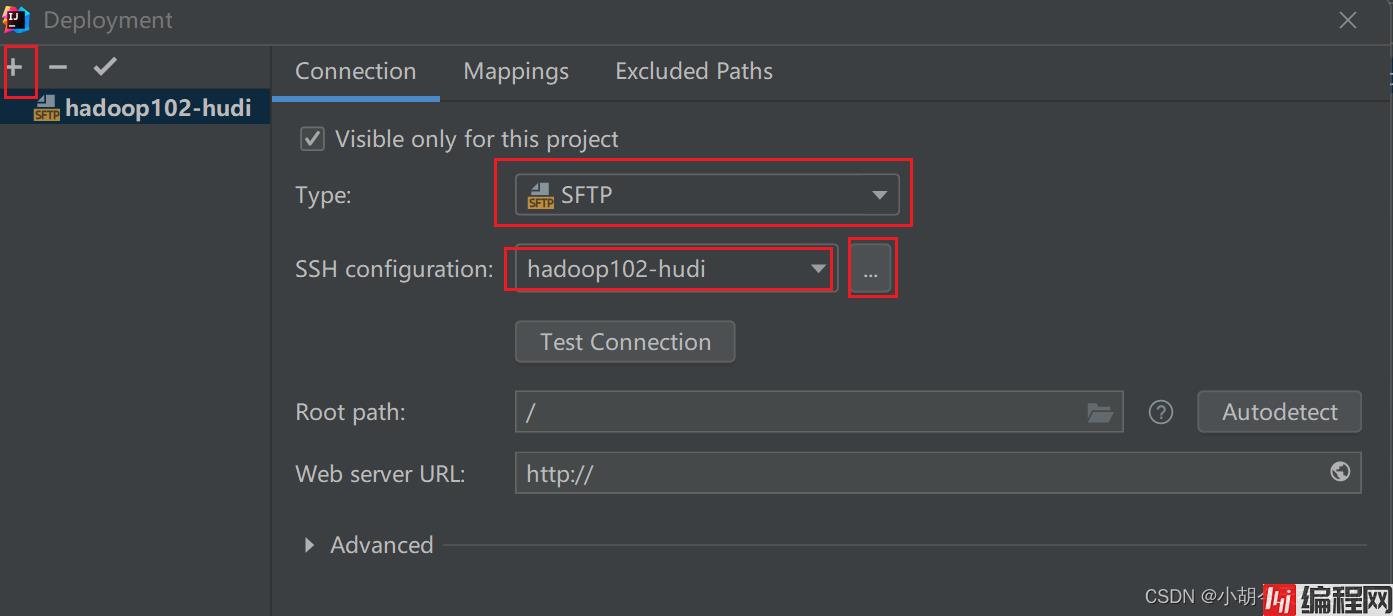
在这里输入服务器的账号和密码
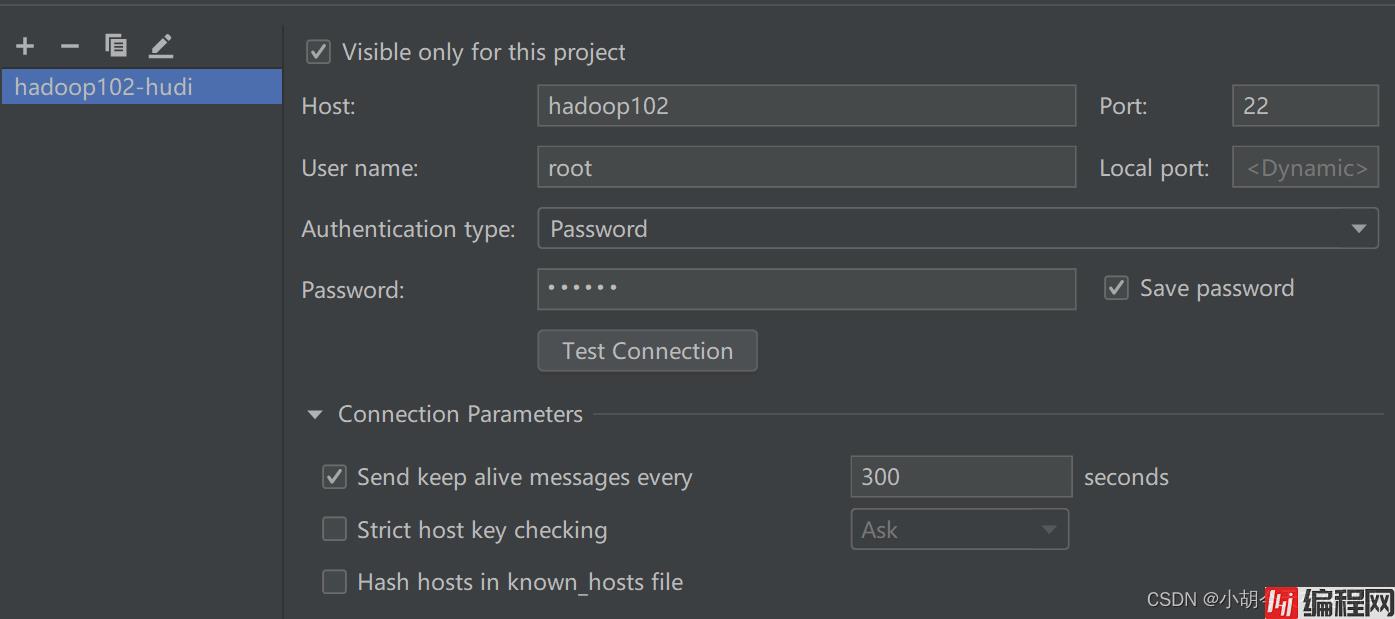
点击Test Connection,提示Successfully的话,就说明配置成功。

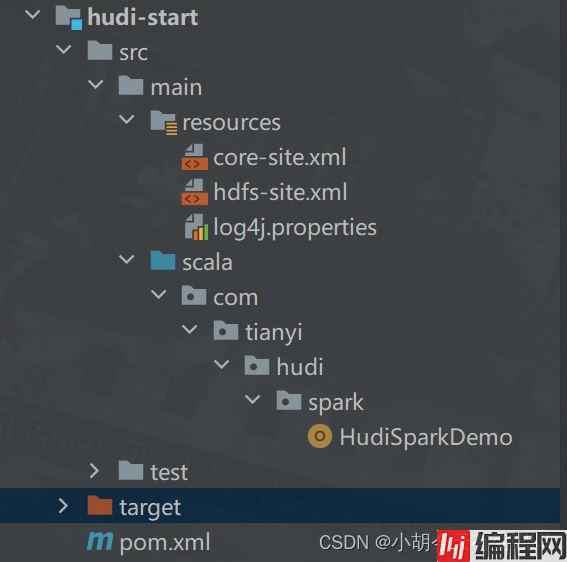
复制hadoop的 core-site.xml、hdfs-site.xml 以及 log4j.properties 三个文件复制到resources文件夹下。

设置 log4j.properties 为打印警告异常信息:
log4j.rootCateGory=WARN, console
4.添加 pom.xml 文件
<repositories>
        <repository>
            <id>aliyun</id>
            <url>Http://maven.aliyun.com/nexus/content/groups/public/</url>
        </repository>
        <repository>
            <id>cloudera</id>
            <url>https://repository.cloudera.com/artifactory/cloudera-repos/</url>
        </repository>
        <repository>
            <id>jboss</id>
            <url>http://repository.jboss.com/nexus/content/groups/public</url>
        </repository>
    </repositories>

    <properties>
        <Scala.version>2.12.10</scala.version>
        <scala.binary.version>2.12</scala.binary.version>
        <spark.version>3.0.0</spark.version>
        <hadoop.version>2.7.3</hadoop.version>
        <hudi.version>0.9.0</hudi.version>
    </properties>

    <dependencies>
        <!-- 依赖Scala语言 -->
        <dependency>
            <groupId>org.scala-lang</groupId>
            <artifactId>scala-library</artifactId>
            <version>${scala.version}</version>
        </dependency>
        <!-- Spark Core 依赖 -->
        <dependency>
            <groupId>org.apache.spark</groupId>
            <artifactId>spark-core_${scala.binary.version}</artifactId>
            <version>${spark.version}</version>
        </dependency>
        <!-- Spark sql 依赖 -->
        <dependency>
            <groupId>org.apache.spark</groupId>
            <artifactId>spark-sql_${scala.binary.version}</artifactId>
            <version>${spark.version}</version>
        </dependency>

        <!-- Hadoop Client 依赖 -->
        <dependency>
            <groupId>org.apache.hadoop</groupId>
            <artifactId>hadoop-client</artifactId>
            <version>${hadoop.version}</version>
        </dependency>

        <!-- hudi-spark3 -->
        <dependency>
            <groupId>org.apache.hudi</groupId>
            <artifactId>hudi-spark3-bundle_2.12</artifactId>
            <version>${hudi.version}</version>
        </dependency>
        <dependency>
            <groupId>org.apache.spark</groupId>
            <artifactId>spark-avro_2.12</artifactId>
            <version>${spark.version}</version>
        </dependency>

    </dependencies>

    <build>
        <outputDirectory>target/classes</outputDirectory>
        <testOutputDirectory>target/test-classes</testOutputDirectory>
        <resources>
            <resource>
                <directory>${project.basedir}/src/main/resources</directory>
            </resource>
        </resources>
        <!-- Maven 编译的插件 -->
        <plugins>
            <plugin>
                <groupId>org.apache.maven.plugins</groupId>
                <artifactId>maven-compiler-plugin</artifactId>
                <version>3.0</version>
                <configuration>
                    <source>1.8</source>
                    <target>1.8</target>
                    <encoding>UTF-8</encoding>
                </configuration>
            </plugin>
            <plugin>
                <groupId>net.alchim31.maven</groupId>
                <artifactId>scala-maven-plugin</artifactId>
                <version>3.2.0</version>
                <executions>
                    <execution>
                        <goals>
                            <goal>compile</goal>
                            <goal>testCompile</goal>
                        </goals>
                    </execution>
                </executions>
            </plugin>
        </plugins>
    </build>
要注释掉创建项目时的生成的下面的代码,不然依赖一直报错:
<!-- <properties>-->
<!-- <maven.compiler.source>8</maven.compiler.source>-->
<!-- <maven.compiler.target>8</maven.compiler.target>-->
<!-- </properties>-->
代码结构:
import org.apache.hudi.QuickstartUtils.DataGenerator
import org.apache.spark.sql.{DataFrame, SaveMode, SparkSession}

object HudiSparkDemo {

  def insertData(spark: SparkSession, table: String, path: String): Unit = {
    import spark.implicits._
    // 第1步、模拟乘车数据
    import org.apache.hudi.QuickstartUtils._
    val dataGen: DataGenerator = new DataGenerator()
    val inserts = convertToStringList(dataGen.generateInserts(100))
    import scala.collection.JavaConverters._
    val insertDF: DataFrame = spark.read.JSON(
      spark.sparkContext.parallelize(inserts.asScala, 2).toDS()
    )
//    		insertDF.printSchema()
//    		insertDF.show(10, truncate = false)
    //第二步: 插入数据到Hudi表
    import org.apache.hudi.DataSourceWriteOptions._
    import org.apache.hudi.config.HoodieWriteConfig._
    insertDF.write
      .mode(SaveMode.Append)
      .fORMat("hudi")
      .option("hoodie.insert.shuffle.parallelism", 2)
      .option("hoodie.insert.shuffle.parallelism", 2)
      //Hudi表的属性设置
      .option(PRECOMBINE_FIELD.key(), "ts")
      .option(RECORDKEY_FIELD.key(), "uuid")
      .option(PARTITIONPATH_FIELD.key(), "partitionpath")
      .option(TBL_NAME.key(), table)
      .save(path)
  }

  def queryData(spark: SparkSession, path: String): Unit = {
    import spark.implicits._
    val tripsDF: DataFrame = spark.read.format("hudi").load(path)
//    tripsDF.printSchema()
//    tripsDF.show(10, truncate = false)
    //查询费用大于10,小于50的乘车数据
    tripsDF
      .filter($"fare" >= 20 && $"fare" <=50)
      .select($"driver", $"rider", $"fare", $"begin_lat", $"begin_lon", $"partitionpath", $"_hoodie_commit_time")
      .orderBy($"fare".desc, $"_hoodie_commit_time".desc)
      .show(20, truncate = false)
  }
  def queryDataByTime(spark: SparkSession, path: String):Unit = {
    import org.apache.spark.sql.functions._
    //方式一:指定字符串,按照日期时间过滤获取数据
    val df1 = spark.read
      .format("hudi")
      .option("as.of.instant", "20220610160908")
      .load(path)
      .sort(col("_hoodie_commit_time").desc)
    df1.printSchema()
    df1.show(numRows = 5, truncate = false)
    //方式二:指定字符串,按照日期时间过滤获取数据
    val df2 = spark.read
      .format("hudi")
      .option("as.of.instant", "2022-06-10 16:09:08")
      .load(path)
      .sort(col("_hoodie_commit_time").desc)
    df2.printSchema()
    df2.show(numRows = 5, truncate = false)
  }


  def insertData(spark: SparkSession, table: String, path: String, dataGen: DataGenerator): Unit = {
    import spark.implicits._
    // 第1步、模拟乘车数据
    import org.apache.hudi.QuickstartUtils._
    val inserts = convertToStringList(dataGen.generateInserts(100))
    import scala.collection.JavaConverters._
    val insertDF: DataFrame = spark.read.json(
      spark.sparkContext.parallelize(inserts.asScala, 2).toDS()
    )
    //    		insertDF.printSchema()
    //    		insertDF.show(10, truncate = false)
    //第二步: 插入数据到Hudi表
    import org.apache.hudi.DataSourceWriteOptions._
    import org.apache.hudi.config.HoodieWriteConfig._
    insertDF.write
      //更换为Overwrite模式
      .mode(SaveMode.Overwrite)
      .format("hudi")
      .option("hoodie.insert.shuffle.parallelism", 2)
      .option("hoodie.insert.shuffle.parallelism", 2)
      //Hudi表的属性设置
      .option(PRECOMBINE_FIELD.key(), "ts")
      .option(RECORDKEY_FIELD.key(), "uuid")
      .option(PARTITIONPATH_FIELD.key(), "partitionpath")
      .option(TBL_NAME.key(), table)
      .save(path)
  }

  def updateData(spark: SparkSession, table: String, path: String, dataGen: DataGenerator):Unit = {
    import spark.implicits._
    // 第1步、模拟乘车数据
    import org.apache.hudi.QuickstartUtils._
    //产生更新的数据
    val updates = convertToStringList(dataGen.generateUpdates(100))
    import scala.collection.JavaConverters._
    val updateDF: DataFrame = spark.read.json(
      spark.sparkContext.parallelize(updates.asScala, 2).toDS()
    )
    // TOOD: 第2步、插入数据到Hudi表
    import org.apache.hudi.DataSourceWriteOptions._
    import org.apache.hudi.config.HoodieWriteConfig._
    updateDF.write
      //追加模式
      .mode(SaveMode.Append)
      .format("hudi")
      .option("hoodie.insert.shuffle.parallelism", "2")
      .option("hoodie.upsert.shuffle.parallelism", "2")
      // Hudi 表的属性值设置
      .option(PRECOMBINE_FIELD.key(), "ts")
      .option(RECORDKEY_FIELD.key(), "uuid")
      .option(PARTITIONPATH_FIELD.key(), "partitionpath")
      .option(TBL_NAME.key(), table)
      .save(path)
  }

  def incrementalQueryData(spark: SparkSession, path: String): Unit = {
    import spark.implicits._
    // 第1步、加载Hudi表数据,获取commit time时间,作为增量查询数据阈值
    import org.apache.hudi.DataSourceReadOptions._
    spark.read
      .format("hudi")
      .load(path)
      .createOrReplaceTempView("view_temp_hudi_trips")
    val commits: Array[String] = spark
      .sql(
        """
				  |select
				  |  distinct(_hoodie_commit_time) as commitTime
				  |from
				  |  view_temp_hudi_trips
				  |order by
				  |  commitTime DESC
				  |""".stripMargin
      )
      .map(row => row.getString(0))
      .take(50)
    val beginTime = commits(commits.length - 1) // commit time we are interested in
    println(s"beginTime = ${beginTime}")
    // 第2步、设置Hudi数据CommitTime时间阈值,进行增量数据查询
    val tripsIncrementalDF = spark.read
      .format("hudi")
      // 设置查询数据模式为:incremental,增量读取
      .option(QUERY_TYPE.key(), QUERY_TYPE_INCREMENTAL_OPT_VAL)
      // 设置增量读取数据时开始时间
      .option(BEGIN_INSTANTTIME.key(), beginTime)
      .load(path)
    // 第3步、将增量查询数据注册为临时视图,查询费用大于20数据
    tripsIncrementalDF.createOrReplaceTempView("hudi_trips_incremental")
    spark
      .sql(
        """
				  |select
				  |  `_hoodie_commit_time`, fare, begin_lon, begin_lat, ts
				  |from
				  |  hudi_trips_incremental
				  |where
				  |  fare > 20.0
				  |""".stripMargin
      )
      .show(10, truncate = false)
  }

  def deleteData(spark: SparkSession, table: String, path: String): Unit = {
    import spark.implicits._
    // 第1步、加载Hudi表数据,获取条目数
    val tripsDF: DataFrame = spark.read.format("hudi").load(path)
    println(s"Raw Count = ${tripsDF.count()}")
    // 第2步、模拟要删除的数据,从Hudi中加载数据,获取几条数据,转换为要删除数据集合
    val dataframe = tripsDF.limit(2).select($"uuid", $"partitionpath")
    import org.apache.hudi.QuickstartUtils._
    val dataGenerator = new DataGenerator()
    val deletes = dataGenerator.generateDeletes(dataframe.collectAsList())
    import scala.collection.JavaConverters._
    val deleteDF = spark.read.json(spark.sparkContext.parallelize(deletes.asScala, 2))
    // 第3步、保存数据到Hudi表中,设置操作类型:DELETE
    import org.apache.hudi.DataSourceWriteOptions._
    import org.apache.hudi.config.HoodieWriteConfig._
    deleteDF.write
      .mode(SaveMode.Append)
      .format("hudi")
      .option("hoodie.insert.shuffle.parallelism", "2")
      .option("hoodie.upsert.shuffle.parallelism", "2")
      // 设置数据操作类型为delete,默认值为upsert
      .option(OPERATION.key(), "delete")
      .option(PRECOMBINE_FIELD.key(), "ts")
      .option(RECORDKEY_FIELD.key(), "uuid")
      .option(PARTITIONPATH_FIELD.key(), "partitionpath")
      .option(TBL_NAME.key(), table)
      .save(path)
    // 第4步、再次加载Hudi表数据,统计条目数,查看是否减少2条数据
    val hudiDF: DataFrame = spark.read.format("hudi").load(path)
    println(s"Delete After Count = ${hudiDF.count()}")
  }
  def main(args: Array[String]): Unit = {
    System.setProperty("HADOOP_USER_NAME","hty")
    //创建SparkSession示例对象,设置属性
    val spark: SparkSession = {
      SparkSession.builder()
        .appName(this.getClass.getSimpleName.stripSuffix("$"))
        .master("local[2]")
        // 设置序列化方式:Kryo
        .config("spark.serializer", "org.apache.spark.serializer.KryoSerializer")
        .getOrCreate()
    }
    //定义变量:表名称、保存路径
    val tableName: String = "tbl_trips_cow"
    val tablePath: String = "/hudi_warehouse/tbl_trips_cow"
    //构建数据生成器,模拟产生业务数据
    import org.apache.hudi.QuickstartUtils._
    //任务一:模拟数据,插入Hudi表,采用COW模式
    //insertData(spark, tableName, tablePath)
     //任务二:快照方式查询(Snapshot Query)数据,采用DSL方式
      //queryData(spark, tablePath)
    //queryDataByTime(spark, tablePath)
    // 任务三:更新(Update)数据,第1步、模拟产生数据,第2步、模拟产生数据,针对第1步数据字段值更新,
    // 第3步、将数据更新到Hudi表中
    val dataGen: DataGenerator = new DataGenerator()
    //insertData(spark, tableName, tablePath, dataGen)
    //updateData(spark, tableName, tablePath, dataGen)
    //任务四:增量查询(Incremental Query)数据,采用SQL方式
    //incrementalQueryData(spark, tablePath)
    //任务五:删除(Delete)数据
    deleteData(spark, tableName,tablePath)
    //应用结束,关闭资源
    spark.stop()
  }
}执行 insertData(spark, tableName, tablePath) 方法后对其用快照查询的方式进行查询:
queryData(spark, tablePath)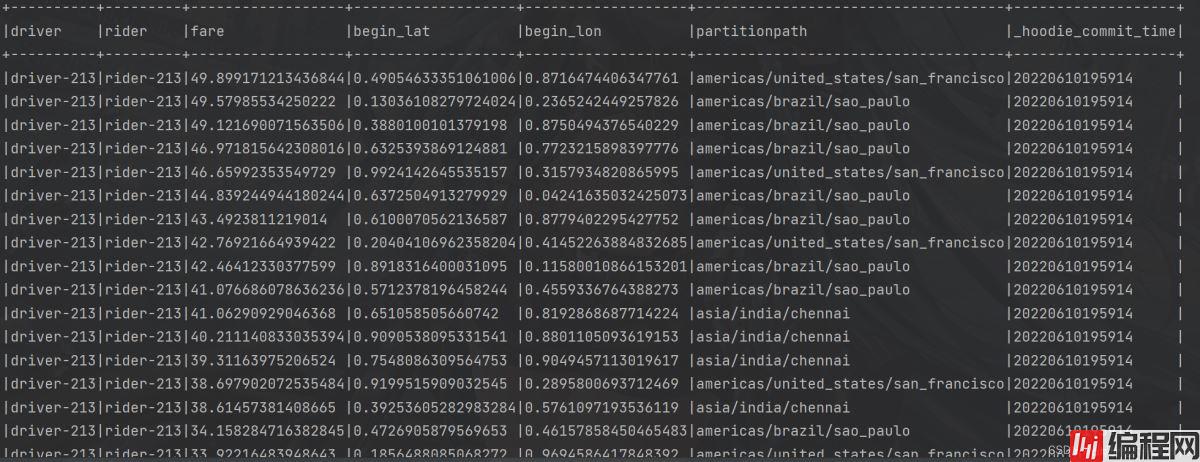
增量查询(Incremental Query)数据:
incrementalQueryData(spark, tablePath)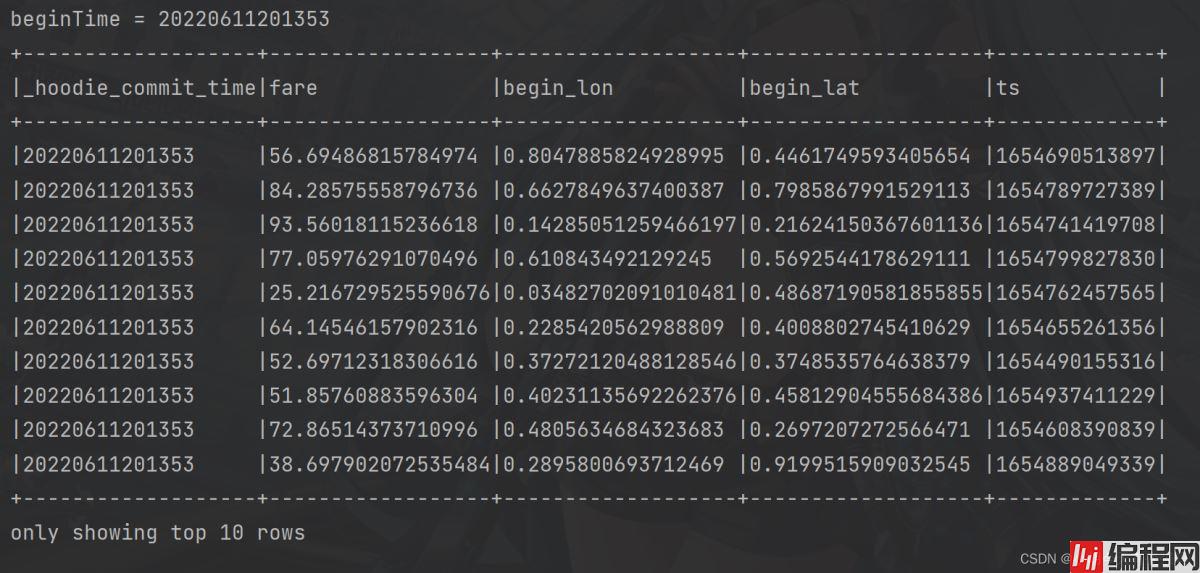
https://www.bilibili.com/video/BV1sb4y1n7hK?p=21&vd_source=e21134e00867aeadc3c6b37bb38b9eee
到此这篇关于idea 中使用 Hudi的文章就介绍到这了,更多相关IDEA 使用 Hudi内容请搜索编程网以前的文章或继续浏览下面的相关文章希望大家以后多多支持编程网!
--结束END--
本文标题: IDEA 中使用 Hudi的示例代码
本文链接: https://www.lsjlt.com/news/151300.html(转载时请注明来源链接)
有问题或投稿请发送至: 邮箱/279061341@qq.com QQ/279061341
下载Word文档到电脑,方便收藏和打印~
2024-03-01
2024-03-01
2024-03-01
2024-02-29
2024-02-29
2024-02-29
2024-02-29
2024-02-29
2024-02-29
2024-02-29
回答
回答
回答
回答
回答
回答
回答
回答
回答
回答


官方手机版

微信公众号

商务合作


0