首先原文是用了3 个服务器,我是用了一个服务器; 然后再原文的基础上,稍加了自己的整理。 前提: Redis中,主从切换场景中,没有绝对的主和从,只有初始化的主和从,然后当主down
首先原文是用了3 个服务器,我是用了一个服务器;
然后再原文的基础上,稍加了自己的整理。
前提:
Redis中,主从切换场景中,没有绝对的主和从,只有初始化的主和从,然后当主down后,从就变成主了,而主即使连接上,也是从,不会变为主
master : redis-1
slave1 : redis-2
slave3 : redis-3

修改从服务 redis-1 redis-2 的redis.conf
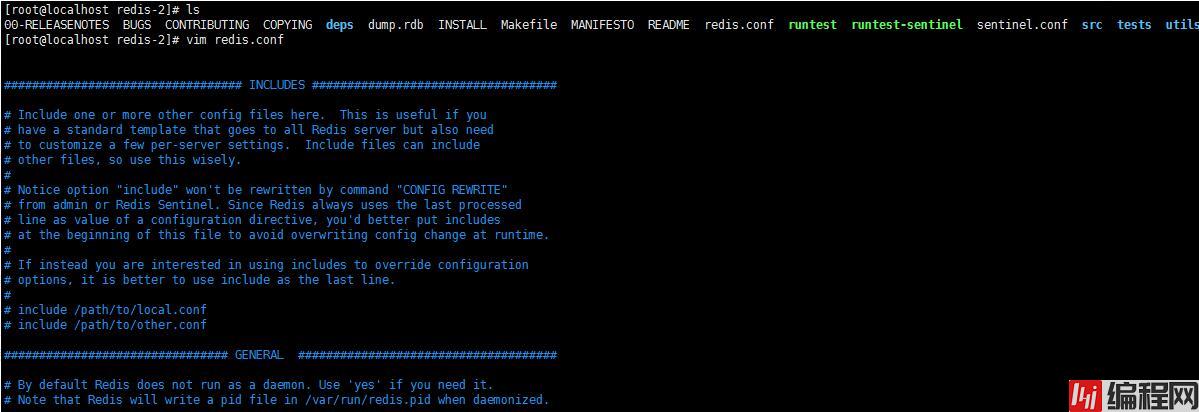

在从服务上 修改redis.conf 加入 slaveof 127.0.0.1 6379
主从备份: 这里设置成功之后,会进行主服务进行set之后,可在从服务进行get key ,可是一旦主服务宕机,从服务无法再进行set key
三个服务器都修改 sentinel-test.conf
加入
sentinel monitor MyMaster 127.0.0.1 6381 1
sentinel down-after-milliseconds MyMaster 5000
sentinel failover-timeout MyMaster 900000
sentinel parallel-syncs MyMaster 2
第一行配置指示 Sentinel 去监视一个名为 mymaster 的主服务器, 这个主服务器的 IP 地址为 127.0.0.1 , 端口号为 6379 , 而将这个主服务器判断为失效至少需要 2 个 Sentinel 同意 (只要同意 Sentinel 的数量不达标,自动故障迁移就不会执行)。
第二行down-after-milliseconds 选项指定了 Sentinel 认为服务器已经断线所需的毫秒数。
如果服务器在给定的毫秒数之内, 没有返回 Sentinel 发送的 PING 命令的回复, 或者返回一个错误, 那么 Sentinel 将这个服务器标记为主观下线(subjectively down,简称 SDOWN )。
不过只有一个 Sentinel 将服务器标记为主观下线并不一定会引起服务器的自动故障迁移: 只有在足够数量的 Sentinel 都将一个服务器标记为主观下线之后, 服务器才会被标记为客观下线(objectively down, 简称 ODOWN ), 这时自动故障迁移才会执行。
将服务器标记为客观下线所需的 Sentinel 数量由对主服务器的配置决定。
第三行暂时不知道是什么意思;
第四行 parallel-syncs 选项指定了在执行故障转移时, 最多可以有多少个从服务器同时对新的主服务器进行同步, 这个数字越小, 完成故障转移所需的时间就越长。
如果从服务器被设置为允许使用过期数据集(参见对 redis.conf 文件中对 slave-serve-stale-data 选项的说明), 那么你可能不希望所有从服务器都在同一时间向新的主服务器发送同步请求, 因为尽管复制过程的绝大部分步骤都不会阻塞从服务器, 但从服务器在载入主服务器发来的 RDB 文件时, 仍然会造成从服务器在一段时间内不能处理命令请求: 如果全部从服务器一起对新的主服务器进行同步, 那么就可能会造成所有从服务器在短时间内全部不可用的情况出现。
你可以通过将这个值设为 1 来保证每次只有一个从服务器处于不能处理命令请求的状态。
  启动redis-server
    # ./src/redis-server redis.conf
    启动redis-sentinel
    # ./src/redis-sentinelsentinel-test.conf
注意: 三台服务器都是这么启动的哦!~
补充:Redis CLuster主备切换、故障转移测试
redis版本5.0.5
1.下线一个从节点,此时它的主节点打印的日志

集群状态

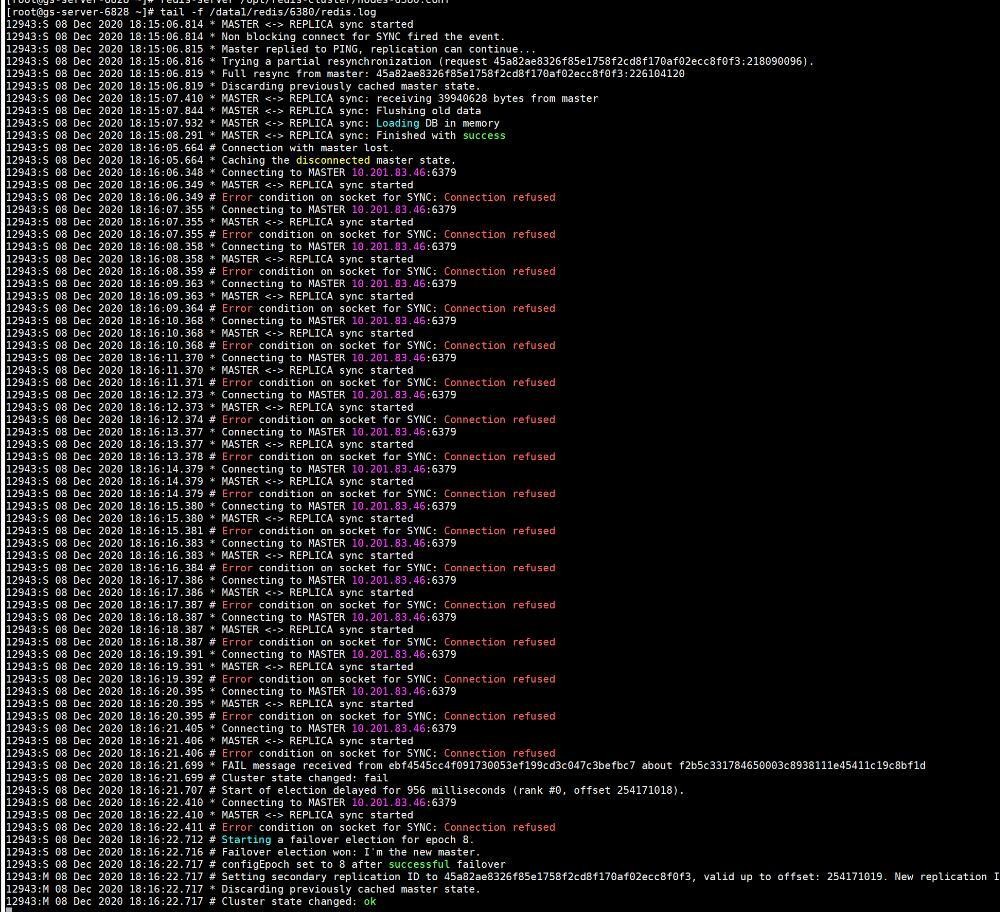
2.下线一台主节点,此时它的从节点打印的日志
集群状态


可以看到六个节点都是可用状态,其中83.46的6379是81.64上的6380的从节点,计划Kill掉81.64上的6380主节点,然后观察83.46的6379节点日志
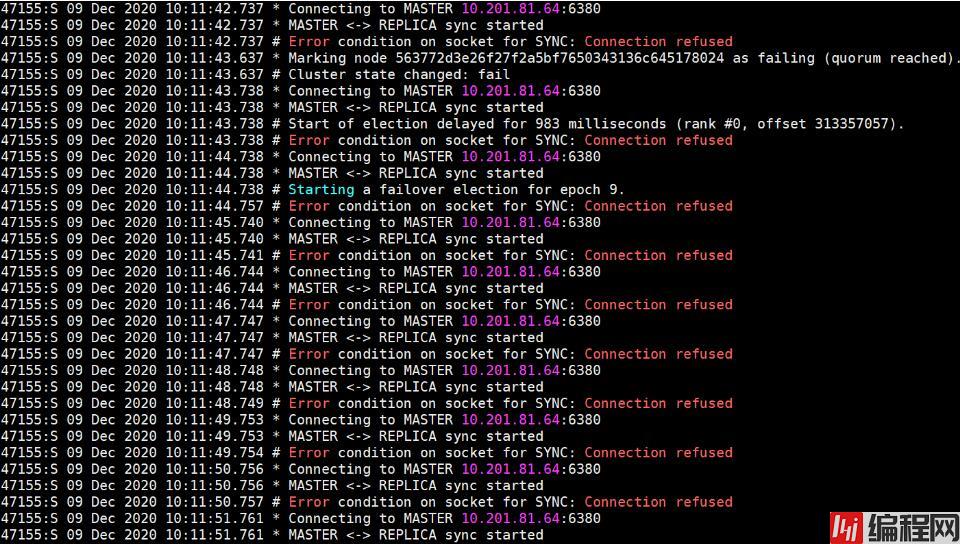
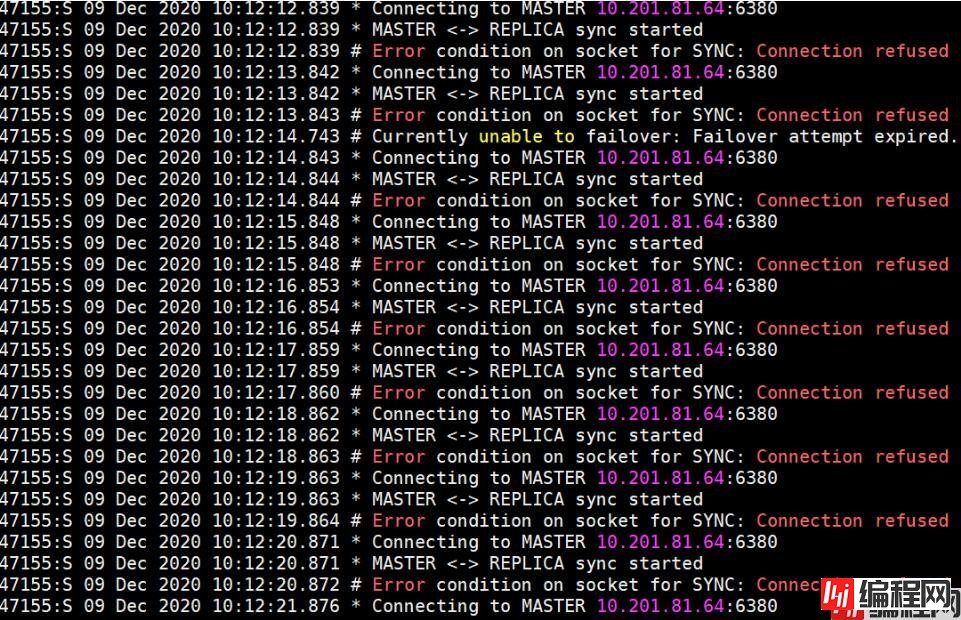
10:11:25:kill掉81.64上的6380,可以看到其从节点很快提示连接主节点失败,并且开始一秒钟一次的重连操作

此时查看集群的节点状态如下,可以看到槽 5461-10922在这个主节点上,此时整个reidis集群处于不可用状态

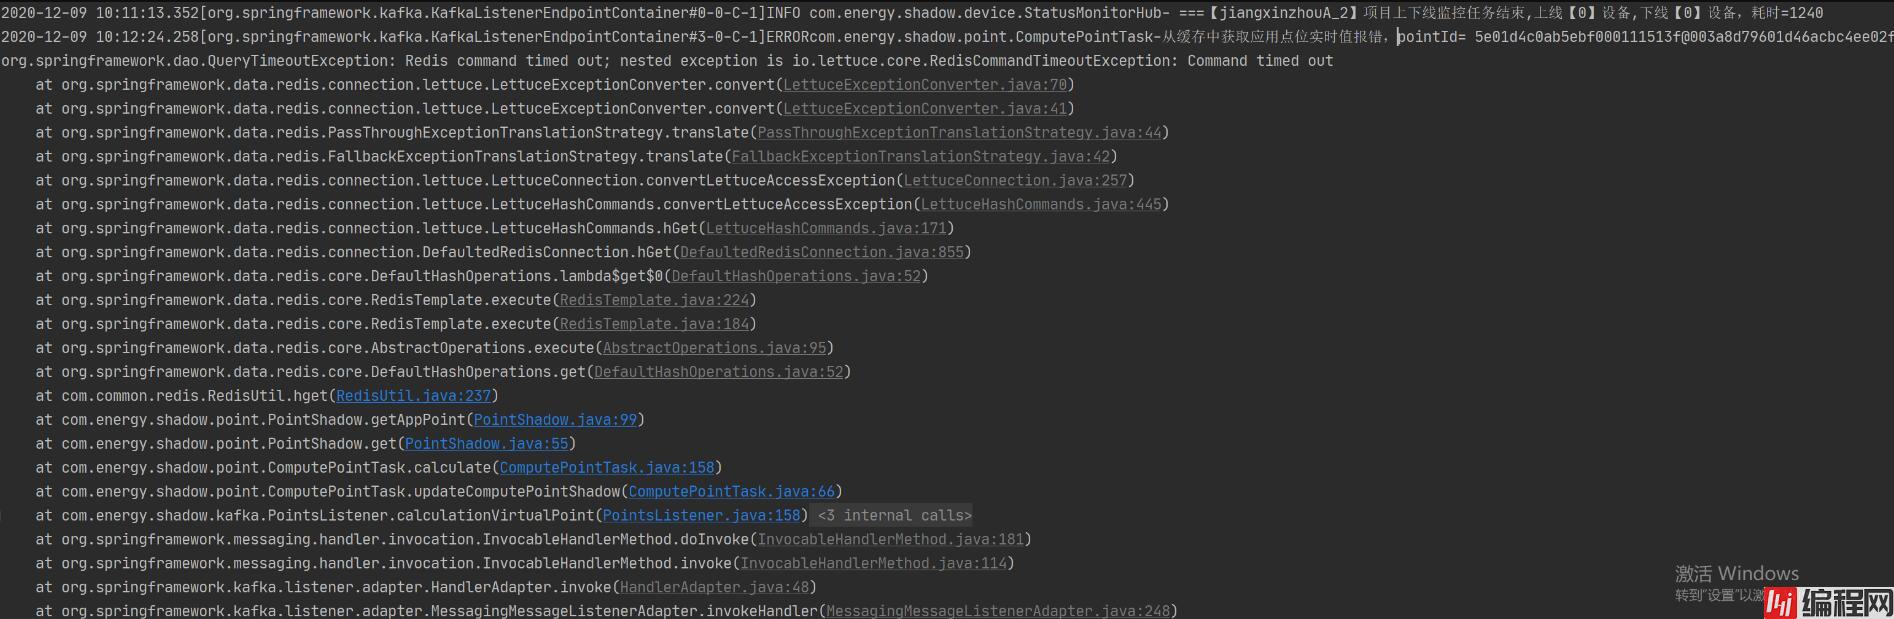
10:12:24:应用程序报错,redis操作超时
10:11:43 :在重连17次失败次数之后,从节点将主节点标记为失败,并且整个集群的状态切换为不可用,之后不甘心,又去尝试连接主节点
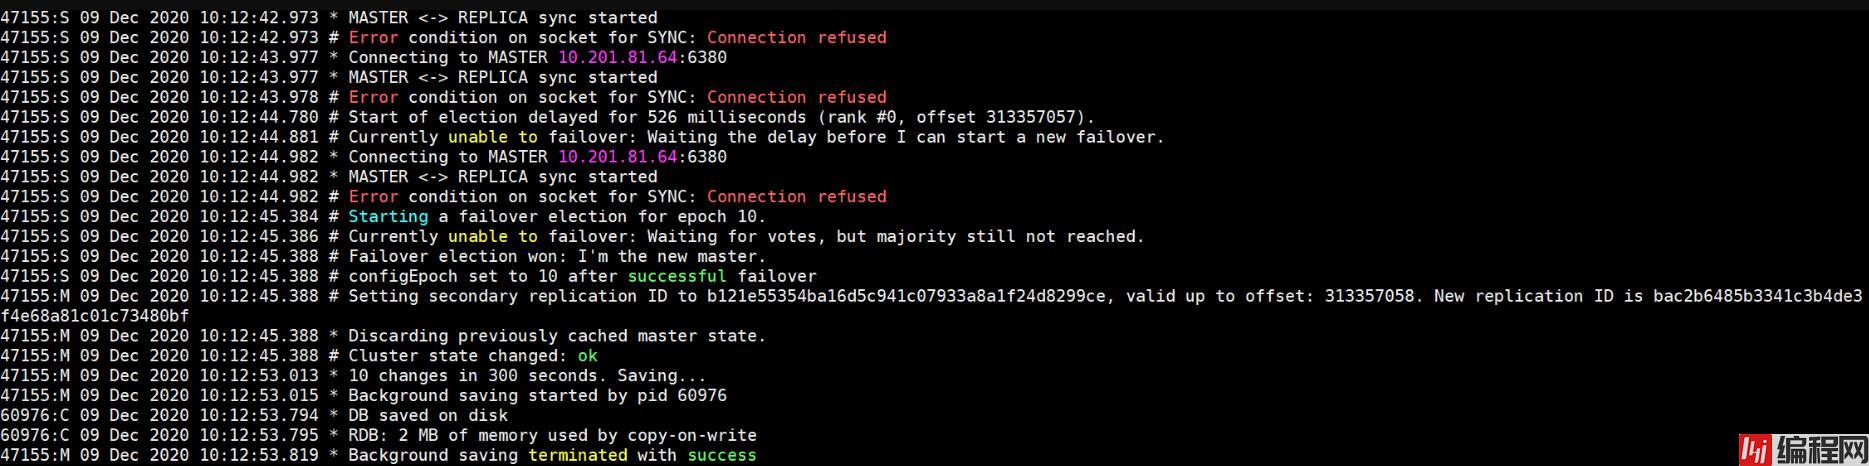
10:12:03:在重连20次失败后,从节点打印日志,等待投票选举,但是没有达到多数赞成,于是继续重连之前的主节点

10:12:14:提示选举失败,选举过期,又继续重连
10:12:45:选举成功胜出,成为了新的主节点,整个集群的状态变为可用
10:13:39:大概一分钟之后,redis客户端自动刷新了集群配置,成功连接上redis集群,此时主备切换和故障转移完成

redis master宕机之后,会出现应用程序连接不上redis cluster的问题,需要重启服务才能解决
排查原因之后发现是Spring Boot 2.x版本默认使用了lettuce作为redis客户端,而lettuce默认是不开启自动刷新集群拓扑的,当redis master宕机并且集群完成故障转移/主从切换之后,客户端使用的还是之前错误的集群信息,就会导致应用程序一直连接不上redis集群。解决方案就是修改redis客户端配置,开启开启自适应刷新拓扑
spring.redis.cluster.nodes=${redis.nodes}
spring.redis.passWord=${redis.pass}
spring.redis.timeout=60000
# 最大重定向次数
spring.redis.cluster.max-redirects=3
spring.redis.lettuce.pool.max-active=64
spring.redis.lettuce.pool.max-idle=16
spring.redis.lettuce.pool.min-idle=0
spring.redis.lettuce.pool.max-wait=60000ms
spring.redis.lettuce.shutdown-timeout=100ms
import com.fasterxml.jackson.annotation.JSONAutoDetect;
import com.fasterxml.jackson.annotation.PropertyAccessor;
import com.fasterxml.jackson.databind.ObjectMapper;
import io.lettuce.core.cluster.ClusterClientOptions;
import io.lettuce.core.cluster.ClusterTopologyRefreshOptions;
import org.apache.commons.pool2.impl.GenericObjectPoolConfig;
import org.springframework.beans.factory.annotation.Autowired;
import org.springframework.boot.autoconfigure.data.redis.RedisProperties;
import org.springframework.context.annotation.Bean;
import org.springframework.context.annotation.Configuration;
import org.springframework.data.redis.connection.RedisClusterConfiguration;
import org.springframework.data.redis.connection.RedisConnectionFactory;
import org.springframework.data.redis.connection.RedisNode;
import org.springframework.data.redis.connection.RedisPassword;
import org.springframework.data.redis.connection.lettuce.LettuceClientConfiguration;
import org.springframework.data.redis.connection.lettuce.LettuceConnectionFactory;
import org.springframework.data.redis.connection.lettuce.LettucePoolinGClientConfiguration;
import org.springframework.data.redis.core.RedisTemplate;
import org.springframework.data.redis.serializer.Jackson2jsonRedisSerializer;
import org.springframework.data.redis.serializer.StringRedisSerializer;
import java.time.Duration;
import java.util.HashSet;
import java.util.List;
import java.util.Set;
@Configuration
public class RedisConfig {
    @Autowired
    private RedisProperties redisProperties;
    @Bean
    @SuppressWarnings("all")
    public RedisTemplate<String, Object> redisTemplate(RedisConnectionFactory factory) {
        RedisTemplate<String, Object> template = new RedisTemplate<String, Object>();
        template.setConnectionFactory(factory);
        Jackson2JsonRedisSerializer jackson2JsonRedisSerializer = new Jackson2JsonRedisSerializer(Object.class);
        ObjectMapper om = new ObjectMapper();
        om.setVisibility(PropertyAccessor.ALL, JsonAutoDetect.Visibility.ANY);
        om.enableDefaultTyping(ObjectMapper.DefaultTyping.NON_FINAL);
        jackson2JsonRedisSerializer.setObjectMapper(om);
        StringRedisSerializer stringRedisSerializer = new StringRedisSerializer();
        // key采用String的序列化方式
        template.seTKEySerializer(stringRedisSerializer);
        // hash的key也采用String的序列化方式
        template.setHashKeySerializer(stringRedisSerializer);
        // value序列化方式采用jackson
        template.setValueSerializer(jackson2JsonRedisSerializer);
        // hash的value序列化方式采用jackson
        template.setHashValueSerializer(jackson2JsonRedisSerializer);
        template.afterPropertiesSet();
        return template;
    }

    @Bean(destroyMethod = "destroy")
    public LettuceConnectionFactory lettuceConnectionFactory() {
        List<String> clusterNodes = redisProperties.getCluster().getNodes();
        Set<RedisNode> nodes = new HashSet<>();
        clusterNodes.forEach(address -> nodes.add(new RedisNode(address.split(":")[0].trim(), Integer.parseInt(address.split(":")[1]))));
        RedisClusterConfiguration clusterConfiguration = new RedisClusterConfiguration();
        clusterConfiguration.setClusterNodes(nodes);
        clusterConfiguration.setPassword(RedisPassword.of(redisProperties.getPassword()));
        clusterConfiguration.setMaxRedirects(redisProperties.getCluster().getMaxRedirects());
        GenericObjectPoolConfig poolConfig = new GenericObjectPoolConfig();
        poolConfig.setMaxIdle(redisProperties.getLettuce().getPool().getMaxIdle());
        poolConfig.setMinIdle(redisProperties.getLettuce().getPool().getMinIdle());
        poolConfig.setMaxTotal(redisProperties.getLettuce().getPool().getMaxActive());
        return new LettuceConnectionFactory(clusterConfiguration, getLettuceClientConfiguration(poolConfig));
    }

    private LettuceClientConfiguration getLettuceClientConfiguration(GenericObjectPoolConfig genericObjectPoolConfig) {

        ClusterTopologyRefreshOptions topologyRefreshOptions = ClusterTopologyRefreshOptions.builder()
                //开启自适应刷新
                //.enableAdaptiveRefreshTrigger(ClusterTopologyRefreshOptions.RefreshTrigger.MOVED_REDIRECT, ClusterTopologyRefreshOptions.RefreshTrigger.PERSISTENT_RECONNECTS)
                //开启所有自适应刷新,MOVED,ASK,PERSISTENT都会触发
                .enableAllAdaptiveRefreshTriggers()
                // 自适应刷新超时时间(默认30秒)
                .adaptiveRefreshTriggersTimeout(Duration.ofSeconds(25)) //默认关闭开启后时间为30秒
                // 开周期刷新
                .enablePeriodicRefresh(Duration.ofSeconds(20))  // 默认关闭开启后时间为60秒 ClusterTopologyRefreshOptions.DEFAULT_REFRESH_PERIOD 60  .enablePeriodicRefresh(Duration.ofSeconds(2)) = .enablePeriodicRefresh().refreshPeriod(Duration.ofSeconds(2))
                .build();
        return LettucePoolingClientConfiguration.builder()
                .poolConfig(genericObjectPoolConfig)
                .clientOptions(ClusterClientOptions.builder().topologyRefreshOptions(topologyRefreshOptions).build())
                .build();
    }
}
以上为个人经验,希望能给大家一个参考,也希望大家多多支持编程网。如有错误或未考虑完全的地方,望不吝赐教。
--结束END--
本文标题: redis 主从备份及其主备切换的操作
本文链接: https://www.lsjlt.com/news/154311.html(转载时请注明来源链接)
有问题或投稿请发送至: 邮箱/279061341@qq.com QQ/279061341
下载Word文档到电脑,方便收藏和打印~
2024-03-01
2024-03-01
2024-02-29
2024-02-29
2024-02-29
2024-02-29
2024-02-29
2024-02-29
2024-02-29
2024-02-29
回答
回答
回答
回答
回答
回答
回答
回答
回答
回答


官方手机版

微信公众号

商务合作


0