Python 官方文档:入门教程 => 点击学习
目录SpringBoot应用启动run方法springApplication.java 中执行的代码ServletWEBServerApplicationContext.java执行
@SpringBootApplication
@EnableAsync //使用异步注解@Async 需要在这里加上@EnableAsync
@MapperScan("springboot.dao") //不可或缺作用是扫描dao包下面的所有mapper装配
public class HelloApplication {
    public static void main(String[] args) {
        SpringApplication.run(HelloApplication.class,args);
    }
}
    public static ConfigurableApplicationContext run(Class<?> primarySource, String... args) {
        return run(new Class[]{primarySource}, args);
    }
    public static ConfigurableApplicationContext run(Class<?>[] primarySources, String[] args) {
        return (new SpringApplication(primarySources)).run(args);
    }
 private void refreshContext(ConfigurableApplicationContext context) {
        this.refresh(context);
        if (this.reGISterShutdownHook) {
            try {
                context.registerShutdownHook();
            } catch (AccessControlException var3) {
            }
        }
    protected void refresh(ApplicationContext applicationContext) {
        Assert.isInstanceOf(AbstractApplicationContext.class, applicationContext);
        ((AbstractApplicationContext)applicationContext).refresh();
    }
    public final void refresh() throws BeansException, IllegalStateException {
        try {
            super.refresh();
        } catch (RuntimeException var2) {
            this.stopAndReleaseWebServer();
            throw var2;
        }
    }
    protected void onRefresh() {
        super.onRefresh();
        try {
            this.createWebServer();
        } catch (Throwable var2) {
            throw new ApplicationContextException("Unable to start web server", var2);
        }
    }
 private void createWebServer() {
        WebServer webServer = this.webServer;
        ServletContext servletContext = this.getServletContext();
        if (webServer == null && servletContext == null) {
            ServletWebServerFactory factory = this.getWebServerFactory();
            this.webServer = factory.getWebServer(new ServletContextInitializer[]{this.getSelfInitializer()});
        } else if (servletContext != null) {
            try {
                this.getSelfInitializer().onStartup(servletContext);
            } catch (ServletException var4) {
                throw new ApplicationContextException("Cannot initialize servlet context", var4);
            }
        }
        this.initPropertySources();
    }
    protected ServletWebServerFactory getWebServerFactory() {
        String[] beanNames = this.getBeanFactory().getBeanNamesForType(ServletWebServerFactory.class);
        if (beanNames.length == 0) {
            throw new ApplicationContextException("Unable to start ServletWebServerApplicationContext due to missing ServletWebServerFactory bean.");
        } else if (beanNames.length > 1) {
            throw new ApplicationContextException("Unable to start ServletWebServerApplicationContext due to multiple ServletWebServerFactory beans : " + StringUtils.arrayToCommaDelimitedString(beanNames));
        } else {
            return (ServletWebServerFactory)this.getBeanFactory().getBean(beanNames[0], ServletWebServerFactory.class);
        }
    }
    //配置嵌入式的servlet容器
    @Bean
    public WebServerFactoryCustomizer<ConfigurableWebServerFactory> MyCustomizer(){
        return new WebServerFactoryCustomizer<ConfigurableWebServerFactory>() {
            @Override
            public void customize(ConfigurableWebServerFactory factory) {
                factory.setPort(8081);
            }
        };
    }
Spring Boot 2.x 版本的嵌入式Servlet容器自动配置是通过 WebServerFactoryCustomizer定制器 来定制的,而在Spring Boot 1.x 版本中我们是通过 EmbeddedServletContainerCustomizer 嵌入式的Servlet容器定制器来定制的。由于之前看的资料都是1.x的版本,但是我使用的是2.x,所以在这里记录一下2.x版本的嵌入式Servlet容器自动配置原理以及启动原理。
嵌入式Servlet容器自动配置原理以及启动原理有三大步:
步骤:
1、首先找到 EmbeddedWebServerFactoryCustomizerAutoConfiguration ,在里面我们可以看到SpringBoot支持的 servlet容器
//SprinBoot支持的servlet容器有三个Tomcat、Jetty、Undertow,但是默认配置的是Tomcat


//嵌入式的Undertow
    @Configuration(
        proxyBeanMethods = false
    )
    @ConditionalOnClass({Undertow.class, SslClientAuthMode.class})
    public static class UndertowWebServerFactoryCustomizerConfiguration {
        public UndertowWebServerFactoryCustomizerConfiguration() {
        }

        @Bean
        public UndertowWebServerFactoryCustomizer undertowWebServerFactoryCustomizer(Environment environment, ServerProperties serverProperties) {
            return new UndertowWebServerFactoryCustomizer(environment, serverProperties);
        }
    }


//嵌入式的Jetty
    @Configuration(
        proxyBeanMethods = false
    )
    @ConditionalOnClass({Server.class, Loader.class, WebAppContext.class})
    public static class JettyWebServerFactoryCustomizerConfiguration {
        public JettyWebServerFactoryCustomizerConfiguration() {
        }

        @Bean
        public JettyWebServerFactoryCustomizer jettyWebServerFactoryCustomizer(Environment environment, ServerProperties serverProperties) {
            return new JettyWebServerFactoryCustomizer(environment, serverProperties);
        }
    }

//嵌入式的Tomcat
    @Configuration(
        proxyBeanMethods = false
    )
    @ConditionalOnClass({Tomcat.class, UpgradeProtocol.class})
    public static class TomcatWebServerFactoryCustomizerConfiguration {
        public TomcatWebServerFactoryCustomizerConfiguration() {
        }

        @Bean
        public TomcatWebServerFactoryCustomizer tomcatWebServerFactoryCustomizer(Environment environment, ServerProperties serverProperties) {
            return new TomcatWebServerFactoryCustomizer(environment, serverProperties);
        }
    }
2、准备环节
1)在以下位置打一个断点
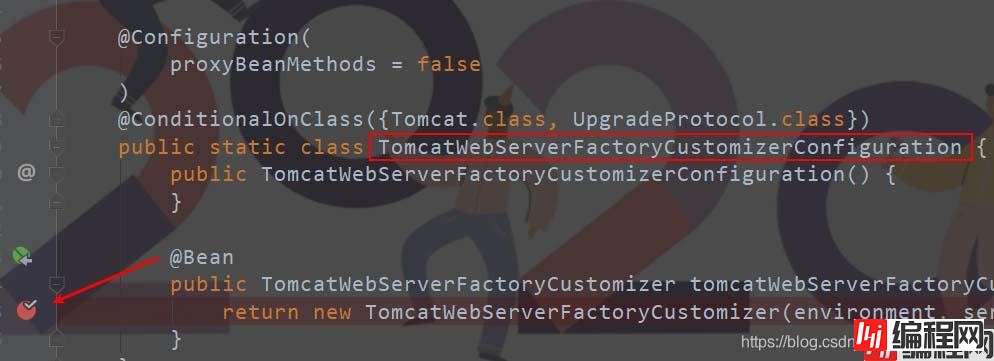
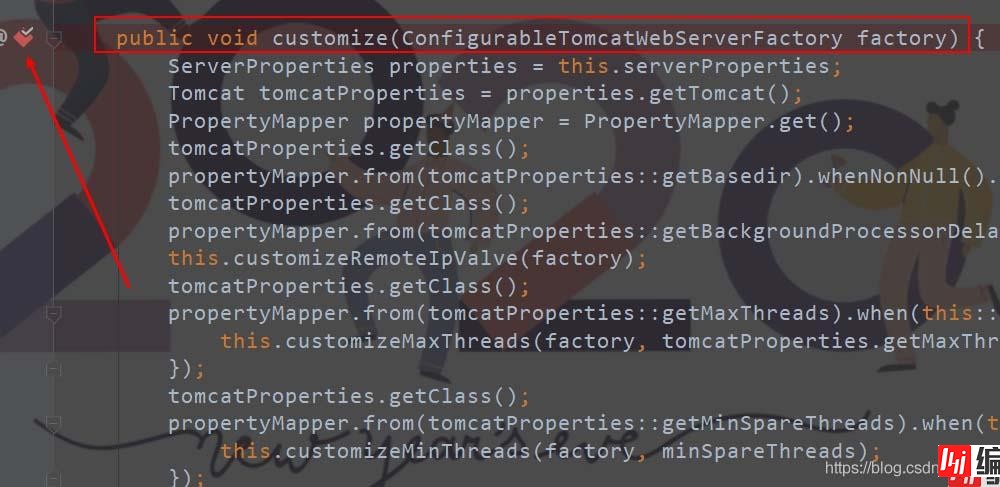
2)、点进 TomcatWebServerFactoryCustomizer 也就是上图 return 的,然后在里面的如下位置打一个断点
3)、然后在里面debug程序,我们在控制台就可以看到如下信息

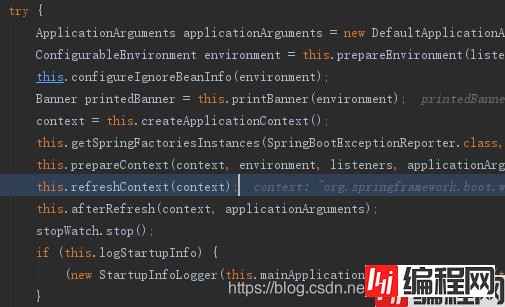
3、按照上图从下往上分析。我们启动springboot应用时,都是直接运行主程序的main方法,然后调用里面的run方法,如下图

4、调用完run方法,回来到 refreshContext 方法,这个方法是帮我们创建IOC容器对象,并且初始化容器,创建容器中的每一个组件

5、在调用了 reflesh 方法刷新刚才的ioc容器后,来到 onreflesh 方法,调用createWebServer()方法,创建WebServer
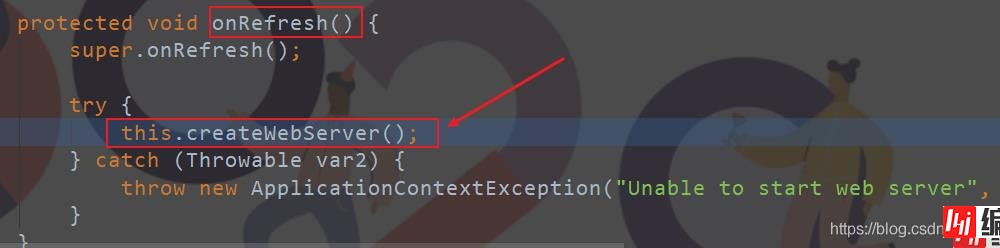
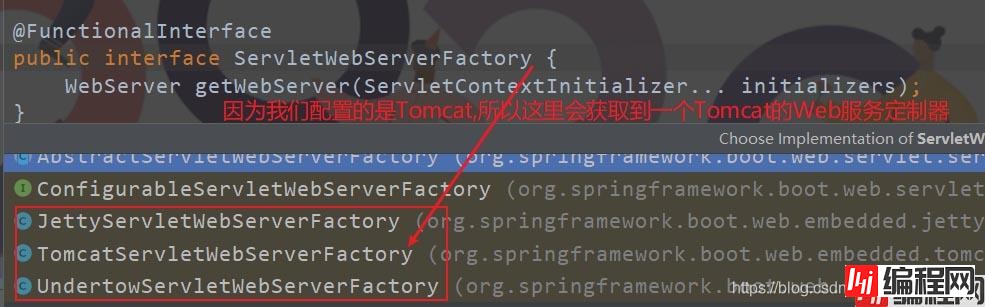
6、来到createWebServer()方法,该方法最终能够获取到一个与当前应用(也就是总结里说的第一步,根据我们导入的依赖来获取)所导入的Servlet类型相匹配的web服务工厂,通过工厂就可以获取到相应的 WebServerFactoryCustomizer (Web服务工厂定制器)
注:createWebServer()执行后,我们其实来到了 EmbeddedWebServerFactoryCustomizerAutoConfiguration,然后根据条件(配置的依赖)配置哪一个Web服务器

我们通过查看 ServletWebServerFactory 的子类,可以看到其中三个就是Tomcat、Jetty和Undertow,根据我们的配置,所以这里获取到的是 TomcatWebServerFactoryCustomizer
至此,TomcatWebServerFactoryCustomizer组件创建完成,对应的服务配置类也已添加到IOC容器。
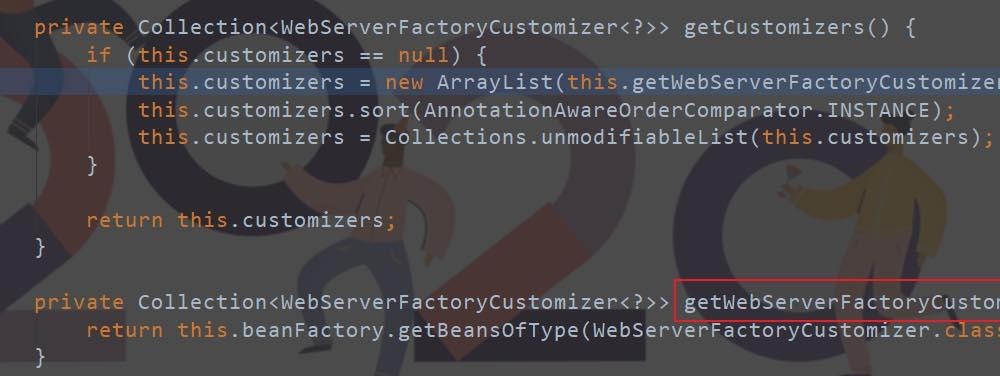
7、因为容器中某个组件要创建对象就会惊动后置处理器 然后就到 WebServerFactoryCustomizerBeanPostProcessor(web服务工厂定制器组件的后置处理器),该类负责在bean组件初始化之前执行初始化工作。它先从IOC容器中获取所有类型为WebServerFactoryCustomizerBeans(web服务工厂定制器的组件)
通过后置处理器获取到的TomcatWebServerFactoryCustomizer调用customize()定制方法,获取到Servlet容器相关配置类ServerProperties,进行自动配置
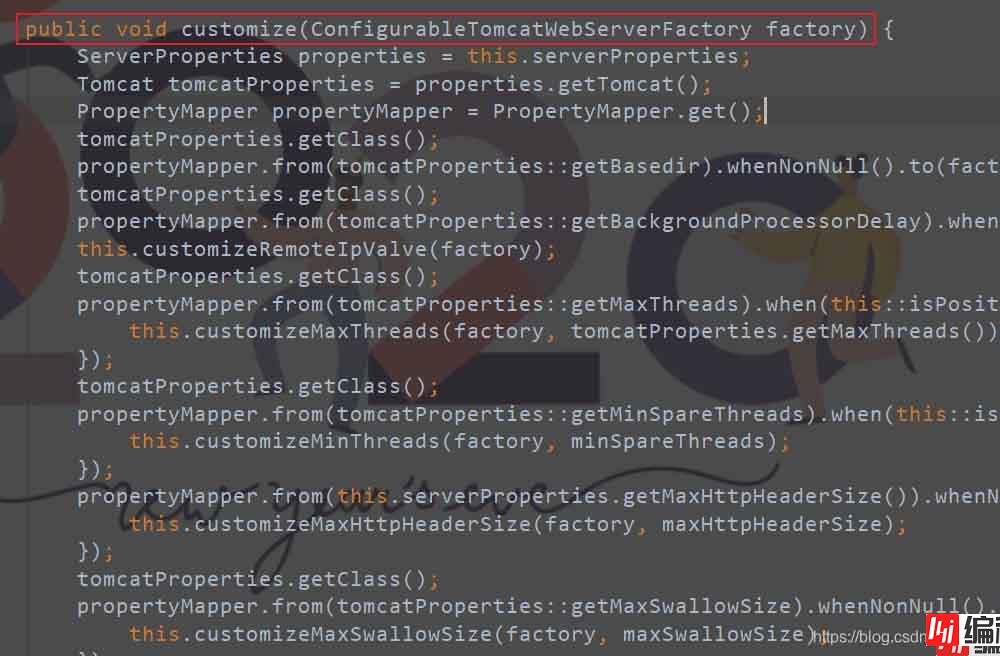
至此,嵌入式Servlet容器的自动配置完成。
注:从源码分析可以得出配置嵌入式Servlet容器的两种解决方案:
1、在全局配置文件中,通过server.xxx来修改和server有关的配置:
server.port=8081
server.tomcat.xxx...
2、实现WebServerFactoryCustomizer接口,重写它的customize()方法,对容器进行定制配置:
@FunctionalInterface
public interface WebServerFactoryCustomizer<T extends WebServerFactory> {
    void customize(T factory);
}1、应用启动后,根据导入的依赖信息,创建了相应的Servlet容器工厂,创建了TomcatServletWebServerFactory,调用getWebServer()方法创建Tomcat容器:(其实就是重写了ServletWebServerFactory里面的getWebServer方法)
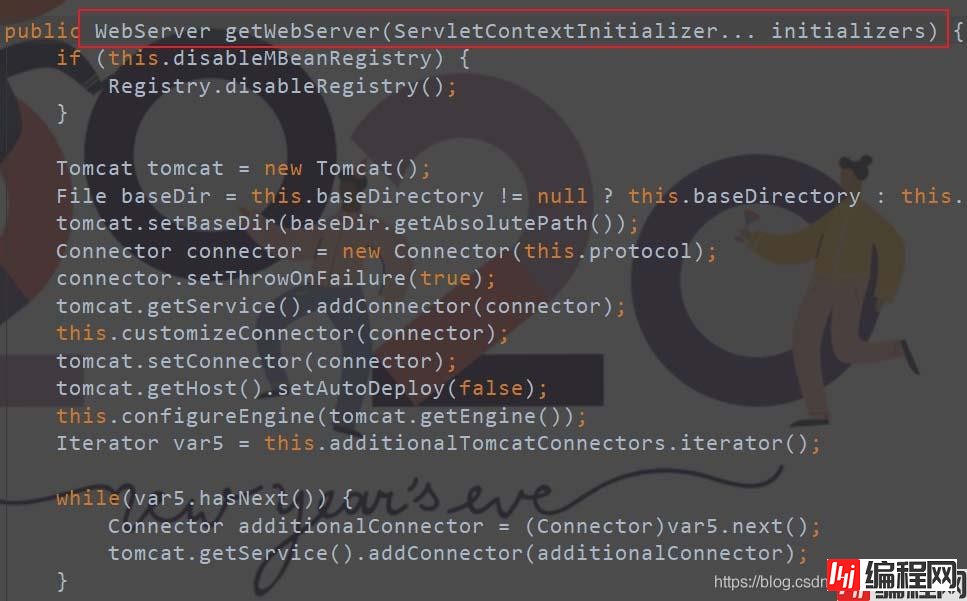
找到下面的getTomcatWebServer方法

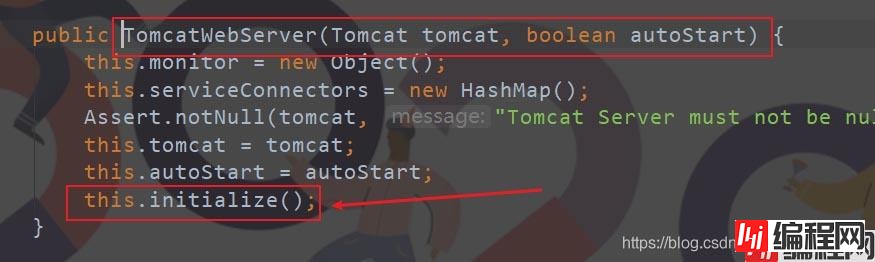
2、然后点进去分析TomcatWebServer的有参构造器,执行 initialize() 方法
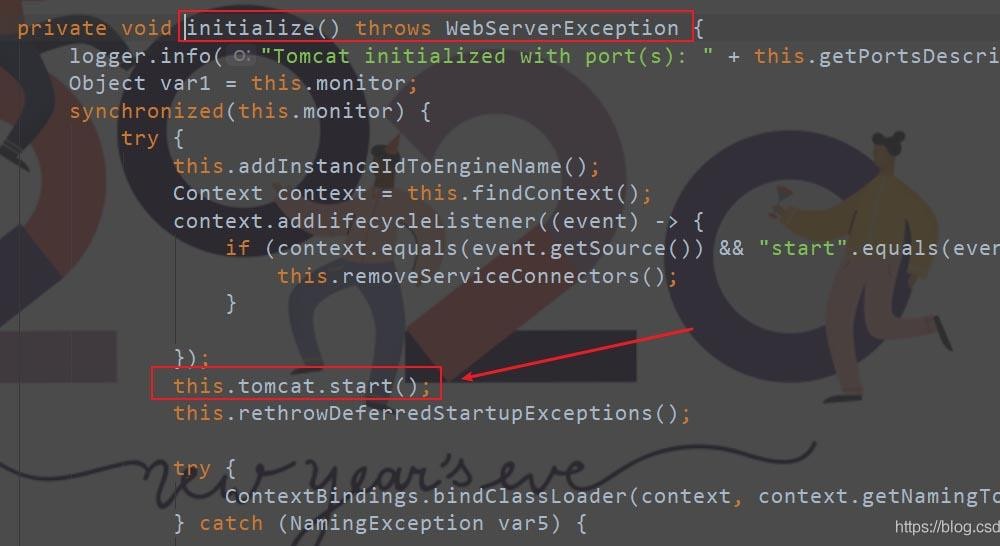
3、点进去就可以发现,里面通过调用start方法来启动Tomcat
以上为个人经验,希望能给大家一个参考,也希望大家多多支持编程网。
--结束END--
本文标题: SpringBoot 嵌入式web容器的启动原理详解
本文链接: https://www.lsjlt.com/news/156791.html(转载时请注明来源链接)
有问题或投稿请发送至: 邮箱/279061341@qq.com QQ/279061341
下载Word文档到电脑,方便收藏和打印~
2024-03-01
2024-03-01
2024-03-01
2024-02-29
2024-02-29
2024-02-29
2024-02-29
2024-02-29
2024-02-29
2024-02-29
回答
回答
回答
回答
回答
回答
回答
回答
回答
回答


官方手机版

微信公众号

商务合作


0