Python 官方文档:入门教程 => 点击学习
目录概述事件监听的结构Publisher,Event和Listener的关系事件发布者监听者总结概述 ApplicationEvent以及Listener是spring为我们提供的
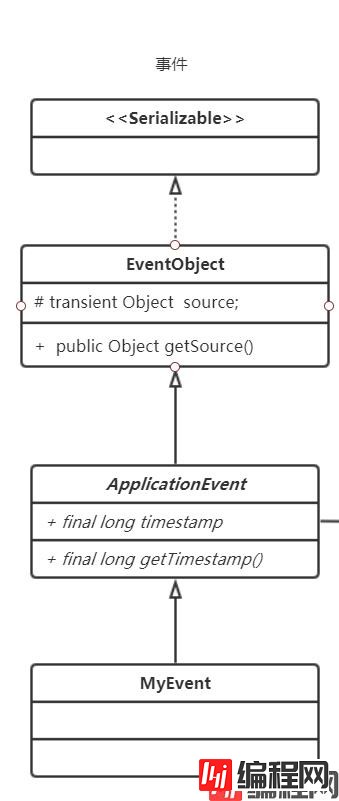
ApplicationEvent以及Listener是spring为我们提供的一个事件监听、订阅的实现,内部实现原理是观察者设计模式,设计初衷也是为了系统业务逻辑之间的解耦,提高可扩展性以及可维护性。事件发布者并不需要考虑谁去监听,监听具体的实现内容是什么,发布者的工作只是为了发布事件而已。事件监听的作用与消息队列有一点类似。

主要有三个部分组成:


我们自定义事件MyTestEvent继承了ApplicationEvent,继承后必须重载构造函数,构造函数的参数可以任意指定,其中source参数指的是发生事件的对象,一般我们在发布事件时使用的是this关键字代替本类对象,而user参数是我们自定义的注册用户对象,该对象可以在监听内被获取。
@Getter
public class MyTestEvent extends ApplicationEvent {
    private static final long serialVersionUID = 1L;
    private User user;

    public MyTestEvent(Object source, User user) {
        super(source);
        this.user = user;
    }
}
事件发布是由ApplicationContext对象管控的,我们发布事件前需要注入ApplicationContext对象调用publishEvent方法完成事件发布。
ApplicationEventPublisher applicationEventPublisher 虽然声明的是ApplicationEventPublisher,但是实际注入的是applicationContext
@RestController
@RequestMapping("/test")
public class TestController {
    @Autowired
    ApplicationContext applicationContext;
    @Autowired
    ApplicationEventPublisher applicationEventPublisher;

    @GetMapping("testEvent")
    public void test() {
        applicationEventPublisher.publishEvent(new MyTestEvent("dzf-casfd-111", new User("dzf-625096527-111", "xiaoming", 19)));
        applicationEventPublisher.publishEvent(new MyTestEvent("dzf-49687489-111", new User("dzf-625096527-111", "xiaowang", 20)));
    }


}
面向接口编程,实现ApplicationListener接口
@Component
public class MyTestListener implements ApplicationListener<MyTestEvent> {

    @Override
    public void onApplicationEvent(MyTestEvent myTestEvent) {
        System.out.println("MyTestListener : " + myTestEvent.getUser());
    }
}
使用@EventListener注解配置
@Component
public class MyTestListener2{

    @EventListener(MyTestEvent.class)
    public void onApplicationEvent(MyTestEvent myTestEvent) {
        System.out.println("MyTestListener2:" + myTestEvent.getUser());
    }
}
到此这篇关于SpringBoot事件发布和监听的文章就介绍到这了,更多相关SpringBoot事件发布和监听内容请搜索编程网以前的文章或继续浏览下面的相关文章希望大家以后多多支持编程网!
--结束END--
本文标题: SpringBoot事件发布和监听详解
本文链接: https://www.lsjlt.com/news/157163.html(转载时请注明来源链接)
有问题或投稿请发送至: 邮箱/279061341@qq.com QQ/279061341
下载Word文档到电脑,方便收藏和打印~
2024-03-01
2024-03-01
2024-03-01
2024-02-29
2024-02-29
2024-02-29
2024-02-29
2024-02-29
2024-02-29
2024-02-29
回答
回答
回答
回答
回答
回答
回答
回答
回答
回答


官方手机版

微信公众号

商务合作


0