Python 官方文档:入门教程 => 点击学习
目录一.GUI(Graphical User Interface(图形用户接口))1.导入需要用到的包2.获取文件夹中所有图片3.定义一个类windows4.创建窗口和frame5.
import tkinter as tk
import tkinter.messagebox
import copy
import os
def get_picture(dirs):
    '''获得所有图片'''
    picture_list = []
    for dir, dir_abs, files in os.walk(dirs):
        for file in files:
            if file.endswith('.png'):  # 注意检查分析数据格式
                picture_list.append(os.path.join(dir, file))
    return picture_list
class Window:
    button_list = []
    object_list = []
    pictures = get_picture("F:\\pic\\class-1\\classresnet\\data\\dangerous")
    file = pictures[0]
    is_show = True
    index = 0
    image_file = ''
    def __init__(self):
        '''创建窗口和frame'''
        self.window = tk.Tk()
        self.window.title('护目镜安全检测')
        self.window.geometry('600x400')
        self.frame = tk.Frame(self.window)
        self.frame.pack()
        self.frame_l = tk.Frame(self.frame)
        self.frame_r = tk.Frame(self.frame)
        self.frame_l.pack(side='left')
        self.frame_r.pack(side='right')
        self.frame_ll = tk.Frame(self.frame_r)
        self.frame_rr = tk.Frame(self.frame_r)
        self.frame_ll.pack(side='left')
        self.frame_rr.pack(side='right')
    def next_picture(self):
        '''下一张图片'''
        self.index = self.pictures.index(self.file)
        self.index += 1
        if self.index < len(self.pictures):
            self.checkout_button()
            self.file = self.pictures[self.index]
            self.create_canvas(self.file)
        else:
            self.index = len(self.pictures) - 1
            tkinter.messagebox.showinfo('提示', '已近是最后一张了')

    def checkout_button(self):
        '''判断列表中是否只有button对象'''
        object_list_copy = copy.copy(self.object_list)
        for ob in self.object_list:
            if ob in self.button_list:
                pass
            else:
                b = object_list_copy.pop(self.object_list.index(ob))
                b.destroy()
        self.object_list = object_list_copy

    def pre_picture(self):
        '''上一页'''
        self.index = self.pictures.index(self.file)
        self.index -= 1
        if self.index >= 0:
            self.checkout_button()
            self.file = self.pictures[self.index]
            self.create_canvas(self.file)
        else:
            self.index = 0
            tkinter.messagebox.showinfo('提示', '已经是第一张了')

    def show_picture(self):
        '''展示图片和翻页按钮'''
        self.file = self.pictures[0]
        if self.is_show:
            self.is_show = False
            self.create_canvas(self.file)
            button1 = tk.Button(self.frame_ll, text='上一张', font=('Arial', 12), width=10, height=1, bg='orange',
                                command=self.pre_picture, relief='ridge', )
            button1.pack()
            button2 = tk.Button(self.frame_rr, text='下一张', font=('Arial', 12), width=10, height=1, bg='orange',
                                command=self.next_picture, relief='ridge', )
            button2.pack()
            self.button_list.append(button1)
            self.button_list.append(button2)
            self.object_list.extend(self.button_list)
        else:
            self.is_show = True
            while self.object_list:
                o = self.object_list.pop()
                o.destroy()
    def new_button(self):
        '''创建展示按钮'''"开始检测和显示结果可在此处新添加tk.button"
        tk.Button(self.frame_l, text='开始读取', font=('Arial Black', 12), width=10, height=1, bg='green',
                  command=self.show_picture, relief='ridge').pack()
        # tk.Button(self.frame_l, text='开始检测', font=('Arial Black', 12), width=10, height=1, bg='blue',command=classresnet, relief='ridge').pack()

    def create_canvas(self, file):
        '''用画布展示图片'''
        self.image_file = tk.PhotoImage(file=file)
        canvas = tk.Canvas(self.frame_r, height=500, width=600, bg='gray')
        canvas.create_image(1, 1, anchor='nw', image=self.image_file)
        canvas.pack()
        self.object_list.append(canvas)

    def run(self):
        '''主程序调用'''
        self.window.mainloop()

if __name__ == '__main__':

    w = Window()
    w.new_button()
    w.run()

import tkinter as tk
import tkinter.messagebox
import copy
import os
# from glob2 import glob
# import main

"""Graphical User Interface(图形用户接口)"""
def get_picture(dirs):
    '''获得所有图片'''
    picture_list = []
    for dir, dir_abs, files in os.walk(dirs):
        for file in files:
            if file.endswith('.png'):  # 注意检查分析数据格式
                picture_list.append(os.path.join(dir, file))
    return picture_list


class Window:
    button_list = []
    object_list = []

    # for pngfile in glob("F:\\pic\\class-1\\classresnet\\datas\\*.png"):
    #     main.image_demo()
    #     output_dir = "F:\\pic\\class-1\\classresnet\\data\\try"  # 保存截取的图像目录
    #     print('图片获取完成 。。。!')
    #
    # main.classresnet()

    pictures = get_picture("F:\\pic\\class-1\\classresnet\\data\\dangerous")
    file = pictures[0]
    is_show = True
    index = 0
    image_file = ''

    def __init__(self):
        '''创建窗口和frame'''
        self.window = tk.Tk()
        self.window.title('护目镜安全检测')
        self.window.geometry('600x400')
        self.frame = tk.Frame(self.window)
        self.frame.pack()
        self.frame_l = tk.Frame(self.frame)
        self.frame_r = tk.Frame(self.frame)
        self.frame_l.pack(side='left')
        self.frame_r.pack(side='right')
        self.frame_ll = tk.Frame(self.frame_r)
        self.frame_rr = tk.Frame(self.frame_r)
        self.frame_ll.pack(side='left')
        self.frame_rr.pack(side='right')

    def next_picture(self):
        '''下一张图片'''
        self.index = self.pictures.index(self.file)
        self.index += 1
        if self.index < len(self.pictures):
            self.checkout_button()
            self.file = self.pictures[self.index]
            self.create_canvas(self.file)
        else:
            self.index = len(self.pictures) - 1
            tkinter.messagebox.showinfo('提示', '已近是最后一张了')

    def checkout_button(self):
        '''判断列表中是否只有button对象'''
        object_list_copy = copy.copy(self.object_list)
        for ob in self.object_list:
            if ob in self.button_list:
                pass
            else:
                b = object_list_copy.pop(self.object_list.index(ob))
                b.destroy()
        self.object_list = object_list_copy

    def pre_picture(self):
        '''上一页'''
        self.index = self.pictures.index(self.file)
        self.index -= 1
        if self.index >= 0:
            self.checkout_button()
            self.file = self.pictures[self.index]
            self.create_canvas(self.file)
        else:
            self.index = 0
            tkinter.messagebox.showinfo('提示', '已经是第一张了')

    def show_picture(self):
        '''展示图片和翻页按钮'''
        self.file = self.pictures[0]
        if self.is_show:
            self.is_show = False
            self.create_canvas(self.file)
            button1 = tk.Button(self.frame_ll, text='上一张', font=('Arial', 12), width=10, height=1, bg='orange',
                                command=self.pre_picture, relief='ridge', )
            button1.pack()
            button2 = tk.Button(self.frame_rr, text='下一张', font=('Arial', 12), width=10, height=1, bg='orange',
                                command=self.next_picture, relief='ridge', )
            button2.pack()
            self.button_list.append(button1)
            self.button_list.append(button2)
            self.object_list.extend(self.button_list)
        else:
            self.is_show = True
            while self.object_list:
                o = self.object_list.pop()
                o.destroy()

    # def code_button(self):
    #     tk.Button(self.frame_l, text='开始检测', font=('Arial Black', 12), width=10, height=1, bg='blue',
    #               command=main.classresnet, relief='ridge').pack()

    def new_button(self):
        '''创建展示按钮'''"开始检测和显示结果可在此处新添加tk.button"
        tk.Button(self.frame_l, text='开始读取', font=('Arial Black', 12), width=10, height=1, bg='green',
                  command=self.show_picture, relief='ridge').pack()
        # tk.Button(self.frame_l, text='开始检测', font=('Arial Black', 12), width=10, height=1, bg='blue',command=classresnet, relief='ridge').pack()

    def create_canvas(self, file):
        '''用画布展示图片'''
        self.image_file = tk.PhotoImage(file=file)
        canvas = tk.Canvas(self.frame_r, height=500, width=600, bg='gray')
        canvas.create_image(1, 1, anchor='nw', image=self.image_file)
        canvas.pack()
        self.object_list.append(canvas)

    def run(self):
        '''主程序调用'''
        self.window.mainloop()

if __name__ == '__main__':


    w = Window()
    w.new_button()
    w.run()
在windows下,可以使用pyinstaller打包Python程序为exe可执行程序。
在cmd命令行窗口运行以下命令安装pyinstaller
pip install pyinstaller
在python程序所在目录,执行以下命令
pyinstaller -F xxx.py -w
注:如果不加-w,生成的exe文件会同时出现命令行窗口
打包完成后,在对应目录会出现build和dist文件夹,exe文件就出现在dist文件夹,直接运行即可。
(1) -F 指定打包后只生成一个exe格式的文件(dist文件只有一个exe格式的文件T1)
pyinstaller -F T1.py
(2) -i 改变生成程序的icon图标
pyinstaller -F -i ./my.ico T1.py
(3) -n NAME,–name=NAME 设置产生文件的名字(mypy)
pyinstaller -F -n mypy -i ./my.ico T1.py
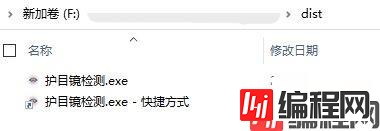
因为是exe应用,是可执行文件了,所以直接双击运行即可,运行效果如下图所示:

到此这篇关于如何利用python写GUI及生成.exe可执行文件的文章就介绍到这了,更多相关python写GUI及生成.exe内容请搜索编程网以前的文章或继续浏览下面的相关文章希望大家以后多多支持编程网!
--结束END--
本文标题: 如何利用python写GUI及生成.exe可执行文件
本文链接: https://www.lsjlt.com/news/160993.html(转载时请注明来源链接)
有问题或投稿请发送至: 邮箱/279061341@qq.com QQ/279061341
下载Word文档到电脑,方便收藏和打印~
2024-03-01
2024-03-01
2024-03-01
2024-02-29
2024-02-29
2024-02-29
2024-02-29
2024-02-29
2024-02-29
2024-02-29
回答
回答
回答
回答
回答
回答
回答
回答
回答
回答


官方手机版

微信公众号

商务合作


0