Python 官方文档:入门教程 => 点击学习
目录一、简介为什么使用缓存?使用场景使用规范二、如何使用引入Maven依赖添加配置配置说明注解说明@EnableCreateCacheAnnotation@EnableMethodC
JetCache是一个基于Java的缓存系统封装,提供统一的API和注解来简化缓存的使用。 JetCache提供了比springCache更加强大的注解,可以原生的支持TTL、两级缓存、分布式自动刷新,还提供了Cache接口用于手工缓存操作。 当前有四个实现:RedisCache、RedisLettuceCache、CaffeineCache、LinkedHashMapCache。
特性:
Cache实例Cache实例和方法缓存的自动统计缓存类型:
LinkedHashMap:使用LinkedHashMap做LUR方式淘汰Caffeine:基于Java8开发的提供了近乎最佳命中率的高性能的缓存库
Redis:使用Jedis客户端,Redis官方首选的Java客户端RedisSpringData:使用SpringData访问Redis(官网未作介绍)RedisLettuce:使用Lettuce客户端,一个高性能基于Java的Redis驱动框架,支持线程安全的同步、异步操作,底层集成了Project Reactor,提供反应式编程,参考:关于SpringBoot整合redis使用Lettuce客户端超时问题
在高并发、大流量等场景下,降低系统延迟,缓解数据库压力,提高系统整体的性能,让用户有更好的体验。
读多写少、不追求强一致性、请求入参不易变化
选择了远程缓存请设置keyPrefix,保证存放至Redis的缓存key规范化,避免与其他系统出现冲突,例如这样设计:系统简称:所属名字:,这样存储到Redis的缓存key为:系统简称:所属名字:缓存key
选择了本地缓存请设置limit,全局默认设置了100,本地缓存的数据存放于内存,减轻内存的损耗,如果使用了Caffeine,缓存的key过多可能导致内存溢出
请勿滥用缓存注解,对于非必要添加缓存的方法我们尽量不使用缓存
说明:以下使用方式是基于SpringBoot引入JetCache缓存框架的,如果不是SpringBoot工程,请参考JetCache官网使用
<dependencies>
    <!-- 使用 jedis 客户端添加以下依赖 -->
    <dependency>
        <groupId>com.alicp.jetcache</groupId>
        <artifactId>jetcache-starter-redis</artifactId>
        <version>${version}</version>
    </dependency>
    <!-- 使用 lettuce 客户端添加以下依赖 -->
    <dependency>
        <groupId>com.alicp.jetcache</groupId>
        <artifactId>jetcache-starter-redis-lettuce</artifactId>
        <version>${version}</version>
    </dependency>
</dependencies>jetcache:
statIntervalMinutes: 60
areainCacheName: false
penetrationProtect: false
enableMethodCache: true
hiddenPackages: com.xxx.xxx,com.xxx.xxx
local:
default:
type: caffeine # 支持的类型:linkedhashmap、caffeine
limit: 100
keyConvertor: fastJSON # 支持的类型:fastjson,可自定义转换器函数
expireAfterWriteInMillis: 600000
expireAfterAccessInMillis: 300000
remote:
default:
type: redis.lettuce # 支持的类型:redis、redis.lettuce
keyPrefix: '系统简称:所属名字:'
keyConvertor: fastjson
valueEncoder: java # 支持的类型:kryo、java,可自定义编码器
valueDecoder: java # 支持的类型:kryo、java,可自定义解码器
expireAfterWriteInMillis: 3600000
#readFrom: slavePreferred # 优先从Slave节点中读取
uri: redis-sentinel://host1:26379,host2:26379,host3:26379/?sentinelMasterId=mymaster # 哨兵模式
#uri: redis://127.0.0.1:6379/ # 单节点模式
#mode: masterslave # 设置为主从模式
#uri: # 集群模式
#- redis://127.0.0.1:7000
#- redis://127.0.0.1:7001
#- redis://127.0.0.1:7002
example:
keyPrefix: '系统简称:所属名字:'
type: redis
keyConvertor: fastjson
valueEncoder: java
valueDecoder: java
expireAfterWriteInMillis: 3600000
poolConfig:
minIdle: 10
maxIdle: 20
maxTotal: 50
#passWord: xxx # 连接密码
#timeout: 2000 # 连接的超时时间,读取数据的超时时间
#database: 0 # 连接的数据库
#clientName: null # 客户端名称
#ssl: 是否使用SSL
host: ${redis.host}
port: ${redis.port}
#sentinel: host1:26379,host2:26379,host3:26379 # 哨兵模式
#masterName: mymasterjetcache的全局配置
| 属性 | 默认值 | 说明 |
|---|---|---|
| jetcache.statIntervalMinutes | 0 | 用于统计缓存调用相关信息的统计间隔(分钟),0表示不统计。 |
| jetcache.areaInCacheName | true | 缓存实例名称cacheName会作为缓存key的前缀,2.4.3以前的版本总是把areaName加在cacheName中,因此areaName也出现在key前缀中。我们一般设置为false。 |
| jetcache.penetrationProtect | false | 当缓存访问未命中的情况下,对并发进行的加载行为进行保护。 当前版本实现的是单JVM内的保护,即同一个JVM中同一个key只有一个线程去加载,其它线程等待结果。这是全局配置,如果缓存实例没有指定则使用全局配置。 |
| jetcache.enableMethodCache | true | 是否使用jetcache缓存。 |
| jetcache.hiddenPackages | 无 | 自动生成缓存实例名称时,为了不让名称太长,hiddenPackages指定的包名前缀会被截掉,多个包名使用逗号分隔。我们一般会指定每个缓存实例的名称。 |
本地缓存的全局配置
| 属性 | 默认值 | 说明 |
|---|---|---|
| jetcache.local.${area}.type | 无 | 本地缓存类型,支持 linkedhashmap、caffeine。 |
| jetcache.local.${area}.limit | 100 | 每个缓存实例存储的缓存数量的全局配置,仅本地缓存需要配置,如果缓存实例没有指定则使用全局配置,请结合实例的业务场景进行配置该参数。 |
| jetcache.local.${area}.keyConvertor | 无 | 缓存key转换器的全局配置,支持的类型:fastjson。仅当使用@CreateCache且缓存类型为LOCAL时可以指定为none,此时通过equals方法来识别key。方法缓存必须指定keyConvertor。支持自定义转换器函数,可设置为:bean:beanName,然后会从spring容器中获取该bean。 |
| jetcache.local.${area}.expireAfterWriteInMillis | 无穷大 | 本地缓存超时时间的全局配置(毫秒)。 |
| jetcache.local.${area}.expireAfterAccessInMillis | 0 | 多长时间没访问就让缓存失效的全局配置(毫秒),仅支持本地缓存。0表示不使用这个功能。 |
远程缓存的全局配置
| 属性 | 默认值 | 说明 |
|---|---|---|
| jetcache.remote.${area}.type | 无 | 连接Redis的客户端类型,支持 redis、redis.lettuce、redis.springdata。 |
| jetcache.remote.${area}.keyPrefix | 无 | 保存至远程缓存key的前缀,请规范使用。 |
| jetcache.remote.${area}.keyConvertor | 无 | 参考上述说明。 |
| jetcache.remote.${area}.valueEncoder | java | 保存至远程缓存value的编码函数,支持:java、kryo。支持自定义编码函数,可设置为:bean:beanName,然后会从spring容器中获取该bean。 |
| jetcache.remote.${area}.valueDecoder | java | 保存至远程缓存value的解码函数,支持:java、kryo。支持自定义解码函数,可设置为:bean:beanName,然后会从spring容器中获取该bean。 |
| jetcache.remote.${area}.expireAfterWriteInMillis | 无穷大 | 远程缓存超时时间的全局配置(毫秒)。 |
| jetcache.remote.${area}.uri | 无 | redis节点信息。 |
上表中${area}对应@Cached和@CreateCache的area属性,如果注解上没有指定area,默认值是"default"。
关于缓存的超时时间:
如果需要使用jetcache缓存,启动类添加两个注解:@EnableCreateCacheAnnotation、@EnableMethodCache
开启可通过@CreateCache注解创建Cache实例功能。
开启可通过@Cached注解创建Cache实例功能,初始化spring aop,注解说明:
| 属性 | 默认值 | 说明 |
|---|---|---|
| basePackages | 无 | jetcache需要拦截的包名,只有这些包名下的Cache实例才会生效 |
| order | Ordered.LOWEST_PRECEDENCE | 指定AOP切面执行过程的顺序,默认最低优先级 |
| mode | AdviceMode.PROXY | Spring AOP的模式,目前就提供默认值让你修改 |
| proxyTargetClass | false | 无 |
@Cached
为一个方法添加缓存,创建对应的缓存实例,注解可以添加在接口或者类的方法上面,该类必须是spring bean,注解说明:
| 属性 | 默认值 | 说明 |
|---|---|---|
| area | "default" | 如果在配置中配置了多个缓存area,在这里指定使用哪个area。 |
| name | 未定义 | 指定缓存实例名称,如果没有指定,会根据类名+方法名自动生成。name会被用于远程缓存的key前缀。另外在统计中,一个简短有意义的名字会提高可读性。 |
| enabled | true | 是否激活缓存。 |
| timeUnit | TimeUnit.SECONDS | 指定expire的单位。 |
| expire | 未定义 | 超时时间。如果注解上没有定义,会使用全局配置,如果此时全局配置也没有定义,则为无穷大。 |
| localExpire | 未定义 | 仅当cacheType为BOTH时适用,为本地缓存指定一个不一样的超时时间,通常应该小于expire。如果没有设置localExpire且cacheType为BOTH,那么本地缓存的超时时间和远程缓存保持一致。 |
| cacheType | CacheType.REMOTE | 缓存的类型,支持:REMOTE、LOCAL、BOTH,如果定义为BOTH,会使用LOCAL和REMOTE组合成两级缓存。 |
| localLimit | 未定义 | 如果cacheType为LOCAL或BOTH,这个参数指定本地缓存的最大元素数量,以控制内存占用。如果注解上没有定义,会使用全局配置,如果此时你没有定义全局配置,则使用默认的全局配置100。请结合实际业务场景进行设置该值。 |
| serialPolicy | 未定义 | 指定远程缓存VALUE的序列化方式,支持SerialPolicy.JAVA、SerialPolicy.KRYO。如果注解上没有定义,会使用全局配置,如果你没有定义全局配置,则使用默认的全局配置SerialPolicy.JAVA。 |
| keyConvertor | 未定义 | 指定KEY的转换方式,用于将复杂的KEY类型转换为缓存实现可以接受的类型,支持:KeyConvertor.FASTJSON、KeyConvertor.NONE。NONE表示不转换,FASTJSON可以将复杂对象KEY转换成String。如果注解上没有定义,会使用全局配置。 |
| key | 未定义 | 使用SpEL指定缓存key,如果没有指定会根据入参自动生成。 |
| cacheNullValue | false | 当方法返回值为null的时候是否要缓存。 |
| condition | 未定义 | 使用SpEL指定条件,如果表达式返回true的时候才去缓存中查询。 |
| postCondition | 未定义 | 使用SpEL指定条件,如果表达式返回true的时候才更新缓存,该评估在方法执行后进行,因此可以访问到#result。 |
用于移除缓存,配置说明:
| 配置 | 默认值 | 说明 |
|---|---|---|
| area | "default" | 如果在配置中配置了多个缓存area,在这里指定使用哪个area。 |
| name | 无 | 指定缓存的唯一名称,一般指向对应的@Cached定义的name。 |
| key | 未定义 | 使用SpEL指定key,如果没有指定会根据入参自动生成。 |
| condition | 未定义 | 使用SpEL指定条件,如果表达式返回true才执行删除,可访问方法结果#result。删除缓存实例中key的元素。 |
| multi | false | 如果根据SpEL指定的key是一个集合,是否从缓存实例中删除对应的每个缓存。如果设置为true,但是key不是集合,则不会删除缓存。 |
用于更新缓存,配置说明:
| 配置 | 默认值 | 说明 |
|---|---|---|
| area | "default" | 如果在配置中配置了多个缓存area,在这里指定使用哪个area。 |
| name | 无 | 指定缓存的唯一名称,一般指向对应的@Cached定义的name。 |
| key | 未定义 | 使用SpEL指定key,如果没有指定会根据入参自动生成。 |
| value | 无 | 使用SpEL指定value。 |
| condition | 未定义 | 使用SpEL指定条件,如果表达式返回true才执行更新,可访问方法结果#result。更新缓存实例中key的元素。 |
| multi | false | 如果根据SpEL指定key和value都是集合并且元素的个数相同,则是否更新缓存实例中的对应的每个元素。如果设置为true,但是key不是集合或者value不是集合或者它们的元素的个数不相同,也不会更新缓存。 |
用于自定刷新缓存,配置说明:
| 配置 | 默认值 | 说明 |
|---|---|---|
| refresh | 无 | 刷新间隔 |
| stopRefreshAfterLastAccess | 未定义 | 指定该key多长时间没有访问就停止刷新,如果不指定会一直刷新。 |
| refreshLockTimeout | 60秒 | 类型为BOTH/REMOTE的缓存刷新时,同时只会有一台服务器在刷新,这台服务器会在远程缓存放置一个分布式锁,此配置指定该锁的超时时间。 |
| timeUnit | TimeUnit.SECONDS | 指定refresh时间单位。 |
当缓存访问未命中的情况下,对并发进行的加载行为进行保护。 当前版本实现的是单JVM内的保护,即同一个JVM中同一个key只有一个线程去加载,其它线程等待结果,配置说明:
| 配置 | 默认值 | 说明 |
|---|---|---|
| value | true | 是否开启保护模式。 |
| timeout | 未定义 | 其他线程的等待超时时间,如果超时则自己执行方法直接返回结果。 |
| timeUnit | TimeUnit.SECONDS | 指定timeout时间单位。 |
在Spring Bean中使用该注解可创建一个Cache实例,配置说明:
| 配置 | 默认值 | 说明 |
|---|---|---|
| area | "default" | 如果在配置中配置了多个缓存area,在这里指定使用哪个area。 |
| name | 未定义 | 指定缓存实例名称,如果没有指定,会根据类名+方法名自动生成。name会被用于远程缓存的key前缀。另外在统计中,一个简短有意义的名字会提高可读性。 |
| timeUnit | TimeUnit.SECONDS | 指定expire的单位。 |
| expire | 未定义 | 超时时间。如果注解上没有定义,会使用全局配置,如果此时全局配置也没有定义,则为无穷大。 |
| localExpire | 未定义 | 仅当cacheType为BOTH时适用,为本地缓存指定一个不一样的超时时间,通常应该小于expire。如果没有设置localExpire且cacheType为BOTH,那么本地缓存的超时时间和远程缓存保持一致。 |
| cacheType | CacheType.REMOTE | 缓存的类型,支持:REMOTE、LOCAL、BOTH,如果定义为BOTH,会使用LOCAL和REMOTE组合成两级缓存。 |
| localLimit | 未定义 | 如果cacheType为LOCAL或BOTH,这个参数指定本地缓存的最大元素数量,以控制内存占用。如果注解上没有定义,会使用全局配置,如果此时你没有定义全局配置,则使用默认的全局配置100。请结合实际业务场景进行设置该值。 |
| serialPolicy | 未定义 | 指定远程缓存VALUE的序列化方式,支持SerialPolicy.JAVA、SerialPolicy.KRYO。如果注解上没有定义,会使用全局配置,如果你没有定义全局配置,则使用默认的全局配置SerialPolicy.JAVA。 |
| keyConvertor | 未定义 | 指定KEY的转换方式,用于将复杂的KEY类型转换为缓存实现可以接受的类型,支持:KeyConvertor.FASTJSON、KeyConvertor.NONE。NONE表示不转换,FASTJSON可以将复杂对象KEY转换成String。如果注解上没有定义,会使用全局配置。 |
使用示例
@SpringBootApplication
@EnableCreateCacheAnnotation
@EnableMethodCache(basePackages = "com.xxx.xxx")
public class Application {
    public static void main(String[] args){
        SpringApplication.run(Application.class, args);
    }
}

public interface JetCacheExampleService {

    User getValue(long userId);

    void updateValue(User  user);

    void deleteValue(User  user);
}

@Service
public class JetCacheExampleServiceImpl implements JetCacheExampleService {

    @CreateCache(name = "JetCacheExampleServiceImpl.exampleCache" , localLimit = 50 ,cacheType = CacheType.LOCAL)
    @CachePenetrationProtect
    private Cache<Long, User> exampleCache;

    @Override
    @Cached(name = "JetCacheExampleService.getValue", expire = 3600 * 6, localLimit = 50, cacheType = CacheType.BOTH)
    @CacheRefresh(refresh = 3600, stopRefreshAfterLastAccess = 3600 * 2)
    @CachePenetrationProtect
    public User getValue(long userId){
        String result = new User();
        // ... 处理逻辑
        return result;
    }

    @Override
    @CacheUpdate(name = "JetCacheExampleService.getValue", key="#user.userId", value="#user")
    public void updateValue(User user){
        // 处理逻辑
    }

    @Override
    @CacheInvalidate(name = "JetCacheExampleService.getValue", key="#user.userId")
    public void deleteValue(User user){
        // 处理逻辑
    }

}
如上述所示
getValue方法会创建一个缓存实例,通过@Cached注解可以看到缓存实例名称cacheName为'JetCacheExampleService.getValue',缓存的有效时长为6小时,本地缓存的数量最多为50,缓存类型为BOTH(优先从本地缓存获取);通过@CacheRefresh注解可以看到会为该缓存实例设置一个刷新策略,刷新间隔为1小时,2个小时没访问后不再刷新,需要刷新的缓存实例会为其每一个缓存数据创建一个RefreshTask周期性任务;@CachePenetrationProtect注解表示该缓存实例开启保护模式,当缓存未命中,同一个JVM中同一个key只有一个线程去加载数据,其它线程等待结果。
updateValue方法可以更新缓存,通过@CacheUpdate注解可以看到会更新缓存实例'JetCacheExampleService.getValue'中缓存key为#user.userId的缓存value为#user。
deleteValue方法可以删除缓存,通过@CacheInvalidate注解可以看到会删除缓存实例'JetCacheExampleService.getValue'中缓存key为#user.userId缓存数据。
exampleCache字段会作为一个缓存实例对象,通过@CreateCache注解可以看到,会将该字段作为cacheName为'JetCacheExampleService.getValue'缓存实例对象,本地缓存的数量最多为50,缓存类型为LOCAL,@CachePenetrationProtect注解表示该缓存实例开启保护模式。
我的业务场景是使用上述的getValue方法创建缓存实例即可。
注意:
@Cached注解不能和@CacheUpdate或者@CacheInvalidate同时使用@CacheInvalidate可以多个同时使用另外通过@CreateCache注解创建缓存实例也可以这样初始化:
@Service
public class JetCacheExampleServiceImpl implements JetCacheExampleService {

	@CreateCache(name = "JetCacheExampleServiceImpl.exampleCache" , localLimit = 50 ,cacheType = CacheType.LOCAL)
	private Cache<Long, User> exampleCache;
	@PostConstruct
	public exampleCacheInit(){
    	RefreshPolicy policy = RefreshPolicy.newPolicy(60, TimeUnit.MINUTES)
                	.stopRefreshAfterLastAccess(120, TimeUnit.MINUTES);
        exampleCache.config().setLoader(this::loadFromDatabase);
        exampleCache.config().setRefreshPolicy(policy);
	}
}
更加详细的使用方法请参考JetCache官方地址。
参考本人git仓库中的JetCache项目,已做详细的注释。
简单概括:利用Spring AOP功能,在调用需要缓存的方法前,通过解析注解获取缓存配置,根据这些配置创建不同的实例对象,进行缓存等操作。
JetCache分为两部分,一部分是Cache API以及实现,另一部分是注解支持。
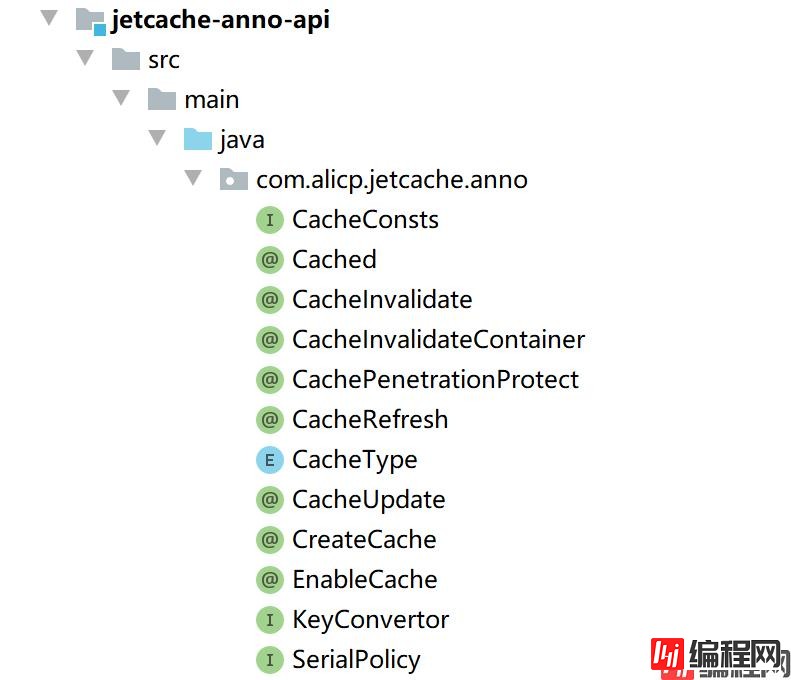
JetCache注解和常量。CacheBuilder构造器@Cached和@CreateCache注解支持,初始化Spring AOP以及JetCache注解等配置。JetCache异步访问缓存的的接口。
在jetcache-anno-api模块中定义了需要用的缓存注解与常量,在上述已经详细的讲述过,其中@CacheInvalidateContainer注解定义value为@CacheInvalidate数组,然后通过jdk8新增的@Repeatable注解,在@CacheInvalidate注解上面添加@Repeatable(CacheInvalidateContainer.class),即可支持同一个地方可以使用多个@CacheInvalidate注解。
主要查看jetcache-core子模块,提供各种Cache缓存,以支持不同的缓存类型
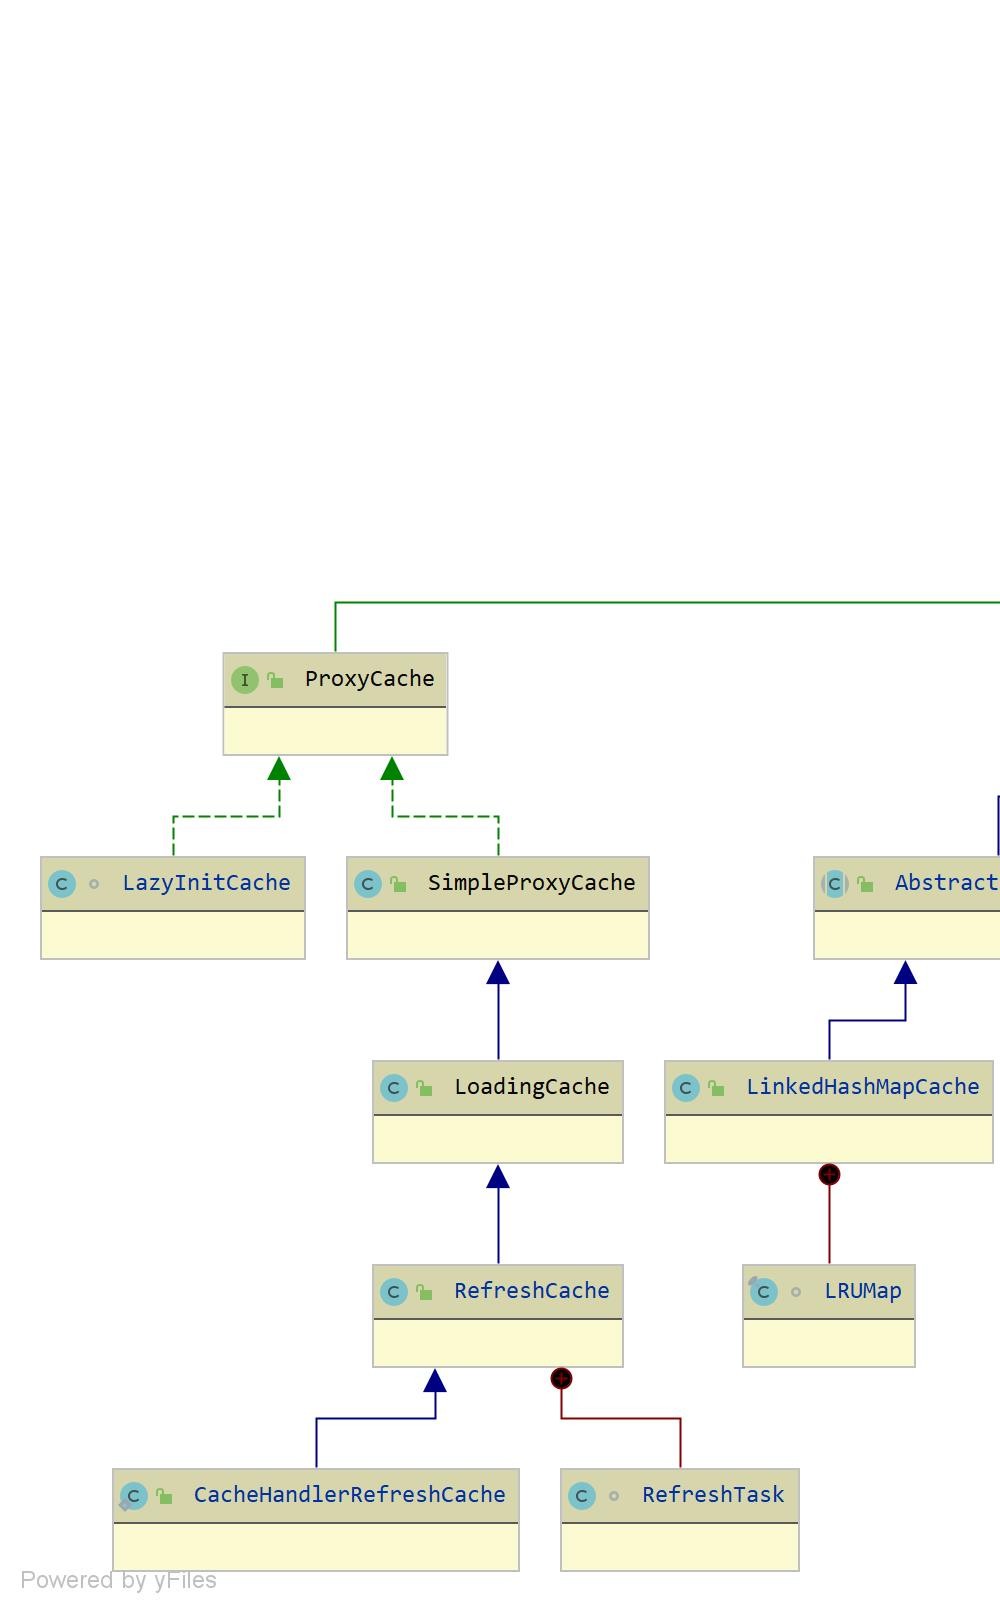
Cache接口的子关系,结构如下图:
主要对象描述:
com.alicp.jetcache.Cache接口,定义了缓存实例的操作方法(部分有默认实现),以及获取分布式锁(非严格,用于刷新远程缓存)的实现,因为继承了java.io.Closeable接口,所以也提供了close方法的默认实现,空方法,交由不同缓存实例的实现去实现该方法用于释放资源,在com.alicp.jetcache.anno.support.ConfigProvider.doShutdown()方法中会调用每个缓存实例对象的close方法进行资源释放。主要代码如下:
public interface Cache<K, V> extends Closeable {
    Logger logger = LoggerFactory.getLogger(Cache.class);
    //-----------------------------JSR 107 style API------------------------------------------------
    default V get(K key) throws CacheInvokeException {
        CacheGetResult<V> result = GET(key);
        if (result.isSuccess()) {
            return result.getValue();
        } else {
            return null;
        }
    }
    default Map<K, V> getAll(Set<? extends K> keys) throws CacheInvokeException {
        MultiGetResult<K, V> cacheGetResults = GET_ALL(keys);
        return cacheGetResults.unwrapValues();
    }
    default void put(K key, V value) {
        PUT(key, value);
    }
    default void putAll(Map<? extends K, ? extends V> map) {
        PUT_ALL(map);
    }
    default boolean putIfAbsent(K key, V value) { // 多级缓存MultiLevelCache不支持此方法
        CacheResult result = PUT_IF_ABSENT(key, value, config().getExpireAfterWriteInMillis(), TimeUnit.MILLISECONDS);
        return result.getResultCode() == CacheResultCode.SUCCESS;
    }
    default boolean remove(K key) {
        return REMOVE(key).isSuccess();
    }
    default void removeAll(Set<? extends K> keys) {
        REMOVE_ALL(keys);
    }
    <T> T unwrap(Class<T> clazz);
    @Override
    default void close() {
    }
    //--------------------------JetCache API---------------------------------------------
    CacheConfig<K, V> config();
    default AutoReleaseLock tryLock(K key, long expire, TimeUnit timeUnit) {
        if (key == null) {
            return null;
        }
        // 随机生成一个值
        final String uuid = UUID.randomUUID().toString();
        // 过期时间
        final long expireTimestamp = System.currentTimeMillis() + timeUnit.toMillis(expire);
        final CacheConfig config = config();
        AutoReleaseLock lock = () -> { // 创建一把会自动释放资源的锁,实现其 close() 方法
            int unlockCount = 0;
            while (unlockCount++ < config.getTryLockUnlockCount()) {
                if(System.currentTimeMillis() < expireTimestamp) { // 这把锁还没有过期,则删除
                    // 删除对应的 Key 值
                    // 出现的结果:成功,失败,Key 不存在
                    CacheResult unlockResult = REMOVE(key);
                    if (unlockResult.getResultCode() == CacheResultCode.FAIL
                            || unlockResult.getResultCode() == CacheResultCode.PART_SUCCESS) {
                        // 删除对应的 Key 值过程中出现了异常,则重试
                        logger.info("[tryLock] [{} of {}] [{}] unlock failed. Key={}, msg = {}",
                                unlockCount, config.getTryLockUnlockCount(), uuid, key, unlockResult.getMessage());
                        // retry
                    } else if (unlockResult.isSuccess()) { // 释放成功
                        logger.debug("[tryLock] [{} of {}] [{}] successfully release the lock. Key={}",
                                unlockCount, config.getTryLockUnlockCount(), uuid, key);
                        return;
                    } else { // 锁已经被释放了
                        logger.warn("[tryLock] [{} of {}] [{}] unexpected unlock result: Key={}, result={}",
                                unlockCount, config.getTryLockUnlockCount(), uuid, key, unlockResult.getResultCode());
                        return;
                    }
                } else { // 该锁已失效
                    logger.info("[tryLock] [{} of {}] [{}] lock already expired: Key={}",
                            unlockCount, config.getTryLockUnlockCount(), uuid, key);
                    return;
                }
            }
        };
        int lockCount = 0;
        Cache cache = this;
        while (lockCount++ < config.getTryLockLockCount()) {
            // 往 Redis(或者本地) 中存放 Key 值(_#RL#结尾的Key)
            // 返回的结果:成功、已存在、失败
            CacheResult lockResult = cache.PUT_IF_ABSENT(key, uuid, expire, timeUnit);
            if (lockResult.isSuccess()) { // 成功获取到锁
                logger.debug("[tryLock] [{} of {}] [{}] successfully get a lock. Key={}",
                        lockCount, config.getTryLockLockCount(), uuid, key);
                return lock;
            } else if (lockResult.getResultCode() == CacheResultCode.FAIL || lockResult.getResultCode() == CacheResultCode.PART_SUCCESS) {
                logger.info("[tryLock] [{} of {}] [{}] cache access failed during get lock, will inquiry {} times. Key={}, msg={}",
                        lockCount, config.getTryLockLockCount(), uuid,
                        config.getTryLockInquiryCount(), key, lockResult.getMessage());
                // 尝试获取锁的过程中失败了,也就是往 Redis 中存放 Key 值出现异常
                // 这个时候可能 Key 值已经存储了,但是由于其他原因导致返回的结果表示执行失败
                int inquiryCount = 0;
                while (inquiryCount++ < config.getTryLockInquiryCount()) {
                    CacheGetResult inquiryResult = cache.GET(key);
                    if (inquiryResult.isSuccess()) {
                        if (uuid.equals(inquiryResult.getValue())) {
                            logger.debug("[tryLock] [{} of {}] [{}] successfully get a lock after inquiry. Key={}",
                                    inquiryCount, config.getTryLockInquiryCount(), uuid, key);
                            return lock;
                        } else {
                            logger.debug("[tryLock] [{} of {}] [{}] not the owner of the lock, return null. Key={}",
                                    inquiryCount, config.getTryLockInquiryCount(), uuid, key);
                            return null;
                        }
                    } else {
                        logger.info("[tryLock] [{} of {}] [{}] inquiry failed. Key={}, msg={}",
                                inquiryCount, config.getTryLockInquiryCount(), uuid, key, inquiryResult.getMessage());
                        // retry inquiry
                    }
                }
            } else { // 已存在表示该锁被其他人占有
                // others holds the lock
                logger.debug("[tryLock] [{} of {}] [{}] others holds the lock, return null. Key={}",
                        lockCount, config.getTryLockLockCount(), uuid, key);
                return null;
            }
        }
        logger.debug("[tryLock] [{}] return null after {} attempts. Key={}", uuid, config.getTryLockLockCount(), key);
        return null;
    }
    default boolean tryLockAndRun(K key, long expire, TimeUnit timeUnit, Runnable action){
        // Release the lock use Java 7 try-with-resources.
        try (AutoReleaseLock lock = tryLock(key, expire, timeUnit)) { // 尝试获取锁
            if (lock != null) { // 获取到锁则执行下面的任务
                action.run();
                return true;
            } else {
                return false;
            }
            // 执行完锁的操作后会进行资源释放,调用 AutoCloseable 的 close() 方法
        }
    }
    CacheGetResult<V> GET(K key);
    MultiGetResult<K, V> GET_ALL(Set<? extends K> keys);
    default V computeIfAbsent(K key, Function<K, V> loader) {
        return computeIfAbsent(key, loader, config().isCacheNullValue());
    }
    V computeIfAbsent(K key, Function<K, V> loader, boolean cacheNullWhenLoaderReturnNull);
    V computeIfAbsent(K key, Function<K, V> loader, boolean cacheNullWhenLoaderReturnNull, long expireAfterWrite, TimeUnit timeUnit);
    default void put(K key, V value, long expireAfterWrite, TimeUnit timeUnit) {
        PUT(key, value, expireAfterWrite, timeUnit);
    }
    default CacheResult PUT(K key, V value) {
        if (key == null) {
            return CacheResult.FAIL_ILLEGAL_ARGUMENT;
        }
        return PUT(key, value, config().getExpireAfterWriteInMillis(), TimeUnit.MILLISECONDS);
    }
    CacheResult PUT(K key, V value, long expireAfterWrite, TimeUnit timeUnit);
    default void putAll(Map<? extends K, ? extends V> map, long expireAfterWrite, TimeUnit timeUnit) {
        PUT_ALL(map, expireAfterWrite, timeUnit);
    }
    default CacheResult PUT_ALL(Map<? extends K, ? extends V> map) {
        if (map == null) {
            return CacheResult.FAIL_ILLEGAL_ARGUMENT;
        }
        return PUT_ALL(map, config().getExpireAfterWriteInMillis(), TimeUnit.MILLISECONDS);
    }
    CacheResult PUT_ALL(Map<? extends K, ? extends V> map, long expireAfterWrite, TimeUnit timeUnit);
    CacheResult REMOVE(K key);
    CacheResult REMOVE_ALL(Set<? extends K> keys);
    CacheResult PUT_IF_ABSENT(K key, V value, long expireAfterWrite, TimeUnit timeUnit);
}
com.alicp.jetcache.Cache定义的方法大都是关于缓存的获取、删除和存放操作
其中大写的方法返回JetCache自定义的CacheResult(完整的返回值,可以清晰的知道执行结果,例如get返回null的时候,无法断定是对应的key不存在,还是访问缓存发生了异常)
小写的方法默认实现就是调用大写的方法
computeIfAbsent方法最为核心,交由子类去实现
tryLockAndRun方法会非堵塞的尝试获取一把AutoReleaseLock分布式锁(非严格),获取过程:
key_#RL#,value为UUID,并设置这个键值对的过期时间为60秒(默认)com.alicp.jetcache.AbstractCache抽象类,实现了Cache接口,主要代码如下:
public abstract class AbstractCache<K, V> implements Cache<K, V> {

    private volatile ConcurrentHashMap<Object, LoaderLock> loaderMap;
    ConcurrentHashMap<Object, LoaderLock> initOrGetLoaderMap() {
        if (loaderMap == null) {
            synchronized (this) {
                if (loaderMap == null) {
                    loaderMap = new ConcurrentHashMap<>();
                }
            }
        }
        return loaderMap;
    }
    @Override
    public final V computeIfAbsent(K key, Function<K, V> loader, boolean cacheNullWhenLoaderReturnNull) {
        return computeIfAbsentImpl(key, loader, cacheNullWhenLoaderReturnNull,
                0, null, this);
    }
    @Override
    public final V computeIfAbsent(K key, Function<K, V> loader, boolean cacheNullWhenLoaderReturnNull,
                                   long expireAfterWrite, TimeUnit timeUnit) {
        return computeIfAbsentImpl(key, loader, cacheNullWhenLoaderReturnNull,
                expireAfterWrite, timeUnit, this);
    }
    private static <K, V> boolean needUpdate(V loadedValue, boolean cacheNullWhenLoaderReturnNull, Function<K, V> loader) {
        if (loadedValue == null && !cacheNullWhenLoaderReturnNull) {
            return false;
        }
        if (loader instanceof CacheLoader && ((CacheLoader<K, V>) loader).vetoCacheUpdate()) {
            return false;
        }
        return true;
    }
    static <K, V> V computeIfAbsentImpl(K key, Function<K, V> loader, boolean cacheNullWhenLoaderReturnNull,
                                               long expireAfterWrite, TimeUnit timeUnit, Cache<K, V> cache) {
    	// 获取内部的 Cache 对象
        AbstractCache<K, V> abstractCache = CacheUtil.getAbstractCache(cache);
        // 封装 loader 函数成一个 ProxyLoader 对象,主要在重新加载缓存后发出一个 CacheLoadEvent 到 CacheMonitor
        CacheLoader<K, V> newLoader = CacheUtil.createProxyLoader(cache, loader, abstractCache::notify);
        CacheGetResult<V> r;
        if (cache instanceof RefreshCache) { // 该缓存实例需要刷新
            RefreshCache<K, V> refreshCache = ((RefreshCache<K, V>) cache);

            r = refreshCache.GET(key);
            // 添加/更新当前 RefreshCache 的刷新缓存任务,存放于 RefreshCache 的 taskMap 中
            refreshCache.addOrUpdateRefreshTask(key, newLoader);
        } else {
            // 从缓存中获取数据
            r = cache.GET(key);
        }
        if (r.isSuccess()) { // 缓存命中
            return r.getValue();
        } else { // 缓存未命中
            // 创建当缓存未命中去更新缓存的函数
            Consumer<V> cacheUpdater = (loadedValue) -> {
                if(needUpdate(loadedValue, cacheNullWhenLoaderReturnNull, newLoader)) {

                    if (timeUnit != null) {
                        cache.PUT(key, loadedValue, expireAfterWrite, timeUnit).waitForResult();
                    } else {
                        cache.PUT(key, loadedValue).waitForResult();
                    }
                }
            };
            V loadedValue;
            if (cache.config().isCachePenetrationProtect()) { // 添加了 @CachePenetrationProtect 注解
            	// 一个JVM只允许一个线程执行
                loadedValue = synchronizedLoad(cache.config(), abstractCache, key, newLoader, cacheUpdater);
            } else {
            	// 执行方法
                loadedValue = newLoader.apply(key);
                // 将新的结果异步缓存
                cacheUpdater.accept(loadedValue);
            }
            return loadedValue;
        }
    }
    static <K, V> V synchronizedLoad(CacheConfig config, AbstractCache<K,V> abstractCache,
                                     K key, Function<K, V> newLoader, Consumer<V> cacheUpdater) {
        ConcurrentHashMap<Object, LoaderLock> loaderMap = abstractCache.initOrGetLoaderMap();
        Object lockKey = buildLoaderLockKey(abstractCache, key);
        while (true) {
            // 为什么加一个 create[] 数组 疑问??
            boolean create[] = new boolean[1];
            LoaderLock ll = loaderMap.computeIfAbsent(lockKey, (unusedKey) -> {
                create[0] = true;
                LoaderLock loaderLock = new LoaderLock();
                loaderLock.signal = new CountDownLatch(1);
                loaderLock.loaderThread = Thread.currentThread();
                return loaderLock;
            });
            if (create[0] || ll.loaderThread == Thread.currentThread()) {
                try {
                    // 加载该 Key 实例的方法
                    V loadedValue = newLoader.apply(key);
                    ll.success = true;
                    ll.value = loadedValue;
                    // 将重新加载的数据更新至缓存
                    cacheUpdater.accept(loadedValue);
                    return loadedValue;
                } finally {
                    // 标记已完成
                    ll.signal.countDown();
                    if (create[0]) {
                        loaderMap.remove(lockKey);
                    }
                }
            } else { // 等待其他线程加载,如果出现异常或者超时则自己加载返回数据,但是不更新缓存
                try {
                    Duration timeout = config.getPenetrationProtectTimeout();
                    if (timeout == null) {
                        ll.signal.await();
                    } else {
                        boolean ok = ll.signal.await(timeout.toMillis(), TimeUnit.MILLISECONDS);
                        if(!ok) {
                            logger.info("loader wait timeout:" + timeout);
                            return newLoader.apply(key);
                        }
                    }
                } catch (InterruptedException e) {
                    logger.warn("loader wait interrupted");
                    return newLoader.apply(key);
                }
                if (ll.success) {
                    return (V) ll.value;
                } else {
                    continue;
                }
            }
        }
    }
    private static Object buildLoaderLockKey(Cache c, Object key) {
        if (c instanceof AbstractEmbeddedCache) {
            return ((AbstractEmbeddedCache) c).buildKey(key);
        } else if (c instanceof AbstractExternalCache) {
            byte bytes[] = ((AbstractExternalCache) c).buildKey(key);
            return ByteBuffer.wrap(bytes);
        } else if (c instanceof MultiLevelCache) {
            c = ((MultiLevelCache) c).caches()[0];
            return buildLoaderLockKey(c, key);
        } else if(c instanceof ProxyCache) {
            c = ((ProxyCache) c).getTargetCache();
            return buildLoaderLockKey(c, key);
        } else {
            throw new CacheException("impossible");
        }
    }

    static class LoaderLock {

        CountDownLatch signal;

        Thread loaderThread;

        boolean success;
        ,
        Object value;
    }
}com.alicp.jetcache.AbstractCache实现了Cache接口的大写方法,内部调用自己定义的抽象方法(以DO_开头,交由不同的子类实现),操作缓存后发送相应的事件CacheEvent,也就是调用自己定义的notify方法,遍历每个CacheMonitor对该事件进行后置操作,用于统计信息。
computeIfAbsentImpl方法实现了Cache接口的核心方法,从缓存实例中根据缓存key获取缓存value,逻辑如下:
@CreateCache注解创建的缓存实例将生成LazyInitCache对象,需要调用其getTargetCache方法才会完成缓存实例的初始化ProxyLoader类型,目的是在加载原有方法后将发送CacheLoadEvent事件RefreshCache类型(在com.alicp.jetcache.anno.support.CacheContext.buildCache方法中会将cache包装成CacheHandlerRefreshCache),则调用RefreshCache.addOrUpdateRefreshTask方法,判断是否应该为它添加一个定时的刷新任务LoaderLock加载锁,获取到这把加载锁才可以执行loader函数,如果已被其他线程占有则进行等待(没有设置超时时间则一直等待),通过CountDownLatch计数器实现com.alicp.jetcache.embedded.AbstractEmbeddedCache抽象类继承AbstractCache抽象类,定义了本地缓存的存放缓存数据的对象为com.alicp.jetcache.embedded.InnerMap接口和一个初始化该接口的createAreaCache抽象方法,基于InnerMap接口实现以DO_开头的方法,完成缓存实例各种操作的具体实现,主要代码如下:
public abstract class AbstractEmbeddedCache<K, V> extends AbstractCache<K, V> {
    protected EmbeddedCacheConfig<K, V> config;

    protected InnerMap innerMap;
    protected abstract InnerMap createAreaCache();
    public AbstractEmbeddedCache(EmbeddedCacheConfig<K, V> config) {
        this.config = config;
        innerMap = createAreaCache();
    }
    @Override
    public CacheConfig<K, V> config() {
        return config;
    }
    public Object buildKey(K key) {
        Object newKey = key;
        Function<K, Object> keyConvertor = config.geTKEyConvertor();
        if (keyConvertor != null) {
            newKey = keyConvertor.apply(key);
        }
        return newKey;
    }
    @Override
    protected CacheGetResult<V> do_GET(K key) {
        Object newKey = buildKey(key);
        CacheValueHolder<V> holder = (CacheValueHolder<V>) innerMap.getValue(newKey);
        return parseHolderResult(holder);
    }
    protected CacheGetResult<V> parseHolderResult(CacheValueHolder<V> holder) {
        long now = System.currentTimeMillis();
        if (holder == null) {
            return CacheGetResult.NOT_EXISTS_WITHOUT_MSG;
        } else if (now >= holder.getExpireTime()) {
            return CacheGetResult.EXPIRED_WITHOUT_MSG;
        } else {
            synchronized (holder) {
                long accessTime = holder.getAccessTime();
                if (config.isExpireAfterAccess()) {
                    long expireAfterAccess = config.getExpireAfterAccessInMillis();
                    if (now >= accessTime + expireAfterAccess) {
                        return CacheGetResult.EXPIRED_WITHOUT_MSG;
                    }
                }
                // 设置该缓存数据的最后一次访问时间
                holder.setAccessTime(now);
            }
            return new CacheGetResult(CacheResultCode.SUCCESS, null, holder);
        }
    }
    @Override
    protected MultiGetResult<K, V> do_GET_ALL(Set<? extends K> keys) {
        ArrayList<K> keyList = new ArrayList<K>(keys.size());
        ArrayList<Object> newKeyList = new ArrayList<Object>(keys.size());
        keys.stream().forEach((k) -> {
            Object newKey = buildKey(k);
            keyList.add(k);
            newKeyList.add(newKey);
        });
        Map<Object, CacheValueHolder<V>> innerResultMap = innerMap.getAllValues(newKeyList);
        Map<K, CacheGetResult<V>> resultMap = new HashMap<>();
        for (int i = 0; i < keyList.size(); i++) {
            K key = keyList.get(i);
            Object newKey = newKeyList.get(i);
            CacheValueHolder<V> holder = innerResultMap.get(newKey);
            resultMap.put(key, parseHolderResult(holder));
        }
        MultiGetResult<K, V> result = new MultiGetResult<>(CacheResultCode.SUCCESS, null, resultMap);
        return result;
    }
    @Override
    protected CacheResult do_PUT(K key, V value, long expireAfterWrite, TimeUnit timeUnit) {
        CacheValueHolder<V> cacheObject = new CacheValueHolder(value ,timeUnit.toMillis(expireAfterWrite));
        innerMap.putValue(buildKey(key), cacheObject);
        return CacheResult.SUCCESS_WITHOUT_MSG;
    }
    @Override
    protected CacheResult do_PUT_ALL(Map<? extends K, ? extends V> map, long expireAfterWrite, TimeUnit timeUnit) {
        HashMap newKeyMap = new HashMap();
        for (Map.Entry<? extends K, ? extends V> en : map.entrySet()) {
            CacheValueHolder<V> cacheObject = new CacheValueHolder(en.getValue(), timeUnit.toMillis(expireAfterWrite));
            newKeyMap.put(buildKey(en.getKey()), cacheObject);
        }
        innerMap.putAllValues(newKeyMap);
        final HashMap resultMap = new HashMap();
        map.keySet().forEach((k) -> resultMap.put(k, CacheResultCode.SUCCESS));
        return CacheResult.SUCCESS_WITHOUT_MSG;
    }
    @Override
    protected CacheResult do_REMOVE(K key) {
        innerMap.removeValue(buildKey(key));
        return CacheResult.SUCCESS_WITHOUT_MSG;
    }
    @Override
    protected CacheResult do_REMOVE_ALL(Set<? extends K> keys) {
        Set newKeys = keys.stream().map((key) -> buildKey(key)).collect(Collectors.toSet());
        innerMap.removeAllValues(newKeys);
        final HashMap resultMap = new HashMap();
        keys.forEach((k) -> resultMap.put(k, CacheResultCode.SUCCESS));
        return CacheResult.SUCCESS_WITHOUT_MSG;
    }
    @Override
    protected CacheResult do_PUT_IF_ABSENT(K key, V value, long expireAfterWrite, TimeUnit timeUnit) {
        CacheValueHolder<V> cacheObject = new CacheValueHolder(value, timeUnit.toMillis(expireAfterWrite));
        if (innerMap.putIfAbsentValue(buildKey(key), cacheObject)) {
            return CacheResult.SUCCESS_WITHOUT_MSG;
        } else {
            return CacheResult.EXISTS_WITHOUT_MSG;
        }
    }
}com.alicp.jetcache.embedded.AbstractEmbeddedCache抽象类实现了操作本地缓存的相关方法
EmbeddedCacheConfig对象InnerMap对象,它的初始化过程交由不同的内存缓存实例(LinkedHashMapCache和CaffeineCache)com.alicp.jetcache.embedded.LinkedHashMapCache基于LinkedHashMap完成缓存实例对象本地缓存基于内存操作缓存数据的InnerMap对象的初始化工作,主要代码如下:
public class LinkedHashMapCache<K, V> extends AbstractEmbeddedCache<K, V> {
    private static Logger logger = LoggerFactory.getLogger(LinkedHashMapCache.class);
    public LinkedHashMapCache(EmbeddedCacheConfig<K, V> config) {
        super(config);
        // 将缓存实例添加至 Cleaner
        addToCleaner();
    }
    protected void addToCleaner() {
        Cleaner.add(this);
    }
    @Override
    protected InnerMap createAreaCache() {
        return new LRUMap(config.getLimit(), this);
    }
    public void cleanExpiredEntry() {
        ((LRUMap) innerMap).cleanExpiredEntry();
    }

    final class LRUMap extends LinkedHashMap implements InnerMap {

        private final int max;

        private Object lock;
        public LRUMap(int max, Object lock) {
            super((int) (max * 1.4f), 0.75f, true);
            this.max = max;
            this.lock = lock;
        }

        @Override
        protected boolean removeEldestEntry(Map.Entry eldest) {
            return size() > max;
        }

        void cleanExpiredEntry() {
            synchronized (lock) { // 占有当前缓存实例这把锁
                for (Iterator it = entrySet().iterator(); it.hasNext();) {
                    Map.Entry en = (Map.Entry) it.next();
                    Object value = en.getValue();
                    if (value != null && value instanceof CacheValueHolder) {
                        CacheValueHolder h = (CacheValueHolder) value;

                        if (System.currentTimeMillis() >= h.getExpireTime()) {
                            it.remove();
                        }
                    } else {
                        // assert false
                        if (value == null) {
                            logger.error("key " + en.getKey() + " is null");
                        } else {
                            logger.error("value of key " + en.getKey() + " is not a CacheValueHolder. type=" + value.getClass());
                        }
                    }
                }
            }
        }
        @Override
        public Object getValue(Object key) {
            synchronized (lock) {
                return get(key);
            }
        }
        @Override
        public Map getAllValues(Collection keys) {
            Map values = new HashMap();
            synchronized (lock) {
                for (Object key : keys) {
                    Object v = get(key);
                    if (v != null) {
                        values.put(key, v);
                    }
                }
            }
            return values;
        }
        @Override
        public void putValue(Object key, Object value) {
            synchronized (lock) {
                put(key, value);
            }
        }
        @Override
        public void putAllValues(Map map) {
            synchronized (lock) {
                Set<Map.Entry> set = map.entrySet();
                for (Map.Entry en : set) {
                    put(en.getKey(), en.getValue());
                }
            }
        }
        @Override
        public boolean removeValue(Object key) {
            synchronized (lock) {
                return remove(key) != null;
            }
        }
        @Override
        public void removeAllValues(Collection keys) {
            synchronized (lock) {
                for (Object k : keys) {
                    remove(k);
                }
            }
        }
        @Override
        @SuppressWarnings("unchecked")
        public boolean putIfAbsentValue(Object key, Object value) {

            synchronized (lock) {
                CacheValueHolder h = (CacheValueHolder) get(key);
                if (h == null || parseHolderResult(h).getResultCode() == CacheResultCode.EXPIRED) {
                    put(key, value);
                    return true;
                } else {
                    return false;
                }
            }
        }
    }
}com.alicp.jetcache.embedded.LinkedHashMapCache自定义LRUMap继承LinkedHashMap并实现InnerMap接口
max字段,存储元素个数的最大值,并设置初始容量为(max * 1.4f)lock字段,每个缓存实例的锁,通过synchronized关键词保证线程安全,所以性能相对来说不好removeEldestEntry方法,当元素大于最大值时移除最老的元素cleanExpiredEntry方法,遍历Map,根据缓存value(被封装成的com.alicp.jetcache.CacheValueHolder对象,包含缓存数据、失效时间戳和第一次访问的时间),清理过期的元素com.alicp.jetcache.embedded.Cleaner清理器中,Cleaner会周期性(每隔60秒)遍历LinkedHashMapCache缓存实例,调用其cleanExpiredEntry方法com.alicp.jetcache.embedded.Cleaner用于清理缓存类型为LinkedHashMapCache的缓存数据,请查看相应注释,代码如下:
class Cleaner {

    static LinkedList<WeakReference<LinkedHashMapCache>> linkedHashMapCaches = new LinkedList<>();
    static {
        // 创建一个线程池,1个核心线程
        ScheduledExecutorService executorService = JetCacheExecutor.defaultExecutor();
        // 起一个循环任务一直清理 linkedHashMapCaches 过期的数据(每隔60秒)
        executorService.scheduleWithFixedDelay(() -> run(), 60, 60, TimeUnit.SECONDS);
    }
    static void add(LinkedHashMapCache cache) {
        synchronized (linkedHashMapCaches) {
            // 创建一个弱引用对象,并添加到清理对象中
            linkedHashMapCaches.add(new WeakReference<>(cache));
        }
    }
    static void run() {
        synchronized (linkedHashMapCaches) {
            Iterator<WeakReference<LinkedHashMapCache>> it = linkedHashMapCaches.iterator();
            while (it.hasNext()) {
                WeakReference<LinkedHashMapCache> ref = it.next();
                // 获取被弱引用的对象(强引用)
                LinkedHashMapCache c = ref.get();
                if (c == null) { // 表示被弱引用的对象被标记成了垃圾,则移除
                    it.remove();
                } else {
                    c.cleanExpiredEntry();
                }
            }
        }
    }
}com.alicp.jetcache.embedded.CaffeineCache基于Caffeine完成缓存实例对象本地缓存基于内存操作缓存数据的InnerMap对象的初始化工作,主要代码如下:
public class CaffeineCache<K, V> extends AbstractEmbeddedCache<K, V> {

    private com.GitHub.benmanes.caffeine.cache.Cache cache;
    public CaffeineCache(EmbeddedCacheConfig<K, V> config) {
        super(config);
    }

    @Override
    @SuppressWarnings("unchecked")
    protected InnerMap createAreaCache() {
        Caffeine<Object, Object> builder = Caffeine.newBuilder();
        // 设置缓存实例的最大缓存数量
        builder.maximumSize(config.getLimit());
        final boolean isExpireAfterAccess = config.isExpireAfterAccess();
        final long expireAfterAccess = config.getExpireAfterAccessInMillis();
        // 设置缓存实例的缓存数据的失效策略
        builder.expireAfter(new Expiry<Object, CacheValueHolder>() {

            private long getRestTimeInNanos(CacheValueHolder value) {
                long now = System.currentTimeMillis();
                long ttl = value.getExpireTime() - now;

                if(isExpireAfterAccess){
                    // 设置缓存的失效时间
                    // 多长时间没访问缓存则失效 and 缓存的有效时长取 min
                    ttl = Math.min(ttl, expireAfterAccess);
                }
                return TimeUnit.MILLISECONDS.toNanos(ttl);
            }
            @Override
            public long expireAfterCreate(Object key, CacheValueHolder value, long currentTime) {
                return getRestTimeInNanos(value);
            }
            @Override
            public long expireAfterUpdate(Object key, CacheValueHolder value,
                                          long currentTime, long currentDuration) {
                return currentDuration;
            }
            @Override
            public long expireAfterRead(Object key, CacheValueHolder value,
                                        long currentTime, long currentDuration) {
                return getRestTimeInNanos(value);
            }
        });
        // 构建 Cache 缓存实例
        cache = builder.build();
        return new InnerMap() {
            @Override
            public Object getValue(Object key) {
                return cache.getIfPresent(key);
            }
            @Override
            public Map getAllValues(Collection keys) {
                return cache.getAllPresent(keys);
            }
            @Override
            public void putValue(Object key, Object value) {
                cache.put(key, value);
            }
            @Override
            public void putAllValues(Map map) {
                cache.putAll(map);
            }
            @Override
            public boolean removeValue(Object key) {
                return cache.asMap().remove(key) != null;
            }
            @Override
            public void removeAllValues(Collection keys) {
                cache.invalidateAll(keys);
            }
            @Override
            public boolean putIfAbsentValue(Object key, Object value) {
                return cache.asMap().putIfAbsent(key, value) == null;
            }
        };
    }
}com.alicp.jetcache.embedded.CaffeineCache通过Caffeine构建一个com.github.benmanes.caffeine.cache.Cache缓存对象,然后实现InnerMap接口,调用这个缓存对象的相关方法
com.alicp.jetcache.CacheValueHolder)的失效时间戳来设置,底层如何实现的可以参考Caffeine官方地址com.github.benmanes.caffeine.cache.Cache的put方法我有遇到过'unable to create native thread'内存溢出的问题,所以请结合实际业务场景合理的设置缓存相关配置com.alicp.jetcache.embedded.AbstractExternalCache抽象类继承AbstractCache抽象类,定义了缓存实例对象远程缓存的配置信息ExternalCacheConfig对象,提供了将缓存key转换成字节数组的方法,代码比较简单。
com.alicp.jetcache.redis.RedisCache使用Jedis连接Redis,对远程的缓存数据进行操作,代码没有很复杂,可查看我的注释
com.alicp.jetcache.redis.RedisCacheConfig配置对象,包含Redis连接池的相关信息DO_开头的方法,也就是通过Jedis操作缓存数据com.alicp.jetcache.redis.lettuce.RedisLettuceCache使用Lettuce连接Redis,对远程的缓存数据进行操作,代码没有很复杂,可查看我的注释
com.alicp.jetcache.redis.lettuce.RedisLettuceCacheConfig配置对象,包含Redis客户端、与Redis建立的安全连接等信息,因为底层是基于Netty实现的,所以无需配置线程池com.alicp.jetcache.redis.lettuce.LettuceConnectionManager自定义管理器将与Redis连接的相关信息封装成LettuceObjects对象,并管理RedisClient与LettuceObjects对应关系com.alicp.jetcache.test.external.LettuceTest当你设置了缓存类型为BOTH两级缓存,那么创建的实例对象会被封装成com.alicp.jetcache.MultiLevelCache对象
caches字段类型为Cache[],用于保存AbstractEmbeddedCache本地缓存实例和AbstractExternalCache远程缓存实例,本地缓存存放于远程缓存前面do_GET方法,遍历caches数组,也就是先从本地缓存获取,如果获取缓存不成功则从远程缓存获取,成功获取到缓存后会调用checkResultAndFillUpperCache方法checkResultAndFillUpperCache方法的逻辑可以看到,将获取到的缓存数据更新至更底层的缓存中,也就是说如果缓存数据是从远程获取到的,那么进入这个方法后会将获取到的缓存数据更新到本地缓存中去,这样下次请求可以直接从本地缓存获取,避免与Redis之间的网络消耗do_PUT方法,遍历caches数组,通过CompletableFuture进行异步编程,将所有的操作绑定在一条链上执行。PUT(K key, V value)方法,会先判断是否单独配置了本地缓存时间localExipre,配置了则单独为本地缓存设置过期时间,没有配置则到期时间和远程缓存的一样tryLock方法,调用caches[caches.length-1].tryLock方法,也就是只会调用最顶层远程缓存的这个方法主要代码如下:
public class MultiLevelCache<K, V> extends AbstractCache<K, V> {
    private Cache[] caches;
    private MultiLevelCacheConfig<K, V> config;
    @SuppressWarnings("unchecked")
    @Deprecated
    public MultiLevelCache(Cache... caches) throws CacheConfigException {
        this.caches = caches;
        checkCaches();
        CacheConfig lastConfig = caches[caches.length - 1].config();
        config = new MultiLevelCacheConfig<>();
        config.setCaches(Arrays.asList(caches));
        config.setExpireAfterWriteInMillis(lastConfig.getExpireAfterWriteInMillis());
        config.setCacheNullValue(lastConfig.isCacheNullValue());
    }
    @SuppressWarnings("unchecked")
    public MultiLevelCache(MultiLevelCacheConfig<K, V> cacheConfig) throws CacheConfigException {
        this.config = cacheConfig;
        this.caches = cacheConfig.getCaches().toArray(new Cache[]{});
        checkCaches();
    }
    private void checkCaches() {
        if (caches == null || caches.length == 0) {
            throw new IllegalArgumentException();
        }
        for (Cache c : caches) {
            if (c.config().getLoader() != null) {
                throw new CacheConfigException("Loader on sub cache is not allowed, set the loader into MultiLevelCache.");
            }
        }
    }
    public Cache[] caches() {
        return caches;
    }
    @Override
    public MultiLevelCacheConfig<K, V> config() {
        return config;
    }
    @Override
    public CacheResult PUT(K key, V value) {
        if (config.isUseExpireOfSubCache()) { // 本地缓存使用自己的失效时间
            // 设置了TimeUnit为null,本地缓存则使用自己的到期时间
            return PUT(key, value, 0, null);
        } else {
            return PUT(key, value, config().getExpireAfterWriteInMillis(), TimeUnit.MILLISECONDS);
        }
    }
    @Override
    public CacheResult PUT_ALL(Map<? extends K, ? extends V> map) {
        if (config.isUseExpireOfSubCache()) {
            return PUT_ALL(map, 0, null);
        } else {
            return PUT_ALL(map, config().getExpireAfterWriteInMillis(), TimeUnit.MILLISECONDS);
        }
    }
    @Override
    protected CacheGetResult<V> do_GET(K key) {
    	// 遍历多级缓存(远程缓存排在后面)
        for (int i = 0; i < caches.length; i++) {
            Cache cache = caches[i];
            CacheGetResult result = cache.GET(key);
            if (result.isSuccess()) {
                CacheValueHolder<V> holder = unwrapHolder(result.getHolder());

                checkResultAndFillUpperCache(key, i, holder);
                return new CacheGetResult(CacheResultCode.SUCCESS, null, holder);
            }
        }
        return CacheGetResult.NOT_EXISTS_WITHOUT_MSG;
    }
    private CacheValueHolder<V> unwrapHolder(CacheValueHolder<V> h) {
        // if @Cached or @CacheCache change type from REMOTE to BOTH (or from BOTH to REMOTE),
        // during the dev/publish process, the value type which different application server put into cache server will be different
        // (CacheValueHolder<V> and CacheValueHolder<CacheValueHolder<V>>, respectively).
        // So we need correct the problem at here and in CacheGetResult.
        Objects.requireNonNull(h);
        if (h.getValue() instanceof CacheValueHolder) {
            return (CacheValueHolder<V>) h.getValue();
        } else {
            return h;
        }
    }
    private void checkResultAndFillUpperCache(K key, int i, CacheValueHolder<V> h) {
        Objects.requireNonNull(h);
        long currentExpire = h.getExpireTime();
        long now = System.currentTimeMillis();
        if (now <= currentExpire) {
            if(config.isUseExpireOfSubCache()){ // 如果使用本地自己的缓存过期时间
                // 使用本地缓存自己的过期时间
                PUT_caches(i, key, h.getValue(), 0, null);
            } else { // 使用远程缓存的过期时间
                long restTtl = currentExpire - now;
                if (restTtl > 0) { // 远程缓存数据还未失效,则重新设置本地的缓存
                    PUT_caches(i, key, h.getValue(), restTtl, TimeUnit.MILLISECONDS);
                }
            }
        }
    }
    @Override
    protected MultiGetResult<K, V> do_GET_ALL(Set<? extends K> keys) {
        HashMap<K, CacheGetResult<V>> resultMap = new HashMap<>();
        Set<K> restKeys = new HashSet<>(keys);
        for (int i = 0; i < caches.length; i++) {
            if (restKeys.size() == 0) {
                break;
            }
            Cache<K, CacheValueHolder<V>> c = caches[i];
            MultiGetResult<K, CacheValueHolder<V>> allResult = c.GET_ALL(restKeys);
            if (allResult.isSuccess() && allResult.getValues() != null) {
                for (Map.Entry<K, CacheGetResult<CacheValueHolder<V>>> en : allResult.getValues().entrySet()) {
                    K key = en.getKey();
                    CacheGetResult result = en.getValue();
                    if (result.isSuccess()) {
                        CacheValueHolder<V> holder = unwrapHolder(result.getHolder());
                        checkResultAndFillUpperCache(key, i, holder);
                        resultMap.put(key, new CacheGetResult(CacheResultCode.SUCCESS, null, holder));
                        restKeys.remove(key);
                    }
                }
            }
        }
        for (K k : restKeys) {
            resultMap.put(k, CacheGetResult.NOT_EXISTS_WITHOUT_MSG);
        }
        return new MultiGetResult<>(CacheResultCode.SUCCESS, null, resultMap);
    }
    @Override
    protected CacheResult do_PUT(K key, V value, long expireAfterWrite, TimeUnit timeUnit) {
        return PUT_caches(caches.length, key, value, expireAfterWrite, timeUnit);
    }
    @Override
    protected CacheResult do_PUT_ALL(Map<? extends K, ? extends V> map, long expireAfterWrite, TimeUnit timeUnit) {
        CompletableFuture<ResultData> future = CompletableFuture.completedFuture(null);
        for (Cache c : caches) {
            CacheResult r;
            if(timeUnit == null) {
                r = c.PUT_ALL(map);
            } else {
                r = c.PUT_ALL(map, expireAfterWrite, timeUnit);
            }
            future = combine(future, r);
        }
        return new CacheResult(future);
    }
    private CacheResult PUT_caches(int lastIndex, K key, V value, long expire, TimeUnit timeUnit) {
        CompletableFuture<ResultData> future = CompletableFuture.completedFuture(null);
        for (int i = 0; i < lastIndex; i++) {
            Cache cache = caches[i];
            CacheResult r;
            if (timeUnit == null) { // 表示本地缓存使用自己过期时间
                r = cache.PUT(key, value);
            } else {
                r = cache.PUT(key, value, expire, timeUnit);
            }
            // 将多个 PUT 操作放在一条链上
            future = combine(future, r);
        }
        return new CacheResult(future);
    }
    private CompletableFuture<ResultData> combine(CompletableFuture<ResultData> future, CacheResult result) {
        return future.thenCombine(result.future(), (d1, d2) -> {
            if (d1 == null) {
                return d2;
            }
            if (d1.getResultCode() != d2.getResultCode()) {
                return new ResultData(CacheResultCode.PART_SUCCESS, null, null);
            }
            return d1;
        });
    }
    @Override
    protected CacheResult do_REMOVE(K key) {
        CompletableFuture<ResultData> future = CompletableFuture.completedFuture(null);
        for (Cache cache : caches) {
            CacheResult r = cache.REMOVE(key);
            future = combine(future, r);
        }
        return new CacheResult(future);
    }
    @Override
    protected CacheResult do_REMOVE_ALL(Set<? extends K> keys) {
        CompletableFuture<ResultData> future = CompletableFuture.completedFuture(null);
        for (Cache cache : caches) {
            CacheResult r = cache.REMOVE_ALL(keys);
            future = combine(future, r);
        }
        return new CacheResult(future);
    }
    @Override
    public <T> T unwrap(Class<T> clazz) {
        Objects.requireNonNull(clazz);
        for (Cache cache : caches) {
            try {
                T obj = (T) cache.unwrap(clazz);
                if (obj != null) {
                    return obj;
                }
            } catch (IllegalArgumentException e) {
                // ignore
            }
        }
        throw new IllegalArgumentException(clazz.getName());
    }
    @Override
    public AutoReleaseLock tryLock(K key, long expire, TimeUnit timeUnit) {
        if (key == null) {
            return null;
        }
        return caches[caches.length - 1].tryLock(key, expire, timeUnit);
    }
    @Override
    public boolean putIfAbsent(K key, V value) {
        throw new UnsupportedOperationException("putIfAbsent is not supported by MultiLevelCache");
    }
    @Override
    protected CacheResult do_PUT_IF_ABSENT(K key, V value, long expireAfterWrite, TimeUnit timeUnit) {
        throw new UnsupportedOperationException("PUT_IF_ABSENT is not supported by MultiLevelCache");
    }
    @Override
    public void close() {
        for (Cache c : caches) {
            c.close();
        }
    }
}com.alicp.jetcache.RefreshCache为缓存实例添加刷新任务,前面在AbstractCache抽象类中讲到了,在com.alicp.jetcache.anno.support.CacheContext.buildCache方法中会将cache包装成CacheHandlerRefreshCache,所以说每个缓存实例都会调用一下addOrUpdateRefreshTask方法,代码如下:
public class RefreshCache<K, V> extends LoadinGCache<K, V> {

    protected CacheConfig<K, V> config;


	private ConcurrentHashMap<Object, RefreshTask> taskMap = new ConcurrentHashMap<>();

    protected void addOrUpdateRefreshTask(K key, CacheLoader<K, V> loader) {
		// 获取缓存刷新策略
		RefreshPolicy refreshPolicy = config.getRefreshPolicy();
		if (refreshPolicy == null) { // 没有则不进行刷新
			return;
		}
		// 获取刷新时间间隔
		long refreshMillis = refreshPolicy.getRefreshMillis();
		if (refreshMillis > 0) {
			// 获取线程任务的ID
			Object taskId = getTaskId(key);
			// 获取对应的RefreshTask,不存在则创建一个
			RefreshTask refreshTask = taskMap.computeIfAbsent(taskId, tid -> {
				logger.debug("add refresh task. interval={},  key={}", refreshMillis, key);
				RefreshTask task = new RefreshTask(taskId, key, loader);
				task.lastAccessTime = System.currentTimeMillis();

				ScheduledFuture<?> future = JetCacheExecutor.heavyIOExecutor().scheduleWithFixedDelay(task,
						refreshMillis, refreshMillis, TimeUnit.MILLISECONDS);
				task.future = future;
				return task;
			});
			// 设置最后一次访问时间
			refreshTask.lastAccessTime = System.currentTimeMillis();
		}
	}
}如果缓存实例配置了刷新策略并且刷新间隔大于0,则会从taskMap(线程安全)中尝试获取对应的刷新任务RefreshTask,如果不存在则创建一个任务放入线程池周期性的执行
com.alicp.jetcache.RefreshCache.RefreshTask代码如下:
public class RefreshCache<K, V> extends LoadingCache<K, V> {

    protected Cache concreteCache() {
		Cache c = getTargetCache();
		while (true) {
			if (c instanceof ProxyCache) {
				c = ((ProxyCache) c).getTargetCache();
			} else if (c instanceof MultiLevelCache) {
				Cache[] caches = ((MultiLevelCache) c).caches();
				// 如果是两级缓存则返回远程缓存
				c = caches[caches.length - 1];
			} else {
				return c;
			}
		}
	}

    class RefreshTask implements Runnable {

		private Object taskId;

		private K key;

		private CacheLoader<K, V> loader;

		private long lastAccessTime;

		private ScheduledFuture future;
		RefreshTask(Object taskId, K key, CacheLoader<K, V> loader) {
			this.taskId = taskId;
			this.key = key;
			this.loader = loader;
		}
		private void cancel() {
			logger.debug("cancel refresh: {}", key);
			// 尝试中断当前任务
			future.cancel(false);
			// 从任务列表中删除
			taskMap.remove(taskId);
		}

		private void load() throws Throwable {
			CacheLoader<K, V> l = loader == null ? config.getLoader() : loader;
			if (l != null) {
				// 封装 CacheLoader 成 ProxyLoader,加载后会发起 Load 事件
				l = CacheUtil.createProxyLoader(cache, l, eventConsumer);
				// 加载
				V v = l.load(key);
				if (needUpdate(v, l)) {
					// 将重新加载的数据放入缓存
					cache.PUT(key, v);
				}
			}
		}

		private void externalLoad(final Cache concreteCache, final long currentTime) throws Throwable {
			// 获取 Key 转换后的值
			byte[] newKey = ((AbstractExternalCache) concreteCache).buildKey(key);
			// 创建分布式锁对应的Key
			byte[] lockKey = combine(newKey, "_#RL#".getBytes());
			// 分布式锁的存在时间
			long loadTimeOut = RefreshCache.this.config.getRefreshPolicy().getRefreshLockTimeoutMillis();
			// 刷新间隔
			long refreshMillis = config.getRefreshPolicy().getRefreshMillis();
			// Key对应的时间戳Key(用于存放上次刷新时间)
			byte[] timestampKey = combine(newKey, "_#TS#".getBytes());
			// AbstractExternalCache buildKey method will not convert byte[]
			// 获取Key上一次刷新时间
			CacheGetResult refreshTimeResult = concreteCache.GET(timestampKey);
			boolean shouldLoad = false; // 是否需要重新加载
			if (refreshTimeResult.isSuccess()) {
				// 当前时间与上一次刷新的时间间隔是否大于或等于刷新间隔
				shouldLoad = currentTime >= Long.parseLong(refreshTimeResult.getValue().toString()) + refreshMillis;
			} else if (refreshTimeResult.getResultCode() == CacheResultCode.NOT_EXISTS) { // 无缓存
				shouldLoad = true;
			}
			if (!shouldLoad) {
				if (multiLevelCache) {
					// 将顶层的缓存数据更新至低层的缓存中,例如将远程的缓存数据放入本地缓存
					// 因为如果是多级缓存,创建刷新任务后,我们只需更新远程的缓存,然后从远程缓存获取缓存数据更新低层的缓存,保证缓存一致
					refreshUpperCaches(key);
				}
				return;
			}
			// 重新加载
			Runnable r = () -> {
				try {
					load();
					// AbstractExternalCache buildKey method will not convert byte[]
					// 保存一个key-value至redis,其中的信息为该value的生成时间,刷新缓存
					concreteCache.put(timestampKey, String.valueOf(System.currentTimeMillis()));
				} catch (Throwable e) {
					throw new CacheException("refresh error", e);
				}
			};
			// AbstractExternalCache buildKey method will not convert byte[]
			// 分布式缓存没有一个全局分配的功能,这里尝试获取一把非严格的分布式锁,获取锁的超时时间默认60秒,也就是获取到这把锁最多可以拥有60秒
			// 只有获取Key对应的这把分布式锁,才执行重新加载的操作
			boolean lockSuccess = concreteCache.tryLockAndRun(lockKey, loadTimeOut, TimeUnit.MILLISECONDS, r);
			if (!lockSuccess && multiLevelCache) { // 没有获取到锁并且是多级缓存
				// 这个时候应该有其他实例在刷新缓存,所以这里设置过一会直接获取远程的缓存数据更新到本地
				// 创建一个延迟任务(1/5刷新间隔后),将最顶层的缓存数据更新至每一层
				JetCacheExecutor.heavyIOExecutor().schedule(() -> refreshUpperCaches(key), (long) (0.2 * refreshMillis),
						TimeUnit.MILLISECONDS);
			}
		}
		private void refreshUpperCaches(K key) {
			MultiLevelCache<K, V> targetCache = (MultiLevelCache<K, V>) getTargetCache();
			Cache[] caches = targetCache.caches();
			int len = caches.length;
			// 获取多级缓存中顶层的缓存数据
			CacheGetResult cacheGetResult = caches[len - 1].GET(key);
			if (!cacheGetResult.isSuccess()) {
				return;
			}
			// 将缓存数据重新放入低层缓存
			for (int i = 0; i < len - 1; i++) {
				caches[i].PUT(key, cacheGetResult.getValue());
			}
		}

		@Override
		public void run() {
			try {
				if (config.getRefreshPolicy() == null || (loader == null && !hasLoader())) {
					// 取消执行
					cancel();
					return;
				}
				long now = System.currentTimeMillis();
				long stopRefreshAfterLastAcceSSMillis = config.getRefreshPolicy().getStopRefreshAfterLastAccessMillis();
				if (stopRefreshAfterLastAccessMillis > 0) {
					// 最后一次访问到现在时间的间隔超过了设置的 stopRefreshAfterLastAccessMillis,则取消当前任务执行
					if (lastAccessTime + stopRefreshAfterLastAccessMillis < now) {
						logger.debug("cancel refresh: {}", key);
						cancel();
						return;
					}
				}
				logger.debug("refresh key: {}", key);
				// 获取缓存实例对象,如果是多层则返回顶层,也就是远程缓存
				Cache concreteCache = concreteCache();
				if (concreteCache instanceof AbstractExternalCache) { // 远程缓存刷新
					externalLoad(concreteCache, now);
				} else { // 本地缓存刷新
					load();
				}
			} catch (Throwable e) {
				logger.error("refresh error: key=" + key, e);
			}
		}
	}
}
刷新逻辑:
future的cancel方法取消执行,并从taskMap中删除load方法,也就是执行loader函数加载原有方法,将获取到的数据更新至缓存实例中(如果是多级缓存,则每级缓存都会更新)externalLoad方法,刷新后会往Redis中存放一个键值对,key为key_#TS#,value为上一次刷新时间先从Redis中获取上一次刷新时间的键值对,根据上一次刷新的时间判断是否大于刷新间隔,大于(或者没有上一次刷新时间)表示需要重新加载数据,否则不需要重新加载数据
如果不需要重新加载数据,但是又是多级缓存,则获取远程缓存数据更新至本地缓存,保证两级缓存的一致性
如果需要重新加载数据,则调用tryLockAndRun方法,尝试获取分布式锁,执行刷新任务(调用load方法,并往Redis中重新设置上一次的刷新时间),如果没有获取到分布式锁,则创建一个延迟任务(1/5刷新间隔后)将最顶层的缓存数据更新至每一层
主要查看jetcache-autoconfigure子模块,解析application.yml中jetcache相关配置,初始化不同缓存类型的CacheBuilder构造器,用于生产缓存实例,也初始化以下对象:
com.alicp.jetcache.anno.support.ConfigProvider:缓存管理器,注入了全局配置GlobalCacheConfig、缓存实例管理器SimpleCacheManager、缓存上下文CacheContext等大量信息
com.alicp.jetcache.autoconfigure.AutoConfigureBeans:存储CacheBuilder构造器以及Redis的相关信息
com.alicp.jetcache.anno.support.GlobalCacheConfig:全局配置类,保存了一些全局信息
通过@Conditional注解将需要使用到的缓存类型对应的构造器初始化类注入到Spring容器并执行初始化过程,也就是创建CacheBuilder构造器
初始化构造器类的类型结构如下图所示:
主要对象描述:
AbstractCacheAutoInit:抽象类,实现Spring的InitializingBean接口,注入至Spring容器时完成初始化
EmbeddedCacheAutoInit:抽象类,继承AbstractCacheAutoInit,解析本地缓存独有的配置
LinkedHashMapAutoConfiguration:初始化LinkedHashMapCacheBuilder构造器
CaffeineAutoConfiguration:初始化CaffeineCacheBuilder构造器
ExternalCacheAutoInit:抽象类,继承AbstractCacheAutoInit,解析远程缓存独有的配置
RedisAutoInit:初始化RedisCacheBuilder构造器
RedisLettuceAutoInit:初始化RedisLettuceCacheBuilder构造器
com.alicp.jetcache.autoconfigure.AbstractCacheAutoInit抽象类主要实现了Spring的InitializingBean接口,在注入Spring容器时,Spring会调用其afterPropertiesSet方法,完成本地缓存类型和远程缓存类型CacheBuilder构造器的初始化,主要代码如下:
public abstract class AbstractCacheAutoInit implements InitializingBean {
    @Autowired
    protected ConfigurableEnvironment environment;
    @Autowired
    protected AutoConfigureBeans autoConfigureBeans;
    @Autowired
    protected ConfigProvider configProvider;
    protected String[] typeNames;
    private boolean inited = false;
    public AbstractCacheAutoInit(String... cacheTypes) {
        Objects.requireNonNull(cacheTypes,"cacheTypes can't be null");
        Assert.isTrue(cacheTypes.length > 0, "cacheTypes length is 0");
        this.typeNames = cacheTypes;
    }

    @Override
    public void afterPropertiesSet() {
        if (!inited) {
            synchronized (this) {
                if (!inited) {
                    // 这里我们有两个指定前缀 'jetcache.local' 'jetcache.remote'
                    process("jetcache.local.", autoConfigureBeans.getLocalCacheBuilders(), true);
                    process("jetcache.remote.", autoConfigureBeans.getRemoteCacheBuilders(), false);
                    inited = true;
                }
            }
        }
    }
    private void process(String prefix, Map cacheBuilders, boolean local) {
        // 创建一个配置对象(本地或者远程)
        ConfigTree resolver = new ConfigTree(environment, prefix);
        // 获取本地或者远程的配置项
        Map<String, Object> m = resolver.getProperties();
        // 获取本地或者远程的 area ,这里我一般只有默认的 default
        Set<String> cacheAreaNames = resolver.directChildrenKeys();
        for (String cacheArea : cacheAreaNames) {
            // 获取本地或者远程存储类型,例如 caffeine,redis.lettuce
            final Object configType = m.get(cacheArea + ".type");
            // 缓存类型是否和当前 CacheAutoInit 的某一个 typeName 匹配(不同的 CacheAutoInit 会设置一个或者多个 typename)
            boolean match = Arrays.stream(typeNames).anyMatch((tn) -> tn.equals(configType));

            if (!match) {
                continue;
            }
            // 获取本地或者远程的 area 的子配置项
            ConfigTree ct = resolver.subTree(cacheArea + ".");
            logger.info("init cache area {} , type= {}", cacheArea, typeNames[0]);
            // 根据配置信息构建本地或者远程缓存的 CacheBuilder 构造器
            CacheBuilder c = initCache(ct, local ? "local." + cacheArea : "remote." + cacheArea);
            // 将 CacheBuilder 构造器存放至 AutoConfigureBeans
            cacheBuilders.put(cacheArea, c);
        }
    }

    protected void parseGeneralConfig(CacheBuilder builder, ConfigTree ct) {
        AbstractCacheBuilder acb = (AbstractCacheBuilder) builder;
        // 设置 Key 的转换函数
        acb.keyConvertor(configProvider.parseKeyConvertor(ct.getProperty("keyConvertor")));
        // 设置超时时间
        String expireAfterWriteInMillis = ct.getProperty("expireAfterWriteInMillis");
        if (expireAfterWriteInMillis == null) {
            // compatible with 2.1 兼容老版本
            expireAfterWriteInMillis = ct.getProperty("defaultExpireInMillis");
        }
        if (expireAfterWriteInMillis != null) {
            acb.setExpireAfterWriteInMillis(Long.parseLong(expireAfterWriteInMillis));
        }
        // 多长时间没有访问就让缓存失效,0表示不使用该功能(注意:只支持本地缓存)
        String expireAfterAccessInMillis = ct.getProperty("expireAfterAccessInMillis");
        if (expireAfterAccessInMillis != null) {
            acb.setExpireAfterAccessInMillis(Long.parseLong(expireAfterAccessInMillis));
        }
    }

    protected abstract CacheBuilder initCache(ConfigTree ct, String cacheAreaWithPrefix);
}
1.在afterPropertiesSet()方法中可以看到会调用process方法分别初始化本地缓存和远程缓存的构造器
2.定义的process方法:
initCache交由子类实现AutoConfigureBeans对象中去3.另外也定义了parseGeneralConfig方法解析本地缓存和远程缓存都有的配置至CacheBuilder构造器中
com.alicp.jetcache.autoconfigure.EmbeddedCacheAutoInit抽象类继承了AbstractCacheAutoInit,主要是覆盖父类的parseGeneralConfig,解析本地缓存单有的配置limit,代码如下:
public abstract class EmbeddedCacheAutoInit extends AbstractCacheAutoInit {
    public EmbeddedCacheAutoInit(String... cacheTypes) {
        super(cacheTypes);
    }
    @Override
    protected void parseGeneralConfig(CacheBuilder builder, ConfigTree ct) {
        super.parseGeneralConfig(builder, ct);
        EmbeddedCacheBuilder ecb = (EmbeddedCacheBuilder) builder;
        // 设置本地缓存每个缓存实例的缓存数量个数限制(默认100)
        ecb.limit(Integer.parseInt(ct.getProperty("limit", String.valueOf(CacheConsts.DEFAULT_LOCAL_LIMIT))));
    }
}com.alicp.jetcache.autoconfigure.LinkedHashMapAutoConfiguration继承了EmbeddedCacheAutoInit,实现了initCache方法,先通过LinkedHashMapCacheBuilder创建一个默认实现类,然后解析相关配置至构造器中完成初始化,代码如下:
@Component
@Conditional(LinkedHashMapAutoConfiguration.LinkedHashMapCondition.class)
public class LinkedHashMapAutoConfiguration extends EmbeddedCacheAutoInit {
    public LinkedHashMapAutoConfiguration() {
        super("linkedhashmap");
    }
    @Override
    protected CacheBuilder initCache(ConfigTree ct, String cacheAreaWithPrefix) {
        // 创建一个 LinkedHashMapCacheBuilder 构造器
        LinkedHashMapCacheBuilder builder = LinkedHashMapCacheBuilder.createLinkedHashMapCacheBuilder();
        // 解析相关配置至 LinkedHashMapCacheBuilder 的 CacheConfig 中
        parseGeneralConfig(builder, ct);
        return builder;
    }
    public static class LinkedHashMapCondition extends JetCacheCondition {
        // 配置了缓存类型为 linkedhashmap 当前类才会被注入 Spring 容器
        public LinkedHashMapCondition() {
            super("linkedhashmap");
        }
    }
}@Conditional注解,这个注解的作用是:满足SpringBootCondition条件这个Bean才会被Spring容器管理LinkedHashMapCondition,继承了JetCacheCondition,也就是说配置文件中配置了缓存类型为linkedhashmap时这个类才会被Spring容器管理,才会完成LinkedHashMapCacheBuilder构造器的初始化JetCacheCondition逻辑并不复杂,可自行查看com.alicp.jetcache.autoconfigure.CaffeineAutoConfiguration继承了EmbeddedCacheAutoInit,实现了initCache方法,先通过CaffeineCacheBuilder创建一个默认实现类,然后解析相关配置至构造器中完成初始化,代码如下:
@Component
@Conditional(CaffeineAutoConfiguration.CaffeineCondition.class)
public class CaffeineAutoConfiguration extends EmbeddedCacheAutoInit {
    public CaffeineAutoConfiguration() {
        super("caffeine");
    }
    @Override
    protected CacheBuilder initCache(ConfigTree ct, String cacheAreaWithPrefix) {
        // 创建一个 CaffeineCacheBuilder 构造器
        CaffeineCacheBuilder builder = CaffeineCacheBuilder.createCaffeineCacheBuilder();
        // 解析相关配置至 CaffeineCacheBuilder 的 CacheConfig 中
        parseGeneralConfig(builder, ct);
        return builder;
    }
    public static class CaffeineCondition extends JetCacheCondition {
        // 配置了缓存类型为 caffeine 当前类才会被注入 Spring 容器
        public CaffeineCondition() {
            super("caffeine");
        }
    }
}@Conditional注解,这个注解的作用是:满足SpringBootCondition条件这个Bean才会被Spring容器管理CaffeineCondition,继承了JetCacheCondition,也就是说配置文件中配置了缓存类型为caffeine时这个类才会被Spring容器管理,才会完成LinkedHashMapCacheBuilder构造器的初始化com.alicp.jetcache.autoconfigure.ExternalCacheAutoInit抽象类继承了AbstractCacheAutoInit,主要是覆盖父类的parseGeneralConfig,解析远程缓存单有的配置keyPrefix、valueEncoder和valueDecoder,代码如下:
public abstract class ExternalCacheAutoInit extends AbstractCacheAutoInit {
    public ExternalCacheAutoInit(String... cacheTypes) {
        super(cacheTypes);
    }

    @Override
    protected void parseGeneralConfig(CacheBuilder builder, ConfigTree ct) {
        super.parseGeneralConfig(builder, ct);
        ExternalCacheBuilder ecb = (ExternalCacheBuilder) builder;
        // 设置远程缓存 key 的前缀
        ecb.setKeyPrefix(ct.getProperty("keyPrefix"));

        ecb.setValueEncoder(configProvider.parseValueEncoder(ct.getProperty("valueEncoder", CacheConsts.DEFAULT_SERIAL_POLICY)));
        ecb.setValueDecoder(configProvider.parseValueDecoder(ct.getProperty("valueDecoder", CacheConsts.DEFAULT_SERIAL_POLICY)));
    }
}
com.alicp.jetcache.autoconfigure.RedisAutoInit继承了ExternalCacheAutoInit,实现initCache方法,完成了通过Jedis连接Redis的初始化操作,主要代码如下:
@Configuration
@Conditional(RedisAutoConfiguration.RedisCondition.class)
public class RedisAutoConfiguration {
    public static final String AUTO_INIT_BEAN_NAME = "redisAutoInit";
    @Bean(name = AUTO_INIT_BEAN_NAME)
    public RedisAutoInit redisAutoInit() {
        return new RedisAutoInit();
    }
    public static class RedisCondition extends JetCacheCondition {
        // 配置了缓存类型为 redis 当前类才会被注入 Spring 容器
        public RedisCondition() {
            super("redis");
        }
    }
    public static class RedisAutoInit extends ExternalCacheAutoInit {
        public RedisAutoInit() {
            // 设置缓存类型
            super("redis");
        }
        @Autowired
        private AutoConfigureBeans autoConfigureBeans;
        @Override
        protected CacheBuilder initCache(ConfigTree ct, String cacheAreaWithPrefix) {
            Pool jedisPool = parsePool(ct);
            Pool[] slavesPool = null;
            int[] slavesPoolWeights = null;
            // 是否只从 Redis 的从节点读取数据
            boolean readFromSlave = Boolean.parseBoolean(ct.getProperty("readFromSlave", "False"));
            // 获取从节点的配置信息
            ConfigTree slaves = ct.subTree("slaves.");
            Set<String> slaveNames = slaves.directChildrenKeys();
            // 依次创建每个从节点的连接池
            if (slaveNames.size() > 0) {
                slavesPool = new Pool[slaveNames.size()];
                slavesPoolWeights = new int[slaveNames.size()];
                int i = 0;
                for (String slaveName: slaveNames) {
                    ConfigTree slaveConfig = slaves.subTree(slaveName + ".");
                    slavesPool[i] = parsePool(slaveConfig);
                    slavesPoolWeights[i] = Integer.parseInt(slaveConfig.getProperty("weight","100"));
                    i++;
                }
            }
            // 创建一个 RedisCacheBuilder 构造器
            ExternalCacheBuilder externalCacheBuilder = RedisCacheBuilder.createRedisCacheBuilder()
                    .jedisPool(jedisPool)
                    .readFromSlave(readFromSlave)
                    .jedisSlavePools(slavesPool)
                    .slaveReadWeights(slavesPoolWeights);
            // 解析相关配置至 RedisCacheBuilder 的 CacheConfig 中
            parseGeneralConfig(externalCacheBuilder, ct);
            // eg: "jedisPool.remote.default"
            autoConfigureBeans.getCustomContainer().put("jedisPool." + cacheAreaWithPrefix, jedisPool);
            return externalCacheBuilder;
        }

        private Pool<Jedis> parsePool(ConfigTree ct) {
            // 创建连接池配置对象
            GenericObjectPoolConfig poolConfig = parsePoolConfig(ct);
            String host = ct.getProperty("host", (String) null);
            int port = Integer.parseInt(ct.getProperty("port", "0"));
            int timeout = Integer.parseInt(ct.getProperty("timeout", String.valueOf(Protocol.DEFAULT_TIMEOUT)));
            String password = ct.getProperty("password", (String) null);
            int database = Integer.parseInt(ct.getProperty("database", String.valueOf(Protocol.DEFAULT_DATABASE)));
            String clientName = ct.getProperty("clientName", (String) null);
            boolean ssl = Boolean.parseBoolean(ct.getProperty("ssl", "false"));
            String masterName = ct.getProperty("masterName", (String) null);
            String sentinels = ct.getProperty("sentinels", (String) null);//ip1:port,ip2:port
            Pool<Jedis> jedisPool;
            if (sentinels == null) {
                Objects.requireNonNull(host, "host/port or sentinels/masterName is required");
                if (port == 0) {
                    throw new IllegalStateException("host/port or sentinels/masterName is required");
                }
                // 创建一个 Jedis 连接池
                jedisPool = new JedisPool(poolConfig, host, port, timeout, password, database, clientName, ssl);
            } else {
                Objects.requireNonNull(masterName, "host/port or sentinels/masterName is required");
                String[] strings = sentinels.split(",");
                HashSet<String> sentinelsSet = new HashSet<>();
                for (String s : strings) {
                    if (s != null && !s.trim().equals("")) {
                        sentinelsSet.add(s.trim());
                    }
                }
                // 创建一个 Jedis Sentine 连接池
                jedisPool = new JedisSentinelPool(masterName, sentinelsSet, poolConfig, timeout, password, database, clientName);
            }
            return jedisPool;
        }
    }
}com.alicp.jetcache.autoconfigure.RedisAutoInit是com.alicp.jetcache.autoconfigure.RedisAutoConfiguration内部的静态类,在RedisAutoConfiguration内通过redisAutoInit()方法定义RedisAutoInit作为Spring Bean
同样RedisAutoConfiguration使用了@Conditional注解,满足SpringBootCondition条件这个Bean才会被Spring容器管理,内部的RedisAutoInit也不会被管理,也就是说配置文件中配置了缓存类型为redis时RedisLettuceAutoInit才会被Spring容器管理,才会完成RedisLettuceCacheBuilder构造器的初始化
实现了initCache方法
AutoConfigureBeans中com.alicp.jetcache.autoconfigure.RedisLettuceAutoInit继承了ExternalCacheAutoInit,实现initCache方法,完成了通过Lettuce连接Redis的初始化操作,主要代码如下:
@Configuration
@Conditional(RedisLettuceAutoConfiguration.RedisLettuceCondition.class)
public class RedisLettuceAutoConfiguration {
    public static final String AUTO_INIT_BEAN_NAME = "redisLettuceAutoInit";

    public static class RedisLettuceCondition extends JetCacheCondition {
        // 配置了缓存类型为 redis.lettuce 当前类才会被注入 Spring 容器
        public RedisLettuceCondition() {
            super("redis.lettuce");
        }
    }
    @Bean(name = {AUTO_INIT_BEAN_NAME})
    public RedisLettuceAutoInit redisLettuceAutoInit() {
        return new RedisLettuceAutoInit();
    }
    public static class RedisLettuceAutoInit extends ExternalCacheAutoInit {
        public RedisLettuceAutoInit() {
            // 设置缓存类型
            super("redis.lettuce");
        }

        @Override
        protected CacheBuilder initCache(ConfigTree ct, String cacheAreaWithPrefix) {
            Map<String, Object> map = ct.subTree("uri").getProperties();
            // 数据节点偏好设置
            String readFromStr = ct.getProperty("readFrom");
            // 集群模式
            String mode = ct.getProperty("mode");
            // 异步获取结果的超时时间,默认1s
            long asyncResultTimeoutInMillis = Long.parseLong(
                    ct.getProperty("asyncResultTimeoutInMillis", Long.toString(CacheConsts.ASYNC_RESULT_TIMEOUT.toMillis())));
            ReadFrom readFrom = null;
            if (readFromStr != null) {

                readFrom = ReadFrom.valueOf(readFromStr.trim());
            }
            AbstractRedisClient client;
            StatefulConnection connection = null;
            if (map == null || map.size() == 0) {
                throw new CacheConfigException("lettuce uri is required");
            } else {
                // 创建对应的 RedisURI
                List<RedisURI> uriList = map.values().stream().map((k) -> RedisURI.create(URI.create(k.toString())))
                        .collect(Collectors.toList());
                if (uriList.size() == 1) { // 只有一个 URI,集群模式只给一个域名怎么办 TODO 疑问??
                    RedisURI uri = uriList.get(0);
                    if (readFrom == null) {
                        // 创建一个 Redis 客户端
                        client = RedisClient.create(uri);
                        // 设置失去连接时的行为,拒绝命令,默认为 DEFAULT
                        ((RedisClient) client).setOptions(ClientOptions.builder().
                                disconnectedBehavior(ClientOptions.DisconnectedBehavior.REJECT_COMMANDS).build());
                    } else {
                        // 创建一个 Redis 客户端
                        client = RedisClient.create();
                        ((RedisClient) client).setOptions(ClientOptions.builder().
                                disconnectedBehavior(ClientOptions.DisconnectedBehavior.REJECT_COMMANDS).build());
                        // 创建一个安全连接并设置数据节点偏好
                        StatefulRedisMasterSlaveConnection c = MasterSlave.connect(
                                (RedisClient) client, new JetCacheCodec(), uri);
                        c.setReadFrom(readFrom);
                        connection = c;
                    }
                } else { // 多个 URI,集群模式
                    if (mode != null && mode.equalsIgnoreCase("MasterSlave")) {
                        client = RedisClient.create();
                        ((RedisClient) client).setOptions(ClientOptions.builder().
                                disconnectedBehavior(ClientOptions.DisconnectedBehavior.REJECT_COMMANDS).build());
                        StatefulRedisMasterSlaveConnection c = MasterSlave.connect(
                                (RedisClient) client, new JetCacheCodec(), uriList);
                        if (readFrom != null) {
                            c.setReadFrom(readFrom);
                        }
                        connection = c;
                    } else {
                        // 创建一个 Redis 客户端
                        client = RedisClusterClient.create(uriList);
                        ((RedisClusterClient) client).setOptions(ClusterClientOptions.builder().
                                disconnectedBehavior(ClientOptions.DisconnectedBehavior.REJECT_COMMANDS).build());
                        if (readFrom != null) {
                            StatefulRedisClusterConnection c = ((RedisClusterClient) client).connect(new JetCacheCodec());
                            c.setReadFrom(readFrom);
                            connection = c;
                        }
                    }
                }
            }
            // 创建一个 RedisLettuceCacheBuilder 构造器
            ExternalCacheBuilder externalCacheBuilder = RedisLettuceCacheBuilder.createRedisLettuceCacheBuilder()
                    .connection(connection)
                    .redisClient(client)
                    .asyncResultTimeoutInMillis(asyncResultTimeoutInMillis);
            // 解析相关配置至 RedisLettuceCacheBuilder 的 CacheConfig 中
            parseGeneralConfig(externalCacheBuilder, ct);
            // eg: "remote.default.client"
            autoConfigureBeans.getCustomContainer().put(cacheAreaWithPrefix + ".client", client);
            // 开始将 Redis 客户端和安全连接保存至 LettuceConnectionManager 管理器中
            LettuceConnectionManager m = LettuceConnectionManager.defaultManager();
            // 初始化 Lettuce 连接 Redis
            m.init(client, connection);
            // 初始化 Redis 连接的相关信息保存至 LettuceObjects 中,并将相关信息保存至 AutoConfigureBeans.customContainer
            autoConfigureBeans.getCustomContainer().put(cacheAreaWithPrefix + ".connection", m.connection(client));
            autoConfigureBeans.getCustomContainer().put(cacheAreaWithPrefix + ".commands", m.commands(client));
            autoConfigureBeans.getCustomContainer().put(cacheAreaWithPrefix + ".asyncCommands", m.asyncCommands(client));
            autoConfigureBeans.getCustomContainer().put(cacheAreaWithPrefix + ".reactiveCommands", m.reactiveCommands(client));
            return externalCacheBuilder;
        }
    }
}
1.com.alicp.jetcache.autoconfigure.RedisLettuceAutoInit是com.alicp.jetcache.autoconfigure.RedisLettuceAutoConfiguration内部的静态类,在RedisLettuceAutoConfiguration内通过redisLettuceAutoInit()方法定义RedisLettuceAutoInit作为Spring Bean
2.同样RedisLettuceAutoConfiguration使用了@Conditional注解,满足SpringBootCondition条件这个Bean才会被Spring容器管理,内部的RedisLettuceAutoInit也不会被管理,也就是说配置文件中配置了缓存类型为redis.lettuce时RedisLettuceAutoInit才会被Spring容器管理,才会完成RedisLettuceCacheBuilder构造器的初始化
3.实现了initCache方法
LettuceConnectionManager管理器,将通过Lettuce创建Redis客户端和与Redis的连接保存AutoConfigureBeans中JetCacheAutoConfiguration自动配置
上面的初始化构造器的类需要被Spring容器管理,就需被扫描到,我们一般会设置扫描路径,但是别人引入JetCache肯定是作为其他包不能够被扫描到的,这些Bean也就不会被Spring管理,这里我们查看jetcache-autoconfigure模块下src/main/resources/META-INF/spring.factories文件,内容如下:
org.springframework.boot.autoconfigure.EnableAutoConfiguration=com.alicp.jetcache.autoconfigure.JetCacheAutoConfiguration
这应该是一种SPI机制,这样这个项目以外的JetCache包里面的com.alicp.jetcache.autoconfigure.JetCacheAutoConfiguration就会被Spring容器扫描到,我们来看看他的代码:
@Configuration
@ConditionalOnClass(GlobalCacheConfig.class)
@ConditionalOnMissingBean(GlobalCacheConfig.class)
@EnableConfigurationProperties(JetCacheProperties.class)
@Import({RedisAutoConfiguration.class,
        CaffeineAutoConfiguration.class,
        MockRemoteCacheAutoConfiguration.class,
        LinkedHashMapAutoConfiguration.class,
        RedisLettuceAutoConfiguration.class,
        RedisSpringDataAutoConfiguration.class})
public class JetCacheAutoConfiguration {
    public static final String GLOBAL_CACHE_CONFIG_NAME = "globalCacheConfig";
    private SpringConfigProvider _springConfigProvider = new SpringConfigProvider();
    private AutoConfigureBeans _autoConfigureBeans = new AutoConfigureBeans();
    private GlobalCacheConfig _globalCacheConfig;
    @Bean
    @ConditionalOnMissingBean
    public SpringConfigProvider springConfigProvider() {
        return _springConfigProvider;
    }
    @Bean
    public AutoConfigureBeans autoConfigureBeans() {
        return _autoConfigureBeans;
    }
    @Bean
    public static BeanDependencyManager beanDependencyManager(){
        return new BeanDependencyManager();
    }
    @Bean(name = GLOBAL_CACHE_CONFIG_NAME)
    public GlobalCacheConfig globalCacheConfig(SpringConfigProvider configProvider,
                                                            AutoConfigureBeans autoConfigureBeans,
                                                            JetCacheProperties props) {
        if (_globalCacheConfig != null) {
            return _globalCacheConfig;
        }
        _globalCacheConfig = new GlobalCacheConfig();
        _globalCacheConfig.setHiddenPackages(props.getHiddenPackages());
        _globalCacheConfig.setStatIntervalMinutes(props.getStatIntervalMinutes());
        _globalCacheConfig.setAreaInCacheName(props.isAreaInCacheName());
        _globalCacheConfig.setPenetrationProtect(props.isPenetrationProtect());
        _globalCacheConfig.setEnableMethodCache(props.isEnableMethodCache());
        _globalCacheConfig.setLocalCacheBuilders(autoConfigureBeans.getLocalCacheBuilders());
        _globalCacheConfig.setRemoteCacheBuilders(autoConfigureBeans.getRemoteCacheBuilders());
        return _globalCacheConfig;
    }
}@Import注解,初始化构造器的那些类会被加入到Spring容器,加上@Condotional注解,只有我们配置过的缓存类型的构造器才会被加入,然后保存至AutoConfigureBeans对象中SpringConfigProvider对象,加上@ConditionalOnMissingBean注解,无法再次注册该对象至Spring容器,相比ConfigProvider对象,它的区别是设置了EncoderParser为DefaultSpringEncoderParser,设置了KeyConvertorParser为DefaultSpringKeyConvertorParser,目的是支持两个解析器能够解析自定义beanBeanDependencyManager中可以看到它是一个BeanFactoryPostProcessor,用于BeanFactory容器初始后执行操作,目的是往JetCacheAutoConfiguration的BeanDefinition的依赖中添加几个AbstractCacheAutoInit类型的beanName,保证几个CacheBuilder构造器已经初始化globalCacheConfig方法中设置全局的相关配置并添加已经初始化的CacheBuilder构造器,然后返回GlobalCacheConfig让Spring容器管理,这样一来就完成了JetCache的解析配置并初始化的功能构造器的作用就是根据配置构建一个对应类型的缓存实例
CacheBuilder的子类结构如下:

根据类名就可以知道其作用
CacheBuilder接口只定义了一个buildCache()方法,用于构建缓存实例,交由不同的实现类
AbstractCacheBuilder抽象类实现了buildCache()方法,主要代码如下:
public abstract class AbstractCacheBuilder<T extends AbstractCacheBuilder<T>> implements CacheBuilder, Cloneable {

    protected CacheConfig config;

    private Function<CacheConfig, Cache> buildFunc;
    public abstract CacheConfig getConfig();
    protected T self() {
        return (T) this;
    }
    public T buildFunc(Function<CacheConfig, Cache> buildFunc) {
        this.buildFunc = buildFunc;
        return self();
    }
    protected void beforeBuild() {
    }
    @Deprecated
    public final <K, V> Cache<K, V> build() {
        return buildCache();
    }
    @Override
    public final <K, V> Cache<K, V> buildCache() {
        if (buildFunc == null) {
            throw new CacheConfigException("no buildFunc");
        }
        beforeBuild();
        // 克隆一份配置信息,因为这里获取到的是全局配置信息,以防后续被修改
        CacheConfig c = getConfig().clone();
        // 通过构建函数创建一个缓存实例
        Cache<K, V> cache = buildFunc.apply(c);

        if (c.getLoader() != null) {
            if (c.getRefreshPolicy() == null) {
                cache = new LoadingCache<>(cache);
            } else {
                cache = new RefreshCache<>(cache);
            }
        }
        return cache;
    }
    @Override
    public Object clone() {
        AbstractCacheBuilder copy = null;
        try {
            copy = (AbstractCacheBuilder) super.clone();
            copy.config = getConfig().clone();
            return copy;
        } catch (CloneNotSupportedException e) {
            throw new CacheException(e);
        }
    }
}
java.lang.Cloneable的clone方法,支持克隆该对象,因为每个缓存实例的配置不一定相同,这个构造器中保存的是全局的一些配置,所以需要克隆一个构造器出来为每个缓存实例设置其自己的配置而不影响这个最初始的构造器buildFunc函数用于构建缓存实例,我们在初始化构造器中可以看到,不同的构造器设置的该函数都是new一个缓存实例并传入配置信息,例如:// 设置构建 CaffeineCache 缓存实例的函数
buildFunc((c) -> new CaffeineCache((EmbeddedCacheConfig) c));
// 进入CaffeineCache的构造器你就可以看到会根据配置完成缓存实例的初始化不同类型的构造器区别在于CacheConfig类型不同,因为远程和本地的配置是有所区别的,还有就是设置的buildFunc函数不同,因为需要构建不同的缓存实例,和上面的例子差不多,都是new一个缓存实例并传入配置信息,这里就不一一讲述了
主要查看jetcache-anno子模块,提供AOP功能
JetCache可以通过@EnableMethodCache和@EnableCreateCacheAnnotation注解完成AOP的初始化工作,我们在Spring Boot工程中的启动类上面添加这两个注解即可启用JetCache缓存。
@Target(ElementType.TYPE)
@Retention(RetentionPolicy.RUNTIME)
@Documented
@Import({CommonConfiguration.class, ConfigSelector.class})
public @interface EnableMethodCache {
    boolean proxyTargetClass() default false;
    AdviceMode mode() default AdviceMode.PROXY;
    int order() default Ordered.LOWEST_PRECEDENCE;
    String[] basePackages();
}
注解的相关配置在上面的'如何使用'中已经讲过了,这里我们关注@Import注解中的CommonConfiguration和ConfigSelector两个类,将会被Spring容器管理
com.alicp.jetcache.anno.config.CommonConfiguration上面有@Configuration注解,所以会被作为一个Spring Bean,里面定义了一个Bean为ConfigMap,所以这个Bean也会被Spring容器管理,com.alicp.jetcache.anno.support.ConfigMap中保存方法与缓存注解配置信息的映射关系com.alicp.jetcache.anno.config.ConfigSelector继承了AdviceModeImportSelector,通过@Import注解他的selectImports方法会被调用,根据不同的AdviceMode导入不同的配置类,可以看到会返回一个JetCacheProxyConfiguration类名称,那么它也会被注入com.alicp.jetcache.anno.config.JetCacheProxyConfiguration是配置AOP的配置类,代码如下:
@Configuration
public class JetCacheProxyConfiguration implements ImportAware, ApplicationContextAware {
    protected AnnotationAttributes enableMethodCache;
    private ApplicationContext applicationContext;
    @Override
    public void setImportMetadata(AnnotationMetadata importMetadata) {
        // 获取 @EnableMethodCache 注解信息
        this.enableMethodCache = AnnotationAttributes.fromMap(
                importMetadata.getAnnotationAttributes(EnableMethodCache.class.getName(), false));
        if (this.enableMethodCache == null) {
            throw new IllegalArgumentException(
                    "@EnableMethodCache is not present on importing class " + importMetadata.getClassName());
        }
    }
    @Override
    public void setApplicationContext(ApplicationContext applicationContext) throws BeansException {
        this.applicationContext = applicationContext;
    }
    @Bean(name = CacheAdvisor.CACHE_ADVISOR_BEAN_NAME)
    @Role(BeanDefinition.ROLE_INFRASTRUCTURE)
    public CacheAdvisor jetcacheAdvisor(JetCacheInterceptor jetCacheInterceptor) {
        CacheAdvisor advisor = new CacheAdvisor();
        // bean的名称:jetcache2.internalCacheAdvisor
        advisor.setAdviceBeanName(CacheAdvisor.CACHE_ADVISOR_BEAN_NAME);
        // 设置缓存拦截器为 JetCacheInterceptor
        advisor.setAdvice(jetCacheInterceptor);
        // 设置需要扫描的包
        advisor.setBasePackages(this.enableMethodCache.getStringArray("basePackages"));
        // 设置优先级,默认 Integer 的最大值,最低优先级
        advisor.setOrder(this.enableMethodCache.<Integer>getNumber("order"));
        return advisor;
    }

    @Bean
    @Role(BeanDefinition.ROLE_INFRASTRUCTURE)
    public JetCacheInterceptor jetCacheInterceptor() {
        return new JetCacheInterceptor();
    }
}因为JetCacheProxyConfiguration是通过@Import注解注入的并且实现了ImportAware接口,当被注入Bean的时候会先调用其setImportMetadata方法(这里好像必须添加@Configuration注解,不然无法被Spring识别出来)获取到@EnableMethodCache注解的元信息
其中定义了两个Bean:
com.alicp.jetcache.anno.aop.JetCacheInterceptor:实现了aop中的MethodInterceptor方法拦截器,可用于aop拦截方法后执行相关处理
com.alicp.jetcache.anno.aop.CacheAdvisor:
1.继承了org.springframework.aop.support.AbstractBeanFactoryPointcutAdvisor,将会作为一个AOP切面
2.设置了通知advice为JetCacheInterceptor,也就是说被拦截的方法都会进入JetCacheInterceptor,JetCacheInterceptor就作为JetCache的入口了
3.根据注解设置了需要扫描的包路径以及优先级,默认是最低优先级
4.CacheAdvisor实现了org.springframework.aopPointcutAdvisor接口的getPointcut()方法,设置这个切面的切入点为com.alicp.jetcache.anno.aop.CachePointcut
5.从CachePointcut作为切入点
org.springframework.aop.ClassFilter接口,用于判断哪些类需要被拦截org.springframework.aop.MethodMatcher接口,用于判断哪些类中的哪些方法会被拦截com.alicp.jetcache.anno.methodCacheInvokeConfig对象中,并把它保存至com.alicp.jetcache.anno.support.ConfigMap对象中总结:@EnableMethodCache注解主要就是生成一个AOP切面用于拦截带有缓存注解的方法
@Target(ElementType.TYPE)
@Retention(RetentionPolicy.RUNTIME)
@Documented
@Import({CommonConfiguration.class, CreateCacheAnnotationBeanPostProcessor.class})
public @interface EnableCreateCacheAnnotation {
}
相比@EnableMethodCache注解,没有相关属性,同样会导入CommonConfiguration类
不同的是将导入com.alicp.jetcache.anno.field.CreateCacheAnnotationBeanPostProcessor类,它继承了org.springframework.beans.factory.annotation.AutowiredAnnotationBeanPostProcessor
作为一个BeanPostProcessor,用于在Spring初始化bean的时候做一些操作
从代码中可以看到他的作用是:如果这个bean内部存在添加了带有@CreateCache注解的字段(没有添加static),会将这个字段作为需要注入的对象,解析成 com.alicp.jetcache.anno.field.LazyInitCache缓存实例
LazyInitCache的主要代码如下:
class LazyInitCache implements ProxyCache {

    private boolean inited;

    private Cache cache;

    private ConfigurableListableBeanFactory beanFactory;

    private CreateCache ann;

    private Field field;

    private RefreshPolicy refreshPolicy;

    private PenetrationProtectConfig protectConfig;
    public LazyInitCache(ConfigurableListableBeanFactory beanFactory, CreateCache ann, Field field) {
        this.beanFactory = beanFactory;
        this.ann = ann;
        this.field = field;
        CacheRefresh cr = field.getAnnotation(CacheRefresh.class);
        if (cr != null) {
            refreshPolicy = CacheConfigUtil.parseRefreshPolicy(cr);
        }
        CachePenetrationProtect penetrateProtect = field.getAnnotation(CachePenetrationProtect.class);
        if (penetrateProtect != null) {
            protectConfig = CacheConfigUtil.parsePenetrationProtectConfig(penetrateProtect);
        }
    }
    private void checkInit() {
        if (!inited) {
            synchronized (this) {
                if (!inited) {
                    init();
                    inited = true;
                }
            }
        }
    }

    @Override
    public Cache getTargetCache() {
        checkInit();
        return cache;
    }
    private void init() {
        if (inited) {
            throw new IllegalStateException();
        }
        // 从 spring 的容器中获取全局缓存配置 GlobalCacheConfig 对象
        GlobalCacheConfig globalCacheConfig = beanFactory.getBean(GlobalCacheConfig.class);
        ConfigProvider configProvider = beanFactory.getBean(ConfigProvider.class);
        // 将注解信息封装到 CachedAnnoConfig 对象中
        CachedAnnoConfig cac = new CachedAnnoConfig();
        cac.setArea(ann.area());
        cac.setName(ann.name());
        cac.setTimeUnit(ann.timeUnit());
        cac.setExpire(ann.expire());
        cac.setLocalExpire(ann.localExpire());
        cac.setCacheType(ann.cacheType());
        cac.setLocalLimit(ann.localLimit());
        cac.setSerialPolicy(ann.serialPolicy());
        cac.setKeyConvertor(ann.keyConvertor());
        cac.setRefreshPolicy(refreshPolicy);
        cac.setPenetrationProtectConfig(protectConfig);
        String cacheName = cac.getName();
        if (CacheConsts.isUndefined(cacheName)) {
            String[] hiddenPackages = globalCacheConfig.getHiddenPackages();
            CacheNameGenerator g = configProvider.createCacheNameGenerator(hiddenPackages);
            cacheName = g.generateCacheName(field);
        }
        // 从缓存实例管理器中获取或者创建对应的缓存实例
        cache = configProvider.getCacheContext().__createOrGetCache(cac, ann.area(), cacheName);
    }
}1.可以看到通过@CreateCache创建的缓存实例也可以添加@CacheRefresh和@CachePenetrationProtect注解
2.在AbstractCache抽象类的computeIfAbsentImpl方法中我们有讲到,如果缓存实例是ProxyCache类型,则会先调用其getTargetCache()方法获取缓存实例对象,所以LazyInitCache在第一次访问的时候才进行初始化,并根据缓存注解配置信息创建(存在则直接获取)一个缓存实例
总结:@EnableCreateCacheAnnotation注解主要是支持@CreateCache能够创建缓存实例
通过@EnableMethodCache和@EnableCreateCacheAnnotation两个注解,加上前面的解析配置过程,已经完成的JetCache的解析与初始化过程,那么接下来我们来看看JetCache如何处理被拦截的方法。
从com.alicp.jetcache.anno.aop.CachePointcut切入点判断方法是否需要拦截的逻辑:
1.方法所在的类对象是否匹配,除去以"java"、"org.springframework"开头和包含"$$EnhancerBySpringCGLIB$$"、"$$FastClassBySpringCGLIB$$"的类,该类是否在我们通过@EnableMethodCache注解配置的basePackages中
2.从ConfigMap获取方法对应的CacheInvokeConfig对象,也就是获取缓存配置信息
com.alicp.jetcache.anno.support.ConfigProvide是一个配置提供者对象,包含了JetCache的全局配置、缓存实例管理器、缓存value转换器、缓存key转换器、上下文和监控指标相关信息,主要代码如下:
public class ConfigProvider extends AbstractLifecycle {

    @Resource
    protected GlobalCacheConfig globalCacheConfig;

    protected SimpleCacheManager cacheManager;

    protected EncoderParser encoderParser;

    protected KeyConvertorParser keyConvertorParser;

    protected CacheMonitORManager cacheMonitorManager;

    private Consumer<StatInfo> metricsCallback = new StatInfoLogger(false);

    private CacheMessagePublisher cacheMessagePublisher;

    private CacheMonitorManager defaultCacheMonitorManager = new DefaultCacheMonitorManager();

    private CacheContext cacheContext;
    public ConfigProvider() {
        cacheManager = SimpleCacheManager.defaultManager;
        encoderParser = new DefaultEncoderParser();
        keyConvertorParser = new DefaultKeyConvertorParser();
        cacheMonitorManager = defaultCacheMonitorManager;
    }
    @Override
    public void doInit() {
        // 启动缓存指标监控器,周期性打印各项指标
        initDefaultCacheMonitorInstaller();
        // 初始化缓存上下文
        cacheContext = newContext();
    }
    protected void initDefaultCacheMonitorInstaller() {
        if (cacheMonitorManager == defaultCacheMonitorManager) {
            DefaultCacheMonitorManager installer = (DefaultCacheMonitorManager) cacheMonitorManager;
            installer.setGlobalCacheConfig(globalCacheConfig);
            installer.setMetricsCallback(metricsCallback);
            if (cacheMessagePublisher != null) {
                installer.setCacheMessagePublisher(cacheMessagePublisher);
            }
            // 启动缓存指标监控器
            installer.init();
        }
    }
    @Override
    public void doShutdown() {
        shutdownDefaultCacheMonitorInstaller();
        cacheManager.rebuild();
    }
    protected void shutdownDefaultCacheMonitorInstaller() {
        if (cacheMonitorManager == defaultCacheMonitorManager) {
            ((DefaultCacheMonitorManager) cacheMonitorManager).shutdown();
        }
    }

    public Function<Object, byte[]> parseValueEncoder(String valueEncoder) {
        return encoderParser.parseEncoder(valueEncoder);
    }

    public Function<byte[], Object> parseValueDecoder(String valueDecoder) {
        return encoderParser.parseDecoder(valueDecoder);
    }

    public Function<Object, Object> parseKeyConvertor(String convertor) {
        return keyConvertorParser.parseKeyConvertor(convertor);
    }
    public CacheNameGenerator createCacheNameGenerator(String[] hiddenPackages) {
        return new DefaultCacheNameGenerator(hiddenPackages);
    }
    protected CacheContext newContext() {
        return new CacheContext(this, globalCacheConfig);
    }
}继承了com.alicp.jetcache.anno.support.AbstractLifecycle,查看其代码可以看到有两个方法,分别为init()初始化方法和shutdown()销毁方法,因为分别添加了@PostConstruct注解和@PreDestroy注解,所以在Spring初始化时会调用init(),在Spring容器销毁时会调用shutdown()方法,内部分别调用doInit()和doShutdown(),这两个方法交由子类实现
在doInit()方法中先启动缓存指标监控器,用于周期性打印各项缓存指标,然后初始化CacheContext缓存上下文,SpringConfigProvider返回的是SpringConfigContext
在doShutdown()方法中关闭缓存指标监控器,清除缓存实例
com.alicp.jetcache.anno.support.CacheContext缓存上下文主要为每一个被拦截的请求创建缓存上下文,构建对应的缓存实例,主要代码如下:
public class CacheContext {
    private static Logger logger = LoggerFactory.getLogger(CacheContext.class);
    private static ThreadLocal<CacheThreadLocal> cacheThreadLocal = new ThreadLocal<CacheThreadLocal>() {
        @Override
        protected CacheThreadLocal initialValue() {
            return new CacheThreadLocal();
        }
    };

    private ConfigProvider configProvider;

    private GlobalCacheConfig globalCacheConfig;

    protected SimpleCacheManager cacheManager;
    public CacheContext(ConfigProvider configProvider, GlobalCacheConfig globalCacheConfig) {
        this.globalCacheConfig = globalCacheConfig;
        this.configProvider = configProvider;
        cacheManager = configProvider.getCacheManager();
    }
    public CacheInvokeContext createCacheInvokeContext(ConfigMap configMap) {
    	// 创建一个本次调用的上下文
        CacheInvokeContext c = newCacheInvokeContext();
        // 添加一个函数,后续用于获取缓存实例
        // 根据注解配置信息获取缓存实例对象,不存在则创建并设置到缓存注解配置类中
        c.setCacheFunction((invokeContext, cacheAnnoConfig) -> {
            Cache cache = cacheAnnoConfig.getCache();
            if (cache == null) {
                if (cacheAnnoConfig instanceof CachedAnnoConfig) { // 缓存注解
                    // 根据配置创建一个缓存实例对象,通过 CacheBuilder
                    cache = createCacheByCachedConfig((CachedAnnoConfig) cacheAnnoConfig, invokeContext);
                } else if ((cacheAnnoConfig instanceof CacheInvalidateAnnoConfig) || (cacheAnnoConfig instanceof CacheUpdateAnnoConfig)) { // 更新/使失效缓存注解
                    CacheInvokeConfig cacheDefineConfig = configMap.getByCacheName(cacheAnnoConfig.getArea(), cacheAnnoConfig.getName());
                    if (cacheDefineConfig == null) {
                        String message = "can't find @Cached definition with area=" + cacheAnnoConfig.getArea()
                                + " name=" + cacheAnnoConfig.getName() +
                                ", specified in " + cacheAnnoConfig.getDefineMethod();
                        CacheConfigException e = new CacheConfigException(message);
                        logger.error("Cache operation aborted because can't find @Cached definition", e);
                        return null;
                    }
                    cache = createCacheByCachedConfig(cacheDefineConfig.getCachedAnnoConfig(), invokeContext);
                }
                cacheAnnoConfig.setCache(cache);
            }
            return cache;
        });
        return c;
    }
    private Cache createCacheByCachedConfig(CachedAnnoConfig ac, CacheInvokeContext invokeContext) {
    	// 缓存区域
        String area = ac.getArea();
        // 缓存实例名称
        String cacheName = ac.getName();
        if (CacheConsts.isUndefined(cacheName)) { // 没有定义缓存实例名称
        	// 生成缓存实例名称:类名+方法名+(参数类型)
            cacheName = configProvider.createCacheNameGenerator(invokeContext.getHiddenPackages())
                    .generateCacheName(invokeContext.getMethod(), invokeContext.getTargetObject());
        }
        // 创建缓存实例对象
        Cache cache = __createOrGetCache(ac, area, cacheName);
        return cache;
    }
    @Deprecated
    public <K, V> Cache<K, V> getCache(String cacheName) {
        return getCache(CacheConsts.DEFAULT_AREA, cacheName);
    }
    @Deprecated
    public <K, V> Cache<K, V> getCache(String area, String cacheName) {
        Cache cache = cacheManager.getCacheWithoutCreate(area, cacheName);
        return cache;
    }
    public Cache __createOrGetCache(CachedAnnoConfig cachedAnnoConfig, String area, String cacheName) {
    	// 缓存名称拼接
        String fullCacheName = area + "_" + cacheName;
        // 从缓存实例管理器中根据缓存区域和缓存实例名称获取缓存实例
        Cache cache = cacheManager.getCacheWithoutCreate(area, cacheName);
        if (cache == null) {
            synchronized (this) { // 加锁
                // 再次确认
                cache = cacheManager.getCacheWithoutCreate(area, cacheName);
                if (cache == null) {

                    if (globalCacheConfig.isAreaInCacheName()) {
                        // for compatible reason, if we use default configuration, the prefix should same to that version <=2.4.3
                        cache = buildCache(cachedAnnoConfig, area, fullCacheName);
                    } else {
                        // 构建一个缓存实例
                        cache = buildCache(cachedAnnoConfig, area, cacheName);
                    }
                    cacheManager.putCache(area, cacheName, cache);
                }
            }
        }
        return cache;
    }
    protected Cache buildCache(CachedAnnoConfig cachedAnnoConfig, String area, String cacheName) {
        Cache cache;
        if (cachedAnnoConfig.getCacheType() == CacheType.LOCAL) { // 本地缓存
            cache = buildLocal(cachedAnnoConfig, area);
        } else if (cachedAnnoConfig.getCacheType() == CacheType.REMOTE) { // 远程缓存
            cache = buildRemote(cachedAnnoConfig, area, cacheName);
        } else { // 两级缓存
        	// 构建本地缓存实例
            Cache local = buildLocal(cachedAnnoConfig, area);
            // 构建远程缓存实例
            Cache remote = buildRemote(cachedAnnoConfig, area, cacheName);
            // 两级缓存时是否单独设置了本地缓存失效时间 localExpire
            boolean useExpireOfSubCache = cachedAnnoConfig.getLocalExpire() > 0;
            // 创建一个两级缓存CacheBuilder
            cache = MultiLevelCacheBuilder.createMultiLevelCacheBuilder()
                    .expireAfterWrite(remote.config().getExpireAfterWriteInMillis(), TimeUnit.MILLISECONDS)
                    .addCache(local, remote)
                    .useExpireOfSubCache(useExpireOfSubCache)
                    .cacheNullValue(cachedAnnoConfig.isCacheNullValue())
                    .buildCache();
        }
        // 设置缓存刷新策略
        cache.config().setRefreshPolicy(cachedAnnoConfig.getRefreshPolicy());
        // 将 cache 封装成 CacheHandlerRefreshCache,也就是 RefreshCache 类型
        // 后续添加刷新任务时会判断是否为 RefreshCache 类型,然后决定是否执行 addOrUpdateRefreshTask 方法,添加刷新任务,没有刷新策略不会添加
        cache = new CacheHandler.CacheHandlerRefreshCache(cache);
        // 设置缓存未命中时,JVM是否只允许一个线程执行方法,其他线程等待,全局配置默认为false
        cache.config().setCachePenetrationProtect(globalCacheConfig.isPenetrationProtect());
        PenetrationProtectConfig protectConfig = cachedAnnoConfig.getPenetrationProtectConfig();
        if (protectConfig != null) { // 方法的@CachePenetrationProtect注解
            cache.config().setCachePenetrationProtect(protectConfig.isPenetrationProtect());
            cache.config().setPenetrationProtectTimeout(protectConfig.getPenetrationProtectTimeout());
        }
        if (configProvider.getCacheMonitorManager() != null) {
        	// 添加监控统计配置
            configProvider.getCacheMonitorManager().addMonitors(area, cacheName, cache);
        }
        return cache;
    }
    protected Cache buildRemote(CachedAnnoConfig cachedAnnoConfig, String area, String cacheName) {
        // 获取缓存区域对应的 CacheBuilder 构造器
        ExternalCacheBuilder cacheBuilder = (ExternalCacheBuilder) globalCacheConfig.getRemoteCacheBuilders().get(area);
        if (cacheBuilder == null) {
            throw new CacheConfigException("no remote cache builder: " + area);
        }
        // 克隆一个 CacheBuilder 构造器,因为不同缓存实例有不同的配置
        cacheBuilder = (ExternalCacheBuilder) cacheBuilder.clone();
        if (cachedAnnoConfig.getExpire() > 0 ) {
        	// 设置失效时间
            cacheBuilder.expireAfterWrite(cachedAnnoConfig.getExpire(), cachedAnnoConfig.getTimeUnit());
        }
        // 设置缓存 key 的前缀
        if (cacheBuilder.getConfig().getKeyPrefix() != null) {
            // 配置文件中配置了 prefix,则设置为 prefix+cacheName
            cacheBuilder.setKeyPrefix(cacheBuilder.getConfig().getKeyPrefix() + cacheName);
        } else { // 设置为 cacheName
            cacheBuilder.setKeyPrefix(cacheName);
        }
        if (!CacheConsts.isUndefined(cachedAnnoConfig.getKeyConvertor())) { // 如果注解中设置了Key的转换方式则替换,否则还是使用全局的
        	// 设置 key 的转换器,只支持 FASTJSON
            cacheBuilder.setKeyConvertor(configProvider.parseKeyConvertor(cachedAnnoConfig.getKeyConvertor()));
        }
        if (!CacheConsts.isUndefined(cachedAnnoConfig.getSerialPolicy())) {
        	// 缓存数据保存至远程需要进行编码和解码,所以这里设置其编码和解码方式,KRYO 和 JAVA 可选择
            cacheBuilder.setValueEncoder(configProvider.parseValueEncoder(cachedAnnoConfig.getSerialPolicy()));
            cacheBuilder.setValueDecoder(configProvider.parseValueDecoder(cachedAnnoConfig.getSerialPolicy()));
        }
        // 设置是否缓存 null 值
        cacheBuilder.setCacheNullValue(cachedAnnoConfig.isCacheNullValue());
        return cacheBuilder.buildCache();
    }
    protected Cache buildLocal(CachedAnnoConfig cachedAnnoConfig, String area) {
    	// 获取缓存区域对应的 CacheBuilder 构造器
        EmbeddedCacheBuilder cacheBuilder = (EmbeddedCacheBuilder) globalCacheConfig.getLocalCacheBuilders().get(area);
        if (cacheBuilder == null) {
            throw new CacheConfigException("no local cache builder: " + area);
        }
        // 克隆一个 CacheBuilder 构造器,因为不同缓存实例有不同的配置
        cacheBuilder = (EmbeddedCacheBuilder) cacheBuilder.clone();
        if (cachedAnnoConfig.getLocalLimit() != CacheConsts.UNDEFINED_INT) {
            // 本地缓存数量限制
            cacheBuilder.setLimit(cachedAnnoConfig.getLocalLimit());
        }
        if (cachedAnnoConfig.getCacheType() == CacheType.BOTH && cachedAnnoConfig.getLocalExpire() > 0) {
        	// 设置本地缓存失效时间,前提是多级缓存,一般和远程缓存保持一致不设置
            cacheBuilder.expireAfterWrite(cachedAnnoConfig.getLocalExpire(), cachedAnnoConfig.getTimeUnit());
        } else if (cachedAnnoConfig.getExpire() > 0) {
        	// 设置失效时间
            cacheBuilder.expireAfterWrite(cachedAnnoConfig.getExpire(), cachedAnnoConfig.getTimeUnit());
        }
        if (!CacheConsts.isUndefined(cachedAnnoConfig.getKeyConvertor())) {
            cacheBuilder.setKeyConvertor(configProvider.parseKeyConvertor(cachedAnnoConfig.getKeyConvertor()));
        }
        // 设置是否缓存 null 值
        cacheBuilder.setCacheNullValue(cachedAnnoConfig.isCacheNullValue());
        // 构建一个缓存实例
        return cacheBuilder.buildCache();
    }
    protected CacheInvokeContext newCacheInvokeContext() {
        return new CacheInvokeContext();
    }
}createCacheInvokeContext方法返回一个本次调用的上下文CacheInvokeContext,为这个上下文设置缓存函数,用于获取或者构建缓存实例,这个函数在CacheHandler中会被调用,我们来看看这个函数的处理逻辑:有两个入参,分别为本次调用的上下文和缓存注解的配置信息
首先从缓存注解的配置信息中获取缓存实例,如果不为null则直接返回,否则调用createCacheByCachedConfig方法,根据配置通过CacheBuilder构造器创建一个缓存实例对象
createCacheByCachedConfig方法:
1.如果没有定义缓存实例名称(@Cached注解中的name配置),则生成类名+方法名+(参数类型)作为缓存实例名称
2.然后调用__createOrGetCache方法
__createOrGetCache方法:
1.通过缓存实例管理器SimpleCacheManager根据缓存区域area和缓存实例名称cacheName获取缓存实例对象,如果不为null则直接返回,判断缓存实例对象是否为null为进行两次确认,第二次会给当前CacheContext加锁进行判断,避免线程不安全
2.缓存实例对象还是为null的话,先判断缓存区域area是否添加至缓存实例名称中,是的话"area_cacheName"为缓存实例名称,然后调用buildCache方法创建一个缓存实例对象
buildCache方法:根据缓存实例类型构建不同的缓存实例对象,处理逻辑如下:
CacheType为LOCAL则调用buildLocal方法:
- 如果配置了localLimit,则设置本地缓存最大数量limit的值
- 如果CacheType为BOTH并且配置了localExpire(大于0),则设置有效时间expireAfterWrite的值为localExpire,否则如果配置的expire大于0,则设置其值为expire
- 如果配置了keyConvertor,则根据该值生成一个转换函数,没有配置的话在初始化构造器的时候根据全局配置可能已经生成了一个转换函数(我一般在全局配置中设置)
- 设置是否缓存null值
CacheType为REMOTE则调用buildRemote方法:
- 如果配置了expire,则设置远程缓存有效时间expireAfterWrite的值
- 如果全局设置远程缓存的缓存key的前缀keyPrefix,则设置缓存key的前缀为"keyPrefix+cacheName",否则我为"cacheName"
- 如果配置了keyConvertor,则根据该值生成一个转换函数,没有配置的话在初始化构造器的时候根据全局配置可能已经生成了一个转换函数(我一般在全局配置中设置)
- 如果设置了serialPolicy,则根据该值生成编码和解码函数,没有配置的话在初始化构造器的时候根据全局配置可能已经生成了编码函数和解码函数(我一般在全局配置中设置)
- 设置是否缓存null值
CacheType为BOTH则调用buildLocal方法构建本地缓存实例,调用buildRemote方法构建远程缓存实例:
1.1. 创建一个MultiLevelCacheBuilder构造器
1.2. 设置有效时间为远程缓存的有效时间、添加local和remote缓存实例、设置是否单独配置了本地缓存的失效时间(是否有配置localExpire)、设置是否缓存null值
1.3. 通过调用构造器的buildCache()方法构建一个缓存实例对象
2.设置刷新策略RefreshPolicy,没有的话为null
3.将缓存实例对象封装成CacheHandlerRefreshCache对象,用于后续的添加刷新任务,在之前的'AbstractCache抽象类'有讲到
4.设置是否开启缓存未命中时加载方法的保护模式,全局默认为false
5.将缓存实例添加至监控管理器中
被拦截后的处理在com.alicp.jetcache.anno.aop.JetCacheInterceptor中,代码如下:
public class JetCacheInterceptor implements MethodInterceptor, ApplicationContextAware {
    private static final Logger logger = LoggerFactory.getLogger(JetCacheInterceptor.class);

    @Autowired
    private ConfigMap cacheConfigMap;

    private ApplicationContext applicationContext;

    private GlobalCacheConfig globalCacheConfig;

    ConfigProvider configProvider;
    @Override
    public void setApplicationContext(ApplicationContext applicationContext) throws BeansException {
        this.applicationContext = applicationContext;
    }
    @Override
    public Object invoke(final MethodInvocation invocation) throws Throwable {
        if (configProvider == null) {

            configProvider = applicationContext.getBean(ConfigProvider.class);
        }
        if (configProvider != null && globalCacheConfig == null) {
            globalCacheConfig = configProvider.getGlobalCacheConfig();
        }
        if (globalCacheConfig == null || !globalCacheConfig.isEnableMethodCache()) {
            return invocation.proceed();
        }
        // 获取被拦截的方法
        Method method = invocation.getMethod();
        // 获取被拦截的对象
        Object obj = invocation.getThis();
        CacheInvokeConfig cac = null;
        if (obj != null) {
        	// 获取改方法的Key(方法所在类名+方法名+(参数类型)+方法返回类型+_被拦截的类名)
            String key = CachePointcut.getKey(method, obj.getClass());
            // 获取该方法的缓存注解信息,在 Pointcut 中已经对注解进行解析并放入 ConfigMap 中
            cac  = cacheConfigMap.getByMethodInfo(key);
        }
        if(logger.isTraceEnabled()){
            logger.trace("JetCacheInterceptor invoke. foundJetCacheConfig={}, method={}.{}(), targetClass={}",
                    cac != null,
                    method.getDeclaringClass().getName(),
                    method.getName(),
                    invocation.getThis() == null ? null : invocation.getThis().getClass().getName());
        }
        // 无缓存相关注解配置信息表明无须缓存,直接执行该方法
        if (cac == null || cac == CacheInvokeConfig.getNoCacheInvokeConfigInstance()) {
            return invocation.proceed();
        }
        // 为本次调用创建一个上下文对象,包含对应的缓存实例
        CacheInvokeContext context = configProvider.getCacheContext().createCacheInvokeContext(cacheConfigMap);
        context.setTargetObject(invocation.getThis());
        context.setInvoker(invocation::proceed);
        context.setMethod(method);
        context.setArgs(invocation.getArguments());
        context.setCacheInvokeConfig(cac);
        context.setHiddenPackages(globalCacheConfig.getHiddenPackages());
        // 继续往下执行
        return CacheHandler.invoke(context);
    }
    public void setCacheConfigMap(ConfigMap cacheConfigMap) {
        this.cacheConfigMap = cacheConfigMap;
    }
}从ConfigMap中获取被拦截的方法对象的缓存配置信息,如果没有则直接执行该方法,否则继续往下执行
根据CacheContext对象(SpringCacheContext,因为在之前讲到的'JetCacheAutoConfiguration自动配置'中有说到注入的是SpringConfigProvider对象,在其初始化方法中调用newContext()方法生成SpringCacheContext)调用其createCacheInvokeContext方法为本次调用创建一个上下文CacheInvokeContext,并设置获取缓存实例函数,具体实现逻辑查看上面讲到的CacheContext
设置本次调用上下文的targetObject为被拦截对象,invoker为被拦截对象的调用器,method为被拦截方法,args为方法入参,cacheInvokeConfig为缓存配置信息,hiddenPackages为缓存实例名称需要截断的包名
通过CacheHandler的invoke方法继续往下执行
com.alicp.jetcache.anno.method.CacheHandler用于JetCache处理被拦截的方法,部分代码如下:
public class CacheHandler implements InvocationHandler {
	public static Object invoke(CacheInvokeContext context) throws Throwable {
		if (context.getCacheInvokeConfig().isEnableCacheContext()) {
			try {
				CacheContextSupport._enable();
				return doInvoke(context);
			} finally {
				CacheContextSupport._disable();
			}
		} else {
			return doInvoke(context);
		}
	}
	private static Object doInvoke(CacheInvokeContext context) throws Throwable {
		// 获取缓存实例配置
		CacheInvokeConfig cic = context.getCacheInvokeConfig();
		// 获取注解配置信息
		CachedAnnoConfig cachedConfig = cic.getCachedAnnoConfig();
		if (cachedConfig != null && (cachedConfig.isEnabled() || CacheContextSupport._isEnabled())) {
			// 经过缓存中获取结果
			return invokeWithCached(context);
		} else if (cic.getInvalidateAnnoConfigs() != null || cic.getUpdateAnnoConfig() != null) {
			// 根据结果删除或者更新缓存
			return invokeWithInvalidateOrUpdate(context);
		} else {
			// 执行该方法
			return invokeOrigin(context);
		}
	}
	private static Object invokeWithCached(CacheInvokeContext context) throws Throwable {
		// 获取本地调用的上下文
		CacheInvokeConfig cic = context.getCacheInvokeConfig();
		// 获取注解配置信息
		CachedAnnoConfig cac = cic.getCachedAnnoConfig();
		// 获取缓存实例对象(不存在则会创建并设置到 cac 中)
		// 可在 JetCacheInterceptor 创建本次调用的上下文时,调用 createCacheInvokeContext(cacheConfigMap) 方法中查看详情
		Cache cache = context.getCacheFunction().apply(context, cac);
		if (cache == null) {
			logger.error("no cache with name: " + context.getMethod());
			// 无缓存实例对象,执行原有方法
			return invokeOrigin(context);
		}
		// 生成缓存 Key 对象(注解中没有配置的话就是入参,没有入参则为 "_$JETCACHE_NULL_KEY$_" )
		Object key = ExpressionUtil.evalKey(context, cic.getCachedAnnoConfig());
		if (key == null) {
			 // 生成缓存 Key 失败则执行原方法,并记录 CacheLoadEvent 事件
			return loadAndCount(context, cache, key);
		}

		if (!ExpressionUtil.evalCondition(context, cic.getCachedAnnoConfig())) {
			// 不满足 condition 则直接执行原方法,并记录 CacheLoadEvent 事件
			return loadAndCount(context, cache, key);
		}
		try {
			// 创建一个执行原有方法的函数
			CacheLoader loader = new CacheLoader() {
				@Override
				public Object load(Object k) throws Throwable {
					Object result = invokeOrigin(context);
					context.setResult(result);
					return result;
				}
				@Override
				public boolean vetoCacheUpdate() {
					// 本次执行原方法后是否需要更新缓存
					return !ExpressionUtil.evalPostCondition(context, cic.getCachedAnnoConfig());
				}
			};
			// 获取结果
			Object result = cache.computeIfAbsent(key, loader);
			return result;
		} catch (CacheInvokeException e) {
			throw e.getCause();
		}
	}
	private static Object loadAndCount(CacheInvokeContext context, Cache cache, Object key) throws Throwable {
		long t = System.currentTimeMillis();
		Object v = null;
		boolean success = false;
		try {
			// 调用原有方法
			v = invokeOrigin(context);
			success = true;
		} finally {
			t = System.currentTimeMillis() - t;
			// 发送 CacheLoadEvent 事件
			CacheLoadEvent event = new CacheLoadEvent(cache, t, key, v, success);
			while (cache instanceof ProxyCache) {
				cache = ((ProxyCache) cache).getTargetCache();
			}
			if (cache instanceof AbstractCache) {
				((AbstractCache) cache).notify(event);
			}
		}
		return v;
	}
	private static Object invokeOrigin(CacheInvokeContext context) throws Throwable {
		// 执行被拦截的方法
		return context.getInvoker().invoke();
	}
}直接查看invokeWithCached方法:
CacheLoader对象,用于执行被拦截的对象的调用器,也就是加载原有方法computeIfAbsent(key, loader)方法获取结果,这个方法的处理过程可查看'缓存API'这一小节到此这篇关于JetCache 缓存框架的使用以及源码分析的文章就介绍到这了,更多相关JetCache 缓存框架内容请搜索编程网以前的文章或继续浏览下面的相关文章希望大家以后多多支持编程网!
--结束END--
本文标题: JetCache 缓存框架的使用及源码解析(推荐)
本文链接: https://www.lsjlt.com/news/162238.html(转载时请注明来源链接)
有问题或投稿请发送至: 邮箱/279061341@qq.com QQ/279061341
下载Word文档到电脑,方便收藏和打印~
2024-03-01
2024-03-01
2024-03-01
2024-02-29
2024-02-29
2024-02-29
2024-02-29
2024-02-29
2024-02-29
2024-02-29
回答
回答
回答
回答
回答
回答
回答
回答
回答
回答


官方手机版

微信公众号

商务合作


0