目录前言 一、ScreenCut.cs 代码如下二、ScreenCut.xaml 代码如下 三、ScreenCutExample.xaml 代码如下每日一笑 肚子
每日一笑
肚子疼,去厕所排便,结果什么都没拉出来。看着自己坐在马桶上痛苦又努力却一无所获的样子,仿佛看到了自己平凡的一生。
有小伙伴需要在软件反馈窗体增加截图功能需求,所以今天来实现一个仿微信的截图。
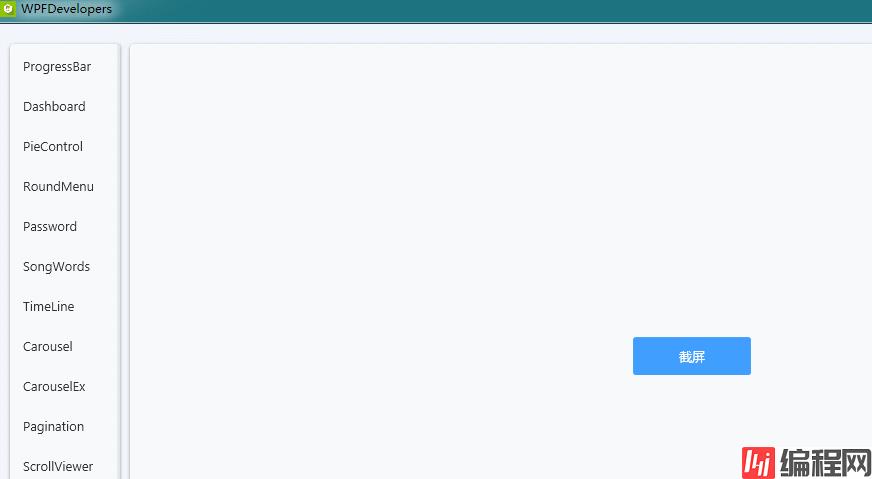
效果预览(更多效果请下载源码体验)
using Microsoft.Win32;
using System;
using System.Collections.Generic;
using System.Drawing.Drawing2D;
using System.Drawing.Text;
using System.Linq;
using System.Text;
using System.windows;
using System.Windows.Controls;
using System.Windows.Input;
using System.Windows.Media;
using System.Windows.Media.Imaging;
using System.Windows.Shapes;

namespace WPFDevelopers.Controls
{
    [TemplatePart(Name = canvasTemplateName, Type = typeof(Canvas))]
    [TemplatePart(Name = RectangleLeftTemplateName, Type = typeof(Rectangle))]
    [TemplatePart(Name = RectangleTopTemplateName, Type = typeof(Rectangle))]
    [TemplatePart(Name = RectangleRightTemplateName, Type = typeof(Rectangle))]
    [TemplatePart(Name = RectangleBottomTemplateName, Type = typeof(Rectangle))]
    [TemplatePart(Name = BorderTemplateName, Type = typeof(Border))]
    [TemplatePart(Name = WrapPanelTemplateName, Type = typeof(WrapPanel))]
    [TemplatePart(Name = ButtonSaveTemplateName, Type = typeof(Button))]
    [TemplatePart(Name = ButtonCancelTemplateName, Type = typeof(Button))]
    [TemplatePart(Name = ButtonCompleteTemplateName, Type = typeof(Button))]

    public class ScreenCut : Window
    {
        private const string CanvasTemplateName = "PART_Canvas";
        private const string RectangleLeftTemplateName = "PART_RectangleLeft";
        private const string RectangleTopTemplateName = "PART_RectangleTop";
        private const string RectangleRightTemplateName = "PART_RectangleRight";
        private const string RectangleBottomTemplateName = "PART_RectangleBottom";
        private const string BorderTemplateName = "PART_Border";
        private const string WrapPanelTemplateName = "PART_WrapPanel";
        private const string ButtonSaveTemplateName = "PART_ButtonSave";
        private const string ButtonCancelTemplateName = "PART_ButtonCancel";
        private const string ButtonCompleteTemplateName = "PART_ButtonComplete";

        private Canvas _canvas;
        private Rectangle _rectangleLeft, _rectangleTop, _rectangleRight, _rectangleBottom;
        private Border _border;
        private WrapPanel _wrapPanel;
        private Button _buttonSave,_buttonCancel, _buttonComplete;
        private Rect rect;
        private Point pointStart, pointEnd;
        private bool isMouseUp = false;

        static ScreenCut()
        {
            DefaultStyleKeyProperty.OverrideMetadata(typeof(ScreenCut), new FrameworkPropertyMetadata(typeof(ScreenCut)));
        }
        public override void OnApplyTemplate()
        {
            base.OnApplyTemplate();
            _canvas = GetTemplateChild(CanvasTemplateName) as Canvas;
            _rectangleLeft = GetTemplateChild(RectangleLeftTemplateName) as Rectangle;
            _rectangleTop = GetTemplateChild(RectangleTopTemplateName) as Rectangle;
            _rectangleRight = GetTemplateChild(RectangleRightTemplateName) as Rectangle;
            _rectangleBottom = GetTemplateChild(RectangleBottomTemplateName) as Rectangle;
            _border = GetTemplateChild(BorderTemplateName) as Border;
            _wrapPanel = GetTemplateChild(WrapPanelTemplateName) as WrapPanel;
            _buttonSave = GetTemplateChild(ButtonSaveTemplateName) as Button;
            if (_buttonSave != null)
                _buttonSave.Click += _buttonSave_Click;
            _buttonCancel = GetTemplateChild(ButtonCancelTemplateName) as Button;
            if (_buttonCancel != null)
                _buttonCancel.Click += _buttonCancel_Click;
            _buttonComplete = GetTemplateChild(ButtonCompleteTemplateName) as Button;
            if (_buttonComplete != null)
                _buttonComplete.Click += _buttonComplete_Click;
            this._canvas.Background = new ImageBrush(ChangeBitmapToImageSource(CaptureScreen()));
            _rectangleLeft.Width = _canvas.Width;
            _rectangleLeft.Height = _canvas.Height;
        }

        private void _buttonSave_Click(object sender, RoutedEventArgs e)
        {
            SaveFileDialog dlg = new SaveFileDialog();
            dlg.FileName = $"WPFDevelopers{DateTime.Now.ToString("yyyyMMddHHmmss")}.jpg";
            dlg.DefaultExt = ".jpg";
            dlg.Filter = "image file|*.jpg";

            if (dlg.ShowDialog() == true)
            {
                BitmapEncoder pngEncoder = new PngBitmapEncoder();
                pngEncoder.Frames.Add(BitmapFrame.Create(CutBitmap()));
                using (var fs = System.IO.File.OpenWrite(dlg.FileName))
                {
                    pngEncoder.Save(fs);
                    fs.Dispose();
                    fs.Close();
                }
            }
            Close();
        }

        private void _buttonComplete_Click(object sender, RoutedEventArgs e)
        {

            Clipboard.SetImage(CutBitmap());
            Close();
        }
        CroppedBitmap CutBitmap()
        {
            var renderTargetBitmap = new RenderTargetBitmap((int)_canvas.Width,
  (int)_canvas.Height, 96d, 96d, System.Windows.Media.PixelFORMats.Default);
            renderTargetBitmap.Render(_canvas);
            return  new CroppedBitmap(renderTargetBitmap, new Int32Rect((int)rect.X, (int)rect.Y, (int)rect.Width, (int)rect.Height));
        }
        private void _buttonCancel_Click(object sender, RoutedEventArgs e)
        {
            Close();
        }

        protected override void OnPreviewKeyDown(KeyEventArgs e)
        {
            if (e.Key == Key.Escape)
                Close();
        }

        protected override void OnPreviewMouseLeftButtonDown(MouseButtonEventArgs e)
        {
            if (!isMouseUp)
            {
                _wrapPanel.Visibility = Visibility.Hidden;
                pointStart = e.GetPosition(_canvas);
                pointEnd = pointStart;
                rect = new Rect(pointStart, pointEnd);
            }

        }
        protected override void OnPreviewMouseMove(MouseEventArgs e)
        {
            if (e.LeftButton == MouseButtonState.Pressed && !isMouseUp)
            {
                var current = e.GetPosition(_canvas);
                MoveAllRectangle(current);
            }
        }
        protected override void OnPreviewMouseLeftButtonUp(MouseButtonEventArgs e)
        {
            if (!isMouseUp)
            {
                _wrapPanel.Visibility = Visibility.Visible;
                Canvas.SetLeft(this._wrapPanel, rect.X + rect.Width - this._wrapPanel.ActualWidth);
                Canvas.SetTop(this._wrapPanel, rect.Y + rect.Height + 4);
                isMouseUp = true;
            }
        }

        void MoveAllRectangle(Point current)
        {
            pointEnd = current;
            rect = new Rect(pointStart, pointEnd);
            this._rectangleLeft.Width = rect.X;
            this._rectangleLeft.Height = _canvas.Height;

            Canvas.SetLeft(this._rectangleTop, this._rectangleLeft.Width);
            this._rectangleTop.Width = rect.Width;
            double h = 0.0;
            if (current.Y < pointStart.Y)
                h = current.Y;
            else
                h = current.Y - rect.Height;
            this._rectangleTop.Height = h;

            Canvas.SetLeft(this._rectangleRight, this._rectangleLeft.Width + rect.Width);
            this._rectangleRight.Width = _canvas.Width - (rect.Width + this._rectangleLeft.Width);
            this._rectangleRight.Height = _canvas.Height;

            Canvas.SetLeft(this._rectangleBottom, this._rectangleLeft.Width);
            Canvas.SetTop(this._rectangleBottom, rect.Height + this._rectangleTop.Height);
            this._rectangleBottom.Width = rect.Width;
            this._rectangleBottom.Height = _canvas.Height - (rect.Height + this._rectangleTop.Height);

            this._border.Height = rect.Height;
            this._border.Width = rect.Width;
            Canvas.SetLeft(this._border, rect.X);
            Canvas.SetTop(this._border, rect.Y);
        }

        System.Drawing.Bitmap CaptureScreen()
        {
            var bmpCaptured = new System.Drawing.Bitmap((int)SystemParameters.PrimaryScreenWidth, (int)SystemParameters.PrimaryScreenHeight, System.Drawing.Imaging.PixelFormat.Format24bppRgb);
            using (System.Drawing.Graphics g = System.Drawing.Graphics.FromImage(bmpCaptured))
            {
                g.SmoothingMode = SmoothingMode.AntiAlias;
                g.CompositingQuality = CompositingQuality.HighQuality;
                g.InterpolationMode = InterpolationMode.HighQualityBicubic;
                g.TextRenderingHint = TextRenderingHint.ClearTypeGridFit;
                g.PixelOffsetMode = PixelOffsetMode.HighQuality;

                g.CopyFromScreen(0, 0, 0, 0, bmpCaptured.Size, System.Drawing.CopyPixelOperation.SourceCopy);
            }
            return bmpCaptured;
        }

        [System.Runtime.InteropServices.DllImport("gdi32.dll")]
        public static extern bool DeleteObject(IntPtr hObject);
        ImageSource ChangeBitmapToImageSource(System.Drawing.Bitmap bitmap)
        {
            IntPtr hBitmap = bitmap.GetHbitmap();
            ImageSource wpfBitmap = System.Windows.Interop.Imaging.CreateBitmapSourceFromHBitmap(
                hBitmap,
                IntPtr.Zero,
                Int32Rect.Empty,
                BitmapSizeOptions.FromEmptyOptions());

            if (!DeleteObject(hBitmap))
            {
                throw new System.ComponentModel.Win32Exception();
            }
            return wpfBitmap;
        }
    }
}<ResourceDictionary xmlns="Http://schemas.microsoft.com/winfx/2006/xaml/presentation"
xmlns:x="http://schemas.microsoft.com/winfx/2006/xaml"
xmlns:controls="clr-namespace:WPFDevelopers.Controls">
<ResourceDictionary.MergedDictionaries>
<ResourceDictionary Source="Basic/ControlBasic.xaml"/>
<ResourceDictionary Source="../Styles/Styles.Buttons.xaml"/>
</ResourceDictionary.MergedDictionaries>
<Style x:Key="RectangleStyle" TargetType="{x:Type Rectangle}">
<Setter Property="Fill" Value="{StaticResource BlackSolidColorBrush}"/>
<Setter Property="Opacity" Value=".5"/>
</Style>
<Style TargetType="{x:Type controls:ScreenCut}" BasedOn="{StaticResource ControlBasicStyle}">
<Setter Property="WindowState" Value="Maximized"/>
<Setter Property="WindowStyle" Value="None"/>
<Setter Property="Template">
<Setter.Value>
<ControlTemplate TargetType="{x:Type controls:ScreenCut}">
<Canvas x:Name="PART_Canvas"
Width="{Binding Source={x:Static SystemParameters.PrimaryScreenWidth}}"
Height="{Binding Source={x:Static SystemParameters.PrimaryScreenHeight}}">
<Rectangle x:Name="PART_RectangleLeft" Style="{StaticResource RectangleStyle}"/>
<Rectangle x:Name="PART_RectangleTop" Style="{StaticResource RectangleStyle}"/>
<Rectangle x:Name="PART_RectangleRight" Style="{StaticResource RectangleStyle}"/>
<Rectangle x:Name="PART_RectangleBottom" Style="{StaticResource RectangleStyle}"/>
<Border x:Name="PART_Border" BorderBrush="{StaticResource SuccessPressedSolidColorBrush}"
BorderThickness="1"/>
<WrapPanel x:Name="PART_WrapPanel"
Visibility="Hidden" Panel.ZIndex="99"
Height="38" Background="{StaticResource WhiteSolidColorBrush}"
VerticalAlignment="Center">
<Button x:Name="PART_ButtonSave" Style="{StaticResource PathButton}"
ToolTip="保存" Margin="10,0,0,0">
<Button.Content>
<Path Fill="{StaticResource InfoPressedSolidColorBrush}"
Width="18" Height="18" Stretch="Fill"
Data="{StaticResource PathSave}"/>
</Button.Content>
</Button>
<Button x:Name="PART_ButtonCancel" Style="{StaticResource PathButton}"
ToolTip="取消">
<Button.Content>
<Path Fill="{StaticResource DangerPressedSolidColorBrush}"
Width="14" Height="14" Stretch="Fill"
Data="{StaticResource PathCancel}"/>
</Button.Content>
</Button>
<Button x:Name="PART_ButtonComplete" Style="{StaticResource PathButton}"
ToolTip="完成" Margin="0,0,10,0">
<Button.Content>
<Path Fill="{StaticResource SuccessPressedSolidColorBrush}"
Width="20" Height="15" Stretch="Fill"
Data="{StaticResource PathComplete}"/>
</Button.Content>
</Button>
</WrapPanel>
</Canvas>
</ControlTemplate>
</Setter.Value>
</Setter>
</Style>
</ResourceDictionary>var screenCut = new ScreenCut();
screenCut.ShowDialog();到此这篇关于WPF仿微信实现截图功能的方法详解的文章就介绍到这了,更多相关WPF截图内容请搜索编程网以前的文章或继续浏览下面的相关文章希望大家以后多多支持编程网!
--结束END--
本文标题: WPF仿微信实现截图功能的方法详解
本文链接: https://www.lsjlt.com/news/165552.html(转载时请注明来源链接)
有问题或投稿请发送至: 邮箱/279061341@qq.com QQ/279061341
下载Word文档到电脑,方便收藏和打印~
2024-03-01
2024-03-01
2024-02-29
2024-02-29
2024-02-29
2024-02-29
2024-02-29
2024-02-29
2024-02-29
2024-02-29
回答
回答
回答
回答
回答
回答
回答
回答
回答
回答


官方手机版

微信公众号

商务合作


0