目录1、什么是动态创建组件2、Vue.extend()3、通过extend实现弹窗的动态创建3.1、创建动态组件3.2、编辑动态组件的逻辑3.3、在main.js中引入使用3.4、在
vue中通过extend动态创建全局组件;
只有在触发事件的时候,才产生某组件,平时它并不存在;
使用基础 Vue 构造器,创建一个“子类”。参数是一个包含组件选项的对象;其实就是一个子类构造器是Vue组件的核心api,实现思路就是使用原型继承的方法返回了Vue的子类,并且利用mergeOptions把传入组件的options和父类的options进行了合并。
extend创建的是一个组件构造器,而不是一个具体的实例;
接收一个对象(包含组件选项的对象)作为参数,需要使用new来创建实例,并且需要$mount手动挂载到一个元素上,才可以获取到这个元素的相应的信息。
基础用法:
<div id="mount-point"></div>
// 创建构造器

var Profile = Vue.extend({
  template: '<p>{{firstName}} {{lastName}} aka {{alias}}</p>',
  data: function () {
    return {
      firstName: 'Walter',
      lastName: 'White',
      alias: 'Heisenberg'
    }
  }
})
// 创建 Profile 实例,并挂载到一个元素上。
new Profile().$mount('#mount-point')
// 结果如下:
<p>Walter White aka Heisenberg</p>
<!--动态组件的模板-->
<template>
  <!--  可以用MessageBox做蒙尘-->
  <div :class="['MessageBox',type]">
    <div class="inner">
      <header class="header">
        <h1 class="title">{{ title }}</h1>
        <span @click="$messageBox.hide()">x</span>
      </header>
      <div class="content">{{ content }}</div>
    </div>
  </div>
</template>
<script>
export default {
  name: "MessageBox",
  props: {
    title: {
      type: String,
      default: "this is title",
    },
    content: {
      type: String,
      default: "this is content",
    },
    type: {
      type: String,
      default: "primary",
      //检测传进来的类型是否是这四种,通过es6提供的includes方法模糊查询
      validator(value) {
        return [
          "primary",
          "success",
          "warn",
          "danger"
        ].includes(value);
      }
    }
  }
}
</script>
<style scoped lang="less">
.MessageBox {
  position: fixed;
  left: 50%;
  top: 0;
  //蒙尘的大小设置
  width: 50%;
  height: 400px;
  background-color: rgba(0, 0, 0, .5);
  //不同弹窗的样式
  &.primary {
    .header {
      background-color: blue;
      color: #fff;
    }
  }
  &.success {
    .header {
      background-color: green;
      color: #fff;
    }
  }
  &.warn {
    .header {
      background-color: rgba(255, 138, 71, 0.96);
      color: #fff;
    }
  }
  &.danger {
    .header {
      background-color: red;
      color: #fff;
    }
  }
  .inner {
    position: absolute;
    top: 100px;
    left: 50%;
    width: 500px;
    margin-left: -250px;
    background-color: #fff;
    box-shadow: 1px 3px 5px #DDD;
    border-radius: 5px;
    overflow: hidden;
    .header {
      height: 44px;
      padding: 0 10px;
      line-height: 44px;
      box-sizing: border-box;
      h1 {
        margin: 0;
        font-weight: nORMal;
      }
      .title {
        font-size: 16px;
        float: left;
      }
      span {
        //将鼠标改为小手样式
        cursor: pointer;
        float: right;
      }
    }
    .content {
      padding: 20px;
      box-sizing: border-box;
    }
  }
}
</style>//引入需要动态创建的模板
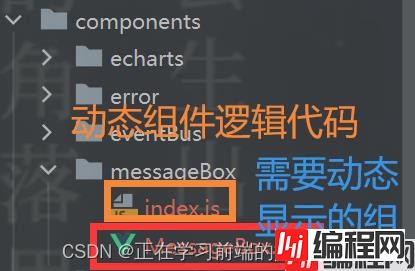
import _MessageBox from "@/components/messageBox/MessageBox";
export default {
//install开发插件的方法,install带有Vue的构造器,可以使用Vue.extend,和Vue.component(注册组件)
//在Vue.use的时候就会调用这个install
install(Vue) {
let messageBox = null;
//使用Vue.component全局注册组件
Vue.component(_MessageBox.name, _MessageBox);
//将方法添加到Vue的prototype属性中,这样实例就可以继承里面的方法
Vue.prototype.$messageBox = {
show, hide,
info({title, content, type}, callback) {
this.show({title, content, type: "primary"}, callback)
},
success({title, content, type}, callback) {
this.show({title, content, type: "success"}, callback)
},
warn({title, content, type}, callback) {
this.show({title, content, type: "warn"}, callback)
},
danger({title, content, type}, callback) {
this.show({title, content, type: "danger"}, callback)
}
}
//显示弹窗
function show(props, callback) {
//判断这个组件是否存在,如果不存在
if (!messageBox) {
//生成构造函数、构造器
const MessageBox = Vue.extend({
//此处传入的是一个函数组件,所以渲染的函数还可以额外接收一个参数
render(h) {
//h函数就是vue中的createElement函数,这个函数作用就是创建虚拟dom,追踪dom变化的
return h("MessageBox", {
//用于接收传递的参数
props: {...props}
})
}
});
//将动态模板组件实例化
messageBox = new MessageBox();
//将这个实例手动挂载,挂载后可以通过$el获取这个元素
this.vm = messageBox.$mount();
//将组件添加到body上,脱离了根节点,不在"id=app中"
document.body.appendChild(this.vm.$el)
callback && callback();
}
}
//关闭弹窗
function hide(callback) {
//移出这个组件
document.body.removeChild(this.vm.$el);
//将这个实例销毁
messageBox.$destroy();
messageBox = null;
this.vm = null;
//如果存在才会执行
callback && callback();
}
}
}import Vue from 'vue'
import App from './App.vue'
//1、引入
import MessageBox from "@/components/messageBox";
//2、全局注册使用
Vue.use(MessageBox);
new Vue({
render: h => h(App)
}).$mount('#app')<template>
<div>
<button @click="showMessageBox">show</button>
<button @click="showInfoMessageBox">info</button>
<button @click="showSucceSSMessageBox">success</button>
<button @click="showWarnMessageBox">warn</button>
<button @click="showDangerMessageBox">danger</button>
</div>
</template>
<script>
export default {
name: "Extend",
methods: {
//通过this.$messageBox可以访问到Vue实例的属性和方法
showMessageBox() {
this.$messageBox.success({
title: 'App',
content: 'this is content of extend study',
type: 'success'
}, () => {
console.log('show over')
})
},
showInfoMessageBox() {
this.$messageBox.info({
title: 'App',
content: 'this is content of extend study',
}, () => {
console.log('info over')
})
},
showSuccessMessageBox() {
this.$messageBox.success({
title: 'App',
content: 'this is content of extend study',
type: 'success'
}, () => {
console.log('success over')
})
},
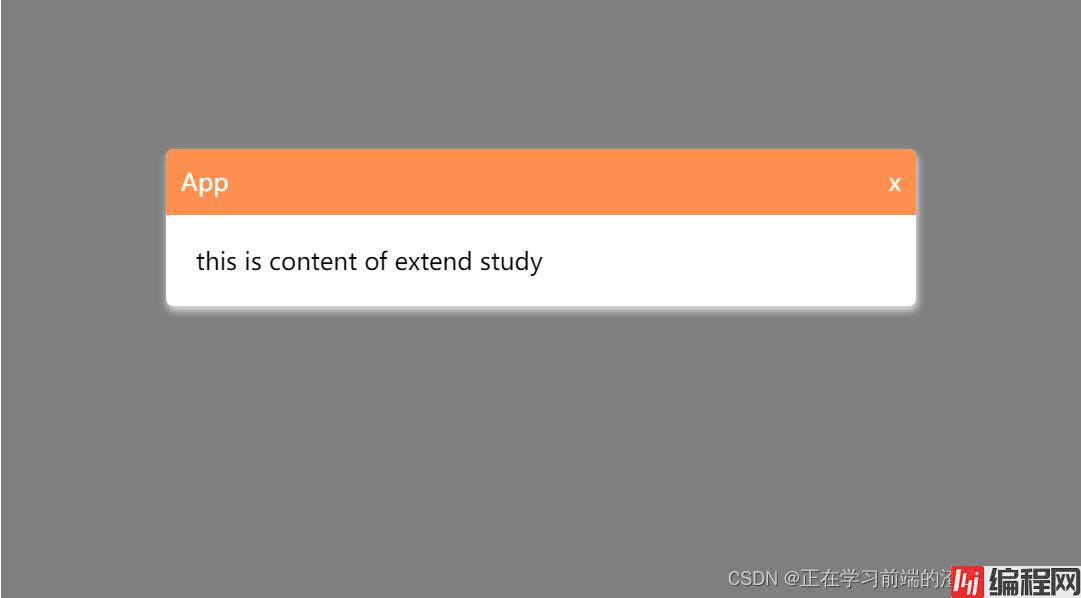
showWarnMessageBox() {
this.$messageBox.warn({
title: 'App',
content: 'this is content of extend study',
type: 'warn'
}, () => {
console.log('warn over')
})
},
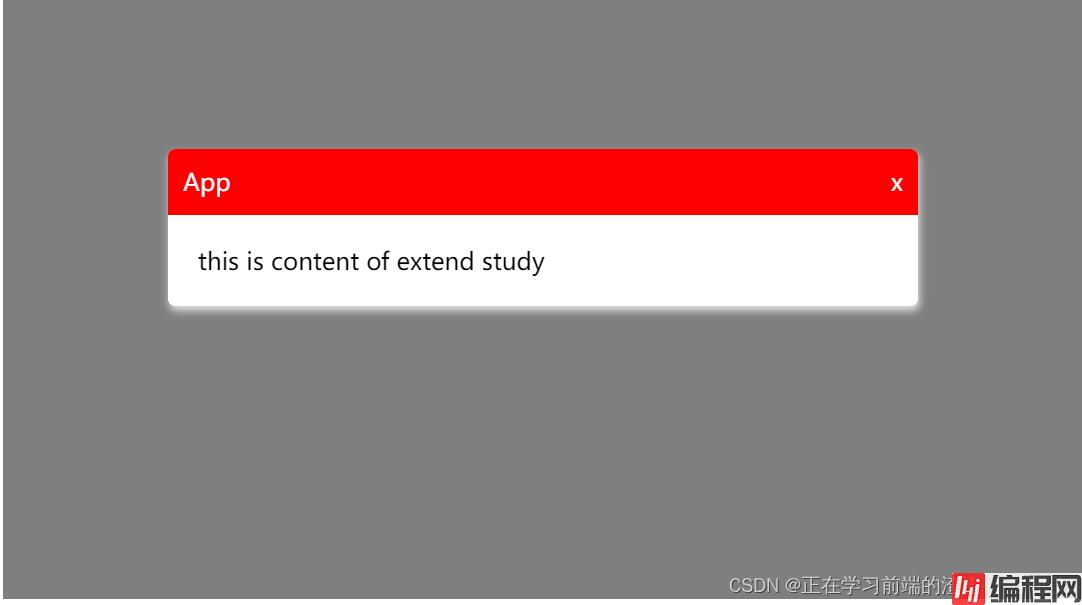
showDangerMessageBox() {
this.$messageBox.danger({
title: 'App',
content: 'this is content of extend study',
type: 'danger'
})
}
}
}
</script>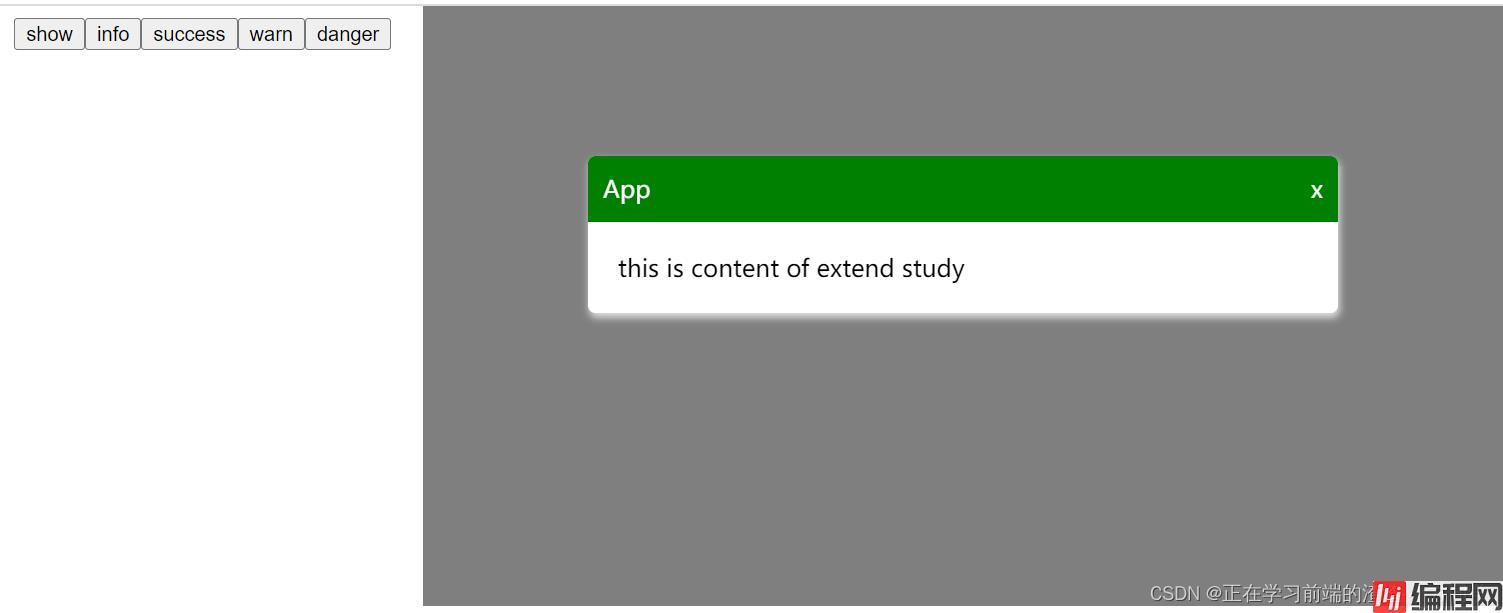

到此这篇关于Vue extend学习示例讲解的文章就介绍到这了,更多相关Vue extend内容请搜索编程网以前的文章或继续浏览下面的相关文章希望大家以后多多支持编程网!
--结束END--
本文标题: Vueextend学习示例讲解
本文链接: https://www.lsjlt.com/news/167991.html(转载时请注明来源链接)
有问题或投稿请发送至: 邮箱/279061341@qq.com QQ/279061341
下载Word文档到电脑,方便收藏和打印~
2024-01-12
2023-05-20
2023-05-20
2023-05-20
2023-05-20
2023-05-20
2023-05-20
2023-05-20
2023-05-20
2023-05-20
回答
回答
回答
回答
回答
回答
回答
回答
回答
回答


官方手机版

微信公众号

商务合作


0