目录一、下面是国外大佬的线程池代码二、下面是我封装的类三、最后在主类中进行封装调用即可四、最后这里将其封装,进行调用使用,非常好用,遂记录下来! 线程池代码是国外大佬写的!网上也有好
这里将其封装,进行调用使用,非常好用,遂记录下来!
线程池代码是国外大佬写的!网上也有好多博主进行了转载!
这篇博客也算是代码积累吧,只是将这种用法记录下载,后期如果遇到其他项目,可以直接在博客里拷贝代码到项目中去使用,甚是方便!
我所封装的效果是:
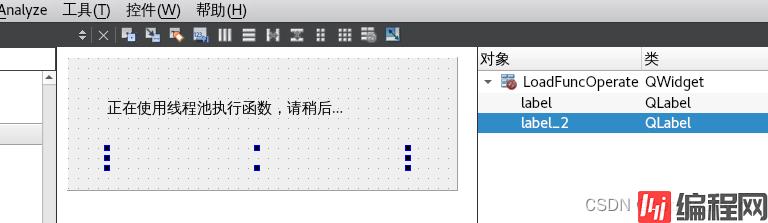
在一个函数里面,有一些特定需要处理的操作,得让他在线程中去运行,遂在处理过程中,显示一个窗体在提示,正在处理中,如下:
threadpool.h
就一个头文件搞定,方便!
#ifndef THREAD_POOL_H
#define THREAD_POOL_H
#include <vector>
#include <queue>
#include <memory>
#include <thread>
#include <mutex>
#include <condition_variable>
#include <future>
#include <functional>
#include <stdexcept>
class ThreadPool {
public:
    ThreadPool(size_t);
    template<class F, class... Args>
    auto enqueue(F&& f, Args&&... args)
        -> std::future<typename std::result_of<F(Args...)>::type>;
    ~ThreadPool();
private:
    // need to keep track of threads so we can join them
    std::vector< std::thread > workers;
    // the task queue
    std::queue< std::function<void()> > tasks;
    // synchronization
    std::mutex queue_mutex;
    std::condition_variable condition;
    bool stop;
};
// the constructor just launches some amount of workers
inline ThreadPool::ThreadPool(size_t threads)
    :   stop(false)
{
    for(size_t i = 0;i<threads;++i)
        workers.emplace_back(
            [this]
            {
                for(;;)
                {
                    std::function<void()> task;
                    {
                        std::unique_lock<std::mutex> lock(this->queue_mutex);
                        this->condition.wait(lock,
                            [this]{ return this->stop || !this->tasks.empty(); });
                        if(this->stop && this->tasks.empty())
                            return;
                        task = std::move(this->tasks.front());
                        this->tasks.pop();
                    }

                    task();
                }
            }
        );
}
// add new work item to the pool
template<class F, class... Args>
auto ThreadPool::enqueue(F&& f, Args&&... args)
    -> std::future<typename std::result_of<F(Args...)>::type>
{
    using return_type = typename std::result_of<F(Args...)>::type;
    auto task = std::make_shared< std::packaged_task<return_type()> >(
            std::bind(std::forward<F>(f), std::forward<Args>(args)...)
        );
    std::future<return_type> res = task->get_future();
    {
        std::unique_lock<std::mutex> lock(queue_mutex);
        // don't allow enqueueing after stopping the pool
        if(stop)
            throw std::runtime_error("enqueue on stopped ThreadPool");
        tasks.emplace([task](){ (*task)(); });
    }
    condition.notify_one();
    return res;
}
// the destructor joins all threads
inline ThreadPool::~ThreadPool()
{
    {
        std::unique_lock<std::mutex> lock(queue_mutex);
        stop = true;
    }
    condition.notify_all();
    for(std::thread &worker: workers)
        worker.join();
}
#endif // THREAD_POOL_H这里面运用了很多c++11的新特性,
代码我是看不懂,有兴趣的可以自己研究一下!
.h
#ifndef LOADFUNCOPERATE_H
#define LOADFUNCOPERATE_H
#include <QDialog>
#include <unistd.h>
#include "threadpool.h"
namespace Ui {
class LoadFuncOperate;
}
class LoadFuncOperate : public QDialog
{
    Q_OBJECT
public:
    explicit LoadFuncOperate(QDialog *parent = nullptr);
    ~LoadFuncOperate();
    // 设置需要运行的函数
    void setOperateFunc(std::function<void()> userThreadOperateFunc);
    // 设置显示标题
    void setTitleHint(const std::string str);
private:
    Ui::LoadFuncOperate *ui;
    std::function<void()> m_pThreadFunction;        // 存储用户设置的函数
    std::shared_ptr<ThreadPool> m_pThreadPools;     // 智能指针定义线程池
};
#endif // LOADFUNCOPERATE_H
.cpp
#include "LoadFuncOperate.h"
#include "ui_LoadFuncOperate.h"
#include <QMovie>
LoadFuncOperate::LoadFuncOperate(QDialog *parent) :
    QDialog(parent),
    ui(new Ui::LoadFuncOperate)
{
    ui->setupUi(this);
    setWindowFlags(Qt::Tool | Qt::FramelessWindowHint | Qt::windowstaysOnTopHint);
    // 设置窗体关闭时自动释放内存
    this->setAttribute(Qt::WA_DeleteOnClose);
    // 初始化智能指针线程池
    m_pThreadPools = std::make_shared<ThreadPool>(2);
    // 设置动图
    QMovie *movie = new QMovie(this);
    movie->setFileName(":/msgbox/pro.gif");     // 设置显示的gif图(先将gif添加到资源文件)
    QSize pSize(301, 20);           // Label大小
    ui->label_2->setMovie(movie);   // Label设置动图
    movie->setScaledSize(pSize);    // QMovie设在大小与Label一致
    movie->start();                 // 启动
}
LoadFuncOperate::~LoadFuncOperate()
{
    delete ui;
}
void LoadFuncOperate::setOperateFunc(std::function<void ()> userThreadOperateFunc)
{
    m_pThreadFunction = userThreadOperateFunc;
    auto Fun = [=]()
    {
        if (m_pThreadFunction)
        {
            sleep(1);
            m_pThreadFunction();    // 执行函数
            done(1);                // exec()运行窗体后返回1
            this->close();
        }
    };
    // 运行调用
    m_pThreadPools->enqueue(Fun);
}
void LoadFuncOperate::setTitleHint(const std::string str)
{
    ui->label->setText(QString::fromStdString(str));
}
ui文件
ui文件就两个Label,自己去定义就好了,或者根据自己的项目需要去整
public:
explicit MainWindow(QWidget *parent = nullptr);
~MainWindow();
// 封装
int ShowLoadingDlg(std::function<void ()> pUserThreadFunction, const std::string &strTips);
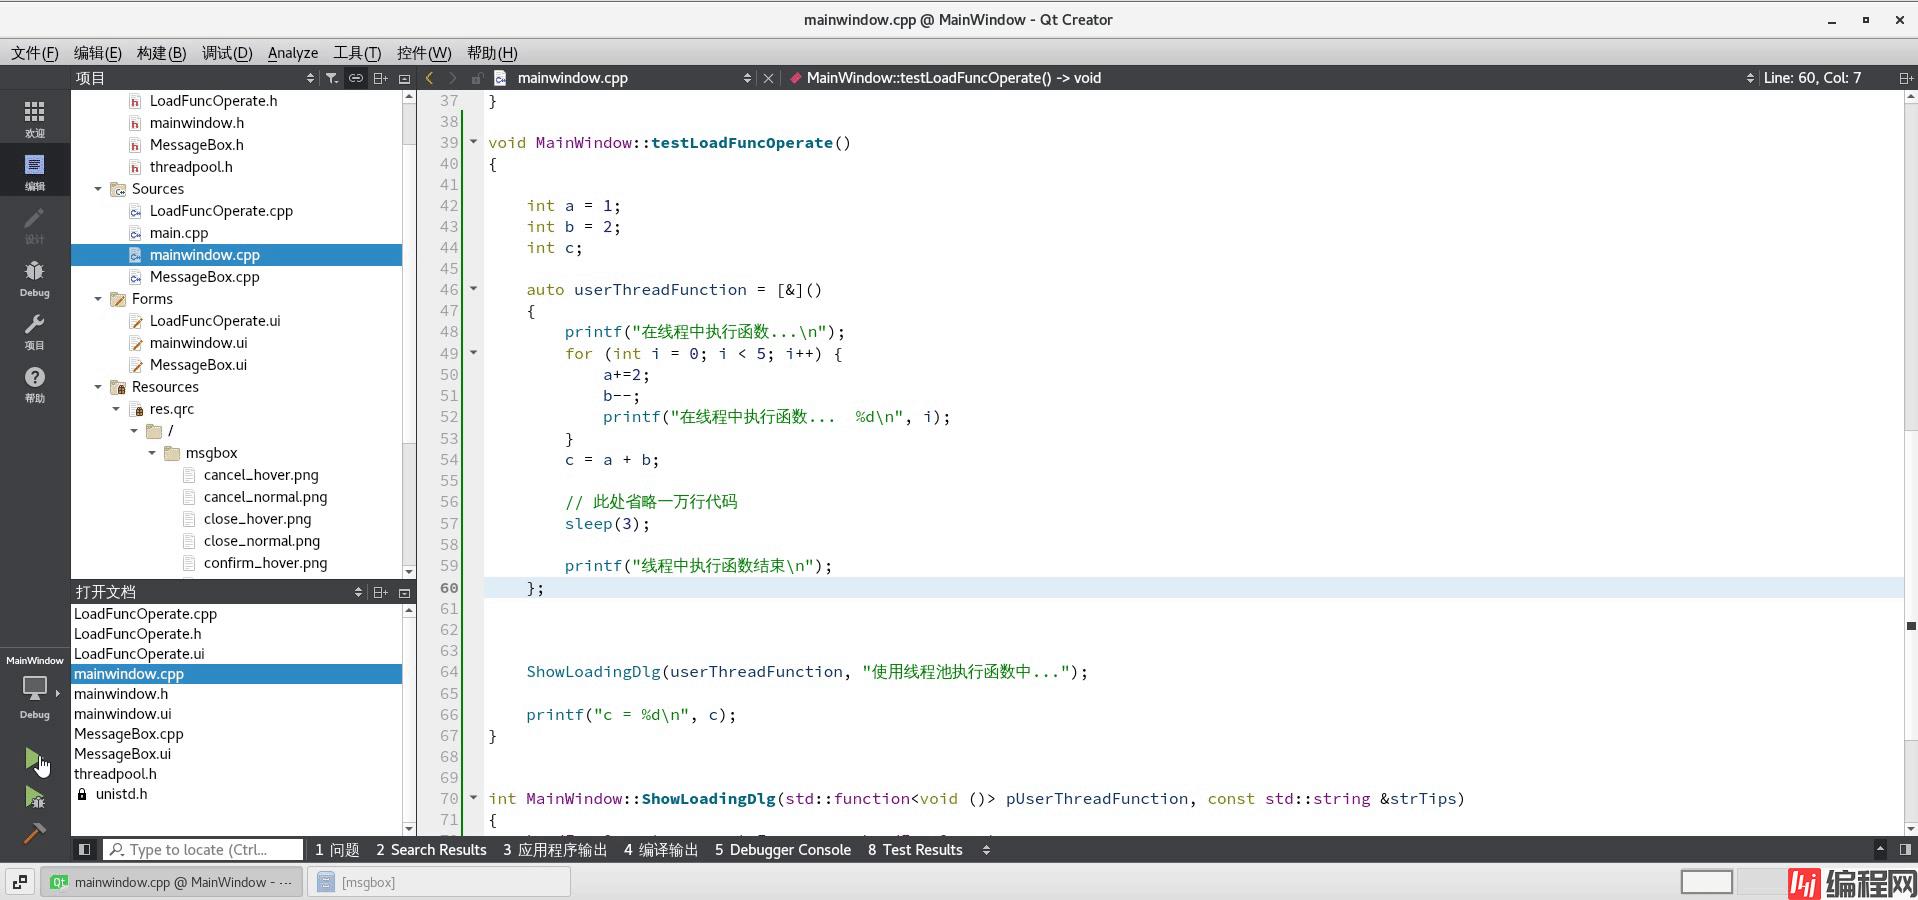
// 测试
void testLoadFuncOperate();void MainWindow::testLoadFuncOperate()
{
int a = 1;
int b = 2;
int c;
auto userThreadFunction = [&]()
{
printf("在线程中执行函数...\n");
for (int i = 0; i < 5; i++) {
a+=2;
b--;
printf("在线程中执行函数... %d\n", i);
}
c = a + b;
// 此处省略一万行代码
sleep(3);
// 此处还省略一万行代码,此时如果上面退出了,这一万行代码就没法执行了
// 正常使用法,应该是auto userThreadFunction 一进来就应该是一个for循环在不断运行,当遇到true == this->indexFlag,
// 就break掉,也就不会再继续for循环了!
printf("线程中执行函数结束\n");
};
ShowLoadingDlg(userThreadFunction, "使用线程池执行函数中...");
printf("c = %d\n", c);
}
int MainWindow::ShowLoadingDlg(std::function<void ()> pUserThreadFunction, const std::string &strTips)
{
LoadFuncOperate *operateFunc = new LoadFuncOperate;
operateFunc->setOperateFunc(pUserThreadFunction);
operateFunc->setTitleHint(strTips);
operateFunc->setModal(true);
int nRes = operateFunc->exec();
return nRes;
}在构造函数中调用函数testLoadFuncOperate();即可!
没啥的了,代码运用就是这样了。
另外,如果想要窗体可以鼠标点击移动,重写以下方法即可:
protected:
    void mouseMoveEvent(QMouseEvent *event) override;
    void mousePressEvent(QMouseEvent *event) override;
    void mouseReleaseEvent(QMouseEvent *event) override;
private:
	bool m_mousePress;
	QPoint m_widgetPos;

void LoadFuncOperate::mouseMoveEvent(QMouseEvent* event)
{
    if (m_mousePress) {
        move(event->pos() - m_widgetPos + this->pos());
    }
}
void LoadFuncOperate::mousePressEvent(QMouseEvent* event)
{
    if (event->button() == Qt::MouseButton::LeftButton) {
        m_widgetPos = event->pos();
        m_mousePress = true;
    }
}
void LoadFuncOperate::mouseReleaseEvent(QMouseEvent* event)
{
    m_mousePress = false;
}
另外,窗体中我去掉了右上角的关闭按钮,如果想要关闭掉,那就定义一个按钮放在右上角,实现槽函数,进行关闭即可。
如果想要关闭后,也停止函数的运行,那么可以定义QWidget变量,保存父类指针,再关闭前获取父类指针后做一些操作后再进行关闭即可,例如:
1. 也就是private加一个QWidget变量
private:
QWidget *m_parent;2. 构造函数将传过来的夫指针初始化他
LoadFuncOperate::LoadFuncOperate(QDialog *parent) :
QDialog(parent),
ui(new Ui::LoadFuncOperate)
{
ui->setupUi(this);this->m_parent= parent;
}
3. 关闭按钮的槽函数
void LoadFuncOperate::on_pBtn_Close_clicked()
{
if(m_parent) // m_parent是父类指针,QWidget对象
{
父类对象* p = static_cast<父类对象*>(m_parent);
if(p)
{
1. 这里可以调用父类的一些公开方法,进行以下处理
2. 例如改变一些条件变量的值,在上传或者下载文件中进行判断这个条件变量,如果值发生改变了,就停止操作,退出即可!
3. 假设父类有一个public方法:void setStopThread(bool flag) { this->indexFlag = flag }
4. 那么这里就可以直接使用p去调用了,p->setStopThread(true);
5. 设置完后,父类的this->indexFlag变量被赋值true,然后在具体位置对其进行判断做处理就行
6. 例如可以参考上面代码:void MainWindow::testLoadFuncOperate() 里的注释
}
}this->done(0); // 返回 0
this->close(); // 关闭窗口
}
第四点是专门记录给自己看的,也是项目的一些用法!
到此这篇关于QT通过C++线程池运行Lambda函数流程详解的文章就介绍到这了,更多相关QT Lambda函数内容请搜索编程网以前的文章或继续浏览下面的相关文章希望大家以后多多支持编程网!
--结束END--
本文标题: QT通过C++线程池运行Lambda自定义函数流程详解
本文链接: https://www.lsjlt.com/news/168974.html(转载时请注明来源链接)
有问题或投稿请发送至: 邮箱/279061341@qq.com QQ/279061341
下载Word文档到电脑,方便收藏和打印~
2024-03-01
2024-03-01
2024-02-29
2024-02-29
2024-02-29
2024-02-29
2024-02-29
2024-02-29
2024-02-29
2024-02-29
回答
回答
回答
回答
回答
回答
回答
回答
回答
回答


官方手机版

微信公众号

商务合作


0