目录前言monorepo主流程入口文件主要结构扩展插件模板配置getProjectNamefORMatTargetDirnpm包名验证和转化取得模板目录得到npm包管理器相关信息文件
继上次阅读create-Vue后 ,本次接着来解析 create-vite, 得益于之前的阅读经验, 本篇笔记将会着重讲解代码执行流程以及函数的扩展
最新的 create-vite 已经升级为Ts编译了,为方便学习理解使用川哥提供的源码仓库
git clone GitHub.com/lxchuan12/v…
Vite和Vue都使用monorepo的形式管理代码,将原本多代码仓库变为单代码仓库,每一个包对应的就是一个项目,这些项目都具有相关性,但在逻辑上是独立的。

vite2/packages/create-vite/index.js
import fs from 'node:fs'
import path from 'node:path'
//...
 async function init() {
//...
  try {
    result = await prompts(
      [
       //省略若干选项代码
      ],
      {
        onCancel: () => {
          throw new Error(red('✖') + ' Operation cancelled')
        }
      }
    )
  } catch (cancelled) {
    console.log(cancelled.message)
    return
  }
      //若干处理代码
 }
 init().catch((e) => {
  console.error(e)
 })
index.js 核心就是执行 init这个异步函数, 通过选项式对话 取到配置变量后 执行操作
import minimist from 'minimist'
import prompts from 'prompts'
import {
  blue,
  cyan,
  green,
  lightRed,
  magenta,
  red,
  reset,
  yellow
} from 'kolorist'
minimist 用于获取命令行参数,用于跳过后续一些选项式对话
prompts 提供了选项式对话的 命令行工具
kolorist 用来在命令行输出不同颜色的字符
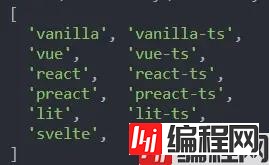
const FRAMEWORKS = [
  {
    name: 'vanilla',
    color: yellow,
    variants: [
      {
        name: 'vanilla',
        display: 'javascript',
        color: yellow
      },
      {
        name: 'vanilla-ts',
        display: 'typescript',
        color: blue
      }
    ]
  },
  //若干代码
]
const TEMPLATES = FRAMEWORKS.map(
  (f) => (f.variants && f.variants.map((v) => v.name)) || [f.name]
).reduce((a, b) => a.concat(b), [])
TEMPLATES 主要用来根据定义好的配置对象 生成对应后续template用到的数组
const getProjectName = () =>
  //path.resolve() 默认返回当前目录
  //path.basename(path.resolve())  对应得到的就是 当前目录名
    targetDir === '.' ? path.basename(path.resolve()) : targetDir
用于获取项目名, 值得一提的是 path.resolve() 默认返回命令执行的目录,path.basename(path.resolve()) 就是获取当前目录名
function formatTargetDir(targetDir) {
  return targetDir?.trim().replace(/\/+$/g, '')
}
将文本去空,并将末尾的 /斜杠去掉
function toValidPackageName(projectName) {
  return projectName
    .trim()
    .toLowerCase()
    .replace(/\s+/g, '-')
    .replace(/^[._]/, '')
    .replace(/[^a-z0-9-~]+/g, '-')
}
function isValidPackageName(projectName) {
  return /^(?:@[a-z0-9-*~][a-z0-9-*._~]*\/)?[a-z0-9-~][a-z0-9-._~]*$/.test(
    projectName
  )
}
用于验证是否符合package.JSON name 的格式 以及转换函数
 const templateDir = path.resolve(
    fileURLToPath(import.meta.url),
    '..',
    `template-${template}`
  )
通过resolve 拼接目录名,根据用户的选择会生成对应的 比如 template-vue-ts
const pkgInfo = pkgFromUserAgent(process.env.npm_config_user_agent)
  const pkgManager = pkgInfo ? pkgInfo.name : 'npm'
  function pkgFromUserAgent(userAgent) {
  if (!userAgent) return undefined
  const pkgSpec = userAgent.split(' ')[0]
  const pkgSpecArr = pkgSpec.split('/')
  return {
    name: pkgSpecArr[0],
    version: pkgSpecArr[1]
  }
}
process.env.npm_config_user_agent 会返回类似这样的字符:
npm/6.7.5 xxxx/xxx xxx ,函数就是取出第一部分然后切割字符, 得到对应的 包管理器以及版本
const write = (file, content) => {
  const targetPath = renameFiles[file]
    ? path.join(root, renameFiles[file])
    : path.join(root, file)
  if (content) {
    fs.writeFileSync(targetPath, content)
  } else {
    copy(path.join(templateDir, file), targetPath)
  }
}
targetPath先匹配.gitignore,否则直接使用参数的file值。 然后根据是否传递了 content参数执行写入 和 复制 template目录下文件 两个操作
function copy(src, dest) {
  const stat = fs.statSync(src)
  if (stat.isDirectory()) {
    copyDir(src, dest)
  } else {
    fs.copyFileSync(src, dest)
  }
}
判断文件信息, 目录则执行 copyDir函数, 否则调用 fs 下 的 copyFileSync
function copyDir(srcDir, destDir) {
  fs.mkdirSync(destDir, { recursive: true })
  for (const file of fs.readdirSync(srcDir)) {
    const srcFile = path.resolve(srcDir, file)
    const destFile = path.resolve(destDir, file)
    copy(srcFile, destFile)
  }
}
创建目标文件夹,然后遍历源文件夹 依次将文件 copy过去
function emptyDir(dir) {
  if (!fs.existsSync(dir)) {
    return
  }
  for (const file of fs.readdirSync(dir)) {
    fs.rmSync(path.resolve(dir, file), { recursive: true, force: true })
  }
}
将目录变为空目录。先判断目录是否存在, 再遍历执行删除操作
function isEmpty(path) {
  const files = fs.readdirSync(path)
  return files.length === 0 || (files.length === 1 && files[0] === '.git')
}
通过fs.readdirSync 得到目录返回的数组长度 进行判断
const { framework, overwrite, packageName, variant } = result
  const root = path.join(cwd, targetDir)
//检查是否可写入
  if (overwrite) {
    emptyDir(root)
  } else if (!fs.existsSync(root)) {
    fs.mkdirSync(root, { recursive: true })
  }
  // determine template
  template = variant || framework || template
  console.log(`\nScaffolding project in ${root}...`)
//得到模板目录
  const templateDir = path.resolve(
    fileURLToPath(import.meta.url),
    '..',
    `template-${template}`
  )
  const write = (file, content) => {
   //写文件函数
  }
  const files = fs.readdirSync(templateDir) //得到模板目录下文件信息
  //将默认目录中非package.json 的文件 复制到 templateDir中
  for (const file of files.filter((f) => f !== 'package.json')) {
    write(file) //不传 content 执行 copy操作
  }
//得到模板目录中的 package.json内容
  const pkg = JSON.parse(
    fs.readFileSync(path.join(templateDir, `package.json`), 'utf-8')
  )
  pkg.name = packageName || getProjectName()
// 修改name 后 写入 package.json 到 templateDir中中
  write('package.json', JSON.stringify(pkg, null, 2))
//得到对应包管理器的 信息 然后回显
  const pkgInfo = pkgFromUserAgent(process.env.npm_config_user_agent)
  const pkgManager = pkgInfo ? pkgInfo.name : 'npm'
  console.log(`\nDone. Now run:\n`)
  if (root !== cwd) {
    console.log(`  cd ${path.relative(cwd, root)}`)
  }
  switch (pkgManager) {
    case 'yarn':
      console.log('  yarn')
      console.log('  yarn dev')
      break
    default:
      console.log(`  ${pkgManager} install`)
      console.log(`  ${pkgManager} run dev`)
      break
  }
  console.log()
这一步总体流程如下:
path.resolve 是相对于当前工作目录 返回路径
path.join 是 根据path字符串片段拼接返回一个路径 需要注意区别
至此 代码和流程就分析完毕了,相对于create-vue, create-vite要简单一点点
对于不懂或者不了解的地方, 复现或者尝试重写进行举一反三 是加深 认知 和学习 更好的方式,光是看和阅读领悟还是不够的!
写了个练习用的小工具,可以用来快捷的生成Vue模板页面
create-harexs-tp
以上就是Create vite理解Vite项目创建流程及代码实现的详细内容,更多关于Create vite 项目创建流程的资料请关注编程网其它相关文章!
--结束END--
本文标题: Create vite理解Vite项目创建流程及代码实现
本文链接: https://www.lsjlt.com/news/170271.html(转载时请注明来源链接)
有问题或投稿请发送至: 邮箱/279061341@qq.com QQ/279061341
下载Word文档到电脑,方便收藏和打印~
2024-01-12
2023-05-20
2023-05-20
2023-05-20
2023-05-20
2023-05-20
2023-05-20
2023-05-20
2023-05-20
2023-05-20
回答
回答
回答
回答
回答
回答
回答
回答
回答
回答


官方手机版

微信公众号

商务合作


0