Python 官方文档:入门教程 => 点击学习
目录1、Redis简介2、实现代码3、启动步骤4、使用ab进行并发测试5、线程安全6、总结7、参考资料1、Redis简介 Redis是一个开源的key-value存储系统。 Redi
Redis是一个开源的key-value存储系统。
Redis的五种基本类型:String(字符串),list(链表),set(集合),zset(有序集合),hash,stream(Redis5.0后的新数据结构)
这些数据类型都支持push/pop、add/remove及取交集并集和差集及更丰富的操作,而且这些操作都是原子性的。
Redis的应用场景为配合关系型数据库做高速缓存,降低数据库io
需要注意的是,Redis是单线程的,如果一次批量处理命令过多,会造成Redis阻塞或网络拥塞(传输数据量大)

pom.xml
<?xml version="1.0" encoding="UTF-8"?>
<project xmlns="Http://Maven.apache.org/POM/4.0.0"
         xmlns:xsi="http://www.w3.org/2001/XMLSchema-instance"
         xsi:schemaLocation="http://maven.apache.org/POM/4.0.0 http://maven.apache.org/xsd/maven-4.0.0.xsd">
    <modelVersion>4.0.0</modelVersion>
    <parent>
        <groupId>org.springframework.boot</groupId>
        <artifactId>spring-boot-starter-parent</artifactId>
        <version>2.2.1.RELEASE</version>
        <relativePath/> <!-- lookup parent from repository -->
    </parent>
    <groupId>org.example</groupId>
    <artifactId>seckill</artifactId>
    <version>1.0-SNAPSHOT</version>
    <properties>
        <java.version>1.8</java.version>
    </properties>

    <dependencies>
        <dependency>
            <groupId>org.springframework.boot</groupId>
            <artifactId>spring-boot-starter-WEB</artifactId>
        </dependency>

        <!-- https://mvnrepository.com/artifact/org.springframework.boot/spring-boot-starter-test -->
        <dependency>
            <groupId>org.springframework.boot</groupId>
            <artifactId>spring-boot-starter-test</artifactId>
            <version>2.2.1.RELEASE</version>
            <scope>test</scope>
        </dependency>

        <!-- redis -->
        <dependency>
            <groupId>org.springframework.boot</groupId>
            <artifactId>spring-boot-starter-data-redis</artifactId>
        </dependency>

        <!-- spring2.X集成redis所需common-pool2-->
        <dependency>
            <groupId>org.apache.commons</groupId>
            <artifactId>commons-pool2</artifactId>
            <version>2.6.0</version>
        </dependency>

        <dependency>
            <groupId>com.alibaba</groupId>
            <artifactId>fastJSON</artifactId>
            <version>1.2.24</version>
        </dependency>

    </dependencies>
    <build>
        <plugins>
            <plugin>
                <groupId>org.springframework.boot</groupId>
                <artifactId>spring-boot-maven-plugin</artifactId>
                <configuration>
                    <fork>true</fork>
                </configuration>
            </plugin>
        </plugins>
    </build>

</project>
application.properties.xml
#Redis服务器地址
spring.redis.host=192.168.1.2
#Redis服务器连接端口
spring.redis.port=6379
#Redis数据库索引(默认为0)
spring.redis.database=0
#连接超时时间(毫秒)
spring.redis.timeout=1800000
#连接池最大连接数(使用负值表示没有限制)
spring.redis.lettuce.pool.max-active=20
#最大阻塞等待时间(负数表示没限制)
spring.redis.lettuce.pool.max-wait=-1
#连接池中的最大空闲连接
spring.redis.lettuce.pool.max-idle=5
#连接池中的最小空闲连接
spring.redis.lettuce.pool.min-idle=0
# 关闭超时时间
#pring.redis.lettuce.shutdown-timeout=100
#配置spring启动端口号
server.port=8080
前端界面
seckillpage.html
<!DOCTYPE html>
<html lang="en" xmlns:v-on="http://www.w3.org/1999/xhtml" xmlns:v-bind="http://www.w3.org/1999/xhtml">
<head>
    <meta charset="UTF-8">
    <title>redis秒杀</title>
</head>
<body>
<!-- 开发环境版本,包含了有帮助的命令行警告 -->
<script src="https://cdn.jsdelivr.net/npm/Vue/dist/vue.js"></script>
<!-- 官网提供的 axiOS 在线地址 -->
<script src="https://cdn.bootcdn.net/ajax/libs/axios/0.20.0-0/axios.min.js"></script>
<div id="app">
    <h1>商品1元秒杀</h1>
    <!-- 左箭头 -->
    <input type="button" value="<" v-on:click="prov" v-show="this.index>-1"/>
    <img v-bind:src="imgArr[index]" width="200px" />
    <!-- 右箭头 -->
    <input type="button" value=">" v-on:click="next" v-show="this.index<2"/><br>
    <input type="button" v-on:click="seckill" value="秒 杀"/>
</div>
<script>
    var app = new Vue({
        el: "#app",
        data: {
            productId: "01234",
            imgArr:[
                "/image/phone1.png",
                "/image/phone2.png",
                "/image/phone3.png",
            ],
            index:0
        },
        methods: {
            seckill: function () {
                let param = new URLSearchParams()
                param.append('productId', this.productId)
                param.append('index', this.index)
                axios({
                    method: 'post',
                    url: 'http://192.168.1.6:8080/index/doSeckill',
                    data: param
                }).then(function (response) {

                    if (response.data == true) {
                        alert("秒杀成功");
                    } else {
                        alert("抢光了");
                    }

                },
                    function(error){
                    alert("发生错误");
                });

            },

            prov:function(){
                this.index--;
            },
            next:function(){
                this.index++;
            }
        }
    });

</script>
</body>
</html>
相关配置类
Redis配置类
RedisConfig.java
package com.SpringBoot_redis_seckill.config;

import com.fasterxml.jackson.annotation.JsonAutoDetect;
import com.fasterxml.jackson.annotation.PropertyAccessor;
import com.fasterxml.jackson.databind.ObjectMapper;
import org.springframework.cache.CacheManager;
import org.springframework.cache.annotation.CachinGConfigurerSupport;
import org.springframework.cache.annotation.EnableCaching;
import org.springframework.context.annotation.Bean;
import org.springframework.context.annotation.Configuration;
import org.springframework.data.redis.cache.RedisCacheConfiguration;
import org.springframework.data.redis.cache.RedisCacheManager;
import org.springframework.data.redis.connection.RedisConnectionFactory;
import org.springframework.data.redis.core.RedisTemplate;
import org.springframework.data.redis.serializer.Jackson2JsonRedisSerializer;
import org.springframework.data.redis.serializer.RedisSerializationContext;
import org.springframework.data.redis.serializer.RedisSerializer;
import org.springframework.data.redis.serializer.StringRedisSerializer;

import java.time.Duration;


@EnableCaching
@Configuration
public class RedisConfig extends CachingConfigurerSupport {

    @Bean
    public RedisTemplate<String, Object> redisTemplate(RedisConnectionFactory factory) {
        RedisTemplate<String, Object> template = new RedisTemplate<>();
        RedisSerializer<String> redisSerializer = new StringRedisSerializer();
        Jackson2JsonRedisSerializer jackson2JsonRedisSerializer = new Jackson2JsonRedisSerializer(Object.class);
        ObjectMapper om = new ObjectMapper();
        om.setVisibility(PropertyAccessor.ALL, JsonAutoDetect.Visibility.ANY);
        om.enableDefaultTyping(ObjectMapper.DefaultTyping.NON_FINAL);
        jackson2JsonRedisSerializer.setObjectMapper(om);
        template.setConnectionFactory(factory);
        template.seTKEySerializer(redisSerializer); //key序列化方式
        template.setValueSerializer(jackson2JsonRedisSerializer); //value序列化
        template.setHashValueSerializer(jackson2JsonRedisSerializer); //value HashMap序列化
        return template;
    }

    @Bean(name = "cacheManager")
    public CacheManager cacheManager(RedisConnectionFactory factory) {
        RedisSerializer<String> redisSerializer = new StringRedisSerializer();
        Jackson2JsonRedisSerializer jackson2JsonRedisSerializer = new Jackson2JsonRedisSerializer(Object.class);
        //解决查询缓存转换异常的问题
        ObjectMapper om = new ObjectMapper();
        om.setVisibility(PropertyAccessor.ALL, JsonAutoDetect.Visibility.ANY);
        om.enableDefaultTyping(ObjectMapper.DefaultTyping.NON_FINAL);
        jackson2JsonRedisSerializer.setObjectMapper(om);
        // 配置序列化(解决乱码的问题),过期时间600秒
        RedisCacheConfiguration config = RedisCacheConfiguration.defaultCacheConfig()
                .entryTtl(Duration.ofSeconds(600))
                .serializeKeysWith(RedisSerializationContext.SerializationPair.fromSerializer(redisSerializer))
                .serializeValuesWith(RedisSerializationContext.SerializationPair.fromSerializer(jackson2JsonRedisSerializer))
                .disableCachingNullValues();
        RedisCacheManager cacheManager = RedisCacheManager.builder(factory)
                .cacheDefaults(config)
                .build();
        return cacheManager;
    }
}配置Vue获取后端接口数据时出现的跨域请求问题。
CorsConfig.java
package com.springboot_redis_seckill.config;

import org.springframework.context.annotation.Bean;
import org.springframework.context.annotation.Configuration;
import org.springframework.web.cors.CorsConfiguration;
import org.springframework.web.cors.UrlBasedCorsConfigurationSource;
import org.springframework.web.filter.CorsFilter;


@Configuration
public class CorsConfig {
    private CorsConfiguration buildConfig() {
        CorsConfiguration corsConfiguration = new CorsConfiguration();
        corsConfiguration.addAllowedOrigin("*"); //允许任何域名
        corsConfiguration.addAllowedHeader("*"); //允许任何头
        corsConfiguration.addAllowedMethod("*"); //允许任何方法
        return corsConfiguration;
    }

    @Bean
    public CorsFilter corsFilter() {
        UrlBasedCorsConfigurationSource source = new UrlBasedCorsConfigurationSource();
        source.reGISterCorsConfiguration("
@Service
public class SecKillServiceImpl implements SecKillService {
    @Autowired
    @Qualifier("redisTemplate")
    private RedisTemplate redisTemplate;

    @Override
    public synchronized boolean doSecKill(String uid, String productId) {
        //1、uid和productId非空判断
        if (uid == null || productId == null) {
            return false;
        }

        //2、拼接key
        String kcKey = "sk:" + productId + ":Qt";   //库存
        String userKey = "sk:" + productId + ":user";  //秒杀成功的用户

        //3、获取库存
        String kc = String.valueOf(redisTemplate.opsForValue().get(kcKey)) ;
        if (kc == null) {
            System.out.println("秒杀还没有开始,请等待");
            return false;
        }

        //4、判断用户是否已经秒杀成功过了
        if (redisTemplate.opsForSet().isMember(userKey, uid)) {
            System.out.println("已秒杀成功,不能重复秒杀");
            return false;
        }
        //5、如果库存数量小于1,秒杀结束
        if (Integer.parseInt(kc) <=0) {
            System.out.println("秒杀结束");
            return false;
        }

        //6、秒杀过程
        redisTemplate.opsForValue().decrement(kcKey);  //库存数量减1
        redisTemplate.opsForSet().add(userKey, uid);
        System.out.println("秒杀成功。。。");
        return true;
    }
}
控制层
package com.springboot_redis_seckill.controller;

import com.alibaba.fastjson.JSONObject;
import com.springboot_redis_seckill.service.SecKillService;
import org.springframework.beans.factory.annotation.Autowired;
import org.springframework.beans.factory.annotation.Qualifier;
import org.springframework.stereotype.Controller;
import org.springframework.web.bind.annotation.RequestMapping;
import org.springframework.web.bind.annotation.RequestMethod;
import org.springframework.web.bind.annotation.ResponseBody;

import javax.servlet.http.HttpServletRequest;
import javax.servlet.http.HttpServletResponse;
import java.io.IOException;
import java.io.PrintWriter;
import java.util.Random;


@Controller
@RequestMapping("/index")
public class MyController {
    @Autowired
    @Qualifier("secKillServiceImpl")
    private SecKillService secKillService;

    @RequestMapping(value = {"/seckillpage"}, method = RequestMethod.GET)
    public String seckillpage() {
        return "/html/seckillpage.html";
    }


    @RequestMapping(value = {"/doSeckill"}, method = RequestMethod.POST)
    @ResponseBody  //自动返回json格式的数据
    public Object doSeckill(HttpServletRequest request, HttpServletResponse response) {
        System.out.println("doSeckill");
        String productId = request.getParameter("productId");
        String index = request.getParameter("index");
        System.out.println(productId+index);  //拼接成为商品ID
        int id = new Random().nextInt(50000);  //使用随机数生成用户ID
        String uid = String.valueOf(id) + " ";
        boolean flag = secKillService.doSecKill(uid, productId+index);
        System.out.println(flag);
        return flag;
    }
}
启动类
RunApplication.java
package com.springboot_redis_seckill;

import org.springframework.boot.SpringApplication;
import org.springframework.boot.autoconfigure.SpringBootApplication;


@SpringBootApplication
public class RunApplication {
    public static void main(String[] args) {
        SpringApplication.run(RunApplication.class, args);
    }
}因为一共有三件商品要秒杀,所以在redis里面设置三个商品的库存数量。这里数量都设置为10。
127.0.0.1:6379> set sk:012340:qt 10
OK
127.0.0.1:6379> set sk:012341:qt 10
OK
127.0.0.1:6379> set sk:012342:qt 10
OK要确保redis能够被访问,要确保关闭linux的防火墙,以及关闭redis的保护模式。
vim redis.conf   --打开redis配置

service iptables stop   --关闭防火墙


//关闭redis保护模式
redis-cli    --进入redis客户端
config set protected-mode "no" --配置里面关闭redis保护模式(只是进入redis.conf把protected-mode变为no是不行的,还要加一句config set protected-mode "no"启动springboot项目

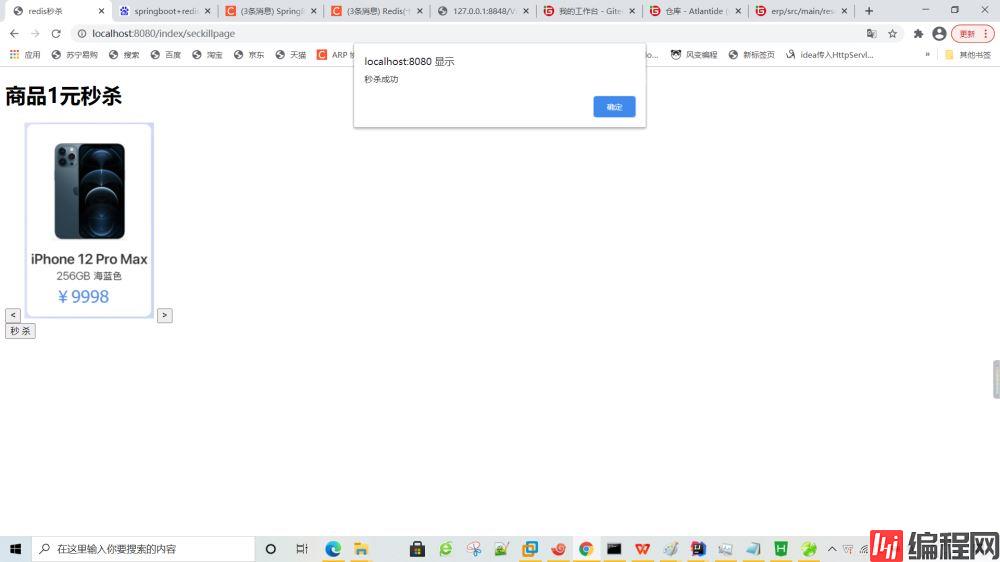
秒杀成功后,该商品在redis中的数量就减1。

当数量减为0时,则提示“抢光了”。


如果是Centos 6版本的linux都是默认按照了ab工具的。
如果没有安装ab工具,可在linux终端用命令联网下载安装。
yum install httpd-tools安装完成后,就可以使用ab工具进行并发测试了。
在linux终端输入如下命令:
ab -n 2000 -c 200 -p '/root/Desktop/post.txt' -T 'application/x-www-fORM-urlencoded' 'http://192.168.1.6:8080/index/doSeckill/'
012341这个商品库存变为0了

为了防止出现“超买”的现象,需要让操作redis的方法是线程安全的(即在方法上加上一个“悲观锁”synchronized)。

如果不加synchronized就会出现“超买”现象,即redis库存会出现负数
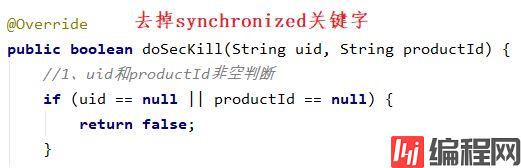

之所以产生这种现象是由于并发导致多个用户同时调用了doSecKill()方法,多个用户同时修改了redis中的sk:012342:qt的值,但暂时都没有提交存入到redis中去。等到后来一起提交,导致了sk:012342:qt的值被修改了多次,因此会出现负数。
因此在doSecKill()方法加上悲观锁,用户调用该方法就对该方法加锁,修改了sk:012342:qt的值后并提交存入redis中之后,才会释放锁。其他用户才能得到锁并操作该方法。
redis作为一种NoSQL的非关系型数据库,因为其单实例,简单高效的特性通常会被作为其他关系型数据库的高速缓存。尤其是在秒杀这样的高并发操作。先将要秒杀的商品信息从数据库读入到redis中,秒杀的过程实际上是在与redis进行交互。等秒杀完成后再将秒杀的结果存入数据库。可以有效降低降低数据库IO,防止数据库宕机。
https://www.bilibili.com/video/BV1Rv41177Af?p=27
https://www.cnblogs.com/taiyonghai/p/5810150.html
到此这篇关于Springboot+redis+Vue实现秒杀的项目实践的文章就介绍到这了,更多相关Springboot+redis+Vue 秒杀内容请搜索编程网以前的文章或继续浏览下面的相关文章希望大家以后多多支持编程网!
--结束END--
本文标题: Springboot+redis+Vue实现秒杀的项目实践
本文链接: https://www.lsjlt.com/news/171931.html(转载时请注明来源链接)
有问题或投稿请发送至: 邮箱/279061341@qq.com QQ/279061341
下载Word文档到电脑,方便收藏和打印~
2024-03-01
2024-03-01
2024-03-01
2024-02-29
2024-02-29
2024-02-29
2024-02-29
2024-02-29
2024-02-29
2024-02-29
回答
回答
回答
回答
回答
回答
回答
回答
回答
回答


官方手机版

微信公众号

商务合作


0