目录前言提取傅里叶变换的高频信息通过蚁群算法进行图片轮廓提取Canny边缘检测 使用cuda加速提取轮廓前言 常用的轮廓提取算法有:Canny、阈值分割、提取傅
常用的轮廓提取算法有:Canny、阈值分割、提取傅里叶变换的高频信息,还有别具一格的蚁群算法,当然比较常见的作法是使用阈值分割+边缘查找,在OpenCV里是threshold和findContours两个函数的组合使用,和Canny。
轮廓提取的算法很多,而其目的都是为了找到图像中灰阶差比较大的位置。而所谓亚像素提取,则是使用了插值算法,以找出灰阶差最大的位置。
##############
#图像中的轮廓提取
#时间:2019/1/3
#作者:cclplus
#仅供学习交流使用
#如有疑问或者需求,可以联系作者的邮箱
#如果你有什么好的建议或者指导,我将不胜感激
import cv2
import numpy as np
from matplotlib import pyplot as plt
import copy
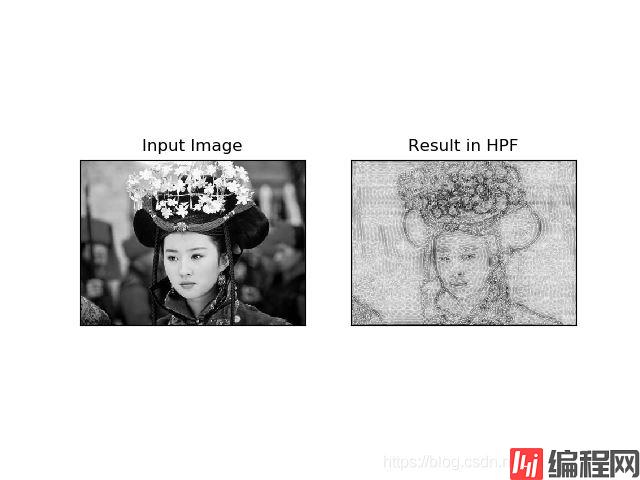
img = cv2.imread('liuyifei.jpg',0)
f = np.fft.fft2(img)
fshift = np.fft.fftshift(f)
rows,cols = img.shape
crow,ccol = int(rows/2) , int(cols/2)
for i in range(crow-30,crow+30):
for j in range(ccol-30,ccol+30):
fshift[i][j]=0.0
f_ishift = np.fft.ifftshift(fshift)
img_back = np.fft.ifft2(f_ishift)#进行高通滤波
# 取绝对值
img_back = np.abs(img_back)
plt.subplot(121),plt.imshow(img,cmap = 'gray')#因图像格式问题,暂已灰度输出
plt.title('Input Image'), plt.xticks([]), plt.yticks([])
#先对灰度图像进行伽马变换,以提升暗部细节
rows,cols = img_back.shape
gamma=copy.deepcopy(img_back)
rows=img.shape[0]
cols=img.shape[1]
for i in range(rows):
for j in range(cols):
gamma[i][j]=5.0*pow(gamma[i][j],0.34)#0.34这个参数是我手动调出来的,根据不同的图片,可以选择不同的数值
#对灰度图像进行反转
for i in range(rows):
for j in range(cols):
gamma[i][j]=255-gamma[i][j]
plt.subplot(122),plt.imshow(gamma,cmap = 'gray')
plt.title('Result in HPF'), plt.xticks([]), plt.yticks([])
plt.show()
原图
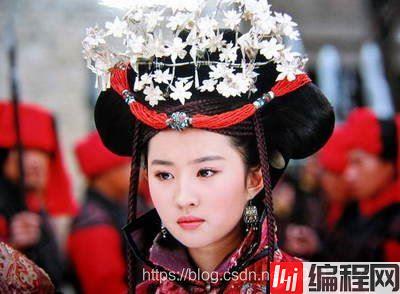
输出结果
相关代码我上传到了我的GitHub上
https://github.com/YuruTu/Ant_colony
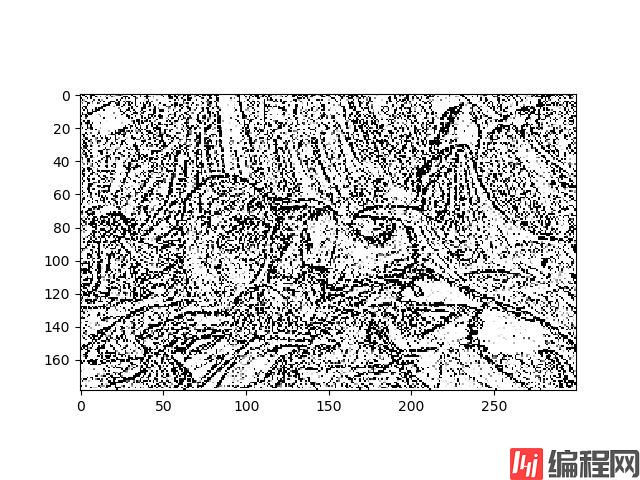
效果不够理想,这也算得上蚁群算法的一大特点,对参数要求较高,需要调参。相关内容,笔者会持续更新
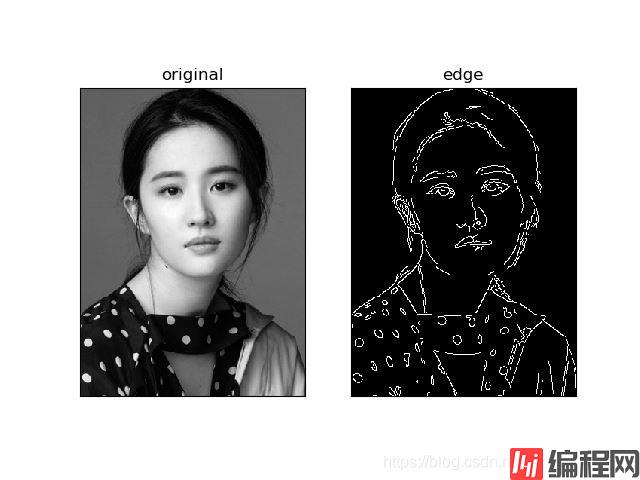
import cv2
import numpy as np
from matplotlib import pyplot as plt

img = cv2.imread('liuyifei.jpg',0)
edges = cv2.Canny(img,100,200)

plt.subplot(121),plt.imshow(img,cmap='gray')
plt.title('original'),plt.xticks([]),plt.yticks([])
plt.subplot(122),plt.imshow(edges,cmap='gray')
plt.title('edge'),plt.xticks([]),plt.yticks([])

plt.show()
#include <iOStream>
#include <cuda.h>
#include <cstdlib>
#include <stdio.h>
#include <cuda_runtime.h>
#include <string>
#include <assert.h>
#include <cuda_runtime.h>
#include <cuda_runtime_api.h>
#include <device_launch_parameters.h>
#include <opencv2/core/core.hpp>
#include <opencv2/imgproc/imgproc.hpp>
#include <opencv2/highgui/highgui.hpp>

using namespace cv;
using namespace std;
// GPU constant memory to hold our kernels (extremely fast access time)
__constant__ float convolutionKernelStore[256];


__global__ void convolve(unsigned char *source, int width, int height, int paddingX, int paddingY, unsigned int kOffset, int kWidth, int kHeight, unsigned char *destination)
{
	// Calculate our pixel's location
	int x = (blockIdx.x * blockDim.x) + threadIdx.x;
	int y = (blockIdx.y * blockDim.y) + threadIdx.y;

	float sum = 0.0;
	int   pWidth = kWidth / 2;
	int   pHeight = kHeight / 2;

	//Solo ejecuta validos pixeles
	if (x >= pWidth + paddingX && y >= pHeight + paddingY && x < (blockDim.x * gridDim.x) - pWidth - paddingX &&
		y < (blockDim.y * gridDim.y) - pHeight - paddingY)
	{
		for (int j = -pHeight; j <= pHeight; j++)
		{
			for (int i = -pWidth; i <= pWidth; i++)
			{
				// Sample the weight for this location
				int ki = (i + pWidth);
				int kj = (j + pHeight);
				float w = convolutionKernelStore[(kj * kWidth) + ki + kOffset];


				sum += w * float(source[((y + j) * width) + (x + i)]);
			}
		}
	}

	// Promedio sum
	destination[(y * width) + x] = (unsigned char)sum;
}

__global__ void pythaGoras(unsigned char *a, unsigned char *b, unsigned char *c)
{
	int idx = (blockIdx.x * blockDim.x) + threadIdx.x;

	float af = float(a[idx]);
	float bf = float(b[idx]);

	c[idx] = (unsigned char)sqrtf(af*af + bf * bf);
}

// crea imagen buffer
unsigned char* createImageBuffer(unsigned int bytes, unsigned char **devicePtr)
{
	unsigned char *ptr = NULL;
	cudaSetDeviceFlags(cudaDeviceMapHost);
	cudaHostAlloc(&ptr, bytes, cudaHostAllocMapped);
	cudaHostGetDevicePointer(devicePtr, ptr, 0);
	return ptr;
}


int main(int arGC, char** argv) {
	// Abre la camaraWEB
	cv::VideoCapture camera(0);
	cv::Mat          frame;
	if (!camera.isOpened())
		return -1;

	// capture windows
	cv::namedWindow("Source");
	cv::namedWindow("Greyscale");
	cv::namedWindow("Blurred");
	cv::namedWindow("Sobel");

	// Funciones para obtener el tiempo de ejecucion
	cudaEvent_t start, stop;
	cudaEventCreate(&start);
	cudaEventCreate(&stop);

	// Crea kernel gaussian(sum = 159)
	const float gaussianKernel5x5[25] =
	{
		2.f / 159.f,  4.f / 159.f,  5.f / 159.f,  4.f / 159.f, 2.f / 159.f,
		4.f / 159.f,  9.f / 159.f, 12.f / 159.f,  9.f / 159.f, 4.f / 159.f,
		5.f / 159.f, 12.f / 159.f, 15.f / 159.f, 12.f / 159.f, 5.f / 159.f,
		4.f / 159.f,  9.f / 159.f, 12.f / 159.f,  9.f / 159.f, 4.f / 159.f,
		2.f / 159.f,  4.f / 159.f,  5.f / 159.f,  4.f / 159.f, 2.f / 159.f,
	};
	cudaMemcpyToSymbol(convolutionKernelStore, gaussianKernel5x5, sizeof(gaussianKernel5x5), 0);
	const unsigned int gaussianKernel5x5Offset = 0;

	// Sobel gradient kernels
	const float sobelGradientX[9] =
	{
		-1.f, 0.f, 1.f,
		-2.f, 0.f, 2.f,
		-1.f, 0.f, 1.f,
	};
	const float sobelGradientY[9] =
	{
		1.f, 2.f, 1.f,
		0.f, 0.f, 0.f,
		-1.f, -2.f, -1.f,
	};
	cudaMemcpyToSymbol(convolutionKernelStore, sobelGradientX, sizeof(sobelGradientX), sizeof(gaussianKernel5x5));
	cudaMemcpyToSymbol(convolutionKernelStore, sobelGradientY, sizeof(sobelGradientY), sizeof(gaussianKernel5x5) + sizeof(sobelGradientX));
	const unsigned int sobelGradientXOffset = sizeof(gaussianKernel5x5) / sizeof(float);
	const unsigned int sobelGradientYOffset = sizeof(sobelGradientX) / sizeof(float) + sobelGradientXOffset;

	// Crea CPU/GPU imagenes compartidos
	camera >> frame;
	unsigned char *sourceDataDevice, *blurredDataDevice, *edgesDataDevice;
	cv::Mat source(frame.size(), CV_8U, createImageBuffer(frame.size().width * frame.size().height, &sourceDataDevice));
	cv::Mat blurred(frame.size(), CV_8U, createImageBuffer(frame.size().width * frame.size().height, &blurredDataDevice));
	cv::Mat edges(frame.size(), CV_8U, createImageBuffer(frame.size().width * frame.size().height, &edgesDataDevice));

	// Crea 2 imagenes temporales (sobel gradients)
	unsigned char *deviceGradientX, *deviceGradientY;
	cudaMalloc(&deviceGradientX, frame.size().width * frame.size().height);
	cudaMalloc(&deviceGradientY, frame.size().width * frame.size().height);

	// Loop while captura imagenes
	while (1)
	{
		// Captura la imagen en eScala de grises
		camera >> frame;
		cvtColor(frame, source, COLOR_RGB2GRAY);
		_sleep(1);
		// Graba el tiempo que demora el proceso
		cudaEventRecord(start);
		{
			// convolution kernel  parametros
			dim3 cblocks(frame.size().width / 16, frame.size().height / 16);
			dim3 cthreads(16, 16);

			// pythagoran kernel parametros
			dim3 pblocks(frame.size().width * frame.size().height / 256);
			dim3 pthreads(256, 1);

			//  gaussian blur (first kernel in store @ 0)
			convolve <<<cblocks, cthreads >> > (sourceDataDevice, frame.size().width, frame.size().height, 0, 0, gaussianKernel5x5Offset, 5, 5, blurredDataDevice);

			// sobel gradient convolutions (x&y padding is now 2 because there is a border of 2 around a 5x5 gaussian filtered image)
			convolve << <cblocks, cthreads >> > (blurredDataDevice, frame.size().width, frame.size().height, 2, 2, sobelGradientXOffset, 3, 3, deviceGradientX);
			convolve << <cblocks, cthreads >> > (blurredDataDevice, frame.size().width, frame.size().height, 2, 2, sobelGradientYOffset, 3, 3, deviceGradientY);
			pythagoras << <pblocks, pthreads >> > (deviceGradientX, deviceGradientY, edgesDataDevice);

			cudaThreadSynchronize();
		}
		cudaEventRecord(stop);

		// Muestra tiempo de ejecucion
		float ms = 0.0f;
		cudaEventSynchronize(stop);
		cudaEventElapsedTime(&ms, start, stop);
		std::cout << "Elapsed GPU time: " << ms << " milliseconds" << std::endl;

		// Muestra resultados
		imshow("Source", frame);
		imshow("Greyscale", source);
		imshow("Blurred", blurred);
		imshow("Sobel", edges);

		// Spin
		if (cv::waiTKEy(1) == 27) break;
	}

	// Exit
	cudaFreeHost(source.data);
	cudaFreeHost(blurred.data);
	cudaFreeHost(edges.data);
	cudaFree(deviceGradientX);
	cudaFree(deviceGradientY);

	return 0;
}
很多时候加上Cuda是有必要的,如果你要使用hough变换之类的时间复杂度比较高的代码,Gpu编程会给你带来多个数量级的加速。
到此这篇关于OpenCV图像轮廓提取的实现的文章就介绍到这了,更多相关OpenCV图像轮廓提取内容请搜索编程网以前的文章或继续浏览下面的相关文章希望大家以后多多支持编程网!
--结束END--
本文标题: OpenCV图像轮廓提取的实现
本文链接: https://www.lsjlt.com/news/172042.html(转载时请注明来源链接)
有问题或投稿请发送至: 邮箱/279061341@qq.com QQ/279061341
下载Word文档到电脑,方便收藏和打印~
2024-03-01
2024-03-01
2024-02-29
2024-02-29
2024-02-29
2024-02-29
2024-02-29
2024-02-29
2024-02-29
2024-02-29
回答
回答
回答
回答
回答
回答
回答
回答
回答
回答


官方手机版

微信公众号

商务合作


0