Python 官方文档:入门教程 => 点击学习
目录前言自动装配案例自动装配分析自动装配总结前言 关于 SpringBoot 的自动装配功能,相信是每一个 Java 程序员
关于 SpringBoot 的自动装配功能,相信是每一个 Java 程序员天天都会用到的一个功能,但是它究竟是如何实现的呢?今天阿粉来带大家看一下。
首先我们通过一个案例来看一下自动装配的效果,创建一个 springBoot 的项目,在 pom 文件中加入下面的依赖。
<dependency>
<groupId>org.springframework.boot</groupId>
<artifactId>spring-boot-starter-WEB</artifactId>
</dependency>

<dependency>
<groupId>org.springframework.boot</groupId>
<artifactId>spring-boot-starter-data-Redis</artifactId>
</dependency>
其中 web 的依赖表示我们这是一个 web 项目,redis 的依赖就是我们这边是要验证的功能依赖。随后在 application.properties 配置文件中增加 redis 的相关配置如下
spring.redis.host=localhost
spring.redis.port=6379
spring.redis.passWord=123456
再编写一个 Controller 和 Service 类,相关代码如下。
package com.example.demo.controller;

import com.example.demo.service.HelloService;
import org.springframework.beans.factory.annotation.Autowired;
import org.springframework.web.bind.annotation.GetMapping;
import org.springframework.web.bind.annotation.RequestParam;
import org.springframework.web.bind.annotation.RestController;
@RestController
public class HelloController {
@Autowired
private HelloService helloService;
@GetMapping(value = "/hello")
public String hello(@RequestParam("name"){
return helloService.sayHello(name);
}
}service 代码如下:
package com.example.demo.service;
import org.springframework.beans.factory.annotation.Autowired;
import org.springframework.data.redis.core.RedisTemplate;
import org.springframework.stereotype.Service;
@Service
public class HelloService {
@Autowired
RedisTemplate<String, String> redisTemplate;
public String sayHello(String name){
String result = doSomething(name);
redisTemplate.opsForValue().set("name", result);
result = redisTemplate.opsForValue().get("name");
return "hello: " + result;
}
private String doSomething(String name){
return name + " 欢迎关注 Java 极客技术";
}
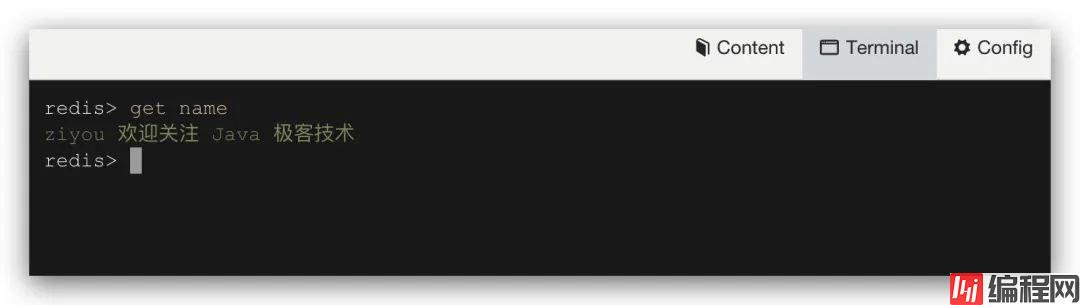
}启动项目,然后我们通过访问 Http://127.0.0.1:8080/hello?name=ziyou,可以看到正常访问。接下来我们再通过 Redis 的客户端,去观察一下数据是否正确的写入到 Redis 中,效果跟我们想象的一致。
看到这里很多小伙伴就会说,这个写法我天天都在使用,用起来是真的爽。虽然用起来是很爽,但是大家有没有想过一个问题,那就是在我们的 HelloService 中通过 @Autowired 注入了一个 RedisTemplate 类,但是我们的代码中并没有写过这个类,也没有使用类似于@RestController,@Service 这样的注解将 RedisTemplate 注入到 Spring ioc 容器中,那为什么我们就可以通过 @Autowired 注解从 IoC 容器中获取到 RedisTemplate
首先我们看下项目的启动类:
package com.example.demo;
import org.springframework.boot.SpringApplication;
import org.springframework.boot.autoconfigure.EnableAutoConfiguration;
import org.springframework.boot.autoconfigure.SpringBootApplication;
import org.springframework.context.annotation.ComponentScan;
@SpringBootApplication
@ComponentScan(value = "com.example.demo.*")
public class DemoApplication {
public static void main(String[] args){
SpringApplication.run(DemoApplication.class, args);
}
}
在启动类上面有一个 @SpringBootApplication 注解,我们点进去可以看到如下内容:
@Target({ElementType.TYPE})
@Retention(RetentionPolicy.RUNTIME)
@Documented
@Inherited
@SpringBootConfiguration
@EnableAutoConfiguration
@ComponentScan(
excludeFilters = {@Filter(
type = FilterType.CUSTOM,
classes = {TypeExcludeFilter.class}
), @Filter(
type = FilterType.CUSTOM,
classes = {AutoConfigurationExcludeFilter.class}
)}
)
public @interface SpringBootApplication {
// 省略
}
在这个注解中,其中有一个 @EnableAutoConfiguration 注解,正是因为有了这样一个注解,我们才得以实现自动装配的功能。继续往下面看。
@Target({ElementType.TYPE})
@Retention(RetentionPolicy.RUNTIME)
@Documented
@Inherited
@AutoConfigurationPackage
@Import({AutoConfigurationImportSelector.class})
public @interface EnableAutoConfiguration {
String ENABLED_OVERRIDE_PROPERTY = "spring.boot.enableautoconfiguration";
Class<?>[] exclude() default {};
String[] excludeName() default {};
}
可以看到 @EnableAutoConfiguration 注解中有一个 @Import({AutoConfigurationImportSelector.class}),导入了一个 AutoConfigurationImportSelector 类,该类间接实现了 ImportSelector 接口,实现了一个 String[] selectImports(AnnotationMetadata importinGClaSSMetadata); 方法,这个方法的返回值是一个字符串数组,对应的是一系列主要注入到 Spring IoC 容器中的类名。当在 @Import 中导入一个 ImportSelector 的实现类之后,会把该实现类中返回的 Class 名称都装载到 IoC 容器中。
一旦被装载到 IoC 容器中过后,我们在后续就可以通过 @Autowired 来进行使用了。接下来我们看下 selectImports 方法里面的实现,当中引用了 getCandidateConfigurations 方法 ,其中的 ImportCandidates.load 方法我们可以看到是通过加载 String location = String.fORMat("META-INF/spring/%s.imports", annotation.getName()); 对应路径下的 org.springframework.boot.autoconfigure.AutoConfiguration.imports 文件,其中就包含了很多自动装配的配置类。
protected List<String> getCandidateConfigurations(AnnotationMetadata metadata, AnnotationAttributes attributes){
List<String> configurations = new ArrayList(SpringFactoriesLoader.loadFactoryNames(this.getSpringFactoriesLoaderFactoryClass(), this.getBeanClassLoader()));
ImportCandidates.load(AutoConfiguration.class, this.getBeanClassLoader()).forEach(configurations::add);
Assert.notEmpty(configurations, "No auto configuration classes found in META-INF/spring.factories nor in META-INF/spring/org.springframework.boot.autoconfigure.AutoConfiguration.imports. If you are using a custom packaging, make sure that file is correct.");
return configurations;
}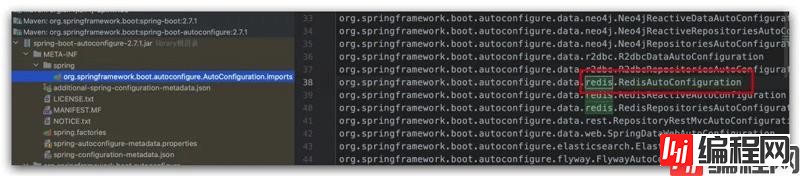
我们可以看到这个文件中有一个 RedisAutoConfiguration 配置类,在这个配置中就有我们需要的 RedisTemplate 类的 Bean,同时也可以看到,在类上面有一个 @ConditionalOnClass({RedisOperations.class}) 注解,表示只要在类路径上有 RedisOperations.class 这个类的时候才会进行实例化。这也就是为什么只要我们添加了依赖,就可以自动装配的原因。

通过 org.springframework.boot.autoconfigure.AutoConfiguration.imports 这个文件,我们可以看到有很多官方帮我们实现好了配置类,这些功能只要我们在 pom 文件中添加对应的 starter 依赖,然后做一些简单的配置就可以直接使用。
其中本质上自动装配的原理很简单,本质上都需要实现一个配置类,只不过这个配置类是官方帮我们创建好了,再加了一些条件类注解,让对应的实例化只发生类类路径存在某些类的时候才会触发。这个配置类跟我们平常自己通过 JavaConfig 形式编写的配置类没有本质的区别。
从上面的分析我们就可以看的出来,之所以很多时候我们使用 SpringBoot 是如此的简单,全都是依赖约定优于配置的思想,很多复杂的逻辑,在框架底层都帮我们做了默认的实现。虽然用起来很爽,但是很多时候会让程序员不懂原理,我们需要做的不仅是会使用,而更要知道底层的逻辑,才能走的更远。
基于上面的分析,我们还可以知道,如果我们要实现一个自己的 starter 其实也很简单,只要安装上面的约定,编写我们自己的配置类和配置文件即可。后面的文章阿粉会带你手写一个自己的 starter 来具体实现一下。
到此这篇关于SpringBoot 自动装配的原理详解分析的文章就介绍到这了,更多相关SpringBoot 自动装配 内容请搜索编程网以前的文章或继续浏览下面的相关文章希望大家以后多多支持编程网!
--结束END--
本文标题: SpringBoot自动装配的原理详解分析
本文链接: https://www.lsjlt.com/news/172176.html(转载时请注明来源链接)
有问题或投稿请发送至: 邮箱/279061341@qq.com QQ/279061341
下载Word文档到电脑,方便收藏和打印~
2024-03-01
2024-03-01
2024-03-01
2024-02-29
2024-02-29
2024-02-29
2024-02-29
2024-02-29
2024-02-29
2024-02-29
回答
回答
回答
回答
回答
回答
回答
回答
回答
回答


官方手机版

微信公众号

商务合作


0