目录简介什么样封装才是最合理的开整开整之前先看看 axiOS 基本类型Talk is cheap,show me the code.简介 ?看了一圈,大家对 ts 封装 axios
?看了一圈,大家对 ts 封装 axios 都各有见解。但都不是我满意的吧,所以自己封装了一个?。至于为什么敢叫最佳实践,因为我满意,就这么简单粗暴??。
别再用 promise 包了,好吗?
看了一下,很多人封装 axios 的时候都用 promise 包装了一层,甚至更有甚者用起了 try catch。为什么反对用 promise 包装,因为 axios 返回的就是个 promise ,脱裤子放屁,完全没必要?♀️。至于 try catch 这个是用于捕获未知错误的,比如 JSON.parse 的时候,有些字符串就是无法转换。记住一句话,滥用 try catch 和随地大小便没有区别。
一个 request 方法梭哈,噗!我一口老血?
部分人直接就一个 request 方法梭哈,所有参数与配置都写在一起,看起来一点也不清晰,简洁。请求有多种方式,get,post,put...,最合理的请求方式应该是 instance[method](url, data, options)。对应 请求地址、请求参数、请求配置项,一目了然。
扩展我需要的请求,不要再 ts-ignore 了?
如果 ts-ignore 用多了,就会产生依赖性。不排除情况紧急急着上线,或者 类型处理 复杂的,但是在有时间的时候,还是得优化一下,作为程序员,追求优雅,永不过时。
求你了!把拦截器拿出来吧?
封装的时候我们都会封装一个请求类,但对应拦截器应该解耦出来。因为每个域名的拦截器处理可能不一致,写死的话封装请求类的意义也就没有了。
接口请求 then 里面又判断后端返回码判断请求是否成功,太狗血了!?
??看到下面这种代码,给我难受的啊。
api.post(url, data).then((res) => {
  if (res.code === 1) {
    // ...
  } else {
    // 全局消息提示
    console.error(res.message)
  }
})
既然是一个 promise ,我们就应该知道 promise 只有成功或者失败。then 怎么会有成功错误的处理呢?then 里面就是请求成功,没有什么 if else,处理失败去 catch 里面处理去。这么喜欢写 if else,你是没写过单元测试是吧?
OK,吐槽了这么多,这时候肯定就有人说了,光说谁不会啊,你整一个啊!?
瞧你这话说的,一点活没干,还让你白嫖了。你咋这么能呢??
不过话说回来,我不要活在他人的评价里,我做这件事情不是因为你的讽刺或者吹捧,而是我自己要做??。
接下来定一下要做的事情
axios 类型,为自定义配置打地基
// 这是 axios 请求类型定义,但是因为我们需要支持自定义配置,所以待会需要把它拓展一下
export interface AxiosRequestConfig<D = any> {
  url?: string;
  method?: Method | string;
  baseURL?: string;
  transfORMRequest?: AxiosRequestTransformer | AxiosRequestTransformer[];
  transformResponse?: AxiosResponseTransformer | AxiosResponseTransformer[];
  headers?: (RawAxiosRequestHeaders & MethodsHeaders) | AxiosHeaders;
  params?: any;
  paramsSerializer?: ParamsSerializerOptions;
  data?: D;
  timeout?: Milliseconds;
  timeoutErrorMessage?: string;
  withCredentials?: boolean;
  // ...
}
// 这是 axios 请求返回类型定义,里面类型需要处理,所以这个我们也得处理一下。
export interface AxiosResponse<T = any, D = any> {
  data: T;
  status: number;
  statusText: string;
  headers: RawAxiosResponseHeaders | AxiosResponseHeaders;
  // 这里的配置没有支持拓展,所以待会也得处理一下
  config: InternalAxiosRequestConfig<D>;
  request?: any;
}
// 所以我们只需要改造 3 个 axios 类型定义就行了
// 另外我们需要定义下自己的拦截器 和 请求结果封装
代码也不多,就也不多解释了,基本注释都加上了。下面是全部代码。
import axios from 'axios'
import type { AxiosInstance, AxiosRequestConfig, AxiosResponse, InternalAxiosRequestConfig } from 'axios'
// 定义一个常见后端请求返回
type BaseApiResponse<T> = {
  code: number
  message: string
  result: T
}
// 拓展 axios 请求配置,加入我们自己的配置
interface RequestOptions {
  // 是否全局展示请求 错误信息
  globalErrorMessage?: boolean
  // 是否全局展示请求 成功信息
  globalSucceSSMessage?: boolean
}
// 拓展自定义请求配置
interface ExpandAxiosRequestConfig<D = any> extends AxiosRequestConfig<D> {
  interceptorHooks?: InterceptorHooks
  requestOptions?: RequestOptions
}
// 拓展 axios 请求配置
interface ExpandInternalAxiosRequestConfig<D = any> extends InternalAxiosRequestConfig<D> {
  interceptorHooks?: InterceptorHooks
  requestOptions?: RequestOptions
}
// 拓展 axios 返回配置
interface ExpandAxiosResponse<T = any, D = any> extends AxiosResponse<T, D> {
  config: ExpandInternalAxiosRequestConfig<D>
}
export interface InterceptorHooks {
  requestInterceptor?: (config: InternalAxiosRequestConfig) => InternalAxiosRequestConfig
  requestInterceptorCatch?: (error: any) => any
  responseInterceptor?: (response: AxiosResponse) => AxiosResponse | Promise<AxiosResponse>
  responseInterceptorCatch?: (error: any) => any
}
// 导出Request类,可以用来自定义传递配置来创建实例
export default class Request {
  // axios 实例
  private _instance: AxiosInstance
  // 默认配置
  private _defaultConfig: ExpandAxiosRequestConfig = {
    baseURL: '/api',
    timeout: 5000,
    requestOptions: {
      globalErrorMessage: true,
      globalSuccessMessage: false
    }
  }
  private _interceptorHooks?: InterceptorHooks
  constructor(config: ExpandAxiosRequestConfig) {
    // 使用axios.create创建axios实例
    this._instance = axios.create(Object.assign(this._defaultConfig, config))
    this._interceptorHooks = config.interceptorHooks
    this.setupInterceptors()
  }
  // 通用拦截,在初始化时就进行注册和运行,对基础属性进行处理
  private setupInterceptors() {
    this._instance.interceptors.request.use(this._interceptorHooks?.requestInterceptor, this._interceptorHooks?.requestInterceptorCatch)
    this._instance.interceptors.response.use(this._interceptorHooks?.responseInterceptor, this._interceptorHooks?.responseInterceptorCatch)
  }
  // 定义核心请求
  public request(config: ExpandAxiosRequestConfig): Promise<AxiosResponse> {
    // !!!⚠️ 注意:axios 已经将请求使用 promise 封装过了
    // 这里直接返回,不需要我们再使用 promise 封装一层
    return this._instance.request(config)
  }
  public get<T = any>(url: string, config?: ExpandAxiosRequestConfig): Promise<AxiosResponse<BaseApiResponse<T>>> {
    return this._instance.get(url, config)
  }
  public post<T = any>(url: string, data?: any, config?: ExpandAxiosRequestConfig): Promise<T> {
    return this._instance.post(url, data, config)
  }
  public put<T = any>(url: string, data?: any, config?: ExpandAxiosRequestConfig): Promise<T> {
    return this._instance.put(url, data, config)
  }
  public delete<T = any>(url: string, config?: ExpandAxiosRequestConfig): Promise<T> {
    return this._instance.delete(url, config)
  }
}
以及使用的 demo。这个保姆级服务满意吗?
// 请求拦截器
const transform: InterceptorHooks = {
requestInterceptor(config) {
// 请求头部处理,如添加 token
const token = 'token-value'
if (token) {
config!.headers!.Authorization = token
}
return config
},
requestInterceptorCatch(err) {
// 请求错误,这里可以用全局提示框进行提示
return Promise.reject(err)
},
responseInterceptor(result) {
// 因为 axios 返回不支持扩展自定义配置,需要自己断言一下
const res = result as ExpandAxiosResponse
// 与后端约定的请求成功码
const SUCCESS_CODE = 1
if (res.status !== 200) return Promise.reject(res)
if (res.data.code !== SUCCESS_CODE) {
if (res.config.requestOptions?.globalErrorMessage) {
// 这里全局提示错误
console.error(res.data.message)
}
return Promise.reject(res.data)
}
if (res.config.requestOptions?.globalSuccessMessage) {
// 这里全局提示请求成功
console.log(res.data.message)
}
// 请求返回值,建议将 返回值 进行解构
return res.data.result
},
responseInterceptorCatch(err) {
// 这里用来处理 Http 常见错误,进行全局提示
const mapErrorStatus = new Map([
[400, '请求方式错误'],
[401, '请重新登录'],
[403, '拒绝访问'],
[404, '请求地址有误'],
[500, '服务器出错']
])
const message = mapErrorStatus.get(err.response.status) || '请求出错,请稍后再试'
// 此处全局报错
console.error(message)
return Promise.reject(err.response)
}
}
// 具体使用时先实例一个请求对象
const request = new Request({
baseURL: '/api',
timeout: 5000,
interceptorHooks: transform
})
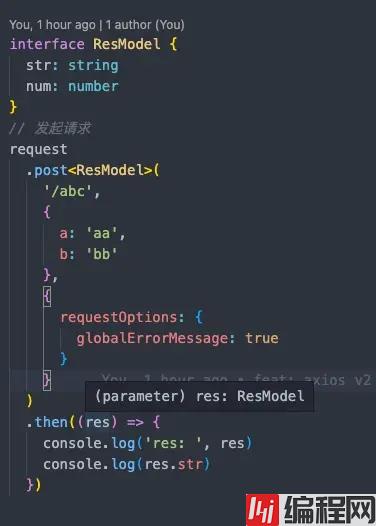
// 定义请求返回
interface ResModel {
str: string
num: number
}
// 发起请求
request
.post<ResModel>(
'/abc',
{
a: 'aa',
b: 'bb'
},
{
requestOptions: {
globalErrorMessage: true
}
}
)
.then((res) => {
console.log('res: ', res)
console.log(res.str)
})
可以看到鼠标浮上去就能看到定义了,完美!
最后源码地址: GitHub.com/coveychen95…
以上就是ts封装axios最佳实践示例详解的详细内容,更多关于ts封装axios的资料请关注编程网其它相关文章!
--结束END--
本文标题: ts封装axios最佳实践示例详解
本文链接: https://www.lsjlt.com/news/199515.html(转载时请注明来源链接)
有问题或投稿请发送至: 邮箱/279061341@qq.com QQ/279061341
下载Word文档到电脑,方便收藏和打印~
2024-01-12
2023-05-20
2023-05-20
2023-05-20
2023-05-20
2023-05-20
2023-05-20
2023-05-20
2023-05-20
2023-05-20
回答
回答
回答
回答
回答
回答
回答
回答
回答
回答


官方手机版

微信公众号

商务合作


0