Python 官方文档:入门教程 => 点击学习
目录搭建生产者工程创建工程添加依赖配置整合发送消息搭建消费者工程创建工程添加依赖配置整合消息监听器搭建生产者工程 创建工程 添加依赖 修改pom.xml文件内容为如下: <
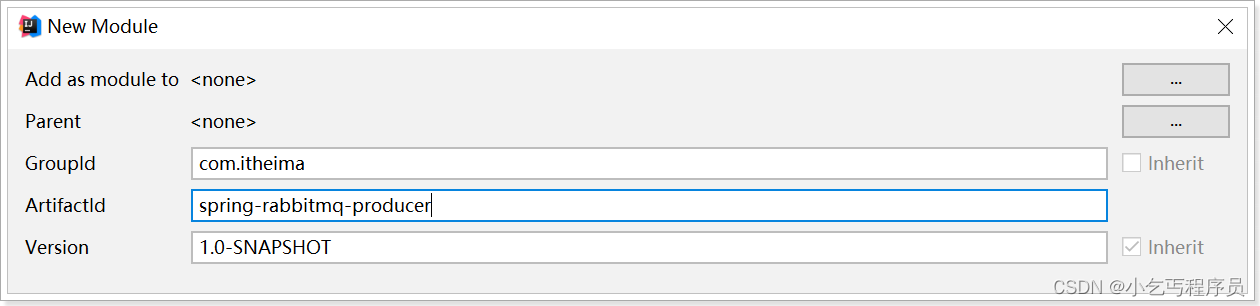

修改pom.xml文件内容为如下:
<?xml version="1.0" encoding="UTF-8"?>
<project xmlns="Http://Maven.apache.org/POM/4.0.0"
         xmlns:xsi="http://www.w3.org/2001/XMLSchema-instance"
         xsi:schemaLocation="http://maven.apache.org/POM/4.0.0 http://maven.apache.org/xsd/maven-4.0.0.xsd">
    <modelVersion>4.0.0</modelVersion>
    <groupId>com.itheima</groupId>
    <artifactId>spring-RabbitMQ-producer</artifactId>
    <version>1.0-SNAPSHOT</version>
    <dependencies>
        <dependency>
            <groupId>org.springframework</groupId>
            <artifactId>spring-context</artifactId>
            <version>5.1.7.RELEASE</version>
        </dependency>
        <dependency>
            <groupId>org.springframework.aMQp</groupId>
            <artifactId>spring-rabbit</artifactId>
            <version>2.1.8.RELEASE</version>
        </dependency>
        <dependency>
            <groupId>junit</groupId>
            <artifactId>junit</artifactId>
            <version>4.12</version>
        </dependency>
        <dependency>
            <groupId>org.springframework</groupId>
            <artifactId>spring-test</artifactId>
            <version>5.1.7.RELEASE</version>
        </dependency>
    </dependencies>
</project>
创建spring-rabbitmq-producer\src\main\resources\properties\rabbitmq.properties连接参数等配置文件;
rabbitmq.host=192.168.12.135
rabbitmq.port=5672
rabbitmq.username=heima
rabbitmq.passWord=heima
rabbitmq.virtual-host=/itcast
创建 spring-rabbitmq-producer\src\main\resources\spring\spring-rabbitmq.xml 整合配置文件;
<?xml version="1.0" encoding="UTF-8"?>
<beans xmlns="http://www.springframework.org/schema/beans"
       xmlns:xsi="http://www.w3.org/2001/XMLSchema-instance"
       xmlns:context="http://www.springframework.org/schema/context"
       xmlns:rabbit="http://www.springframework.org/schema/rabbit"
       xsi:schemaLocation="http://www.springframework.org/schema/beans
       http://www.springframework.org/schema/beans/spring-beans.xsd
       http://www.springframework.org/schema/context
       https://www.springframework.org/schema/context/spring-context.xsd
       http://www.springframework.org/schema/rabbit
       http://www.springframework.org/schema/rabbit/spring-rabbit.xsd">
    <!--加载配置文件-->
    <context:property-placeholder location="classpath:properties/rabbitmq.properties"/>
    <!-- 定义rabbitmq connectionFactory -->
    <rabbit:connection-factory id="connectionFactory" host="${rabbitmq.host}"
                               port="${rabbitmq.port}"
                               username="${rabbitmq.username}"
                               password="${rabbitmq.password}"
                               virtual-host="${rabbitmq.virtual-host}"/>
    <!--定义管理交换机、队列-->
    <rabbit:admin connection-factory="connectionFactory"/>
    <!--定义持久化队列,不存在则自动创建;不绑定到交换机则绑定到默认交换机
    默认交换机类型为direct,名字为:"",路由键为队列的名称
    id:bean的名称
    name : queue的名称
    auto-declare 自动创建
    auto-delete 自动删除,最后一个消费者和该队列断开连接后自动删除
    duable 是否持久化
    -->
    <rabbit:queue id="spring_queue" name="spring_queue" auto-declare="true"/>
    <!-- ~~~~~~~~~~~~~~~~~~~~~~~~~~~~广播;所有队列都能收到消息~~~~~~~~~~~~~~~~~~~~~~~~~~~~ -->
    <!--定义广播交换机中的持久化队列,不存在则自动创建-->
    <rabbit:queue id="spring_fanout_queue_1" name="spring_fanout_queue_1" auto-declare="true"/>
    <!--定义广播交换机中的持久化队列,不存在则自动创建-->
    <rabbit:queue id="spring_fanout_queue_2" name="spring_fanout_queue_2" auto-declare="true"/>
    <!--定义广播类型交换机;并绑定上述两个队列-->
    <rabbit:fanout-exchange id="spring_fanout_exchange" name="spring_fanout_exchange" auto-declare="true">
        <rabbit:bindings>
            <rabbit:binding queue="spring_fanout_queue_1"/>
            <rabbit:binding queue="spring_fanout_queue_2"/>
        </rabbit:bindings>
    </rabbit:fanout-exchange>
	<!--<rabbit:direct-exchange name=“aa”">
        <rabbit:bindings>
            <rabbit:binding queue="spring_fanout_queue_1 key="xx"/>
            <rabbit:binding queue="spring_fanout_queue_2"/>
        </rabbit:bindings>
    </rabbit:direct-exchange>-->
    <!-- ~~~~~~~~~~~~~~~~~~~~~~~~~~~~通配符;*匹配一个单词,#匹配多个单词 ~~~~~~~~~~~~~~~~~~~~~~~~~~~~ -->
    <!--定义广播交换机中的持久化队列,不存在则自动创建-->
    <rabbit:queue id="spring_topic_queue_star" name="spring_topic_queue_star" auto-declare="true"/>
    <!--定义广播交换机中的持久化队列,不存在则自动创建-->
    <rabbit:queue id="spring_topic_queue_well" name="spring_topic_queue_well" auto-declare="true"/>
    <!--定义广播交换机中的持久化队列,不存在则自动创建-->
    <rabbit:queue id="spring_topic_queue_well2" name="spring_topic_queue_well2" auto-declare="true"/>
    <rabbit:topic-exchange id="spring_topic_exchange" name="spring_topic_exchange" auto-declare="true">
        <rabbit:bindings>
            <rabbit:binding pattern="heima.*" queue="spring_topic_queue_star"/>
            <rabbit:binding pattern="heima.#" queue="spring_topic_queue_well"/>
            <rabbit:binding pattern="itcast.#" queue="spring_topic_queue_well2"/>
        </rabbit:bindings>
    </rabbit:topic-exchange>
    <!--定义rabbitTemplate对象操作可以在代码中方便发送消息-->
    <rabbit:template id="rabbitTemplate" connection-factory="connectionFactory"/>
</beans>创建测试文件 spring-rabbitmq-producer\src\test\java\com\itheima\rabbitmq\ProducerTest.java
@RunWith(SpringJUnit4ClassRunner.class)
@ContextConfiguration(locations = "classpath:spring/spring-rabbitmq.xml")
public class ProducerTest {
    @Autowired
    private RabbitTemplate rabbitTemplate;

    @Test
    public void queueTest(){
        //路由键与队列同名
        rabbitTemplate.convertAndSend("spring_queue", "只发队列spring_queue的消息。");
    }

    @Test
    public void fanoutTest(){

        rabbitTemplate.convertAndSend("spring_fanout_exchange", "", "发送到spring_fanout_exchange交换机的广播消息");
    }

    @Test
    public void topicTest(){

        rabbitTemplate.convertAndSend("spring_topic_exchange", "heima.bj", "发送到spring_topic_exchange交换机heima.bj的消息");
        rabbitTemplate.convertAndSend("spring_topic_exchange", "heima.bj.1", "发送到spring_topic_exchange交换机heima.bj.1的消息");
        rabbitTemplate.convertAndSend("spring_topic_exchange", "heima.bj.2", "发送到spring_topic_exchange交换机heima.bj.2的消息");
        rabbitTemplate.convertAndSend("spring_topic_exchange", "itcast.cn", "发送到spring_topic_exchange交换机itcast.cn的消息");
    }
}修改pom.xml文件内容为如下:
<?xml version="1.0" encoding="UTF-8"?>
<project xmlns="http://maven.apache.org/POM/4.0.0"
         xmlns:xsi="http://www.w3.org/2001/XMLSchema-instance"
         xsi:schemaLocation="http://maven.apache.org/POM/4.0.0 http://maven.apache.org/xsd/maven-4.0.0.xsd">
    <modelVersion>4.0.0</modelVersion>
    <groupId>com.itheima</groupId>
    <artifactId>spring-rabbitmq-consumer</artifactId>
    <version>1.0-SNAPSHOT</version>
    <dependencies>
        <dependency>
            <groupId>org.springframework</groupId>
            <artifactId>spring-context</artifactId>
            <version>5.1.7.RELEASE</version>
        </dependency>
        <dependency>
            <groupId>org.springframework.amqp</groupId>
            <artifactId>spring-rabbit</artifactId>
            <version>2.1.8.RELEASE</version>
        </dependency>
    </dependencies>
</project>
创建spring-rabbitmq-consumer\src\main\resources\properties\rabbitmq.properties连接参数等配置文件;
rabbitmq.host=192.168.12.135
rabbitmq.port=5672
rabbitmq.username=heima
rabbitmq.password=heima
rabbitmq.virtual-host=/itcast
创建 spring-rabbitmq-consumer\src\main\resources\spring\spring-rabbitmq.xml 整合配置文件;
<?xml version="1.0" encoding="UTF-8"?>
<beans xmlns="http://www.springframework.org/schema/beans"
       xmlns:xsi="http://www.w3.org/2001/XMLSchema-instance"
       xmlns:context="http://www.springframework.org/schema/context"
       xmlns:rabbit="http://www.springframework.org/schema/rabbit"
       xsi:schemaLocation="http://www.springframework.org/schema/beans
       http://www.springframework.org/schema/beans/spring-beans.xsd
       http://www.springframework.org/schema/context
       https://www.springframework.org/schema/context/spring-context.xsd
       http://www.springframework.org/schema/rabbit
       http://www.springframework.org/schema/rabbit/spring-rabbit.xsd">
    <!--加载配置文件-->
    <context:property-placeholder location="classpath:properties/rabbitmq.properties"/>
    <!-- 定义rabbitmq connectionFactory -->
    <rabbit:connection-factory id="connectionFactory" host="${rabbitmq.host}"
                               port="${rabbitmq.port}"
                               username="${rabbitmq.username}"
                               password="${rabbitmq.password}"
                               virtual-host="${rabbitmq.virtual-host}"/>
    <bean id="springQueueListener" class="com.itheima.rabbitmq.listener.SpringQueueListener"/>
    <bean id="fanoutListener1" class="com.itheima.rabbitmq.listener.FanoutListener1"/>
    <bean id="fanoutListener2" class="com.itheima.rabbitmq.listener.FanoutListener2"/>
    <bean id="topicListenerStar" class="com.itheima.rabbitmq.listener.TopicListenerStar"/>
    <bean id="topicListenerWell" class="com.itheima.rabbitmq.listener.TopicListenerWell"/>
    <bean id="topicListenerWell2" class="com.itheima.rabbitmq.listener.TopicListenerWell2"/>
    <rabbit:listener-container connection-factory="connectionFactory" auto-declare="true">
        <rabbit:listener ref="springQueueListener" queue-names="spring_queue"/>
        <rabbit:listener ref="fanoutListener1" queue-names="spring_fanout_queue_1"/>
        <rabbit:listener ref="fanoutListener2" queue-names="spring_fanout_queue_2"/>
        <rabbit:listener ref="topicListenerStar" queue-names="spring_topic_queue_star"/>
        <rabbit:listener ref="topicListenerWell" queue-names="spring_topic_queue_well"/>
        <rabbit:listener ref="topicListenerWell2" queue-names="spring_topic_queue_well2"/>
    </rabbit:listener-container>
</beans>1)队列监听器
创建 spring-rabbitmq-consumer\src\main\java\com\itheima\rabbitmq\listener\SpringQueueListener.java
public class SpringQueueListener implements MessageListener {
    public void onMessage(Message message) {
        try {
            String msg = new String(message.getBody(), "utf-8");
            System.out.printf("接收路由名称为:%s,路由键为:%s,队列名为:%s的消息:%s \n",
                    message.getMessageProperties().getReceivedExchange(),
                    message.getMessageProperties().getReceivedRoutingKey(),
                    message.getMessageProperties().getConsumerQueue(),
                    msg);
        } catch (Exception e) {
            e.printStackTrace();
        }
    }
}
2)广播监听器1
创建 spring-rabbitmq-consumer\src\main\java\com\itheima\rabbitmq\listener\FanoutListener1.java
public class FanoutListener1 implements MessageListener {
    public void onMessage(Message message) {
        try {
            String msg = new String(message.getBody(), "utf-8");
            System.out.printf("广播监听器1:接收路由名称为:%s,路由键为:%s,队列名为:%s的消息:%s \n",
                    message.getMessageProperties().getReceivedExchange(),
                    message.getMessageProperties().getReceivedRoutingKey(),
                    message.getMessageProperties().getConsumerQueue(),
                    msg);
        } catch (Exception e) {
            e.printStackTrace();
        }
    }
}
3)广播监听器2
创建 spring-rabbitmq-consumer\src\main\java\com\itheima\rabbitmq\listener\FanoutListener2.java
public class FanoutListener2 implements MessageListener {
    public void onMessage(Message message) {
        try {
            String msg = new String(message.getBody(), "utf-8");
            System.out.printf("广播监听器2:接收路由名称为:%s,路由键为:%s,队列名为:%s的消息:%s \n",
                    message.getMessageProperties().getReceivedExchange(),
                    message.getMessageProperties().getReceivedRoutingKey(),
                    message.getMessageProperties().getConsumerQueue(),
                    msg);
        } catch (Exception e) {
            e.printStackTrace();
        }
    }
}
4)星号通配符监听器
创建 spring-rabbitmq-consumer\src\main\java\com\itheima\rabbitmq\listener\TopicListenerStar.java
public class TopicListenerStar implements MessageListener {
    public void onMessage(Message message) {
        try {
            String msg = new String(message.getBody(), "utf-8");
            System.out.printf("通配符*监听器:接收路由名称为:%s,路由键为:%s,队列名为:%s的消息:%s \n",
                    message.getMessageProperties().getReceivedExchange(),
                    message.getMessageProperties().getReceivedRoutingKey(),
                    message.getMessageProperties().getConsumerQueue(),
                    msg);
        } catch (Exception e) {
            e.printStackTrace();
        }
    }
}
5)井号通配符监听器
创建 spring-rabbitmq-consumer\src\main\java\com\itheima\rabbitmq\listener\TopicListenerWell.java
public class TopicListenerWell implements MessageListener {
    public void onMessage(Message message) {
        try {
            String msg = new String(message.getBody(), "utf-8");
            System.out.printf("通配符#监听器:接收路由名称为:%s,路由键为:%s,队列名为:%s的消息:%s \n",
                    message.getMessageProperties().getReceivedExchange(),
                    message.getMessageProperties().getReceivedRoutingKey(),
                    message.getMessageProperties().getConsumerQueue(),
                    msg);
        } catch (Exception e) {
            e.printStackTrace();
        }
    }
}
6)井号通配符监听器2
创建 spring-rabbitmq-consumer\src\main\java\com\itheima\rabbitmq\listener\TopicListenerWell2.java
public class TopicListenerWell2 implements MessageListener {
    public void onMessage(Message message) {
        try {
            String msg = new String(message.getBody(), "utf-8");
            System.out.printf("通配符#监听器2:接收路由名称为:%s,路由键为:%s,队列名为:%s的消息:%s \n",
                    message.getMessageProperties().getReceivedExchange(),
                    message.getMessageProperties().getReceivedRoutingKey(),
                    message.getMessageProperties().getConsumerQueue(),
                    msg);
        } catch (Exception e) {
            e.printStackTrace();
        }
    }
}
到此这篇关于Spring整合消息队列RabbitMQ流程的文章就介绍到这了,更多相关Spring整合RabbitMQ内容请搜索编程网以前的文章或继续浏览下面的相关文章希望大家以后多多支持编程网!
--结束END--
本文标题: Spring整合消息队列RabbitMQ流程
本文链接: https://www.lsjlt.com/news/200545.html(转载时请注明来源链接)
有问题或投稿请发送至: 邮箱/279061341@qq.com QQ/279061341
下载Word文档到电脑,方便收藏和打印~
2024-03-01
2024-03-01
2024-03-01
2024-02-29
2024-02-29
2024-02-29
2024-02-29
2024-02-29
2024-02-29
2024-02-29
回答
回答
回答
回答
回答
回答
回答
回答
回答
回答


官方手机版

微信公众号

商务合作


0