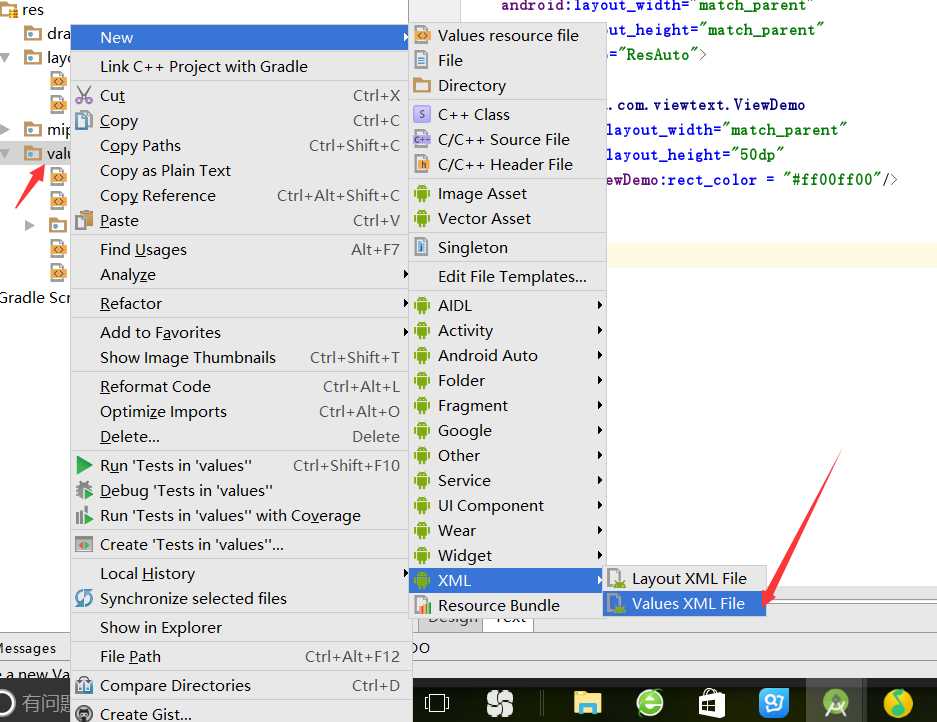
目录一、创建一个类,继承View二、如何创建自定义属性呢?2-1:创建一个资源文件2-2:打开我们创建好的资源文件,来写我们需要的属性,我简单的写了两个,如图:三、如何引用我们的自定
本章讲解:自定义视图,我们需要做哪些准备!
对于一些中级的开发者来说就要接触到自定义视图,由于Android自带的视图无法满足自己需求,又或者美观度不够自己的要求,我们就要自来亲自设计自己的视图。那么如何来实现自定义视图呢?下面我们先简单的来认识下如何实现自定义视图!
第一步 自定义视图首先需要什么?我们都要做那些简单的准备?
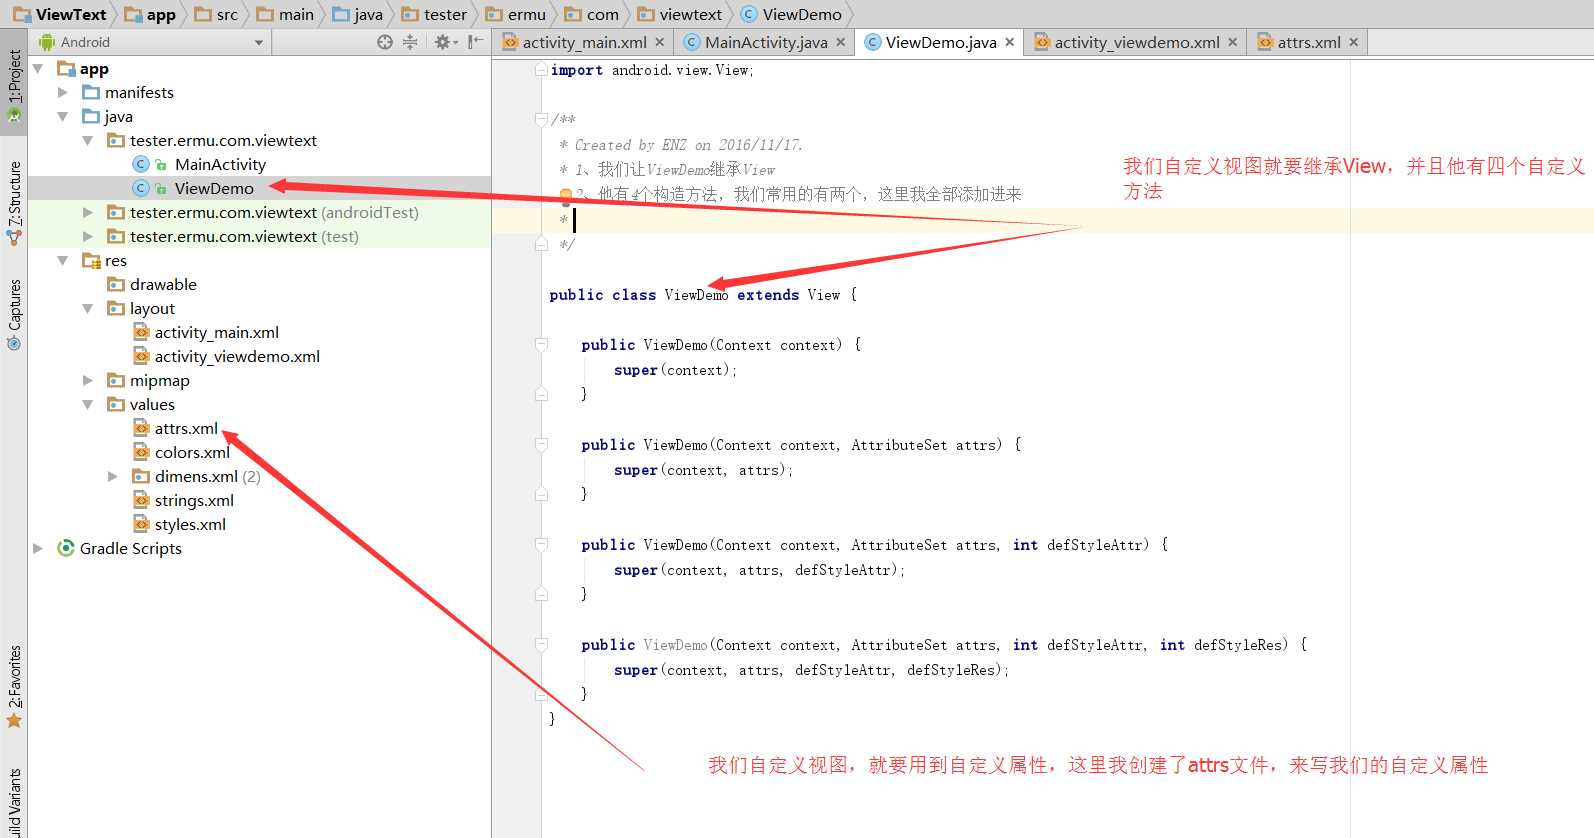
1、我们需要创建一个类,来继承View
2、我们需要自己去实现自定义视图需求的各种资源属性
3、引用我们定义好的自定义属性
4、我们还经常用到3个方法onMeasure(),onLayout(),onDraw(),(这里先不讲)
会提示我们添加构造方法,它拥有4个,我们起码要用2个,如下
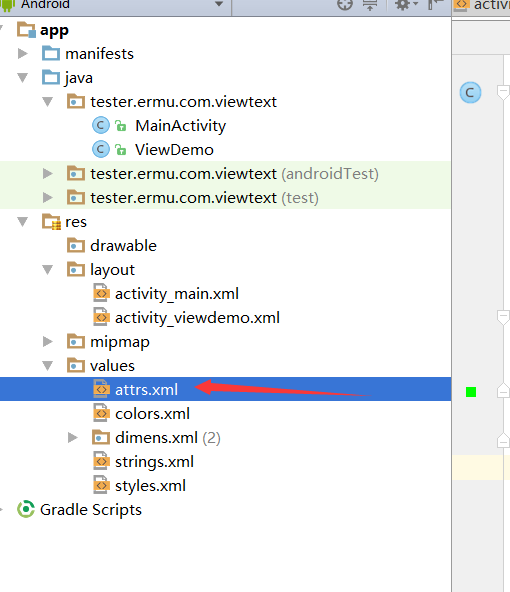
创建成功
注意:自定义属性的过程及属性和对应的类别
>自定义属性:
1. reference:参考某一资源ID,以此类推
(1)属性定义:
<declare-styleable name = "名称">
<attr name = "background" fORMat = "reference" />
</declare-styleable>

(2)属性使用:
<ImageView
Android:layout_width = "42dip"
android:layout_height = "42dip"
android:background = "@drawable/图片ID"
/>

2. color:颜色值
<declare-styleable name = "名称">
<attr name = "textColor" format = "color" />
</declare-styleable>

3. boolean:布尔值
<declare-styleable name = "名称">
<attr name = "focusable" format = "boolean" />
</declare-styleable>

4. dimension:尺寸值。注意,这里如果是dp那就会做像素转换
<declare-styleable name = "名称">
<attr name = "layout_width" format = "dimension" />
</declare-styleable>

5. float:浮点值。
6. integer:整型值。
7. string:字符串
8. fraction:百分数。
9. enum:枚举值
10. flag:是自己定义的,类似于 android:gravity="top",就是里面对应了自己的属性值。
11. reference|color:颜色的资源文件。
12.reference|boolean:布尔值的资源文件
可以通过TypedArray 类来接受我们自定义的属性,也可以在xml中来指定我们自定义的属性
public class ViewDemo extends View {

    public ViewDemo(Context context) {
        super(context);
    }

    public ViewDemo(Context context, AttributeSet attrs) {
        super(context, attrs);

        TypedArray typedArray = context.obtainStyledAttributes(attrs,R.styleable.Myview);
        int colors =typedArray.getColor(R.styleable.Myview_rect_color,0xffff0000);//给他赋值一个红色
        setBackgroundColor(colors);

        typedArray.recycle();
    }

}
引用后设置为颜色为红色,我们布局中的组件就会变成红色
我们还可以在我们的布局中直接引用我们的属性,如下
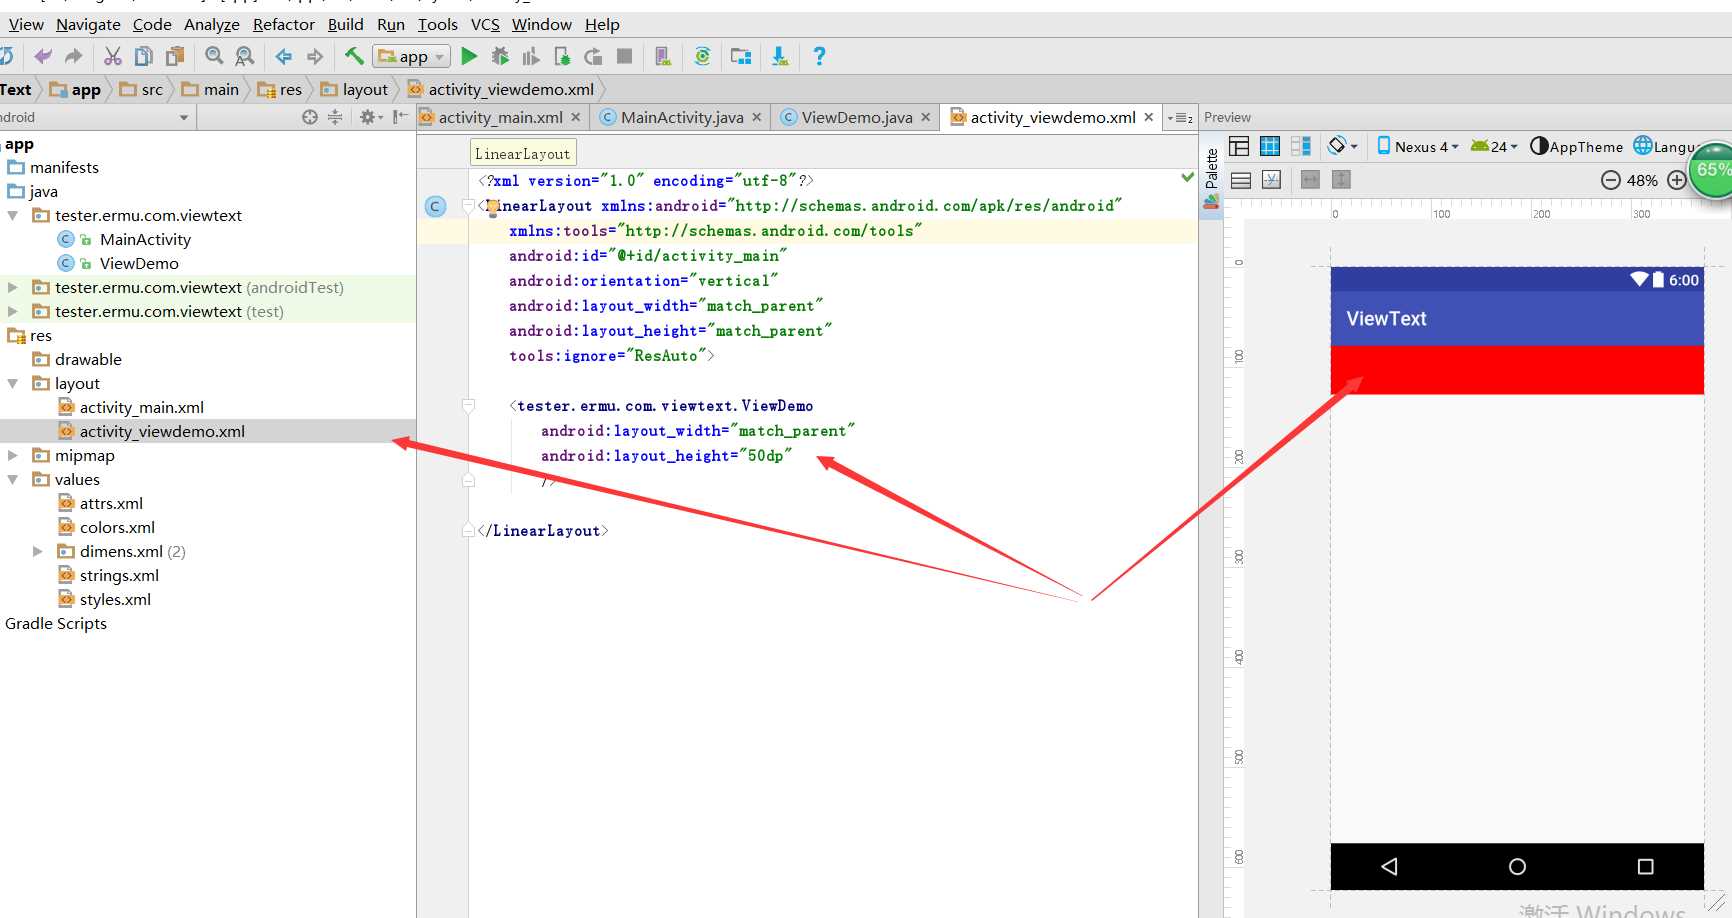
<?xml version="1.0" encoding="utf-8"?>
<LinearLayout xmlns:android="Http://schemas.android.com/apk/res/android"
    xmlns:attrs_ViewDemo="http://schemas.android.com/apk/res/tester.ermu.com.viewtext"
    xmlns:tools="http://schemas.android.com/tools"
    android:id="@+id/activity_main"
    android:orientation="vertical"
    android:layout_width="match_parent"
    android:layout_height="match_parent"
    tools:ignore="ResAuto">

    <tester.ermu.com.viewtext.ViewDemo
        android:layout_width="match_parent"
        android:layout_height="50dp"
        attrs_ViewDemo:rect_color = "#ff00ff00"/>

</LinearLayout>
运行效果,已经覆盖红色

附上所有的代码 MainActivity
package tester.ermu.com.viewtext;

import android.app.Activity;
import android.os.Bundle;

public class MainActivity extends Activity {

    @Override
    protected void onCreate(Bundle savedInstanceState) {
        super.onCreate(savedInstanceState);
        setContentView(R.layout.activity_main);

    }
}
ViewDemo
package tester.ermu.com.viewtext;

import android.content.Context;
import android.content.res.TypedArray;
import android.util.AttributeSet;
import android.view.View;


public class ViewDemo extends View {

    public ViewDemo(Context context) {
        super(context);
    }

    public ViewDemo(Context context, AttributeSet attrs) {
        super(context, attrs);

        TypedArray typedArray = context.obtainStyledAttributes(attrs,R.styleable.Myview);
        int colors =typedArray.getColor(R.styleable.Myview_rect_color,0xffff0000);//给他赋值一个红色
        setBackgroundColor(colors);

        typedArray.recycle();
    }

}
main布局
<?xml version="1.0" encoding="utf-8"?>
<RelativeLayout xmlns:android="http://schemas.android.com/apk/res/android"
    xmlns:tools="http://schemas.android.com/tools"
    android:id="@+id/activity_main"
    android:layout_width="match_parent"
    android:layout_height="match_parent"
    android:paddingBottom="@dimen/activity_vertical_margin"
    android:paddingLeft="@dimen/activity_horizontal_margin"
    android:paddingRight="@dimen/activity_horizontal_margin"
    android:paddingTop="@dimen/activity_vertical_margin"
    tools:context="tester.ermu.com.viewtext.MainActivity">

    <include
       layout="@layout/activity_viewdemo" />
</RelativeLayout>
自定义view布局
<?xml version="1.0" encoding="utf-8"?>
<LinearLayout xmlns:android="http://schemas.android.com/apk/res/android"
    xmlns:attrs_ViewDemo="http://schemas.android.com/apk/res/tester.ermu.com.viewtext"
    xmlns:tools="http://schemas.android.com/tools"
    android:id="@+id/activity_main"
    android:orientation="vertical"
    android:layout_width="match_parent"
    android:layout_height="match_parent"
    tools:ignore="ResAuto">

    <tester.ermu.com.viewtext.ViewDemo
        android:layout_width="match_parent"
        android:layout_height="50dp"
        attrs_ViewDemo:rect_color = "#ff00ff00"/>

</LinearLayout>
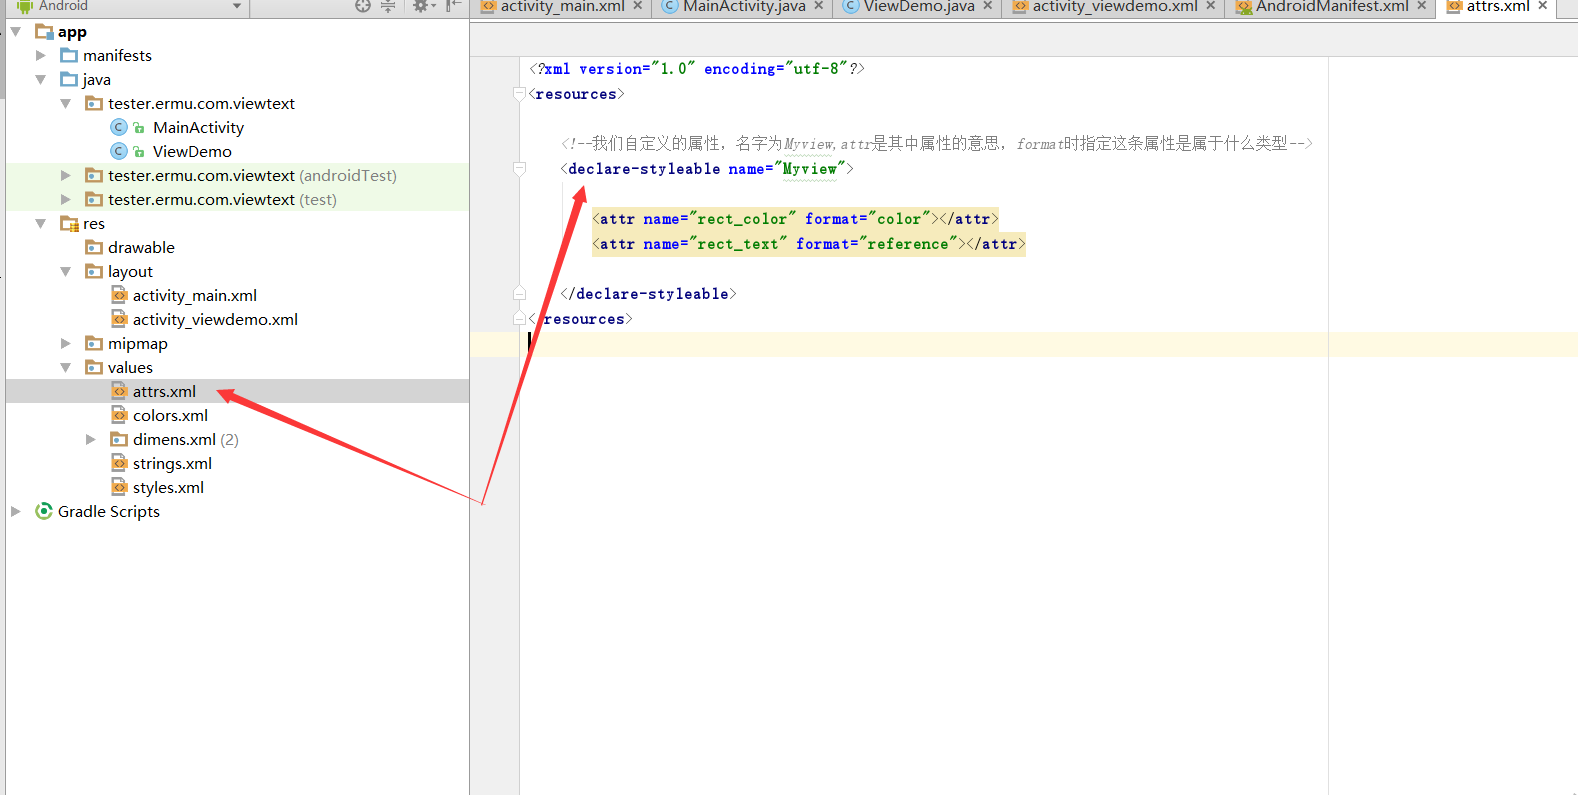
自定义属性资源
<?xml version="1.0" encoding="utf-8"?>
<resources>

    <!--我们自定义的属性,名字为Myview,attr是其中属性的意思,format时指定这条属性是属于什么类型-->
    <declare-styleable name="Myview">

        <attr name="rect_color" format="color"></attr>
        <attr name="rect_text" format="reference"></attr>

    </declare-styleable>
</resources>
到此这篇关于图文详解自定义View视图的属性及引用的文章就介绍到这了,更多相关自定义View视图属性引用内容请搜索编程网以前的文章或继续浏览下面的相关文章希望大家以后多多支持编程网!
--结束END--
本文标题: 图文详解自定义View视图的属性及引用
本文链接: https://www.lsjlt.com/news/203023.html(转载时请注明来源链接)
有问题或投稿请发送至: 邮箱/279061341@qq.com QQ/279061341
下载Word文档到电脑,方便收藏和打印~
2024-01-21
2023-10-28
2023-10-28
2023-10-27
2023-10-27
2023-10-27
2023-10-27
回答
回答
回答
回答
回答
回答
回答
回答
回答
回答


官方手机版

微信公众号

商务合作


0