上一篇我们学习了自定义ViewGroup的基本步骤,并做了一个CustomGridLayout的实例,这篇我们继续来说说自定义ViewGroup。 Android中当有大量照
上一篇我们学习了自定义ViewGroup的基本步骤,并做了一个CustomGridLayout的实例,这篇我们继续来说说自定义ViewGroup。
Android中当有大量照片需要展示的时候,我们可以用GridView作为照片墙,但是GridView太整齐了,有时候不规则也是一种美,瀑布流模型就是这样一个不规则的展示墙,接下来我们尝试用自定义ViewGroup来实现瀑布流。
实现瀑布流的方式也有很多,下面我们一一道来:
一、继承ViewGroup
其实这种实现方式我们只需要在上篇博客的基础上稍作修改即可,主要修改这几个地方:
•LayoutParams
因为瀑布流中每张图片宽度设为相同,高度则会不同,不能通过top加上固定高度得到bottom,所以这里我干脆把四个参数都定义上
public static class LayoutParams extends ViewGroup.LayoutParams {
  public int left = 0;
  public int top = 0;
  public int right = 0;
  public int bottom = 0;
  public LayoutParams(Context arg0, AttributeSet arg1) {
  super(arg0, arg1);
  }
  public LayoutParams(int arg0, int arg1) {
  super(arg0, arg1);
  }
  public LayoutParams(android.view.ViewGroup.LayoutParams arg0) {
  super(arg0);
  }
 }
•onMeasure
这里每个图片宽相同,高等比缩放,所以会导致WaterfallLayout的layout_height没有用。同时用一个数组top[colums]来记录每列当前高度,以便下次添加图片的时候添加到高度最小的那一列。
 @Override
 protected void onMeasure(int widthMeasureSpec, int heightMeasureSpec) {
 int widthMode = MeasureSpec.getMode(widthMeasureSpec);
 int sizeWidth = MeasureSpec.getSize(widthMeasureSpec);
 measureChildren(widthMeasureSpec, heightMeasureSpec);
 int childCount = this.getChildCount();
 //宽布局为wrap_content时,childWidth取childView宽的最大值,否则动态计算
 if (widthMode == MeasureSpec.AT_MOST) {
  for (int i = 0; i < childCount; i++) {
  View child = this.getChildAt(i);
  childWidth = Math.max(childWidth, child.getMeasuredWidth());
  }
 } else if (widthMode == MeasureSpec.EXACTLY) {
  childWidth = (sizeWidth - (colums - 1) * hSpace) / colums;
 }
 //自定义View的onMeasure、onLayout会执行两次,为了以后执行得到正确的结果
 clearTop();
 //遍历每个子view,将它们坐标保存在它们的LayoutParams中,为后面onLayout服务
 for (int i = 0; i < childCount; i++) {
  View child = this.getChildAt(i);
  childHeight = child.getMeasuredHeight() * childWidth / child.getMeasuredWidth();
  LayoutParams lParams = (LayoutParams) child.getLayoutParams();
  int minColum = getMinHeightColum();
  lParams.left = minColum * (childWidth + hSpace);
  lParams.top = top[minColum];
  lParams.right = lParams.left + childWidth;
  lParams.bottom = lParams.top + childHeight;
  top[minColum] += vSpace + childHeight;
 }
 //当宽为wrap_content时,计算出的viewGroup宽高
 int wrapWidth;
 int wrapHeight;
 if (childCount < colums) {
  wrapWidth = childCount * childWidth + (childCount - 1) * hSpace;
 } else {
  wrapWidth = colums * childWidth + (colums - 1) * hSpace;
 }
 wrapHeight = getMaxHeight();
 setMeasuredDimension(widthMode == MeasureSpec.AT_MOST? wrapWidth:sizeWidth, wrapHeight);
 }
•onLayout
因为LayoutParams定义了View的四个参数,所以直接设置即可
 @Override
 protected void onLayout(boolean changed, int l, int t, int r, int b) {
 int childCount = this.getChildCount();
 for (int i = 0; i < childCount; i++) {
  View child = this.getChildAt(i);
  LayoutParams lParams = (LayoutParams) child.getLayoutParams();
  child.layout(lParams.left, lParams.top, lParams.right, lParams.bottom);
 }
 }
这里有个地方需要注意一下,每次设置子View的LayoutParams前需要将top[]数组清零,因为onMeasure和onLayout会调用两次,这样就确保了下一次设置参数正确。
延伸:为什么自定义viewGroup中的onMeasure和onLayout方法会调用两次?
因为当我们new ViewGroup()的时候,通过getWidth()和getHeight(),得到的值首先是0,0,然后通过调用onMeasure()和onLayout()方法,会对这个view测量大小,这个时候view的宽高就发生了改变,这个时候又会重新调用一次onMeasure和onLayout方法(当view发生改变的时候,这两个方法会被调用),这时候你通过getWidth和getHeight方法就可以看到被测量之后的宽高了。这就是会调用两次的原因。
•点击事件回调
 //点击事件的回调接口
 public interface OnItemClickListener {
 void onItemClick(View v, int index);
 }
 public void setOnItemClickListener(final OnItemClickListener listener) {
 for (int i = 0; i < getChildCount(); i++) {
  final int index = i;
  View view = getChildAt(i);
  view.setOnClickListener(new OnClickListener() {
  @Override
  public void onClick(View v) {
   listener.onItemClick(v, index);
  }
  });
 }
 }
使用WaterfallLayout来添加图片:
<?xml version="1.0" encoding="utf-8"?>
<ScrollView xmlns:android="Http://schemas.android.com/apk/res/android" xmlns:app="http://schemas.android.com/apk/res/com.hx.waterfalllayout"
 android:layout_width="match_parent"
 android:layout_height="match_parent"
 android:background="#303030"
 android:orientation="vertical" >
 <com.hx.waterfalllayout.WaterfallLayout
 android:id="@+id/gridview"
 android:layout_width="wrap_content"
 android:layout_height="wrap_content"
 android:background="#1e1d1d"
 app:hSpace="10"
 app:numColumns="3"
 app:vSpace="10" >
 <ImageView
  android:layout_width="wrap_content"
  android:layout_height="wrap_content"
  android:scaleType="centerCrop"
  android:src="@drawable/crazy_1" />
 <ImageView
  android:layout_width="wrap_content"
  android:layout_height="wrap_content"
  android:scaleType="centerCrop"
  android:src="@drawable/crazy_2" />
 <ImageView
  android:layout_width="wrap_content"
  android:layout_height="wrap_content"
  android:scaleType="centerCrop"
  android:src="@drawable/crazy_1" />
 <ImageView
  android:layout_width="wrap_content"
  android:layout_height="wrap_content"
  android:scaleType="centerCrop"
  android:src="@drawable/crazy_2" />
 </com.hx.waterfalllayout.WaterfallLayout>
</ScrollView>
这里最外层我们用的ScrollView,因为照片墙可以无限添加照片,为了让照片数量在超出频幕范围后可以滚动。还有这里ImageView都是在xml中写的,当然我们也可以在Java中向这个ViewGroup动态添加ImageView,而且代码更美观。
实现瀑布流图片的点击事件回调函数:
((WaterfallLayout) findViewById(R.id.waterfallLayout)).setOnItemClickListener(new com.hx.waterfalllayout.WaterfallLayout.OnItemClickListener() {
  @Override
  public void onItemClick(View v, int index) {
   Toast.makeText(MainActivity.this, "item="+index, Toast.LENGTH_SHORT).show();
  }
  });
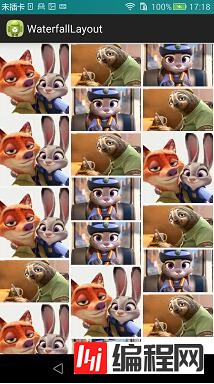
来看看运行效果:

延伸:
一般我们自定义的控件,嵌套在scrollview中会显示不全,这个问题很纠结,不过当你打开scrollview的源码,你会发现有一个地方,同时可以理解scrollview中嵌套viewpager,gridview,listview时候会显示不全的问题了。

这里有个小技巧可以让嵌套的viewpager,gridview,listview显示完全,譬如我们可以定义自己的OtherGridView继承Gridview,并重写onMeasure方法即可,其他ViewGroup同理:
public class OtherGridView extends GridView {
 public OtherGridView(Context paramContext, AttributeSet paramAttributeSet) {
 super(paramContext, paramAttributeSet);
 }

 @Override
 public void onMeasure(int widthMeasureSpec, int heightMeasureSpec) {
 int expandSpec = MeasureSpec.makeMeasureSpec(Integer.MAX_VALUE >> 2,
  MeasureSpec.AT_MOST);
 super.onMeasure(widthMeasureSpec, expandSpec);
 }
}
二、继承ScrollView
继承ScrollView的瀑布流模型当图片过多需要滑动式不必在外面再嵌套一个ScrollView。
这时不需要重写onMesure,只需要重写onLayout
•onLayout
 @Override
 protected void onLayout(boolean changed, int l, int t, int r, int b) {
 super.onLayout(changed, l, t, r, b);
 if (changed && !loadOnce) {
  firstColumn = (LinearLayout) findViewById(R.id.first_column);
  secondColumn = (LinearLayout) findViewById(R.id.second_column);
  thirdColumn = (LinearLayout) findViewById(R.id.third_column);
  columnWidth = firstColumn.getWidth();
  loadOnce = true;
  loadImages();
 }
 }
•加载图片
 public void loadImages() {
 for (int i = 0; i < imageRes.length; i++) {
  Bitmap bitmap = resource2Bitmap(imageRes[i]);
  if (bitmap != null) {
  double ratio = bitmap.getWidth() / (columnWidth * 1.0);
  int scaledHeight = (int) (bitmap.getHeight() / ratio);
  addImage(i, bitmap, columnWidth, scaledHeight);
  }
 }
 }

 private void addImage(int index, Bitmap bitmap, int imageWidth, int imageHeight) {
 LinearLayout.LayoutParams params = new LinearLayout.LayoutParams(imageWidth, imageHeight);
 ImageView imageView = new ImageView(getContext());
 imageView.setLayoutParams(params);
 imageView.setImageBitmap(bitmap);
 imageView.setScaleType(ScaleType.FIT_XY);
 imageView.setPadding(5, 5, 5, 5);
 findColumnToAdd(imageView, imageHeight).addView(imageView);
 //给图片添加点击事件的回调
 imageView.setOnClickListener(new OnClickListener() {
  @Override
  public void onClick(View v) {
  if (onItemClickListener != null) {
   onItemClickListener.onItemClick(v, index);
  }
  }
 });
 }

 private LinearLayout findColumnToAdd(ImageView imageView,int imageHeight) {
 if (firstColumnHeight <= secondColumnHeight) {
  if (firstColumnHeight <= thirdColumnHeight) {
  firstColumnHeight += imageHeight;
  return firstColumn;
  }
  thirdColumnHeight += imageHeight;
  return thirdColumn;
 } else {
  if (secondColumnHeight <= thirdColumnHeight) {
  secondColumnHeight += imageHeight;
  return secondColumn;
  }
  thirdColumnHeight += imageHeight;
  return thirdColumn;
 }
 }
到这里就可以显示瀑布流照片墙了,是不是很方便呢?但是这种方式也有局限性,譬如这里列宽被写死成3列了,没有很好的扩展性。
代码里我们并没有看到自定义ViewGroup实现每个childView的layout方法,那么childView是怎么布局的呢?其实childView的布局是通过LinearLayout来实现的,也就是说在LinearLayout内部调用了每个childView的layout方法,这是不是和之前我们讲自定义View时的组合控件很像呢?
findColumnToAdd(imageView, imageHeight).addView(imageView);
•定义图片点击回调接口
 //点击事件的回调接口
 public OnItemClickListener onItemClickListener;
 public interface OnItemClickListener {
 void onItemClick(View v, int index);
 }
 public void setOnItemClickListener(OnItemClickListener onItemClickListener){
 this.onItemClickListener = onItemClickListener;
 }
•使用ScrollWaterfallLayout
因为代码里指定了只有三列,所以xml需要三个水平摆放的LinearLayout
 <?xml version="1.0" encoding="utf-8"?>
<LinearLayout xmlns:android="http://schemas.android.com/apk/res/android"
 android:layout_width="fill_parent"
 android:layout_height="fill_parent"
 android:orientation="vertical">
 <com.hx.waterfalllayout.ScrollWaterfallLayout
 android:id="@+id/scrollWaterfallLayout"
 android:layout_width="match_parent"
 android:layout_height="match_parent" >
 <LinearLayout
  android:layout_width="match_parent"
  android:layout_height="wrap_content"
  android:orientation="horizontal" >
  <LinearLayout
  android:id="@+id/first_column"
  android:layout_width="0dp"
  android:layout_height="wrap_content"
  android:layout_weight="1"
  android:orientation="vertical" >
  </LinearLayout>
  <LinearLayout
  android:id="@+id/second_column"
  android:layout_width="0dp"
  android:layout_height="wrap_content"
  android:layout_weight="1"
  android:orientation="vertical" >
  </LinearLayout>
  <LinearLayout
  android:id="@+id/third_column"
  android:layout_width="0dp"
  android:layout_height="wrap_content"
  android:layout_weight="1"
  android:orientation="vertical" >
  </LinearLayout>
 </LinearLayout>
 </com.hx.waterfalllayout.ScrollWaterfallLayout>
</LinearLayout>
实现瀑布流图片的点击事件回调函数:
((ScrollWaterfallLayout)findViewById(R.id.scrollWaterfallLayout)).setOnItemClickListener(new com.hx.waterfalllayout.ScrollWaterfallLayout.OnItemClickListener() {
  @Override
  public void onItemClick(View v, int index) {
   Toast.makeText(MainActivity.this, "item="+index, Toast.LENGTH_SHORT).show();
  }
  });
运行效果:
源码下载:http://xiazai.jb51.net/201609/yuanma/Android-WaterfallLayout(jb51.net).rar
您可能感兴趣的文章:Android自定义ViewGroup之实现FlowLayout流式布局Android简单实现自定义流式布局的方法Android实现热门标签的流式布局解析在Android中为TextView增加自定义html标签的实现方法android配合viewpager实现可滑动的标签栏示例分享Android中使用include标签和merge标签重复使用布局Android开发常用标签小结android多行标签热点示例Android自定义ViewGroup之CustomGridLayout(一)Android自定义ViewGroup之FlowLayout(三)
--结束END--
本文标题: Android自定义ViewGroup之WaterfallLayout(二)
本文链接: https://www.lsjlt.com/news/23992.html(转载时请注明来源链接)
有问题或投稿请发送至: 邮箱/279061341@qq.com QQ/279061341
下载Word文档到电脑,方便收藏和打印~
2024-01-21
2023-10-28
2023-10-28
2023-10-27
2023-10-27
2023-10-27
2023-10-27
回答
回答
回答
回答
回答
回答
回答
回答
回答
回答


官方手机版

微信公众号

商务合作


0