本文实例讲述了Android编程实现读取手机联系人、拨号、发送短信及长按菜单操作方法。分享给大家供大家参考,具体如下: 1.Andrid项目结构图↓主要操作图中红色方框内的文件
本文实例讲述了Android编程实现读取手机联系人、拨号、发送短信及长按菜单操作方法。分享给大家供大家参考,具体如下:
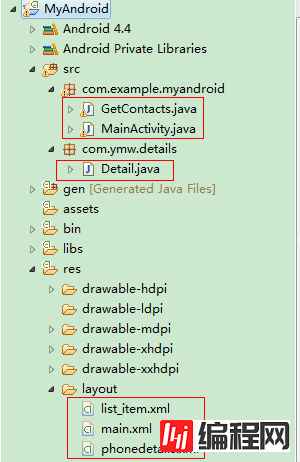
1.Andrid项目结构图↓主要操作图中红色方框内的文件。
2.首先布局代码如下
a, main.xml 程序运行的主界面,主要用ListView列表控件展示手机联系人
<?xml version="1.0" encoding="utf-8"?>
<LinearLayout xmlns:android="Http://schemas.android.com/apk/res/android"
android:layout_width="match_parent"
android:layout_height="match_parent"
android:background="@drawable/bg"
android:orientation="vertical" >
<ListView
android:id="@+id/listView"
android:layout_width="fill_parent"
android:layout_height="fill_parent"
android:layout_marginLeft="5dip"
android:cacheColorHint="#00000000"
android:divider="@drawable/divider_horizontal_bright"
android:paddingRight="5dip" >
</ListView>
</LinearLayout>
b.list_item.xml ListView的列表项布局文件,相当于展示模版
<?xml version="1.0" encoding="utf-8"?>
<LinearLayout xmlns:android="http://schemas.android.com/apk/res/android"
android:layout_width="fill_parent"
android:layout_height="wrap_content"
android:orientation="horizontal" >
<ImageView
android:id="@+id/imgView"
android:layout_width="wrap_content"
android:layout_height="wrap_content"
android:contentDescription="@string/photo"
android:paddingRight="2dip" />
<TextView
android:id="@+id/name"
android:layout_width="80dip"
android:layout_height="wrap_content"
android:layout_marginLeft="10dip"
android:paddingTop="8dip"
android:singleLine="false"
android:textAppearance="?android:attr/textAppearanceMedium"
android:textColor="#ffffff" />
<TextView
android:id="@+id/number"
android:layout_width="fill_parent"
android:layout_height="wrap_content"
android:layout_marginRight="6dip"
android:paddingTop="8dip"
android:singleLine="false"
android:textColor="#ffffff"
android:textAppearance="?android:attr/textAppearanceMedium"/>
</LinearLayout>
c,phonedetails.xml 长按菜单显示联系人详细布局界面,示例只做了跳转展示
<?xml version="1.0" encoding="utf-8"?>
<LinearLayout xmlns:android="http://schemas.android.com/apk/res/android"
android:layout_width="match_parent"
android:layout_height="match_parent"
android:orientation="vertical" >
<TextView
android:id="@+id/ymw"
android:layout_width="fill_parent"
android:layout_height="wrap_content"
android:textAppearance="?android:attr/textAppearanceMedium"/>
</LinearLayout>
2.Java实现代码如下
a,MainActivity.java 程序运行的入口文件
package com.example.myandroid;
import java.util.ArrayList;
import java.util.HashMap;
import java.util.Iterator;
import android.app.Activity;
import android.content.ContentResolver;
import android.content.Intent;
import android.database.Cursor;
import android.net.Uri;
import android.os.Bundle;
import android.provider.ContactsContract;
import android.provider.ContactsContract.CommonDataKinds;
import android.view.ContextMenu;
import android.view.ContextMenu.ContextMenuInfo;
import android.view.MenuItem;
import android.view.View;
import android.view.View.OnCreateContextMenuListener;
import android.widget.AdapterView;
import android.widget.AdapterView.OnItemClickListener;
import android.widget.ListView;
import android.widget.SimpleAdapter;
import android.widget.Toast;
import com.ymw.details.Detail;
public class MainActivity extends Activity {
@Override
public void onCreate(Bundle savedInstanceState) {
super.onCreate(savedInstanceState);
setContentView(R.layout.main);
final ListView listView = (ListView) findViewById(R.id.listView);
// 生成动态数组,加入数据
ArrayList<HashMap<String, Object>> listItem = fillMaps();
SimpleAdapter listItemAdapter = new SimpleAdapter(this, listItem,
R.layout.list_item,
new String[] { "imgView", "name", "number" }, new int[] {
R.id.imgView, R.id.name, R.id.number });
listView.setAdapter(listItemAdapter);
// 添加单击事件
listView.setOnItemClickListener(new OnItemClickListener() {
@Override
public void onItemClick(AdapterView<?> arg0, View arg1, int arg2,
long arg3) {
HashMap<String, String> map = (HashMap<String, String>) listView
.getItemAtPosition(arg2);
String name = map.get("name");
Toast toast = Toast.makeText(getApplicationContext(), "第"
+ arg2 + "项" + name, Toast.LENGTH_LONG);
toast.show();
String phoneNum = map.get("number");
Intent intent = new Intent(Intent.ACTION_CALL, Uri.parse("tel:"
+ phoneNum));
startActivity(intent);
}
});
// 添加长按菜单
listView.setOnCreateContextMenuListener(new OnCreateContextMenuListener() {
public void onCreateContextMenu(ContextMenu menu, View v,
ContextMenuInfo menuInfo) {
menu.setHeaderTitle("长按菜单-ContextMenu");
menu.add(0, 0, 0, "查看详细");
menu.add(0, 1, 0, "发送信息");
menu.add(0, 2, 0, "删除联系人");
}
});
}
public boolean onContextItemSelected(MenuItem item) {
// setTitle("点击了长按菜单里面的第"+item.getItemId()+"个项目");
Toast.makeText(getApplicationContext(),
"选择了" + item.getItemId() + item.getTitle() + "项",
Toast.LENGTH_LONG).show();
int id = item.getItemId();
// 查看详细
if (id == 0) {
Intent intent = new Intent();
intent.putExtra("ymw", item.getTitle());
intent.setClass(MainActivity.this, Detail.class);
startActivity(intent);
}
// 发送短信
else if (id == 1) {
Uri uri = Uri.parse("smsto://18664599745");
Intent intent = new Intent(Intent.ACTION_SENDTO, uri);
intent.putExtra("sms_body", "ymw-LOVE-yh");
startActivity(intent);
}
// 删除联系人
else if (id == 2) {
}
return super.onContextItemSelected(item);
}
// 获取手机联系人列表方法一
public ArrayList<HashMap<String, Object>> GetContects() {
ArrayList<HashMap<String, Object>> list = new ArrayList<HashMap<String, Object>>();
Cursor cursor = getContentResolver().query(
ContactsContract.Contacts.CONTENT_URI,
null,
null,
null,
ContactsContract.Contacts.DISPLAY_NAME
+ " COLLATE LOCALIZED ASC");
if (cursor.moveToFirst()) {
int idColumn = cursor.getColumnIndex(ContactsContract.Contacts._ID);
int nameColum = cursor
.getColumnIndex(ContactsContract.Contacts.DISPLAY_NAME);
do {
String contactId = cursor.getString(idColumn);
String disPlayNameString = cursor.getString(nameColum);
// 查看有多少电话号码 没有则返回为0
int phoneCount = cursor
.getInt(cursor
.getColumnIndex(ContactsContract.Contacts.HAS_PHONE_NUMBER));
if (phoneCount > 0) {
// 获得联系人的电话号码
Cursor phones = getContentResolver().query(
ContactsContract.CommonDataKinds.Phone.CONTENT_URI,
null,
ContactsContract.CommonDataKinds.Phone.CONTACT_ID
+ "=" + contactId, null, null);
HashMap<String, Object> map = new HashMap<String, Object>();
map.put("imgView", R.drawable.ic_launcher);
map.put("name", disPlayNameString);
list.add(map);
}
} while (cursor.moveToNext());
if (cursor != null)
cursor.close();
}
return list;
}
// 获取联系人方法二
public ArrayList<HashMap<String, Object>> fillMaps() {
ArrayList<HashMap<String, Object>> items = new ArrayList<HashMap<String, Object>>();
ContentResolver cr = getContentResolver();
HashMap<String, ArrayList<String>> hashMap = new HashMap<String, ArrayList<String>>();
Cursor phone = cr.query(CommonDataKinds.Phone.CONTENT_URI,
new String[] { CommonDataKinds.Phone.CONTACT_ID,
CommonDataKinds.Phone.DISPLAY_NAME,
CommonDataKinds.Phone.NUMBER,
CommonDataKinds.Phone.DATA1
// CommonDataKinds.StructuredPostal.DATA3,
}, null, null, null);
while (phone.moveToNext()) {
String contactId = phone.getString(phone
.getColumnIndex(CommonDataKinds.Phone.CONTACT_ID));
String displayName = phone.getString(phone
.getColumnIndex(CommonDataKinds.Phone.DISPLAY_NAME));
String PhoneNumber = phone
.getString(phone
.getColumnIndex(ContactsContract.CommonDataKinds.Phone.NUMBER));
String address = phone.getString(phone
.getColumnIndex(CommonDataKinds.Phone.DATA1));
// 以contactId为主键,把同一人的所有电话都存到一起。
ArrayList<String> ad = hashMap.get(contactId);
if (ad == null) {
ad = new ArrayList<String>();
ad.add(displayName);
ad.add(PhoneNumber);
// ad.add(address);
hashMap.put(contactId, ad);
} else {
ad.add(PhoneNumber);
}
}
phone.close();
ArrayList<String> tmpList;
String tmpStr = "";
int k;
Iterator iter = hashMap.entrySet().iterator();
while (iter.hasNext()) {
HashMap.Entry entry = (HashMap.Entry) iter.next();
Object key = entry.geTKEy();
Object val = entry.getValue();
tmpList = (ArrayList) val;
tmpStr = "";
for (k = 1; k < tmpList.size(); k++) {
tmpStr = tmpStr + tmpList.get(k) + ',';
}
tmpStr = GetString(tmpStr);
HashMap<String, Object> tmpMap = new HashMap<String, Object>();
tmpMap.put("name", tmpList.get(0));
tmpMap.put("number", tmpStr);
tmpMap.put("imgView", R.drawable.ic_launcher);
items.add(tmpMap);
}
return items;
}
private String GetString(String str) {
String strLast = "";
int i = str.lastIndexOf(",");
if (i > 0) {
strLast = str.substring(0, str.length() - 1);
}
return strLast.replace(" ", "").replace(",", "\n").replace("+86", "");
}
}
b,Detail.java 主界面长按菜单显示联系人详细的跳转界面,接受主界面传来的参数
package com.ymw.details;
import com.example.myandroid.R;
import android.app.Activity;
import android.content.Intent;
import android.os.Bundle;
import android.widget.TextView;
public class Detail extends Activity {
@Override
protected void onCreate(Bundle savedInstanceState) {
// TODO Auto-generated method stub
super.onCreate(savedInstanceState);
setContentView(com.example.myandroid.R.layout.phonedetails);
Intent intent = getIntent();
String strPara = intent.getStringExtra("ymw");
TextView tView = (TextView) findViewById(R.id.ymw);
tView.setText(strPara);
}
}
3.获取手机联系人和拨号发短信等需要配置权限
在AndroidManifest.xml文件中的application节点上加入如下代码
<!--添加权限-->
<uses-permission android:name="android.permission.SEND_SMS"/>
<uses-permission android:name="android.permission.CALL_PHONE"/>
<uses-permission android:name="android.permission.READ_CONTACTS"/>
4.使用Android模拟器或连接Android智能手机运行本程序可以看到手机联系人列表,
单击某个联系人会直接拨号,长按某个联系人会出现菜单选项,可以选择发送短信。
希望本文所述对大家Android程序设计有所帮助。
您可能感兴趣的文章:Android获取手机通讯录、sim卡联系人及调用拨号界面方法Android 获取手机联系人实例代码详解android利用ContentResolver访问者获取手机联系人信息Android获取手机联系人信息Android获取手机联系人电话号码并返回结果Android读取手机通讯录联系人到自己项目android如何获取手机联系人的数据库示例代码浅谈Android手机联系人开发之增删查改功能Android ContentProvider获取手机联系人实例Android ContentProvider实现手机联系人读取和插入
--结束END--
本文标题: Android编程实现读取手机联系人、拨号、发送短信及长按菜单操作方法实例小结
本文链接: https://www.lsjlt.com/news/26421.html(转载时请注明来源链接)
有问题或投稿请发送至: 邮箱/279061341@qq.com QQ/279061341
下载Word文档到电脑,方便收藏和打印~
2024-01-21
2023-10-28
2023-10-28
2023-10-27
2023-10-27
2023-10-27
2023-10-27
回答
回答
回答
回答
回答
回答
回答
回答
回答
回答


官方手机版

微信公众号

商务合作


0