这篇文章主要介绍怎么用js实现网页瀑布流布局,文中介绍的非常详细,具有一定的参考价值,感兴趣的小伙伴们一定要看完!JS是什么JS是javascript的简称,它是一种直译式的脚本语言,其解释器被称为JavaScript引擎,是浏览器的一部分
这篇文章主要介绍怎么用js实现网页瀑布流布局,文中介绍的非常详细,具有一定的参考价值,感兴趣的小伙伴们一定要看完!
JS是javascript的简称,它是一种直译式的脚本语言,其解释器被称为JavaScript引擎,是浏览器的一部分,主要用于WEB的开发,可以给网站添加各种各样的动态效果,让网页更加美观。
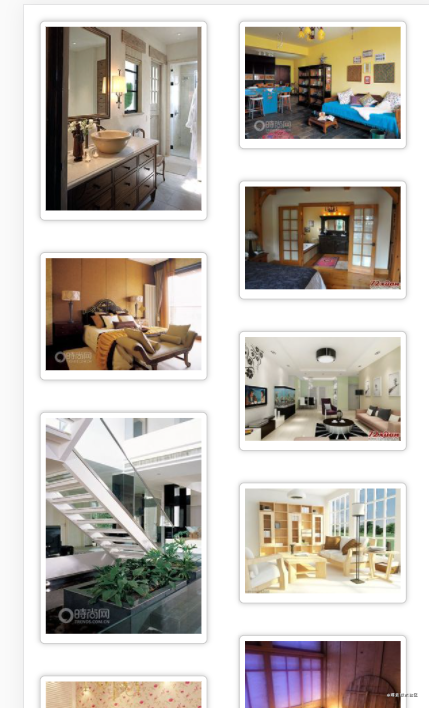
先看效果:
不完整html代码:
<div id="container"> <div class="box"> <div class="box-img"> <img src="./img/1.jpg" > </div> </div> <div class="box"> <div class="box-img"> <img src="./img/2.jpg" > </div> </div> <div class="box"> <div class="box-img"> <img src="./img/3.jpg" > </div> </div> </div> ......<!-- 省略了图片,多少张图片自行决定-->完整的css代码
*{ padding: 0; margin: 0; } #container{ position: relative; } .box{ float: left; padding: 15px; } .box-img { width: 150px; padding: 5px; border: 1px solid #ccc ; box-shadow: 0 0 5px #ccc; border-radius: 5px; } .box-img img{ width: 100%; height: auto; }简单地来说,如果要实现瀑布流布局,得完成这几件事✍
function getChildElemnt() { const contentArr = []//定义数组准备装图 const parent = document.getElementById(container)//得到整个页面 const allContent = parent.getElementsByTagName('*')//得到整个标签 console.log(allContent); for (var i = 0; i < allContent.length; i++) { if (allContent[i].className == 'box') { contentArr.push(allContent[i])//将class='box'的标签装入数组 } } console.log(contentArr); return contentArr//返回数组 } var ccontent = getChildElemnt() var imgWidth = ccontent[0].offsetWidth//令所有图片宽度等于第一张图片var dWidth=document.documentElement.clientWidth//页面宽度var num = Math.floor(dWidth/ imgWidth)//Math.floor()向下取整因为在瀑布流布局中,当第一行图片已经摆满后,第二行的第一张图片要放在第一行中高度最小的图片的下面
var BoxHeightArr = []//定义一个数组,把每张图片的高度依次放进去 for (var i = 0; i < ccontent.length; i++) { if (i < num) { BoxHeightArr[i] = ccontent[i].offsetHeight//将图片的高度存入数组 } else {//当第一行已经存放不了图片后 var minHeight = Math.min.apply(null, BoxHeightArr)//比较出上一行最小的高度 } }//定义一个getMinHeightLocation函数,给它传入BoxHeightArr上一行全部图片,和minHeight上一行图片的最小高度 function getMinHeightLocation(BoxHeightArr, minHeight) { for (var i in BoxHeightArr) { if (BoxHeightArr[i] === minHeight) {//当图片高度等于最小高度时,该图片的位置为最小高度图片的位置 return i } } }for (var i = 0; i < ccontent.length; i++) { if (i < num) { BoxHeightArr[i] = ccontent[i].offsetHeight } else { var minHeight = Math.min.apply(null, BoxHeightArr) var minIndex = getMinHeightLocation(BoxHeightArr, minHeight) ccontent[i].style.position = 'absolute'//将要插入的图片绝对定位,即元素的位置通过 "left", "top", "right" 以及 "bottom" 属性进行规定 ccontent[i].style.top = minHeight + 'px'//令插入的图片到顶端的距离刚好等于要插其下面图片的高度 ccontent[i].style.left = ccontent[minIndex].offsetLeft + 'px'//令插入的图片到最左边的距离刚好等于要插其下面图片到最左边的距离 BoxHeightArr[minIndex] = BoxHeightArr[minIndex] + ccontent[i].offsetHeight//插入图片后,得将这位置的高度设为两张图片的高度和 } }优化代码,提高性能
window.onload = function() { imgLocation('container', 'box')//构造函数imgLocation}//用window.onload = function() {}函数就不用等着body页面中调用就可以执行了// 获取到当前有多少张图片要摆放function imgLocation(parent, content) {//令parent='container',content='box' // 将parent下所有的内容全部取出 var cparent = document.getElementById(parent) var ccontent = getChildElemnt(cparent, content) var imgWidth = ccontent[0].offsetWidth var num = Math.floor(document.documentElement.clientWidth / imgWidth) cparent.style.cssText = `width: ${imgWidth * num} px` var BoxHeightArr = [] for (var i = 0; i < ccontent.length; i++) { if (i < num) { BoxHeightArr[i] = ccontent[i].offsetHeight } else { var minHeight = Math.min.apply(null, BoxHeightArr) var minIndex = getMinHeightLocation(BoxHeightArr, minHeight) ccontent[i].style.position = 'absolute' ccontent[i].style.top = minHeight + 'px' ccontent[i].style.left = ccontent[minIndex].offsetLeft + 'px' BoxHeightArr[minIndex] = BoxHeightArr[minIndex] + ccontent[i].offsetHeight } } // console.log(BoxHeightArr);}function getChildElemnt(parent, content) {parent='container',content='box' const contentArr = [] const allContent = parent.getElementsByTagName('*') console.log(allContent); for (var i = 0; i < allContent.length; i++) { if (allContent[i].className == content) { contentArr.push(allContent[i]) } } console.log(contentArr); return contentArr}function getMinHeightLocation(BoxHeightArr, minHeight) { for (var i in BoxHeightArr) { if (BoxHeightArr[i] === minHeight) { return i } }}以上是“怎么用JS实现网页瀑布流布局”这篇文章的所有内容,感谢各位的阅读!希望分享的内容对大家有帮助,更多相关知识,欢迎关注编程网精选频道!
--结束END--
本文标题: 怎么用JS实现网页瀑布流布局
本文链接: https://www.lsjlt.com/news/274630.html(转载时请注明来源链接)
有问题或投稿请发送至: 邮箱/279061341@qq.com QQ/279061341
下载Word文档到电脑,方便收藏和打印~
2024-04-29
2024-04-29
2024-04-29
2024-04-29
2024-04-29
2024-04-29
2024-04-29
2024-04-29
2024-04-29
2024-04-29
回答
回答
回答
回答
回答
回答
回答
回答
回答
回答


官方手机版

微信公众号

商务合作


0