这篇文章主要介绍“SpringBoot2.x 集成 Thymeleaf的详细步骤”,在日常操作中,相信很多人在springBoot2.x 集成 Thymeleaf的详细步骤问题上存在疑惑,小编查阅了各式资料,整理出简单好用的操作方法,希望对
这篇文章主要介绍“SpringBoot2.x 集成 Thymeleaf的详细步骤”,在日常操作中,相信很多人在springBoot2.x 集成 Thymeleaf的详细步骤问题上存在疑惑,小编查阅了各式资料,整理出简单好用的操作方法,希望对大家解答”SpringBoot2.x 集成 Thymeleaf的详细步骤”的疑惑有所帮助!接下来,请跟着小编一起来学习吧!
一、Thymeleaf简介
二、集成Thymeleaf
三、Thymeleaf常用语法
Thymeleaf是面向WEB和独立环境的现代服务器Java模板引擎,能够处理html,XML,javascript,CSS甚至纯文本。
Thymeleaf旨在提供一个优雅的、高度可维护的创建模板的方式。为了实现这一目标,Thymeleaf建立在自然模板的概念上,将其逻辑注入到模板文件中,不会影响模板设计原型。这改善了设计的沟通,弥合了设计和开发团队之间的差距。
Thymeleaf从设计之初就遵循Web标准——特别是HTML5标准,如果需要,Thymeleaf允许创建完全符合HTML5验证标准的模板。
通过Maven新建一个名为springboot-thymeleaf的项目。
引入依赖
<dependency> <groupId>org.springframework.boot</groupId> <artifactId>spring-boot-starter-web</artifactId></dependency><!-- Thymeleaf 起步依赖 --><dependency> <groupId>org.springframework.boot</groupId> <artifactId>spring-boot-starter-thymeleaf</artifactId></dependency><!-- lombok插件 --><dependency> <groupId>org.projectlombok</groupId> <artifactId>lombok</artifactId> <version>1.18.8</version></dependency>编写配置文件
spring: thymeleaf: # 在构建URL时用于查看名称的前缀,默认为classpath:/templates/ prefix: classpath:/templates/ # 在构建URL时附加到视图名称的后缀,默认为.html suffix: .html # 模板模式,默认为HTML mode: HTML # 模板文件编码,默认为UTF-8 encoding: UTF-8 # 是否启用模板缓存,默认为true,表示启用,false不启用 cache: false # 在呈现模板之前是否检查模板存在与否,默认为true check-template: true # 是否检查模板位置存在与否,默认为true check-template-location: true更多的配置可以查看ThymeleafProperties类:

准备模板
首先按照配置文件中配置的模板前缀在resources下创建一个templates目录,用于存放模板。然后创建如下名为hello.html的模板:
<!DOCTYPE html><html lang="en" xmlns:th="Http://www.thymeleaf.org"><head> <meta charset="UTF-8"> <title>Hello Thymeleaf</title></head><body> <div> <span th:text="${hello}">th:text文本替换会转义html标签,不解析html</span> </div> <hr/> <div> <span th:utext="${hello}">th:utext文本替换不会转义html标签,会解析html</span> </div></body></html><html>标签中的xmlns:th="http://www.thymeleaf.org声明使用Thymeleaf标签。th:text属性会计算表达式的值将结果设置为标签的标签体。但它会转义HTML标签,HTML标签会直接显示在浏览器上。th:utext属性不会转义HTML标签,HTML标签会被浏览器解析。${hello}是一个变量表达式,它包含一个OGNL(Object-Graph Navigation Language)的表达式,它会从上下文中获取名为hello的变量,然后在模板上进行渲染。
Controller层
创建Controller并将模板中要获取的变量设置到Model对象中,如果Controller类上使用的是@Controller注解,则可以返回跟模板名称相同的字符串(不包括前缀和后缀),视图解析器会解析出视图具体地址并生成视图,然后返回给前端控制器进行渲染:
package com.rtxtitanv.controller;import org.springframework.stereotype.Controller;import org.springframework.ui.Model;import org.springframework.web.bind.annotation.GetMapping;@Controllerpublic class ThymeleafController { @GetMapping("/hello") public String hello(Model model) { model.addAttribute("hello", "<h2>Hello Thymeleaf</h2>"); return "hello"; }}运行项目,浏览器访问http://localhost:8080/hello,发现数据成功渲染到模板:

如果Controller类上使用的是@RestController注解,则需要将视图添加到ModelAndView对象中并返回:
package com.rtxtitanv.controller;import org.springframework.web.bind.annotation.GetMapping;import org.springframework.web.bind.annotation.RequestMapping;import org.springframework.web.bind.annotation.RestController;import org.springframework.web.servlet.ModelAndView;@RequestMapping("/test")@RestControllerpublic class TestController { @GetMapping("/hello") public ModelAndView hello() { ModelAndView modelAndView = new ModelAndView("hello"); modelAndView.addObject("hello", "<h2>hello thymeleaf</h2>"); return modelAndView; }}运行项目,浏览器访问http://localhost:8080/test/hello,发现数据成功渲染到模板:

标准表达式
(1)变量表达式
${}表达式实际上是在上下⽂中包含的变量的映射上执行的OGNL(Object-Graph Navigation Language)对象。例如:${session.user.name}。
在Spring mvc启用的应用程序中,OGNL将被替换为SpringEL,但其语法与OGNL相似(实际上,在大多数常见情况下完全相同)。
模板variable.html如下:
<!DOCTYPE html><html lang="en" xmlns:th="http://www.thymeleaf.org"><head> <meta charset="UTF-8"> <title>变量表达式</title></head><body> <p>变量表达式:${}</p> <div> <p>id: <span th:text="${user.id}"></span></p> <p>username: <span th:text="${user.username}"></span></p> <p>passWord: <span th:text="${user.password}"></span></p> </div></body></html>User实体类:
package com.rtxtitanv.model;import lombok.AllArgsConstructor;import lombok.Data;import lombok.NoArgsConstructor;@AllArgsConstructor@NoArgsConstructor@Datapublic class User { private Long id; private String username; private String password;}ThymeleafController中新增以下方法:
@GetMapping("/variable")public String variable(Model model) { model.addAttribute("user", new User(1L, "赵云", "qwe123")); return "variable";}效果:

在${}表达式中还可以使用基本对象和工具类对象。这些对象都以#开头。基本对象:
#ctx:上下文对象。
#vars:上下文变量。
#locale:上下文区域设置。
#request:(仅在Web Contexts中)httpservletRequest对象。
#response:(仅在Web上下⽂中)HttpServletResponse对象。
#session:(仅在Web上下⽂中)HttpSession对象。
#servletContext:(仅在Web上下⽂中)ServletContext对象。
工具类对象:
#execInfo:有关正在处理的模板的信息。
#messages:用于在变量表达式中获取外部化消息的方法,与使用#{}语法获取的方式相同。
#uris:转义URL/URI部分的方法。
#conversions:执行配置的转换服务的方法。
#dates:java.util.Date对象的方法。
#calendars:类似于#dates,但对应java.util.Calendar对象。
#numbers:用于格式化数字对象的方法。
#strings:字符串对象的方法。
#objects:一般对象的方法。
#bools:布尔相关方法。
#arrays:Array的方法。
#lists:List的方法。
#sets:Set的方法。
#maps:Map的方法。
#ids:处理可能重复的id属性的方法。
这些对象的详细方法可以查看官方文档:https://www.thymeleaf.org/doc/tutorials/3.0/usingthymeleaf.html#appendix-a-expression-basic-objects。
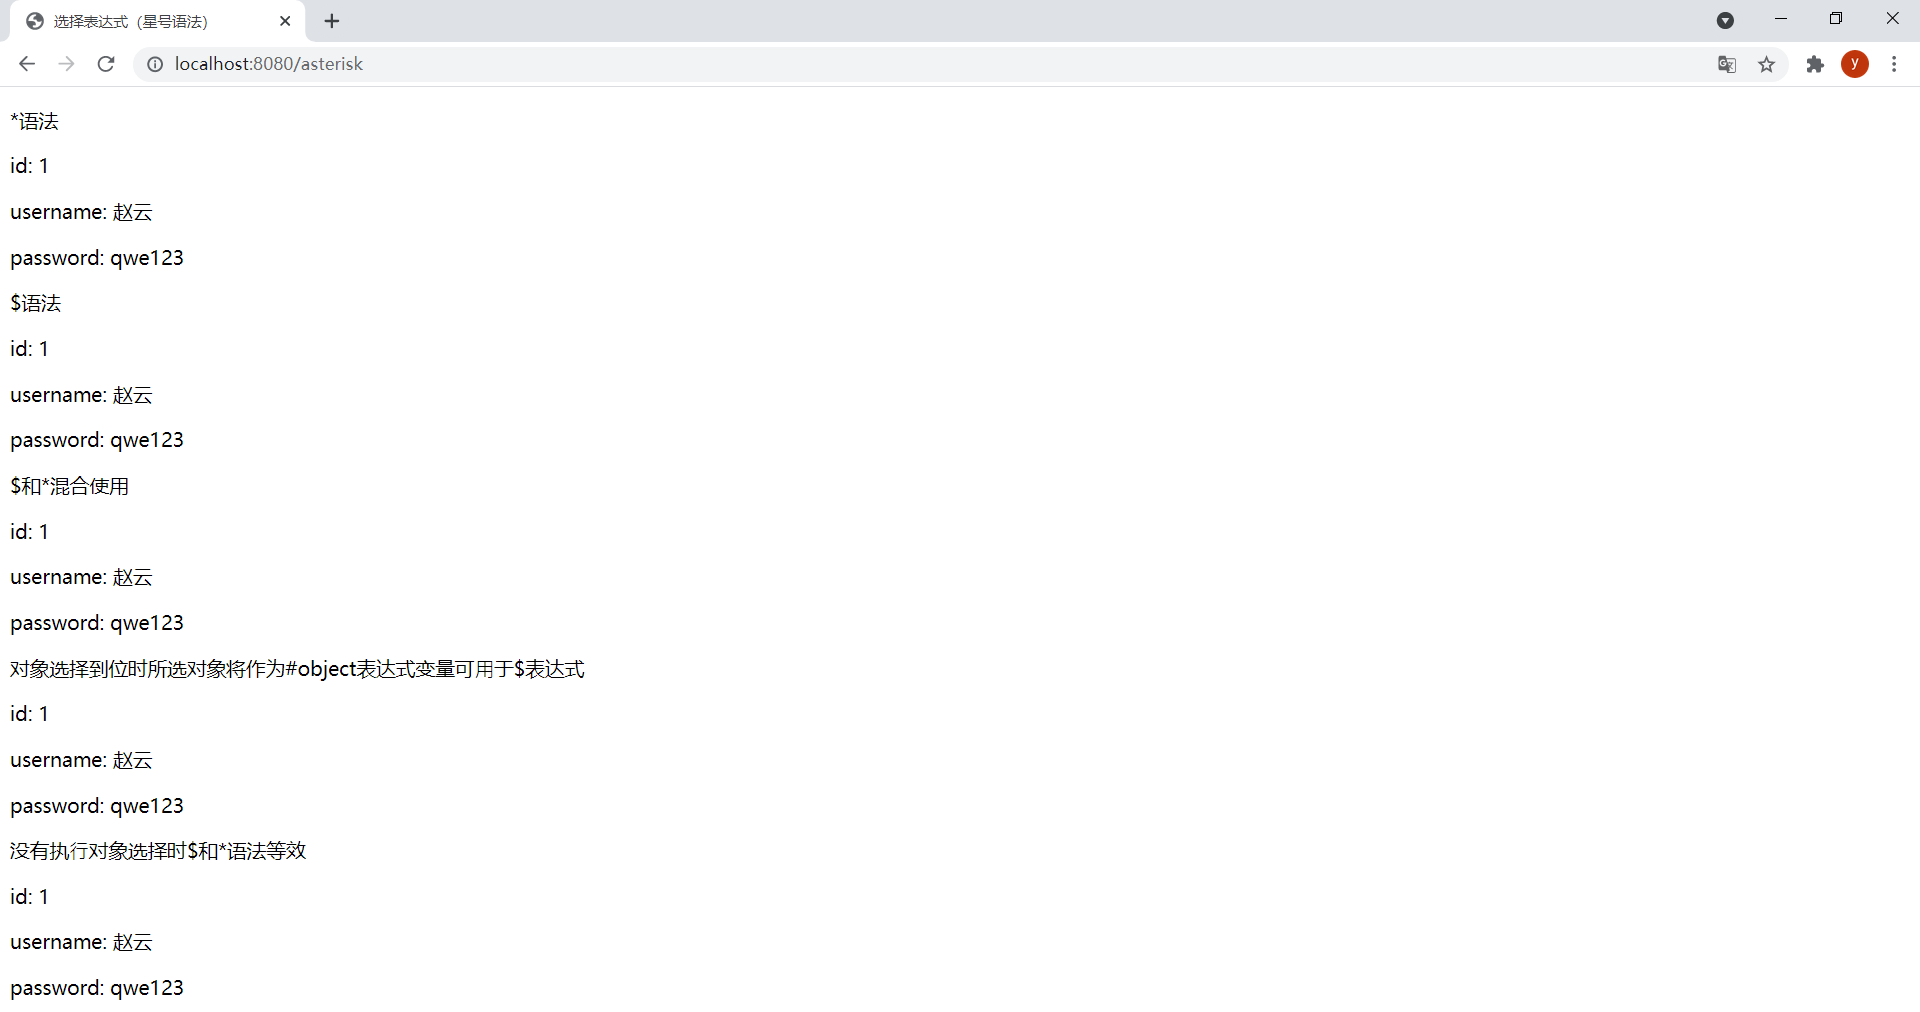
(2)选择表达式(星号语法)
星号语法*{}计算所选对象而不是整个上下文的表达式。也就是说,只要没有选定的对象(选定对象为th:object属性的表达式结果),$和*语法就会完全相同。
模板asterisk.html如下:
<!DOCTYPE html><html lang="en" xmlns:th="http://www.thymeleaf.org"><head> <meta charset="UTF-8"> <title>选择表达式(星号语法)</title></head><body> <p>*语法</p> <div th:object="${user}"> <p>id: <span th:text="*{id}"></span></p> <p>username: <span th:text="*{username}"></span></p> <p>password: <span th:text="*{password}"></span></p> </div> <p>$语法</p> <div> <p>id: <span th:text="${user.id}"></span></p> <p>username: <span th:text="${user.username}"></span></p> <p>password: <span th:text="${user.password}"></span></p> </div> <p>$和*混合使用</p> <div th:object="${user}"> <p>id: <span th:text="*{id}"></span></p> <p>username: <span th:text="${user.username}"></span></p> <p>password: <span th:text="*{password}"></span></p> </div> <p>对象选择到位时所选对象将作为#object表达式变量可⽤于$表达式</p> <div th:object="${user}"> <p>id: <span th:text="${#object.id}"></span></p> <p>username: <span th:text="${user.username}"></span></p> <p>password: <span th:text="*{password}"></span></p> </div> <p>没有执⾏对象选择时$和*语法等效</p> <div> <p>id: <span th:text="*{user.id}"></span></p> <p>username: <span th:text="*{user.username}"></span></p> <p>password: <span th:text="*{user.password}"></span></p> </div></body></html>ThymeleafController中新增以下方法:
@GetMapping("/asterisk")public String star(Model model) { model.addAttribute("user", new User(1L, "赵云", "qwe123")); return "asterisk";}效果:
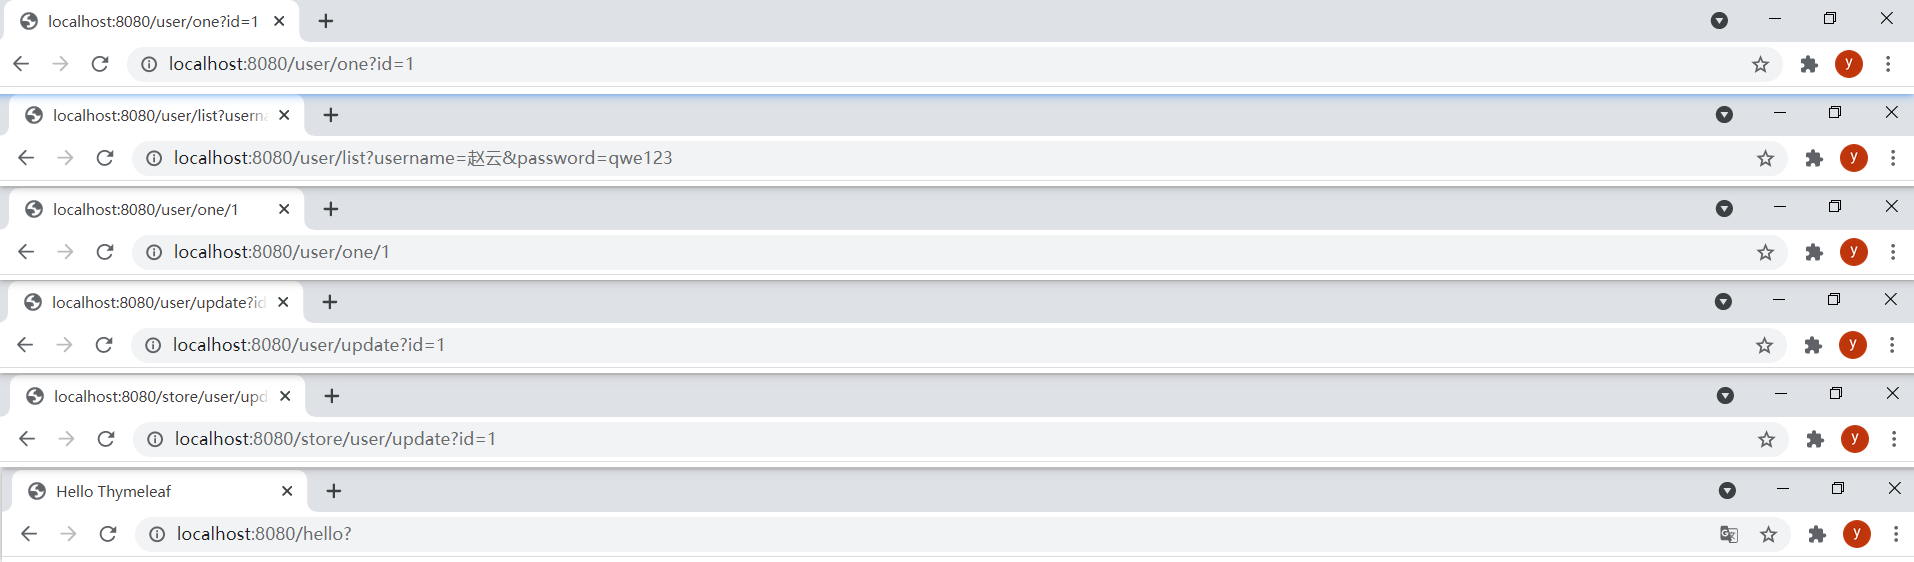
(3)URL表达式
URL表达式的语法为@{}。使用th:href属性可以对链接进行渲染。
模板url.html如下:
<!DOCTYPE html><html lang="en" xmlns:th="http://www.thymeleaf.org"><head> <meta charset="UTF-8"> <title>URL表达式</title></head><body> <ol> <li><a href="user/one.html" rel="external nofollow" rel="external nofollow" th:href="@{/user/one(id=${user.id})}" rel="external nofollow" >设置单个参数</a></li> <li><a href="user/list.html" rel="external nofollow" th:href="@{/user/list(username=${user.username},password=${user.password})}" rel="external nofollow" >设置多个参数</a></li> <li><a href="user/one.html" rel="external nofollow" rel="external nofollow" th:href="@{/user/one/{id}(id=${user.id})}" rel="external nofollow" >URL路径中也允许使⽤变量模板(rest风格参数)</a></li> <li><a href="user/update.html" rel="external nofollow" th:href="@{${url}(id=${user.id})}" rel="external nofollow" >URL基数也可以是计算另⼀个表达式的结果</a></li> <li><a href="store/user/update.html" rel="external nofollow" th:href="@{'/store' + ${url}(id=${user.id})}" rel="external nofollow" >url基数也可以是计算另⼀个表达式的结果</a></li> </ol> <hr/> <!-- th:action设置表单提交地址 --> <fORM id="login-form" th:action="@{/hello}"> <button>提交</button> </form></body></html>注意:
th:href属性会计算要使用的URL并将该值设置为<a>标签的href属性。URL中允许使用表达式的URL参数,设置多个参数将以,分隔。
URL路径中也可以使用变量模板,即可以设置rest风格的参数。/开头的相对URL将自动以应用上下文名称为前缀。如果cookie未启用或还未知道,可能会在相对URL中添加;jsessionid=...后缀以便保留会话。这被称为URL重写。
th:href属性允许在模板中有一个静态的href属性,这样在直接打开原型模板时,模板链接可以被导航。
ThymeleafController中新增以下方法:
@GetMapping("/url")public String url(Model model) { model.addAttribute("user", new User(1L, "赵云", "qwe123")); model.addAttribute("url", "/user/update"); return "url";}效果:

从上到下依次点击5个链接和提交表单的结果:
(4)字面量
字面量(Literals)分为:
文本文字(Text literals):包含在单引号之间的字符串,可以包含任何字符,其中的单引号需要\'转义。
数字字面量(Number literals):数字。
布尔字面量(Boolean literals):包含true和false。
null字面量(The null literal):null。
文本符号(Literal tokens):数字,布尔和null字面量实际是文本符号的特殊情况,文本符号不需要引号包围,只允许使用字母(A-Z和a-z)、数字(0-9)、括号、点(.)、连字符(-)和下划线(_)。
模板literal.html如下:
<!DOCTYPE html><html lang="en" xmlns:th="http://www.thymeleaf.org"><head> <meta charset="UTF-8"> <title>字面量</title></head><body> <div> <ul> <li> <p><span>文本文字:</span><span th:text="'Hello World'">⽂本文字只是包含在单引号之间的字符串,可以包含任何字符,其中的单引号需要\'转义</span></p> </li> <li> <p><span>数字字面量:</span><span th:text="2020 + 1">数字字面量就是数字</span></p> </li> <li> <p><span>布尔字面量:</span><span th:if="${flag} == false">布尔字⾯量包含true和false</span></p> </li> <li> <p><span>null字面量:</span><span th:if="${flag} != null">Thymeleaf标准表达式语法中也可以使⽤null字⾯量</span></p> </li> <li> <p><span>文本符号:</span><span th:text="Hello_.-._World">数字,布尔和null字面量实际上是⽂本符号的特殊情况</span></p> </li> </ul> </div></body></html>ThymeleafController中新增以下方法:
@GetMapping("/literal")public String literal(Model model) { model.addAttribute("flag", false); return "literal";}效果:

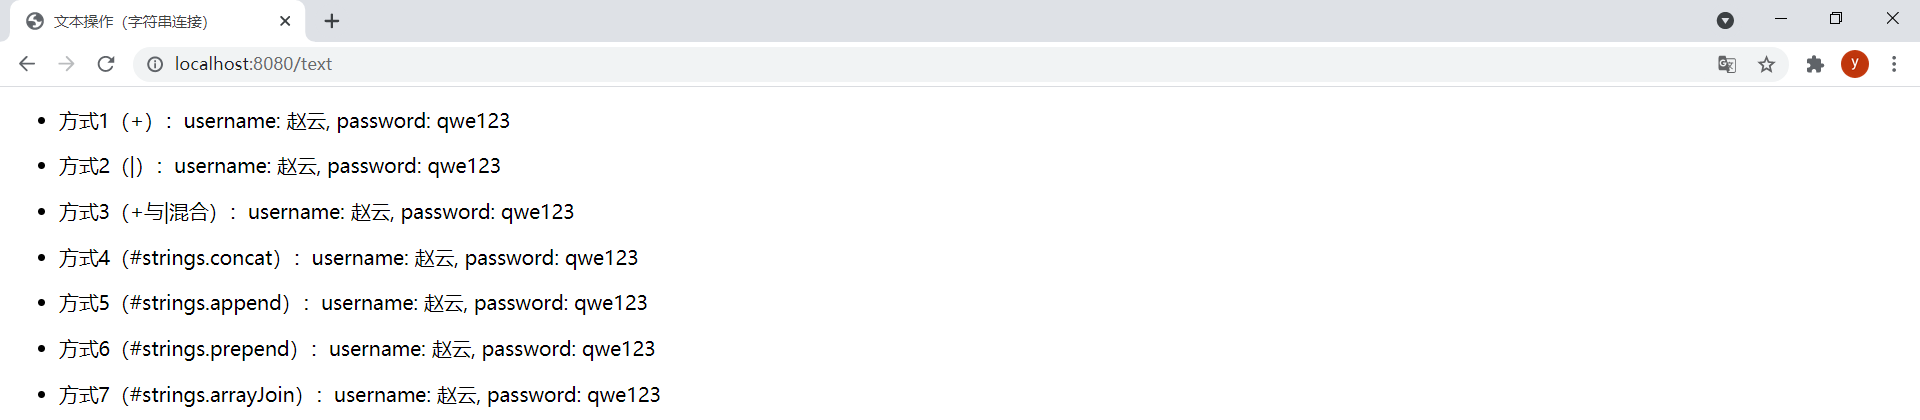
(5)文本操作
这里的文本操作包含:
追加文本(Appending texts),即字符串连接:无论是文本常量还是表达式结果都可以使用+运算符进行拼接。
字面替换(Literal substitutions):字面替换可以轻松地对包含变量值的字符串进行格式化,而不需要在字面后加+,这些替换必需用|包围。使用字面替换也可以实现和追加文本相同的效果。
模板text.html如下:
<!DOCTYPE html><html lang="en" xmlns:th="http://www.thymeleaf.org"><head> <meta charset="UTF-8"> <title>文本操作(字符串连接)</title></head><body> <div> <ul> <li> <p><span>方式1(+):</span><span th:text="'username: ' + ${user.username} + ', password: ' + ${user.password}"></span></p> </li> <li> <p><span>方式2(|):</span><span th:text="|username: ${user.username}, password: ${user.password}|"></span></p> </li> <li> <!-- 只有变量或消息表达式(${},*{},#{})才允许包含在||中 --> <p><span>方式3(+与|混合):</span><span th:text="'username: ' + ${user.username} + |, password: ${user.password}|"></span></p> </li> <li> <p><span>方式4(#strings.concat):</span><span th:text="${#strings.concat('username: ', user.username, ', password: ', user.password)}"></span></p> </li> <li> <p><span>方式5(#strings.append):</span><span th:text="${#strings.append('username: ' + user.username, ', password: ' + user.password)}"></span></p> </li> <li> <p><span>方式6(#strings.prepend):</span><span th:text="${#strings.prepend(', password: ' + user.password, 'username: ' + user.username)}"></span></p> </li> <li> <p><span>方式7(#strings.arrayJoin):</span><span th:text="${#strings.arrayJoin(new String[] {'username: ', user.username, ', password: ', user.password}, '')}"></span></p> </li> </ul> </div></body></html>ThymeleafController中新增以下方法:
@GetMapping("/text")public String text(Model model) { model.addAttribute("user", new User(1L, "赵云", "qwe123")); return "text";}效果:
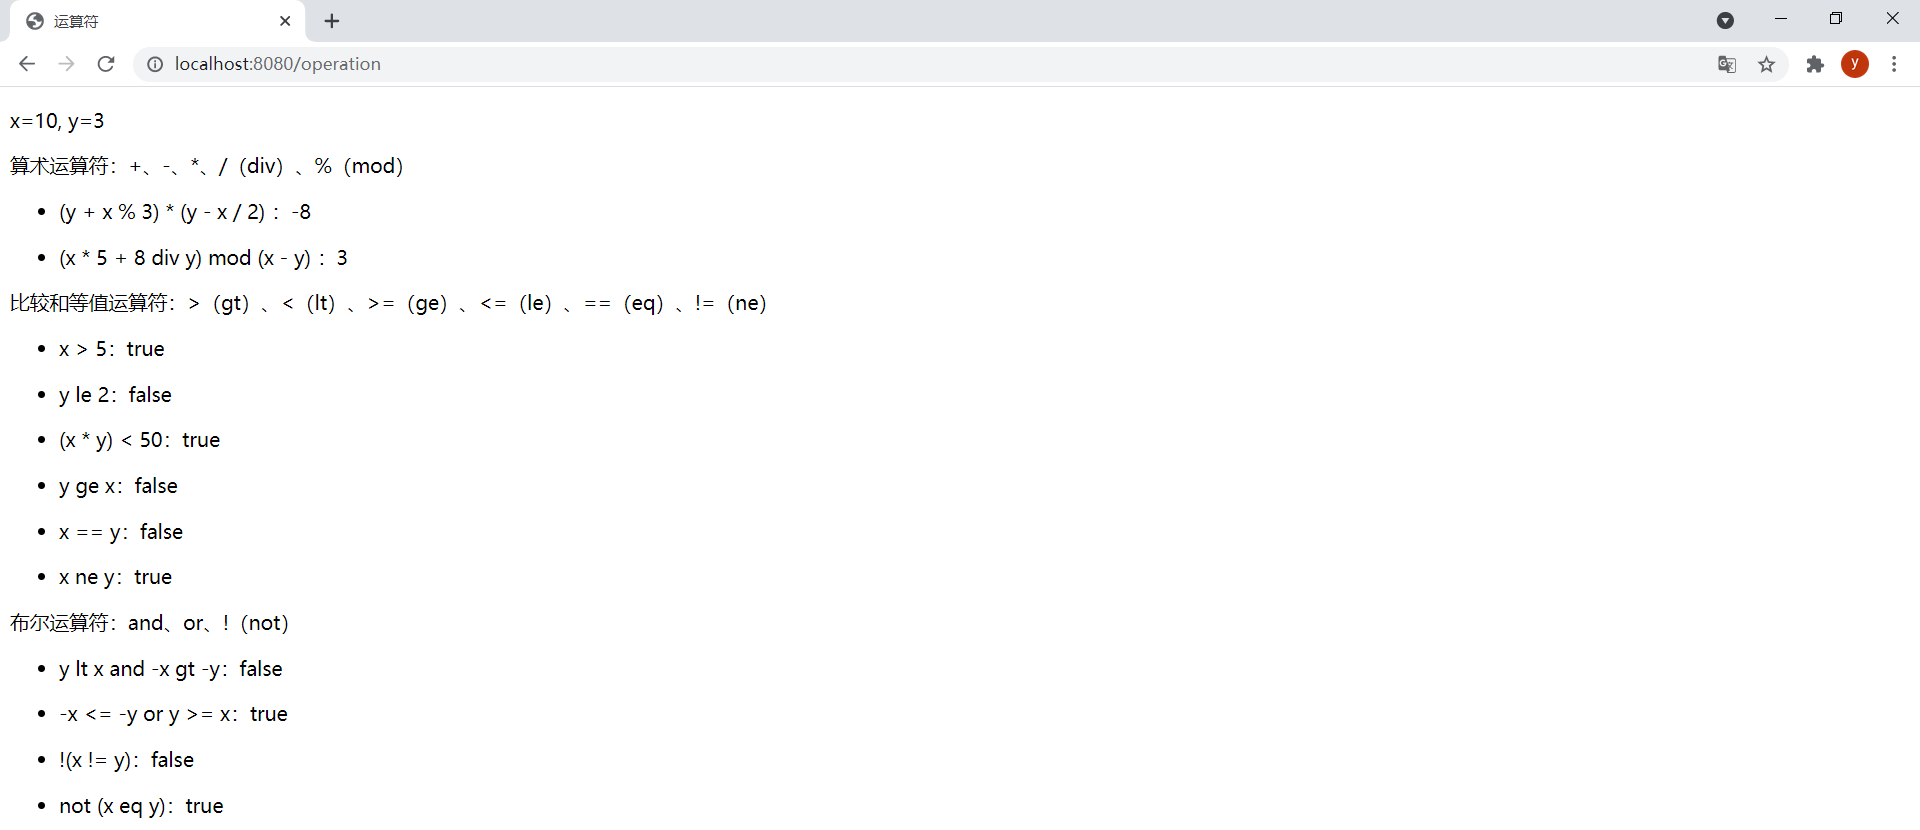
(6)运算符
运算符:
算数运算符:+、-、*、/(div)、%(mod)。
比较运算符:>(gt)、<(lt)、>=(ge)、<=(le)。
等值运算符:==(eq)、!=(ne)。
布尔运算符:and、or、!(not)。
模板operation.html如下:
<!DOCTYPE html><html lang="en" xmlns:th="http://www.thymeleaf.org"><head> <meta charset="UTF-8"> <title>运算符</title></head><body> <p th:text="|x=${x}, y=${y}|"></p> <p>算术运算符:+、-、*、/(div)、%(mod)</p> <div> <ul> <li> <p><span>(y + x % 3) * (y - x / 2) :</span><span th:text="(${y} + ${x} % 3) * (${y} - ${x} / 2)"></span></p> </li> <li> <!-- 运算符也可以在OGNL变量表达式本身中应⽤(这种情况下由OGNL解析执⾏,⽽不是Thymeleaf标准表达式引擎来解析执⾏) --> <p><span>(x * 5 + 8 div y) mod (x - y) :</span><span th:text="${(x * 5 + 8 div y) mod (x - y)}"></span></p> </li> </ul> </div> <p>比较和等值运算符:>(gt)、<(lt)、>=(ge)、<=(le)、==(eq)、!=(ne)</p> <div> <ul> <li> <p><span>x > 5:</span><span th:text="${x} > 5"></span></p> </li> <li> <p><span>y le 2:</span><span th:text="${y le 2}"></span></p> </li> <li> <p><span>(x * y) < 50:</span><span th:text="${(x * y) < 50}"></span></p> </li> <li> <p><span>y ge x:</span><span th:text="${y} ge ${x}"></span></p> </li> <li> <p><span>x == y:</span><span th:text="${x == y}"></span></p> </li> <li> <p><span>x ne y:</span><span th:text="${x} ne ${y}"></span></p> </li> </ul> </div> <p>布尔运算符:and、or、!(not)</p> <div> <ul> <li> <p><span>y lt x and -x gt -y:</span><span th:text="${y} lt ${x} and ${-x} gt ${-y}"></span></p> </li> <li> <p><span>-x <= -y or y >= x:</span><span th:text="${-x <= -y or y >= x}"></span></p> </li> <li> <p><span>!(x != y):</span><span th:text="${!(x != y)}"></span></p> </li> <li> <p><span>not (x eq y):</span><span th:text="${not (x eq y)}"></span></p> </li> </ul> </div></body></html>ThymeleafController中新增以下方法:
@GetMapping("/operation")public String operator(Model model) { model.addAttribute("x", 10); model.addAttribute("y", 3); return "operation";}效果:
(7)条件表达式
条件表达式:
If-then:(if) ? (then)。if表达式结果为true,则条件表达式结果为then表达式结果,否则为null。
If-then-else:(if) ? (then) : (else)。if表达式结果为true,则条件表达式结果为then表达式结果,否则为else表达式结果。
Default(默认表达式):(value) ?: (defaultvalue)。value不为null,则结果为value,否则结果为defaultvalue。
模板conditional-expr.html如下:
<!DOCTYPE html><html lang="en" xmlns:th="http://www.thymeleaf.org"><head> <meta charset="UTF-8"> <title>条件表达式、默认表达式、_符号</title></head><body> <p th:text="|grade: ${grade}, age: ${age}|"></p> <div> <ul> <li> <!-- (if) ? (then) : (else) --> <p><span>成绩是否及格:</span><span th:text="${grade >= 60} ? '及格' : '不及格'"></span></p> </li> <li> <!-- (if) ? (then),else表达式可以省略,在这种情况下,如果条件为false,则返回null值 --> <p><span>成绩是否是正常数据:</span><span th:text="${grade >= 0 and grade <= 100} ? '正常数据'"></span></p> </li> <li> <!-- 条件表达式可以使⽤括号嵌套 --> <p><span>成绩对应的级别:</span><span th:text="${grade >= 0 and grade <= 100} ? (${grade >= 60} ? (${grade} >= 70 ? (${grade >= 90} ? '优' : '良') : '差') : '不及格') : '无效数据'"></span></p> </li> <li> <!-- 默认表达式 第一个表达式结果不为null,则结果使用第一个表达式的值,结果为null,则使用第二个表达式 --> <p><span>年龄:</span><span th:text="${age} ?: '没有年龄数据'"></span></p> </li> <li> <p><span>默认表达式嵌套示例:</span><span th:text="${age} ?: (${grade} ?: '年龄和成绩数据都不存在')"></span></p> </li> <li> <!-- _符号指定表达式不处理任何结果,这允许开发⼈员使⽤原型⽂本作为默认值 --> <p><span>年龄:</span><span th:text="${age} ?: _">没有年龄数据</span></p> </li> </ul> </div></body></html>ThymeleafController中新增以下方法:
@GetMapping("/conditional/expr")public String conditionExpr(Model model) { model.addAttribute("grade", 85); model.addAttribute("age", null); return "conditional-expr";}效果:

grade设置为-1,age设置为20。效果如下:

设置属性
使用th:attr属性可以设置标签的任何属性值,th:attr只需要通过一个表达式将值赋给对应的属性,并且还可以通过,分隔的形式设置多个属性值。不过使用th:attr设置属性不太优雅,所以用的不多,一般使用其他th:*属性的形式设置指定属性,例如要设置value属性,可以使用th:value,要设置action属性,可以使用th:action,要设置href属性,可以使用th:href,具体都有哪些属性可以这样设置可以参考官方文档。
th:attrprepend和th:attrappend可以给属性设置前缀和后缀。Thymeleaf标准方言中还有两个特定的附加属性th:classappend和th:styleappend,用于将CSS的class或style样式追加到元素中,而不覆盖现有属性。
HTML中有布尔属性这个概念,布尔属性没有值,并且一旦这个布尔属性存在则意味着属性值为true。但是在XHTML中,这些属性只取它本身作为属性值。例如checked属性。Thymeleaf标准方言允许通过计算条件表达式的结果来设置这些属性的值,如果条件表达式结果为true,则该属性将被设置为其固定值,如果评估为false,则不会设置该属性。
Thymeleaf支持使用HTML5自定义属性语法data-{prefix}-{name}来处理模板,这不需要使用任何命名空间。Thymeleaf使这种语法自动适用于所有的方言(不仅仅是标准的方法)。
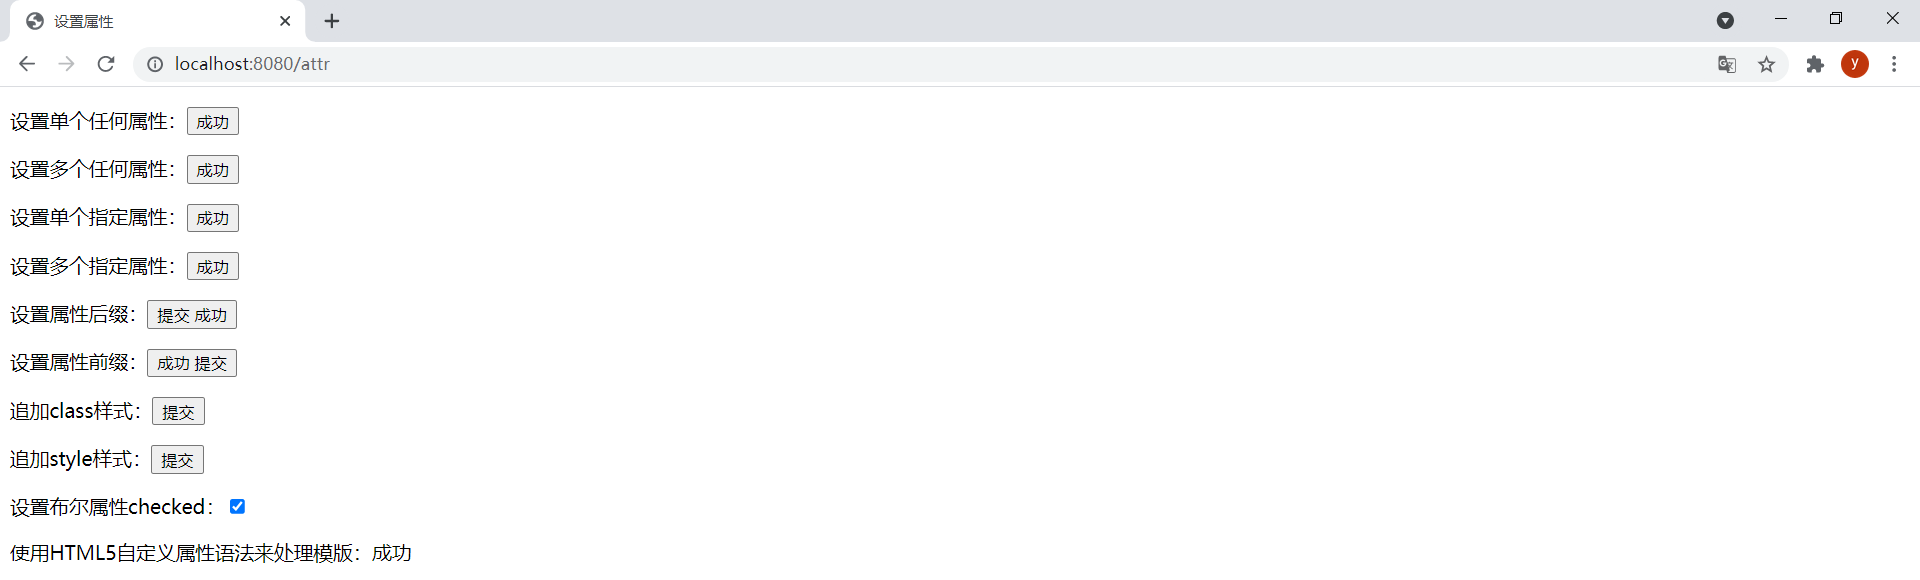
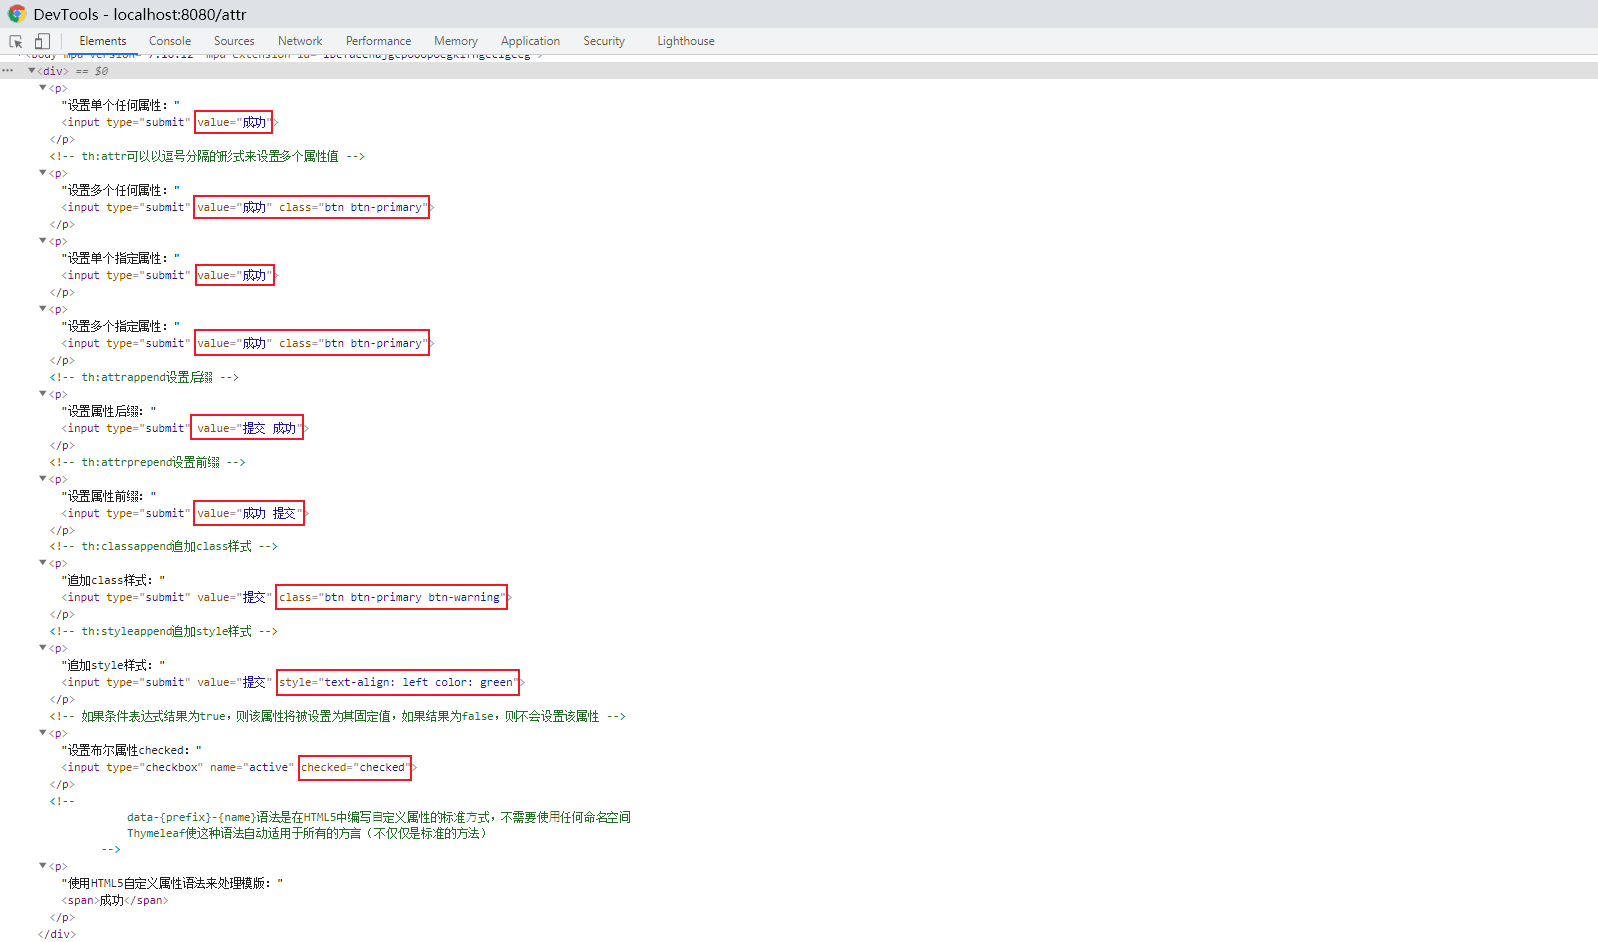
模板attr.html如下:
<!DOCTYPE html><html lang="en" xmlns:th="http://www.thymeleaf.org"><head> <meta charset="UTF-8"> <title>设置属性</title></head><body> <div> <p>设置单个任何属性:<input type="submit" value="提交" th:attr="value=${success}"></p> <!-- th:attr可以以逗号分隔的形式来设置多个属性值 --> <p>设置多个任何属性:<input type="submit" value="提交" th:attr="value=${success},class='btn btn-primary'"></p> <p>设置单个指定属性:<input type="submit" value="提交" th:value="${success}"></p> <p>设置多个指定属性:<input type="submit" value="提交" th:value="${success}" th:class="'btn btn-primary'"></p> <!-- th:attrappend设置后缀 --> <p>设置属性后缀:<input type="submit" value="提交" th:attrappend="value=${' ' + success}"></p> <!-- th:attrprepend设置前缀 --> <p>设置属性前缀:<input type="submit" value="提交" th:attrprepend="value=${success + ' '}"></p> <!-- th:classappend追加class样式 --> <p>追加class样式:<input type="submit" value="提交" class='btn btn-primary' th:classappend="'btn-warning'"></p> <!-- th:styleappend追加style样式 --> <p>追加style样式:<input type="submit" value="提交" th:styleappend="'color: green'"></p> <!-- 如果条件表达式结果为true,则该属性将被设置为其固定值,如果结果为false,则不会设置该属性 --> <p>设置布尔属性checked:<input type="checkbox" name="active" th:checked="${active}"></p> <!-- data-{prefix}-{name}语法是在HTML5中编写⾃定义属性的标准⽅式,不需要使⽤任何命名空间 Thymeleaf使这种语法自动适用于所有的方言(不仅仅是标准的方法) --> <p>使用HTML5自定义属性语法来处理模版:<span data-th-text="${success}"></span></p> </div></body></html>ThymeleafController中新增以下方法:
@GetMapping("/attr")public String attr(Model model) { model.addAttribute("success", "成功"); model.addAttribute("active", true); return "attr";}效果:
f12查看源码可见属性设置成功:
active设置为false。checkbox没有选中,查看源码也没有设置checked属性:

条件判断
th:if属性可以通过判断一个条件是否满足,来决定是否将模板片段显示在结果中,只有满足条件才将模板片段显示在结果中。而th:unless属性则正好与th:if属性相反。通过th:switch和th:case可以在模板中使用一种与Java中的Swicth语句等效的结构有条件地显示模板内容。
模板conditional.html如下:
<!DOCTYPE html><html lang="en" xmlns:th="http://www.thymeleaf.org"><head> <meta charset="UTF-8"> <title>条件判断</title></head><body> <p th:text="|age: ${age}, userLevel: ${userLevel}, rank: ${rank}|"></p> <div th:if="${age} >= 18 and ${userLevel} eq 6"> <span>年龄大于18并且用户等级等于6,则显示此元素</span> </div> <div th:unless="!(${age} < 18 or ${userLevel} ne 6)"> <span>与if条件判断相反,年龄小于18或用户等级不等于6,则显示此元素</span> </div> <div th:if="'null'"> <span>表达式的值不为null,th:if判定此表达式的值为true</span> </div> <div th:if="null"> <span>表达式的值为null,th:if判定此表达式的值为false</span> </div> <div th:if="${age}"> <span>值是数字并且不为0,判定此表达式的值为true</span> </div> <div th:if="0"> <span>值是数字但为0,判定此表达式的值为false</span> </div> <div th:if="A"> <span>值是一个字符并且不为0,判定此表达式的值为true</span> </div> <div th:if="'string'"> <span>值是一个字符串,不是false,off或no,判定此表达式的值为true</span> </div> <div th:if="'false'"> <span>值是字符串false,判定此表达式的值为false</span> </div> <div th:if="'off'"> <span>值是字符串off,判定此表达式的值为false</span> </div> <div th:if="'no'"> <span>值是字符串no,判定此表达式的值为false</span> </div> <hr/> <div th:switch="${rank}"> <span th:case="1">青铜</span> <span th:case="2">白银</span> <span th:case="3">黄金</span> <span th:case="4">铂金</span> <span th:case="5">钻石</span> <span th:case="6">王者</span> <span th:case="*">无段位</span> </div></body></html>注意:
如果表达式的值不为null。(如果表达式的值为null,
th:if属性不仅仅以布尔值作为判断条件。它将按照以下规则判定指定的表达式值为true:th:if判定此表达式的值为false。)
如果值为布尔值,则为true。如果值是数字且不为0。
如果值是一个字符且不为0。如果值是一个字符串,不是"false",“off"或"no”。
如果值不是布尔值,数字,字符或字符串。同一个Switch语句中只要第一个
th:case的值为true,则其他的th:case属性将被视为false。Switch语句的default选项指定为th:case=“*”。
ThymeleafController中新增以下方法:
@GetMapping("/conditional")public String condition(Model model) { Map<String, Object> map = new HashMap<>(); map.put("age", 10); map.put("userLevel", 6); map.put("rank", 5); model.addAllAttributes(map); return "conditional";}效果:

age设置为20,userLevel设置为6,rank设置为0。效果如下:

循环迭代
使用th:each属性可以迭代以下对象:
任何实现java.util.Iterable接口的对象。
任何实现java.util.Enumeration接口的对象。
任何实现java.util.Iterator接口的对象。其值将被迭代器返回,不需要在内存中缓存所有值。
任何实现java.util.Map接口的对象。迭代map时,迭代变量将是java.util.Map.Entry类型。
任何数组。
任何其将被视为包含对象本身的单值列表。
(1)迭代List
模板each-list.html如下:
<!DOCTYPE html><html lang="en" xmlns:th="http://www.thymeleaf.org"><head> <meta charset="UTF-8"> <title>循环迭代List</title></head><body> <table> <thead> <tr> <th>id</th> <th>username</th> <th>password</th> <th>index</th> <th>count</th> <th>size</th> <th>current</th> <th>even</th> <th>odd</th> <th>first</th> <th>last</th> </tr> </thead> <tbody> <!-- ${users}为迭代表达式或被迭代变量,userStat为状态变量,user为迭代变量 --> <tr th:each="user,userStat : ${users}"> <td th:text="${user.id}"></td> <td th:text="${user.username}"></td> <td th:text="${user.password}"></td> <!-- 当前迭代索引,从0开始 --> <td th:text="${userStat.index}"></td> <!-- 当前迭代索引,从1开始 --> <td th:text="${userStat.count}"></td> <!-- 被迭代变量中元素总数 --> <td th:text="${userStat.size}"></td> <!-- 每次迭代的迭代变量 --> <td th:text="${userStat.current}"></td> <!-- 布尔值,当前迭代是否是奇数,从0算起 --> <td th:text="${userStat.even}"></td> <!-- 布尔值,当前迭代是否是偶数,从0算起 --> <td th:text="${userStat.odd}"></td> <!-- 布尔值,当前迭代是否是第一个 --> <td th:text="${userStat.first}"></td> <!-- 布尔值,当前迭代是否是最后一个 --> <td th:text="${userStat.last}"></td> </tr> </tbody> </table></body></html>状态变量是在使用
th:each时Thymeleaf提供的一种用于跟踪迭代状态的机制。状态变量在th:each属性中通过在迭代变量之后直接写其名称来定义,用,分隔。与迭代变量一样,状态变量的作用范围也是th:each属性所在标签定义的代码片段中。如果没有显式地设置状态变量,Thymeleaf总是会创建一个名为迭代变量名加上Stat后缀的状态变量。
ThymeleafController中新增以下方法:
@GetMapping("/each/list")public String eachList(ModelMap model) { List<User> users = new ArrayList<>(); users.add(new User(1L, "刘备", "123132")); users.add(new User(2L, "关羽", "321231")); users.add(new User(3L, "张飞", "213312")); model.addAttribute("users", users); return "each-list";}效果:

(2)迭代Map
模板each-map.html如下:
<!DOCTYPE html><html lang="en" xmlns:th="http://www.thymeleaf.org"><head> <meta charset="UTF-8"> <title>循环迭代Map</title></head><body> <table> <thead> <tr> <th>id</th> <th>username</th> <th>password</th> <th>key</th> <th>index</th> <th>count</th> <th>size</th> <th>current</th> <th>even</th> <th>odd</th> <th>first</th> <th>last</th> </tr> </thead> <tbody> <tr th:each="map,mapStat : ${userMap}"> <td th:text="${mapStat.current.value.id}"></td> <td th:text="${mapStat.current.value.username}"></td> <td th:text="${mapStat.current.value.password}"></td> <td th:text="${mapStat.current.key}"></td> <td th:text="${mapStat.index}"></td> <td th:text="${mapStat.count}"></td> <td th:text="${mapStat.size}"></td> <td th:text="${mapStat.current}"></td> <td th:text="${mapStat.even}"></td> <td th:text="${mapStat.odd}"></td> <td th:text="${mapStat.first}"></td> <td th:text="${mapStat.last}"></td> </tr> </tbody> </table> <hr/> <table> <thead> <tr> <th>id</th> <th>username</th> <th>password</th> <th>key</th> <th>index</th> <th>count</th> <th>size</th> <th>current</th> <th>even</th> <th>odd</th> <th>first</th> <th>last</th> </tr> </thead> <tbody> <tr th:each="map,mapStat : ${userMap}"> <td th:text="${map.value.id}"></td> <td th:text="${map.value.username}"></td> <td th:text="${map.value.password}"></td> <td th:text="${map.key}"></td> <td th:text="${mapStat.index}"></td> <td th:text="${mapStat.count}"></td> <td th:text="${mapStat.size}"></td> <td th:text="${mapStat.current}"></td> <td th:text="${mapStat.even}"></td> <td th:text="${mapStat.odd}"></td> <td th:text="${mapStat.first}"></td> <td th:text="${mapStat.last}"></td> </tr> </tbody> </table></body></html>ThymeleafController中新增以下方法:
@GetMapping("/each/map")public String eachMap(Model model) { Map<String, Object> map = new HashMap<>(16); map.put("user1", new User(1L, "刘备", "123132")); map.put("user2", new User(2L, "关羽", "321231")); map.put("user3", new User(3L, "张飞", "213312")); model.addAttribute("userMap", map); return "each-map";}效果:

(3)迭代Array
模板each-array.html如下:
<!DOCTYPE html><html lang="en" xmlns:th="http://www.thymeleaf.org"><head> <meta charset="UTF-8"> <title>循环迭代Array</title></head><body> <table> <thead> <tr> <th>id</th> <th>username</th> <th>password</th> <th>index</th> <th>count</th> <th>size</th> <th>current</th> <th>even</th> <th>odd</th> <th>first</th> <th>last</th> </tr> </thead> <tbody> <!-- ${users}为迭代表达式或被迭代变量,userStat为状态变量,user为迭代变量 --> <tr th:each="user,userStat : ${users}"> <td th:text="${user.id}"></td> <td th:text="${user.username}"></td> <td th:text="${user.password}"></td> <!-- 当前迭代索引,从0开始 --> <td th:text="${userStat.index}"></td> <!-- 当前迭代索引,从1开始 --> <td th:text="${userStat.count}"></td> <!-- 被迭代变量中元素总数 --> <td th:text="${userStat.size}"></td> <!-- 每次迭代的迭代变量 --> <td th:text="${userStat.current}"></td> <!-- 布尔值,当前迭代是否是奇数,从0算起 --> <td th:text="${userStat.even}"></td> <!-- 布尔值,当前迭代是否是偶数,从0算起 --> <td th:text="${userStat.odd}"></td> <!-- 布尔值,当前迭代是否是第一个 --> <td th:text="${userStat.first}"></td> <!-- 布尔值,当前迭代是否是最后一个 --> <td th:text="${userStat.last}"></td> </tr> </tbody> </table></body></html>ThymeleafController中新增以下方法:
@GetMapping("/each/array")public String eachArray(Model model) { User[] users = {new User(1L, "刘备", "123132"), new User(2L, "关羽", "321231"), new User(3L, "张飞", "213312")}; model.addAttribute("users", users); return "each-array";}效果:

模板布局
(1)引用模板片段
th:fragment属性可以用来定义模板片段,th:insert、th:replace和th:include(Thymeleaf3.0不再推荐使用)属性可以引用模板片段。
首先创建一个名为footer.html的模板文件用来包含模板片段,然后定义一个名为copy1的片段:
<!DOCTYPE html><html lang="en" xmlns:th="http://www.thymeleaf.org"><head> <meta charset="UTF-8"> <title>footer</title></head><body> <div th:fragment="copy1"> © 2021 </div></body></html>然后在名为layout.html的模板中引用该片段:
<!DOCTYPE html><html lang="en" xmlns:th="http://www.thymeleaf.org"><head> <meta charset="UTF-8"> <title>引用模板片段</title></head><body> <div th:insert="~{footer :: copy1}"></div> <div th:replace="~{footer :: copy1}"></div> <div th:include="~{footer :: copy1}"></div></body></html>ThymeleafController中新增以下方法:
@GetMapping("/layout")public String layout(Model model) { return "layout";}效果:

引用模板片段语法中的~{}是可选的,以下代码与之前的等价:
<div th:insert="footer :: copy1"></div><div th:replace="footer :: copy1"></div><div th:include="footer :: copy1"></div>效果:

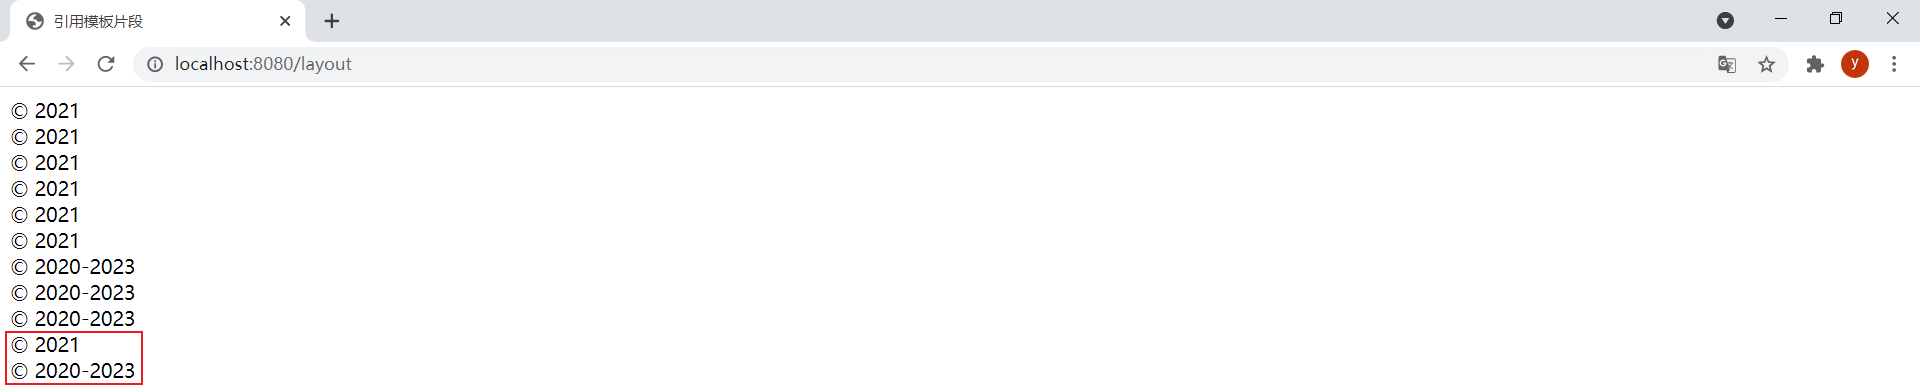
th:insert、th:replace和th:include都能引用模板片段,直接在页面中还看不出三者的区别。为了更明显地看出区别,在footer.html模板中新增以下片段:
<footer th:fragment="copy2" > © 2020-2023</footer>然后在layout.html模板中分别使用th:insert、th:replace和th:include进行引用:
<div th:insert="footer :: copy2">th:insert将指定片段插⼊到指定宿主标签的标签体中</div><div th:replace="footer :: copy2">th:replace实际上⽤指定的⽚段替换其宿主标签</div><div th:include="footer :: copy2">th:include只插⼊此⽚段的内容到指定宿主标签的标签体中</div>效果:

按F12查看源码可以看出区别:
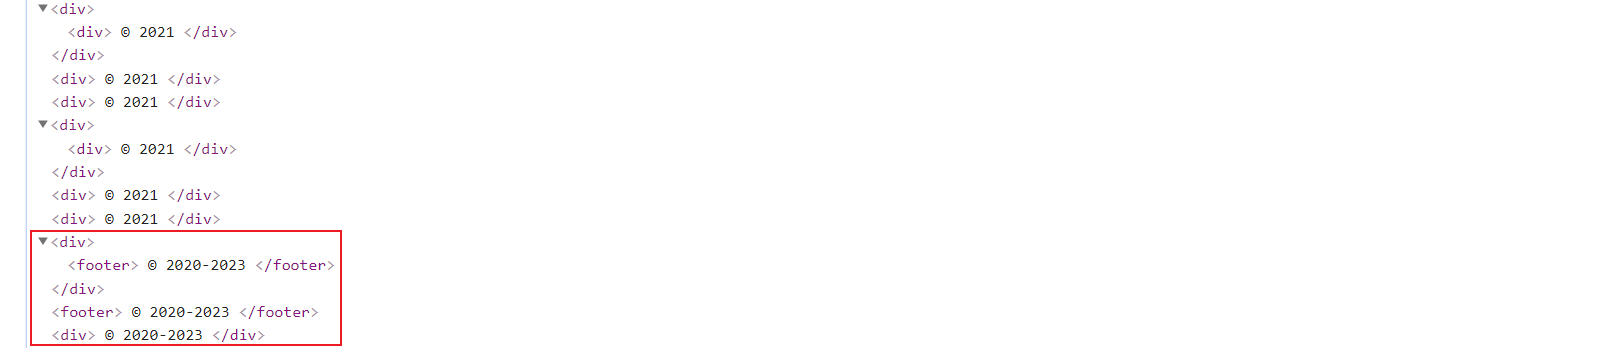
所以三者区别为:
th:insert将指定片段插入到指定宿主标签的标签体中。
th:replace实际上用指定的片段替换其宿主标签。
th:include只插入此片段的内容到指定宿主标签的标签体中。
引用模板片段的规范语法有以下三种格式:
~{templatename::selector}:包含在名为templatename的模板上通过指定的selector匹配的片段。selector可以只是一个片段名称。
~{templatename}:包含名为templatename的整个模板。
~{::selector}或~{this::selector}:包含在同一模板中与指定selector匹配的片段。如果在表达式出现的模板上没有找到,模板调用(插入)的堆栈会向最初处理的模板(root)遍历,直到selector在某个层次上匹配。
templatename和selector都可以是表达式。模板片段中可以包含任何th:*属性,一旦在目标模板中引用了片段,这些属性将被计算并且它们能够引用目标模板中定义的任何上下文变量。
通过th:replace="~{footer}"可以引用整个footer.html:
<div th:replace="~{footer}">引用名为footer的整个模板</div>效果:
在layout.html模板中新增以下几个片段:
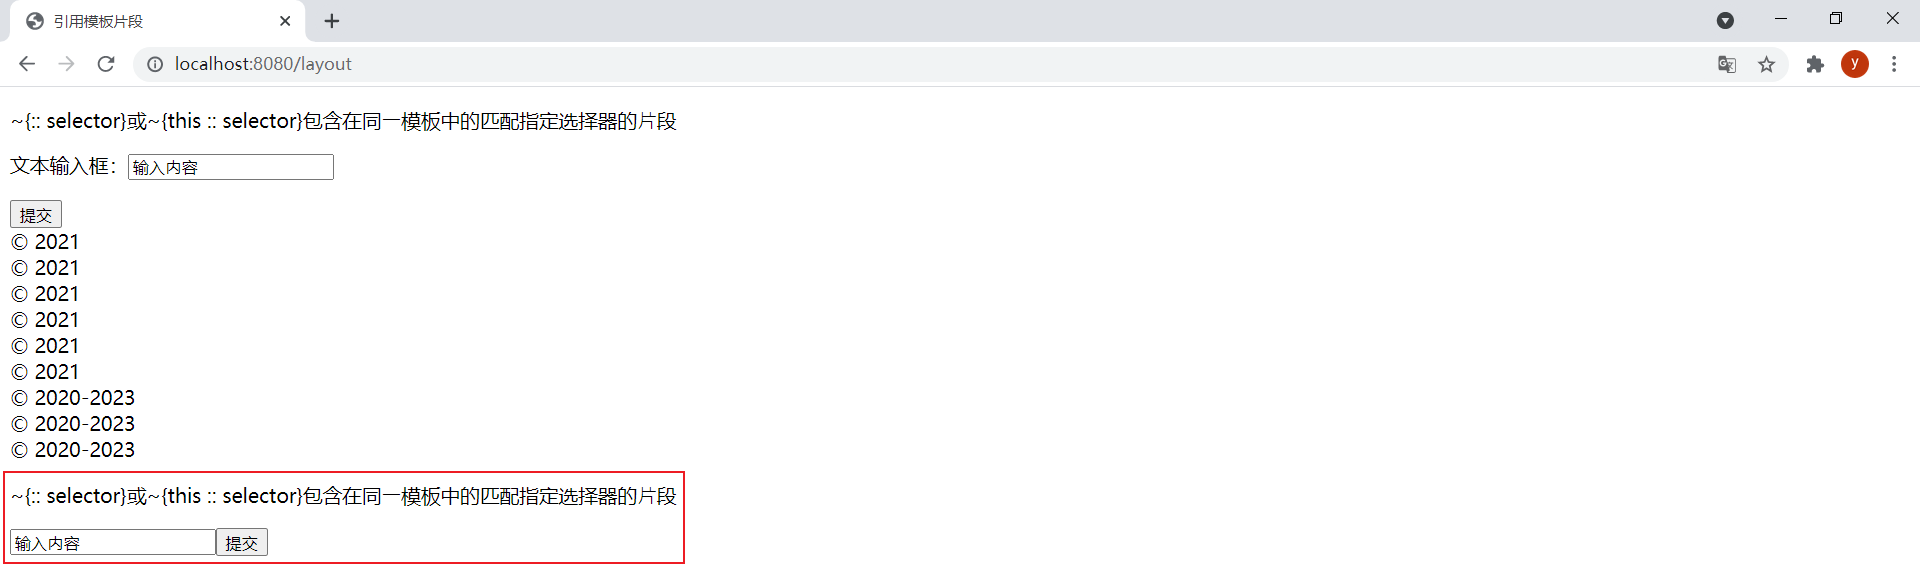
<div th:fragment="frag"> <p>~{:: selector}或~{this :: selector}包含在同⼀模板中的匹配指定选择器的⽚段</p></div><div> <p>文本输入框:<input type="text" value="输入内容"></p></div><input type="submit" value="提交">在layout.html模板中引用frag和input片段:
<div th:insert="~{:: frag}">引用当前模板中的片段</div><div th:insert="~{this :: input}">引用当前模板中的片段</div>效果:
selector写成一个条件表达式,可以通过条件来决定引用的片段:
<div th:insert="~{footer :: (${flag} ? copy1 : copy2)}">模板名和选择器都可以是表达式</div>将变量flag设置到Model中:
model.addAttribute("flag", true);效果:

flag设置为fasle时的效果:

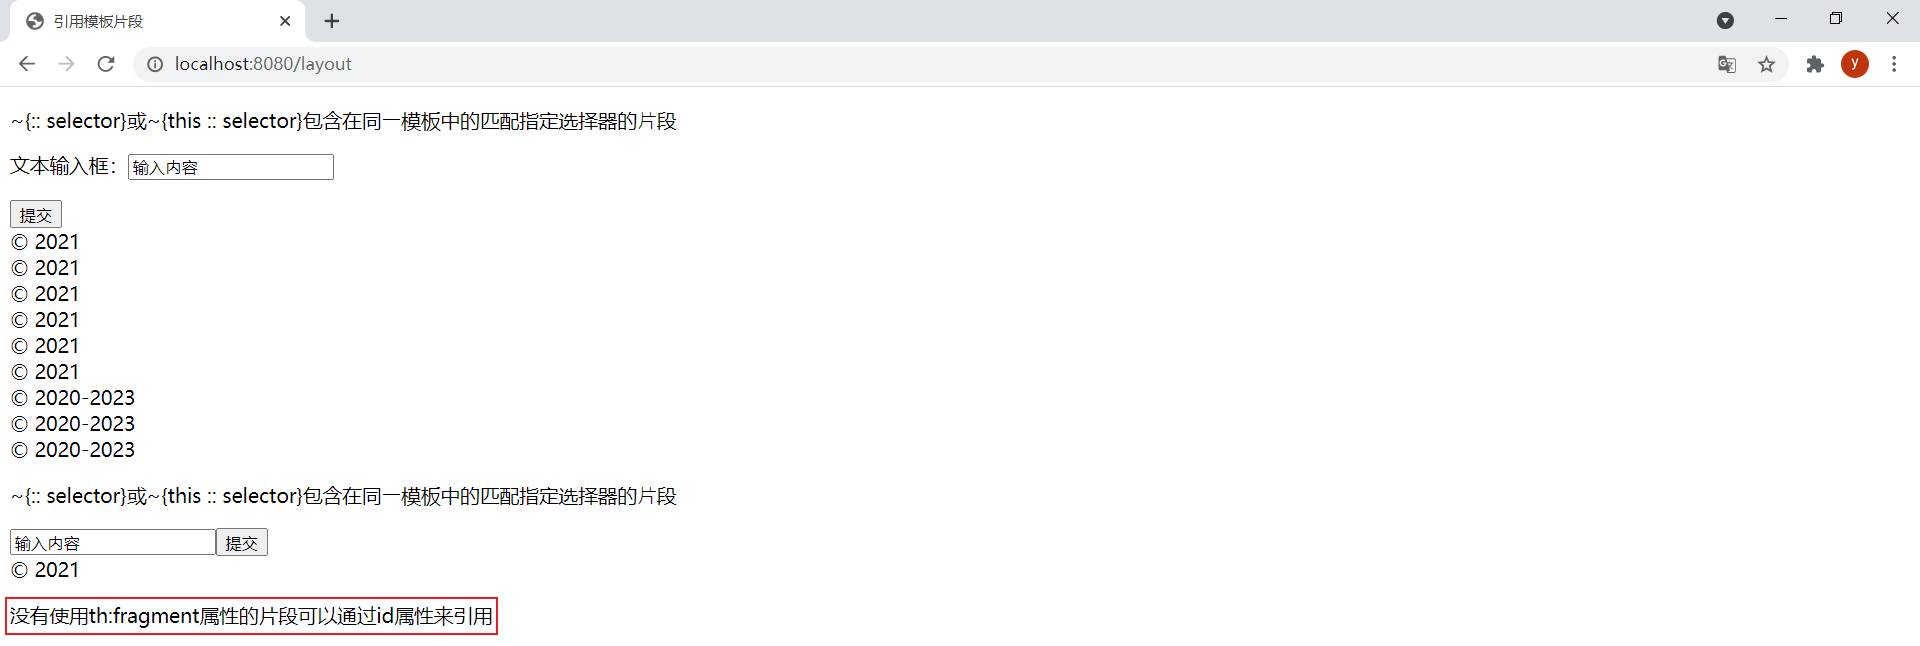
由于标签选择器的强大功能,没有使用th:fragment属性的片段可以通过id属性来引用。在footer.html模板中新增以下片段:
<div id="copy-section"> <p>没有使用th:fragment属性的片段可以通过id属性来引用</p></div>在layout.html模板中引用该片段:
<div th:insert="~{footer :: #copy-section}">可以通过id属性来引⽤没有th:fragment属性的⽚段</div>效果:
(2)参数化的模板片段
th:fragment定义的片段可以指定一组参数。在footer.html模板中新增以下片段:
<div th:fragment="frag (var1,var2)"> <p th:text="${var1} + ' - ' + ${var2}">th:fragment定义的⽚段可以指定⼀组参数</p></div>在layout.html模板中分别用以下两种语法引用该片段:
<!-- 引用定义了参数的模板片段的两种语法 --><div th:insert="footer :: frag (${var1},${var2})">引用定义了参数的模板片段语法1</div><div th:insert="footer :: frag (var1=${var1},var2=${var2})">引用定义了参数的模板片段语法2,可以改变参数顺序</div>将变量var1和var2设置到Model中:
model.addAttribute("var1", "参数1");model.addAttribute("var2", "参数2");效果:

即使片段没有定义参数,也可以调用片段中的局部变量。在footer.html模板中新增以下片段:
<div th:fragment="frag2"> <p th:text="${var1} + ' * ' + ${var2}">没有定义参数的模板片段</p></div>在layout.html模板中分别通过以下语法调用片段中的局部变量:
<!-- 没有定义参数的模板片段中的局部变量,可以使用以下语法调用,以下两种写法等价 --><div th:insert="footer :: frag2 (var1=${var1},var2=${var2})">没有定义参数的模板片段中的局部变量的调用语法1</div><div th:insert="footer :: frag2" th:with="var1=${var1},var2=${var2}">没有定义参数的模板片段中的局部变量的调用语法2</div>引用定义参数的模板片段的两种语法中,第一种语法不能调用没有定义参数的片段中的局部变量,只有第二种语法能调用。
注意:片段的局部变量规范 - 无论是否具有参数签名 - 都不会导致上下文在执行前被清空。片段仍然能访问调用模板中正在使用的每个上下文变量。
效果:

使用th:assert可以进行模板内部断言,它可以指定逗号分隔的表达式列表,如果每个表达式的结果都为true,则正确执行,否则引发异常。在footer.html模板中新增以下片段:
<div th:fragment="assert-test (user)" th:assert="${user.id != null},${!#strings.isEmpty(user.username)},${!#strings.isEmpty(user.password)}"> <p th:text="${#strings.toString(user)}">⽤th:assert进⾏模版内部断⾔ </p></div>在layout.html模板中引用该片段:
<!-- 引用带有断言的模板片段 --><div th:insert="footer :: assert-test (${user})"></div>将变量user设置到Model中:
model.addAttribute("user", new User(1L, "赵云", "qwe123"));效果:
只将id设置为null,访问模板出现以下异常:

只将username设置为空,访问模板出现以下异常:

只将password设置为空,访问模板出现以下异常:

(3)灵活布局
通过片段表达式不仅可以指定文本类型、数字类型、对象类型的参数,还可以指定标记片段作为参数。这种方式可以使模板布局变得非常灵活。
下面进行一个页面布局的简单模拟测试,首先在templates下新建一个layout目录,用于存放一些组件模板。
layout/footer.html:
<!DOCTYPE html><html lang="en" xmlns:th="http://www.thymeleaf.org"><head> <meta charset="UTF-8"> <title>footer</title></head><body> <footer th:fragment="footer"> <h2>模板布局页面页脚</h2> </footer></body></html>layout/header.html:
<!DOCTYPE html><html lang="en" xmlns:th="http://www.thymeleaf.org"><head> <meta charset="UTF-8"> <title>header</title></head><body> <header th:fragment="header"> <h2>模板布局页面头部</h2> </header></body></html>layout/left.html:
<!DOCTYPE html><html lang="en" xmlns:th="http://www.thymeleaf.org"><head> <meta charset="UTF-8"> <title>left</title></head><body> <div th:fragment="left"> <h2>模板布局页面左侧菜单</h2> </div></body></html>在templates下新建一个基础模板base.html:
<!DOCTYPE html><html lang="en" xmlns:th="http://www.thymeleaf.org"><head th:fragment="common_header (title)"> <meta charset="UTF-8"> <title th:replace="${title}">common title</title></head><body> <div th:fragment="common_div (header,left,footer)"> <div th:replace="${header}"><h2>common header</h2></div> <div th:replace="${left}"><h2>common left</h2></div> <p>common content</p> <div th:replace="${footer}"><h2>common footer</h2></div> </div></body></html>然后在名为layout-home.html的模板中引用base.html中的片段:
<!DOCTYPE html><html lang="en" xmlns:th="http://www.thymeleaf.org"><head th:replace="base :: common_header(~{:: title})"> <title>模板布局主页</title></head><body> <div th:replace="base :: common_div (~{layout/header :: header},~{layout/left :: left},~{layout/footer :: footer})"></div></body></html>ThymeleafController中新增以下方法:
@GetMapping("/layout/home")public String layoutHome(Model model) { return "layout-home";}效果:

使用特殊片段表达式~{}可以指定没有标记。在layout-home.html中通过以下代码引用base.html中的片段:
<div th:replace="base :: common_div (~{layout/header :: header},~{layout/left :: left},~{})"></div>效果:

_符号也可以用作片段参数。在layout-home.html中通过以下代码引用base.html中的片段:
<div th:replace="base :: common_div (~{layout/header :: header},~{layout/left :: left},_)"></div>
_符号导致common_div片段中的th:replace="${footer}"不被执行,从而该div标签使用原型文本。
效果:

~{}和_符号可以通过简单优雅的方式实现执行片段的条件插入。在layout-home.html中通过以下代码引用base.html中的片段:
<div th:replace="base :: common_div (${condition} ? ~{layout/header :: header} : ~{},${condition} ? ~{layout/left :: left} : ~{},${condition} ? ~{layout/footer :: footer} : ~{})"></div>参数中的每一个
condition条件可以根据实际业务需求灵活控制。这里为了测试方便,都使用的相同条件。
将变量condition设置到Model中:
model.addAttribute("condition", false);效果:

在layout-home.html中通过以下代码引用base.html中的片段:
<div th:replace="base :: common_div (${condition} ? ~{layout/header :: header} : _,${condition} ? ~{layout/left :: left} : _,${condition} ? ~{layout/footer :: footer} : _)"></div>效果:

条件也可以不在参数中进行判断,还在common_div片段的th:replace属性中进行判断。在layout-home.html中通过以下代码引用base.html中的片段:
<div th:replace="base :: common_div (~{layout/header :: header},~{layout/left :: left},~{layout/footer :: footer},${condition})"></div>base.html中的common_div片段:
<div th:fragment="common_div (header,left,footer,condition)"> <div th:replace="${condition} ? ${header} : _"><h2>Common header</h2></div> <div th:replace="${condition} ? ${left}: _"><h2>Common left</h2></div> <p>Common content</p> <div th:replace="${condition} ? ${footer}: _"><h2>Common footer</h2></div></div>效果:

局部变量
Thymeleaf的局部变量是指定义在模板片段中的变量,该变量的作用域为所在模板片段。th:each中的迭代变量就是一个局部变量,作用域为th:each所在的标签范围,可用于该标签内优先级低于th:each的任何其他th:*属性,可用于该标签的任何子元素。使用th:with属性可以声明局部变量。
在local.html模板中使⽤th:with属性声明局部变量:
<!DOCTYPE html><html lang="en" xmlns:th="http://www.thymeleaf.org"><head> <meta charset="UTF-8"> <title>局部变量</title></head><body> <!-- 使⽤th:with属性声明局部变量 --> <div th:with="user1=${users[0]}"> <span>user1的姓名:</span><span th:text="${user1.username}"></span> </div></body></html>ThymeleafController中新增以下方法:
@GetMapping("/local")public String local(Model model) { User[] users = {new User(1L, "刘备", "123132"), new User(2L, "关羽", "321231"), new User(3L, "张飞", "213312")}; model.addAttribute("users", users); return "local";}效果:

局部变量只能在声明的标签内使用。在local.html模板中新增以下内容:
<!-- 局部变量不能在声明的标签外使用 --><div> <span>user1的姓名:</span><span th:text="${user1.username}">张三</span></div>访问模板会报错:

可以同时定义多个局部变量。在local.html模板中新增以下内容:
<!-- 使⽤通常的多重赋值语法同时定义多个变量 --><div th:with="user1=${users[0]},user2=${users[1]}"> <span>user1的姓名:</span><span th:text="${user1.username}"></span> <br/> <span>user2的姓名:</span><span th:text="${user2.username}"></span></div>效果:

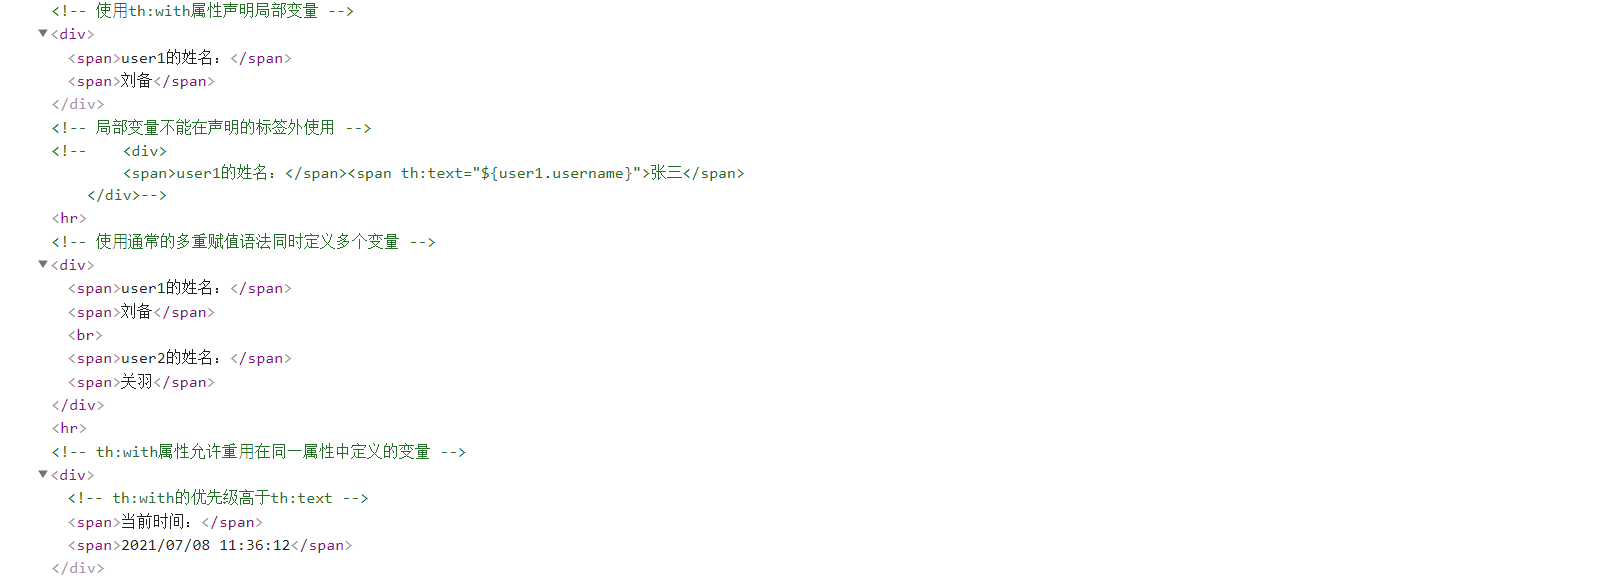
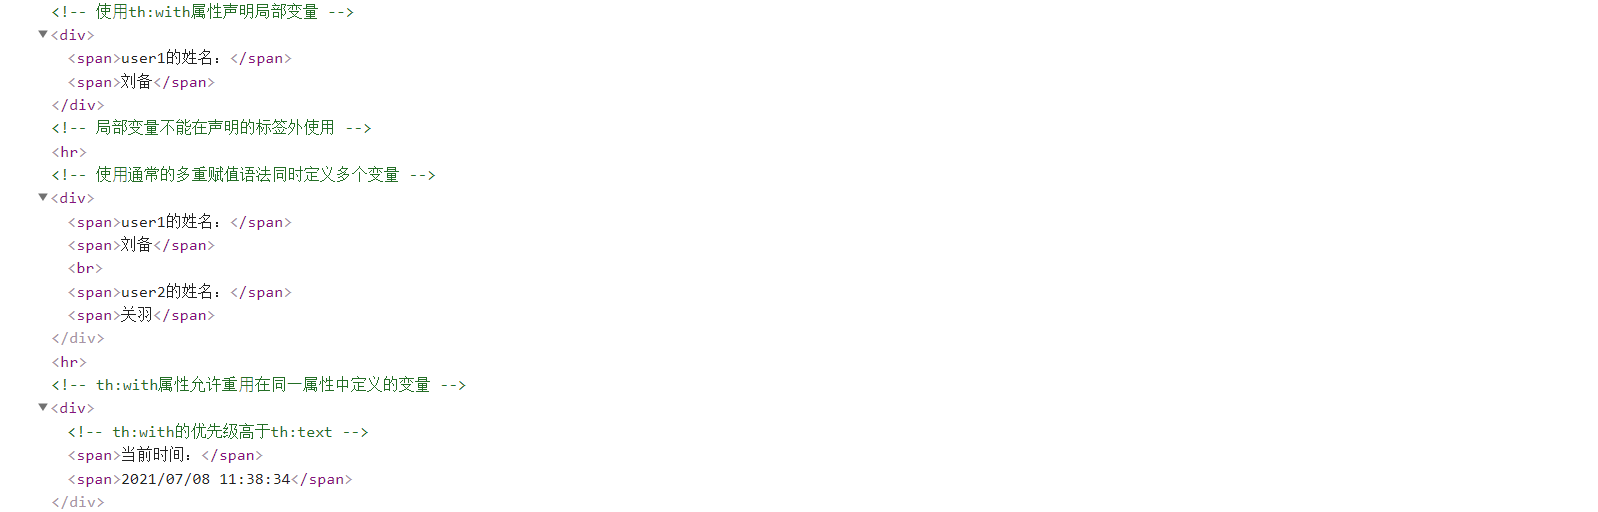
th:with属性允许重⽤在同⼀属性中定义的变量。在local.html模板中新增以下内容:
<!-- th:with属性允许重⽤在同⼀属性中定义的变量 --><div> <!-- th:with的优先级高于th:text --> <span>当前时间:</span><span th:with="now=${#calendars.createNow()}" th:text="${#calendars.format(now, 'yyyy/MM/dd hh:mm:ss')}"></span></div>效果:

属性优先级
多个th:*属性在同一个标签中的执行顺序由优先级决定。所有Thymeleaf属性都定义了一个数字优先级,以确定了它们在标签中执行的顺序,数字越小优先级越高:
| Order | Feature | Attributes |
|---|---|---|
| 1 | Fragment inclusion | th:insert th:replace |
| 2 | Fragment iteration | th:each |
| 3 | Conditional evaluation | th:if th:unless th:switch th:case |
| 4 | Local variable definition | th:object th:with |
| 5 | General attribute modification | th:attr th:attrprepend th:attrappend |
| 6 | Specific attribute modification | th:value th:href th:src ... |
| 7 | Text (tag body modification) | th:text th:utext |
| 8 | Fragment specification | th:fragment |
| 9 | Fragment removal | th:remove |
优先级意味着属性位置发生变化,也会得出相同的结果。
注释和块
(1)标准HTML/XML注释
标准HTML/XML注释<!-- -->可以在Thymeleaf模板中的任何地方使用。这些注释中的任何内容都不会被Thymeleaf处理,并将逐字复制到结果中。
这里直接运行项目访问local.html模板,查看模板源码可见HTML注释没有被处理,保持原样:
(2)ThymeLeaf解析器级注释
解析器级注释块<!---->在Thymeleaf解析时会将<!--/和*/-->之间的所有内容从模板中删除。当此模板静态打开时,这些注释块可用于显示代码。
修改local.html模板的其中一个注释为如下内容:
<!---->查看源码可见注释已从模板中删除:
(3)Thymeleaf专有注释
Thymeleaf允许定义特殊注释块<!---->,在Thymeleaf解析时会将<!---->标记删除,但不删除标记之间的内容。当此模板静态打开时,会显示注释标记。
修改local.html模板的其中一个注释为如下内容:
<!---->查看源码发现只删除了标记部分,中间的内容保留:

(4)th:block标签
th:block标签是Thymeleaf标准方言中唯一的元素处理器。th:block是一个允许模板开发者指定想要的任何属性的属性容器,Thymeleaf会执行这些属性并让这个块消失,但它的内容保留。
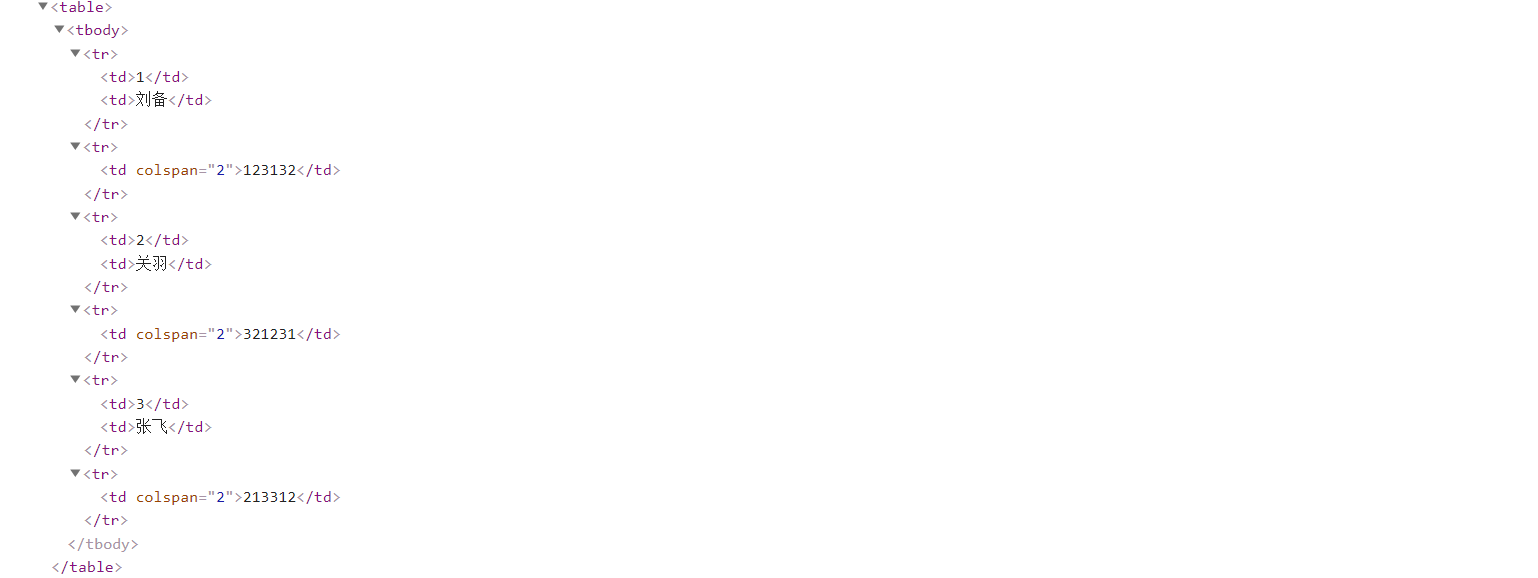
模板block.html如下:
<!DOCTYPE html><html lang="en" xmlns:th="http://www.thymeleaf.org"><head> <meta charset="UTF-8"> <title>th:block</title></head><body> <table> <th:block th:each="user : ${users}"> <tr> <td th:text="${user.id}">1</td> <td th:text="${user.username}">root</td> </tr> <tr> <td colspan="2" th:text="${user.password}">root</td> </tr> </th:block> </table></body></html>使用
th:block可以轻松地迭代同级标签,例如在<table>中为每个迭代元素创建多个<tr>时使用th:block就很简单。
ThymeleafController中新增以下方法:
@GetMapping("/block")public String block(Model model) { List<User> users = new ArrayList<>(); users.add(new User(1L, "刘备", "123132")); users.add(new User(2L, "关羽", "321231")); users.add(new User(3L, "张飞", "213312")); model.addAttribute("users", users); return "block";}效果:

查看源码:
在和原型注释块结合时很有用:
<table> <!----> <tr> <td th:text="${user.id}">1</td> <td th:text="${user.username}">root</td> </tr> <tr> <td colspan="2" th:text="${user.password}">root</td> </tr> <!----></table>效果:

内联 (1)内联表达式
[[]]或[()]中的表达式为内联表达式,可以直接将表达式写入HTML文本。任何在th:text或th:utext属性中使用的表达式都可以出现在[[]]或[()]中。[[]]等价于th:text,会转义html标签;[()]等价于th:utext,不会转义html标签。
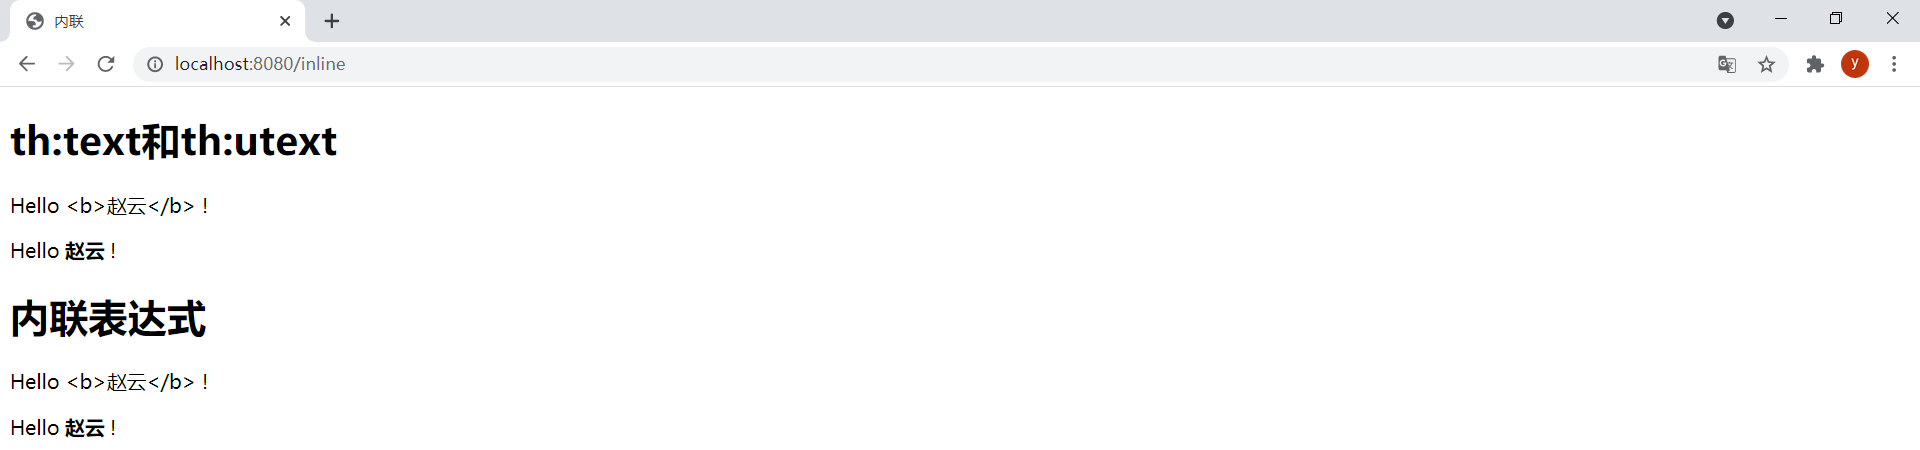
模板inline.html如下:
<!DOCTYPE html><html lang="en" xmlns:th="http://www.thymeleaf.org"><head> <meta charset="UTF-8"> <title>内联</title></head><body> <h2>th:text和th:utext</h2> <p>Hello <span th:text="${user.username}">World</span> !</p> <p>Hello <span th:utext="${user.username}">World</span> !</p> <h2>内联表达式</h2> <!-- 会转义html标签,等价于th:text --> <p>Hello [[${user.username}]] !</p> <!-- 不会转义html标签,等价于th:utext --> <p>Hello [(${user.username})] !</p></body></html>ThymeleafController中新增以下方法:
@GetMapping("/inline")public String inline(Model model) { model.addAttribute("user", new User(1L, "<b>赵云</b>", "this is \"pass\" word")); return "inline";}效果:
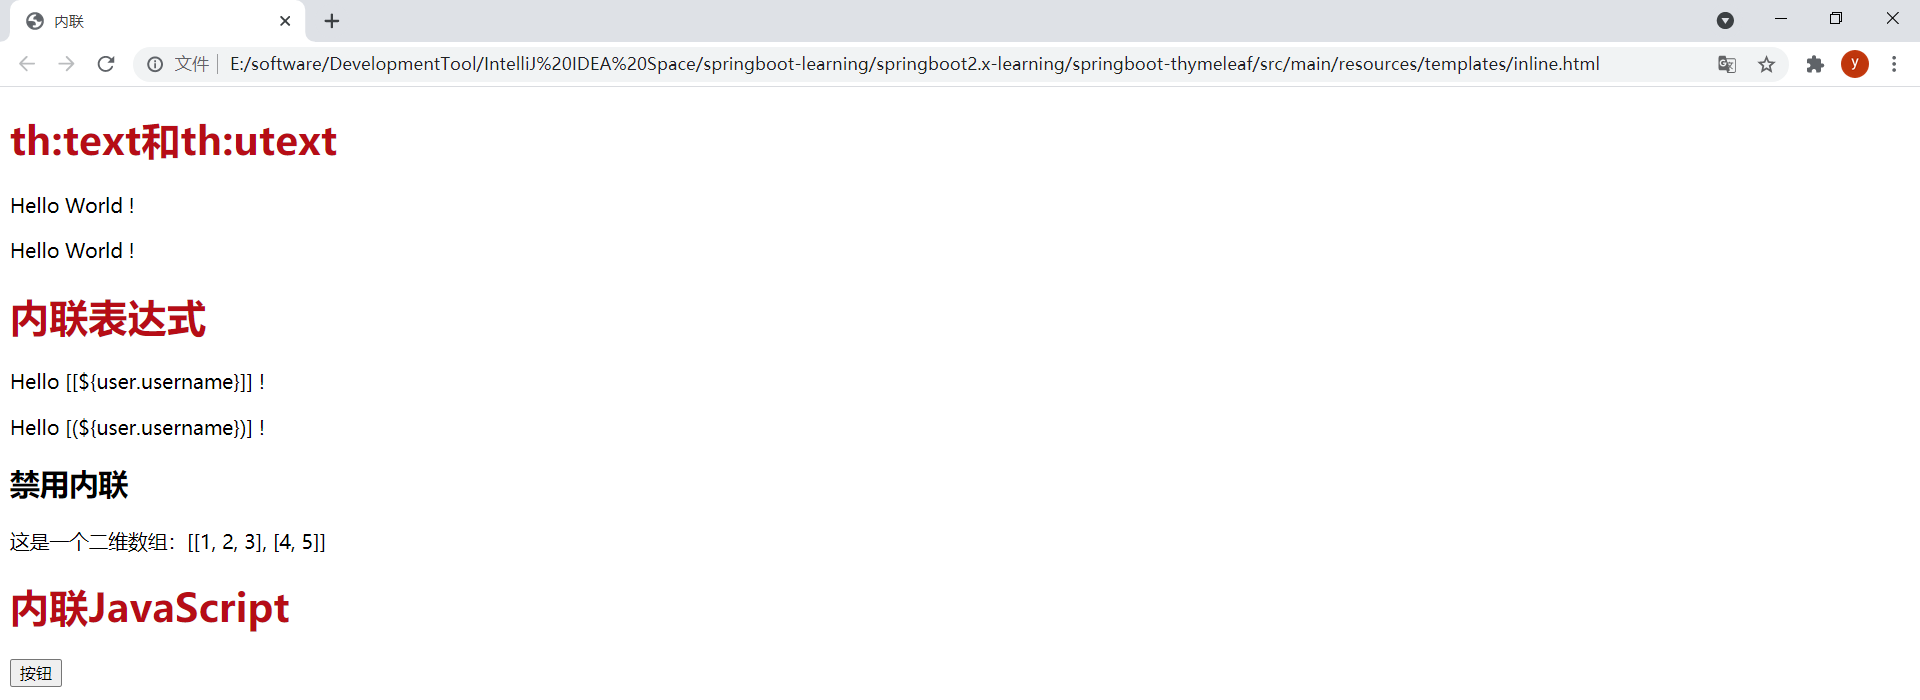
注意,静态打开模板文件时,内联表达式会显示出来,这样就无法将其作为原型设计了。静态打开inline.html模板的效果如下:

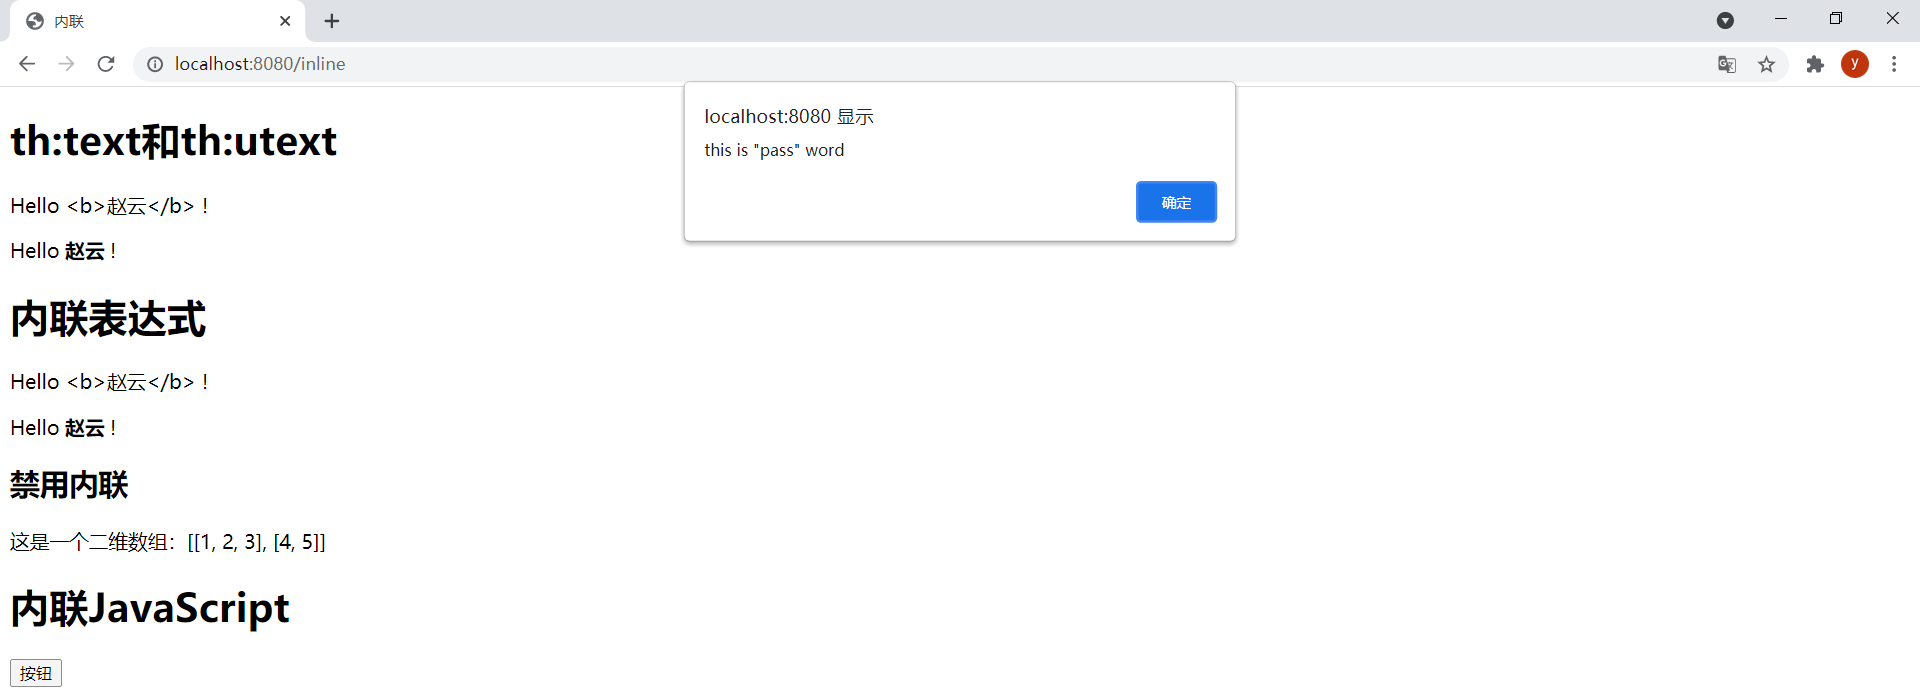
在有些情况下可能需要禁用内联,比如需要输出[[]]序列时。通过th:inline="none"可以禁用内联。在模板inline.html中新增以下内容:
<p>这是一个二维数组:[[1, 2, 3], [4, 5]]</p>访问模板时会报如下错误:

在刚才的代码中增加禁用内联:
<h3>禁用内联</h3><p th:inline="none">这是一个二维数组:[[1, 2, 3], [4, 5]]</p>效果:

(2)内联JavaScript
使用th:inline="javascript"启用内联JavaScript。
在模板inline.html中新增以下内容:
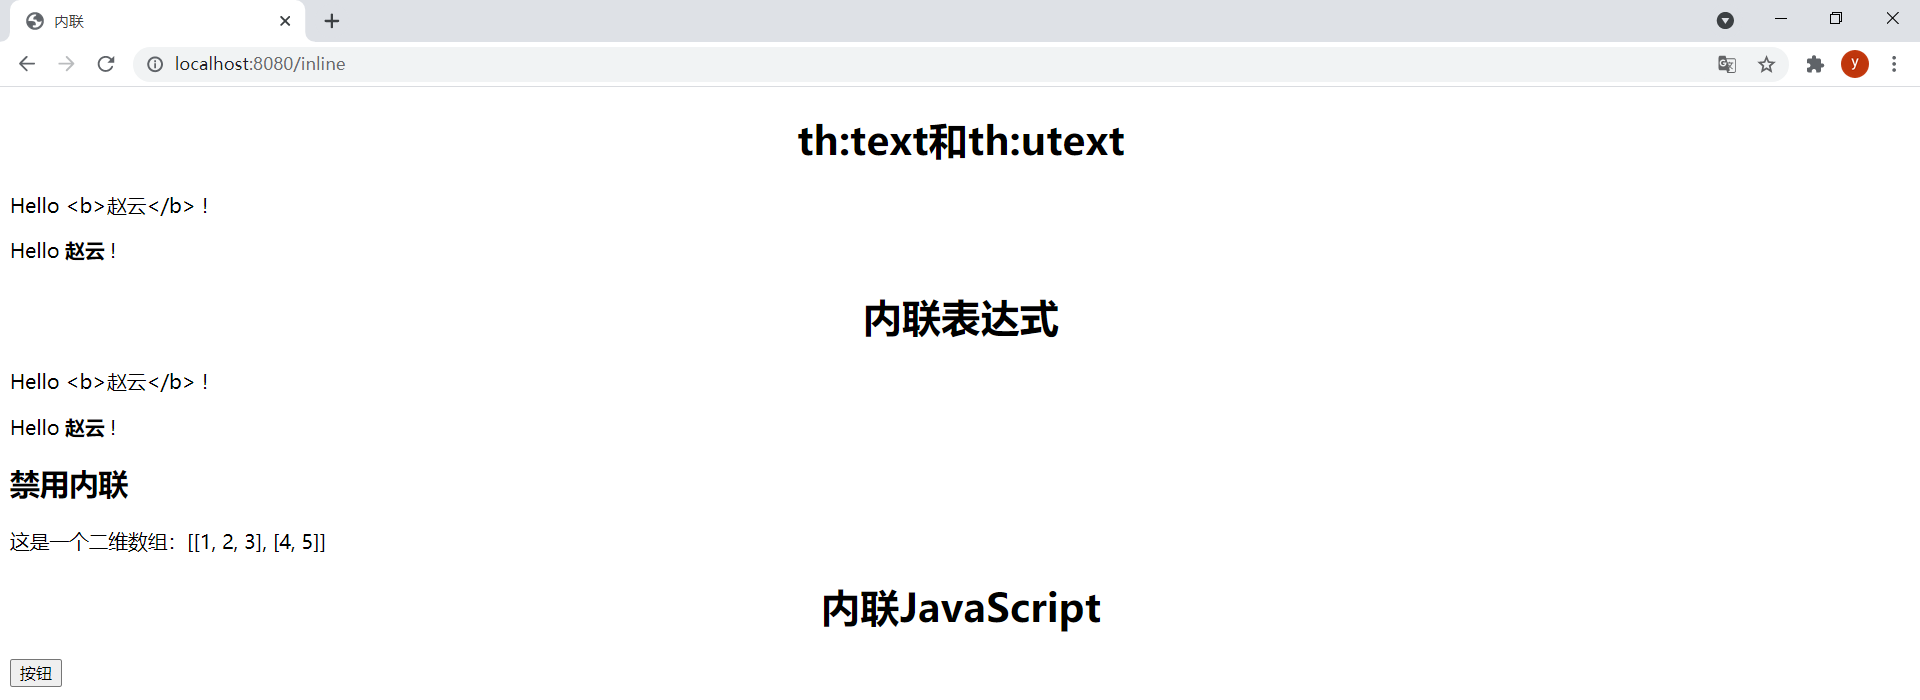
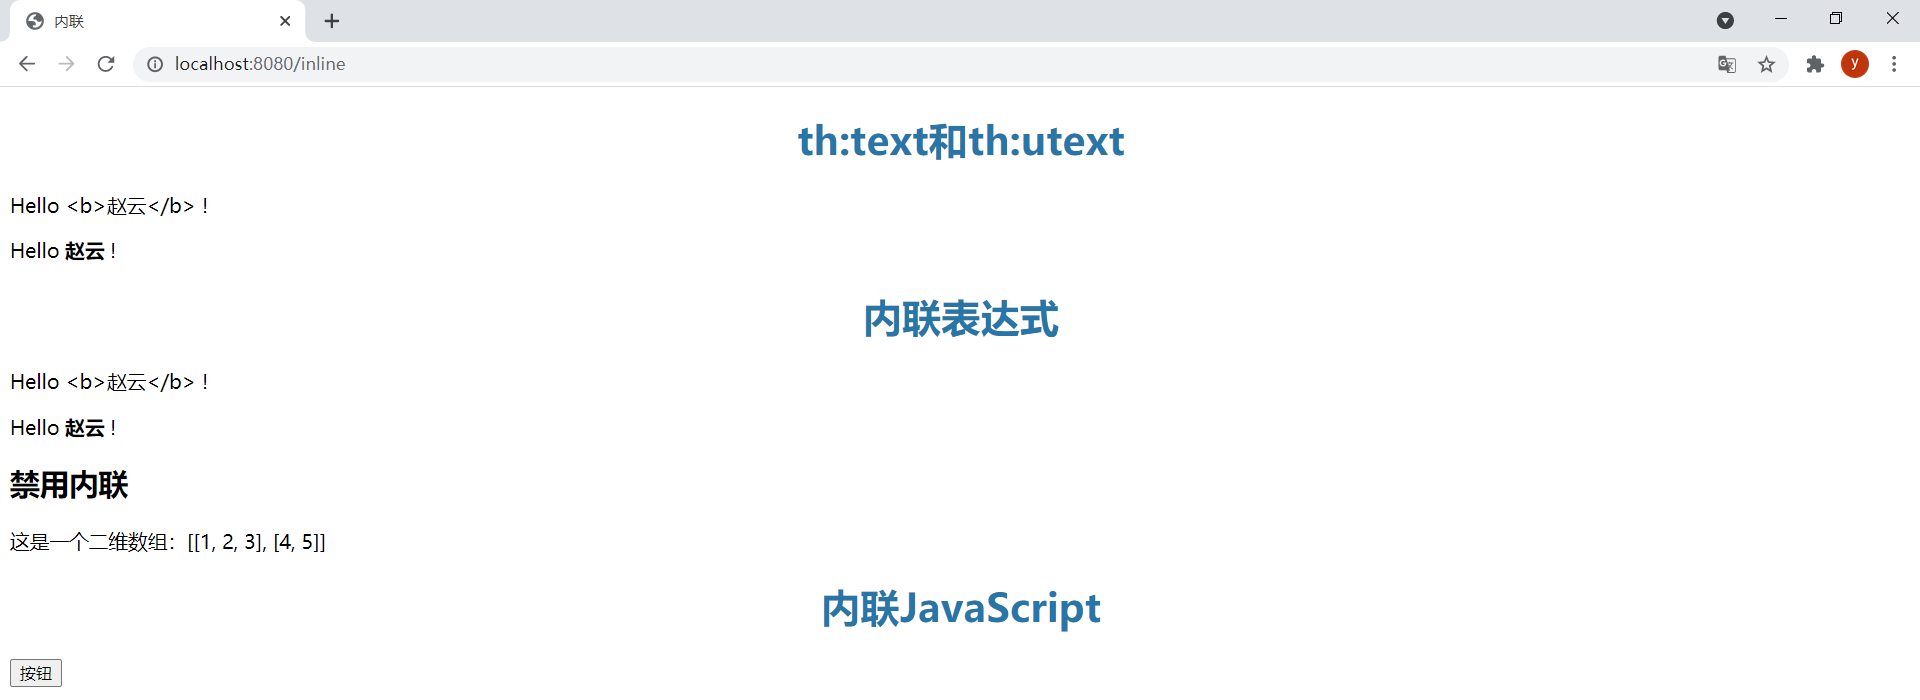
<h2>内联JavaScript</h2><div> <span><button onclick="showPassword()">按钮</button></span></div><script type="text/javascript" th:inline="javascript"> let password = [[${user.password}]]; console.log("password:", password); function showPassword() { alert(password); }</script>效果:
查看源码,可见输出的字符串进行了转义,是格式正确的JavaScript字符串,因为使用[[]]在输出${user.password}表达式的时候进行了转义:

查看Console中打印的日志:

注释掉let password = [[${user.password}]];,新增let password = [(${user.password})];。查看源码,由于[()]不会进行转义,可见输出的字符串没有转义,是格式错误的JavaScript代码:

查看Console,发现有语法错误:

如果通过附加内联表达式的方式来构建脚本的一部分,可能会需要输出未转义的字符串,所以这个功能也很有用。
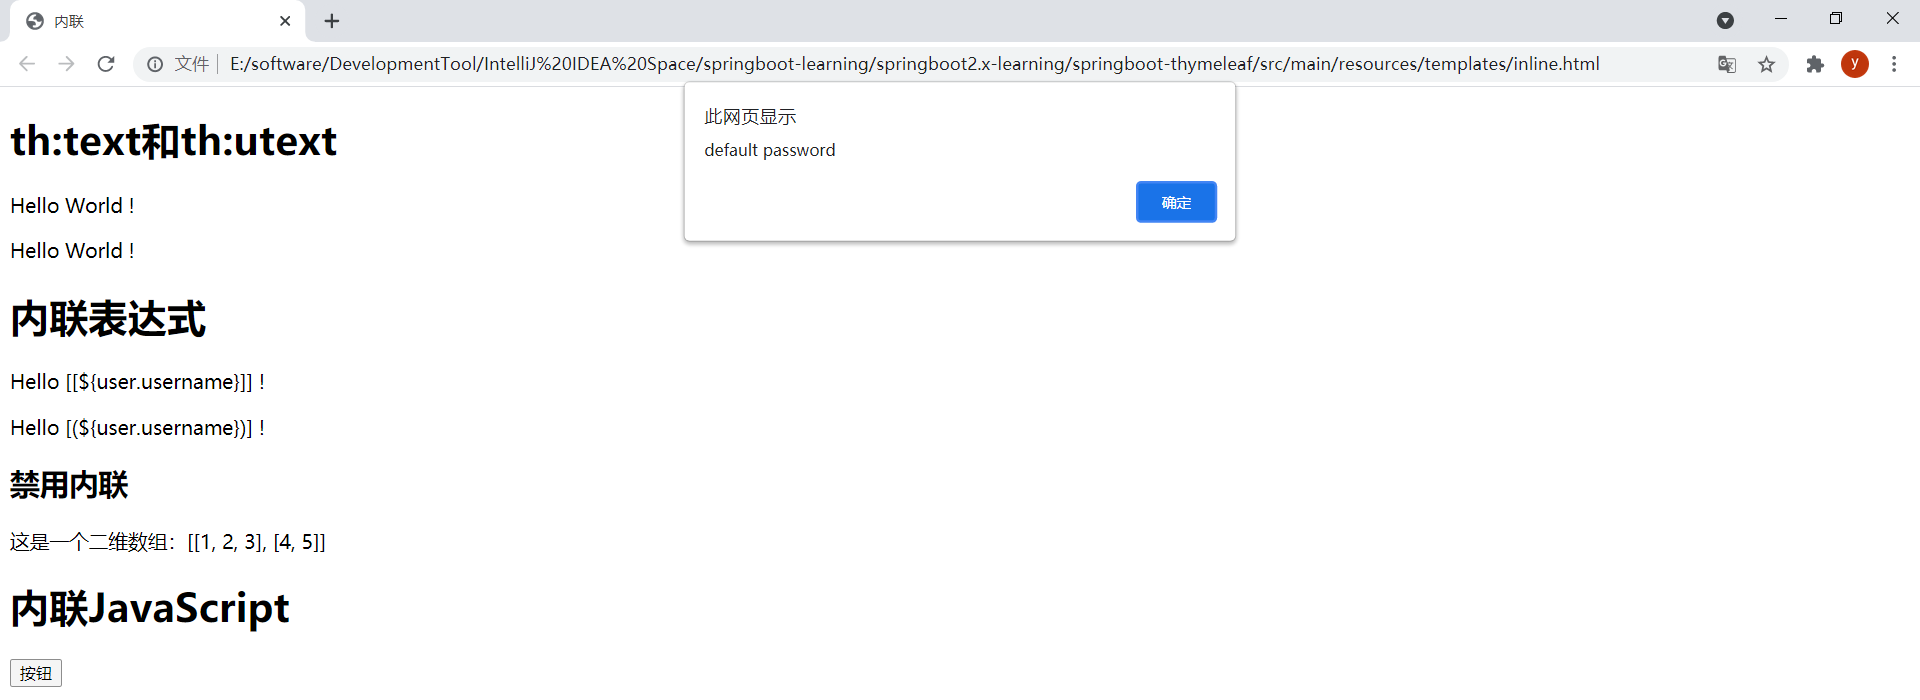
内联JavaScript可以通过在注释中包含内联表达式作为JavaScript自然模板。下面注释掉let password = [(${user.password})];,新增如下代码:
// 在JavaScript注释中包含(转义)内联表达式,Thymeleaf将忽略在注释之后和分号之前的所有内容let password = "default password";查看源码:

查看Console中打印的日志:
发现"default password"确实被忽略了。以静态方式打开模板时变量password的值就为"default password"了:


JavaScript内联表达式结果不限于字符串,还会自动地将Strings、Numbers、Booleans、Arrays、Collections、Maps、Beans(有getter和setter方法)这些对象序列化为JavaScript对象。下面在Controller中新增以下代码:
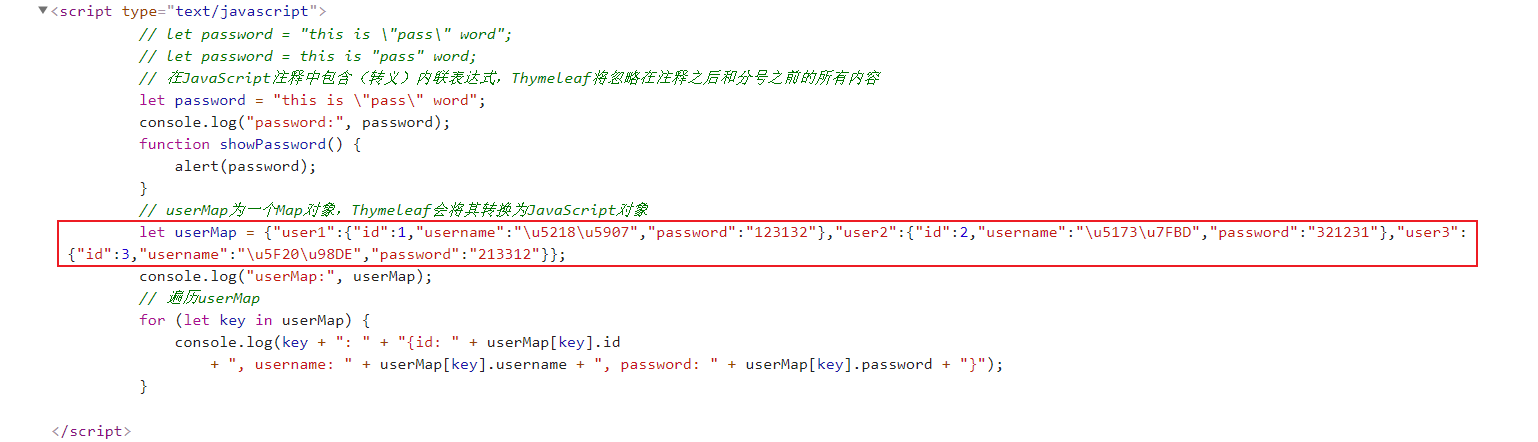
Map<String, Object> map = new HashMap<>(16);map.put("user1", new User(1L, "刘备", "123132"));map.put("user2", new User(2L, "关羽", "321231"));map.put("user3", new User(3L, "张飞", "213312"));model.addAttribute("userMap", map);script标签内新增以下代码,Thymeleaf会将userMap对象转换为JavaScript对象:
// userMap为一个Map对象,Thymeleaf会将其转换为JavaScript对象let userMap = null;console.log("userMap:", userMap);// 遍历userMapfor (let key in userMap) { console.log(key + ": " + "{id: " + userMap[key].id + ", username: " + userMap[key].username + ", password: " + userMap[key].password + "}");}查看源码发现Thymeleaf已经将其转换为JavaScript对象:
查看Console中打印的日志:

(3)内联CSS
使用th:inline="css"启用内联CSS。
在模板inline.html中新增以下内容:
<style type="text/css" th:inline="css"> [[${element}]] { text-align: [[${align}]]; color: [[${color}]]; }</style>将变量element、align和color设置到Model中:
model.addAttribute("element", "h2");model.addAttribute("align", "center");model.addAttribute("color", "#2876A7");访问模板,对齐生效,颜色未生效:
查看源码,发现color的值多了一个\:

这是由于[[]]会进行转义,所以多了一个\。这里不需要对其转义,所以需要使用[()]。将代码修改为color: [(${color})];。访问模板,发现样式都生效了:
查看源码,没有多出\了:

内联CSS也允许通过在注释中包含内联表达式作为CSS自然模板,使CSS可以静态和动态的工作。将<style>的代码修改为如下内容:
<style type="text/css" th:inline="css"> h2 { text-align: left; color: #B60d16; }</style>模板动态打开时的效果:

查看源码:

以静态方式打开的效果:
查看源码:
国际化
这里简单模拟一下国际化功能,通过语言切换应用对应语言的国际化配置文件。
(1)创建国际化配置文件
在resources/i18n目录下创建如下配置文件。
index.properties:
user.reGISter=注册user.login=登录index.language=语言index.language.chinese=中文index.language.english=英文index_en_US.properties:
user.register=Registeruser.login=Loginindex.language=Languageindex.language.chinese=Chineseindex.language.english=Englishindex_zh_CN.properties:
user.register=注册user.login=登录index.language=语言index.language.chinese=中文index.language.english=英文(2)新增配置
在application.yml中新增以下配置:
spring: messages: # 配置消息源的基本名称,默认为messages,这里配置为国际化配置文件的前缀 basename: i18n.index(3)创建模板
模板i18n.html如下:
<!DOCTYPE html><html lang="en" xmlns:th="http://www.thymeleaf.org"><head> <meta charset="UTF-8"> <title>国际化</title></head><body> <div> <span><button th:text="#{user.register}">注册</button></span> <span><button th:text="#{user.login}">登录</button></span> <span th:text="#{index.language}">语言</span> <a th:href="@{/index(lang='zn_CN')}" th:text="#{index.language.chinese}">中文</a> <a th:href="@{/index(lang='en_US')}" th:text="#{index.language.english}">英文</a> </div></body></html>
#{}为消息表达式,用于引用消息字符串。而消息字符串通常保存在外部化文本中,消息字符串形式为key=value,通过#{key}可以引用特定的消息。而根据不同的语言从与其对应的外部化文本中获取同一个key的消息,可以实现国际化。
(4)配置国际化解析器
package com.rtxtitanv.config;import org.springframework.context.annotation.Bean;import org.springframework.context.annotation.Configuration;import org.springframework.web.servlet.LocaleResolver;import org.springframework.web.servlet.config.annotation.WebMvcConfigurer;import org.thymeleaf.util.StringUtils;import javax.servlet.http.HttpServletRequest;import javax.servlet.http.HttpServletResponse;import java.util.Locale;@Configurationpublic class WebConfig implements WebMvcConfigurer { @Bean public LocaleResolver localeResolver() { return new MyLocaleResolver(); } public static class MyLocaleResolver implements LocaleResolver { @Override public Locale resolveLocale(HttpServletRequest request) { // 接收语言参数 String lang = request.getParameter("lang"); // 使用默认语言 Locale locale = Locale.getDefault(); // 语言参数不为空就设置为该语言 if (!StringUtils.isEmptyOrWhitespace(lang)) { String[] s = lang.split("_"); locale = new Locale(s[0], s[1]); } return locale; } @Override public void setLocale(HttpServletRequest request, HttpServletResponse response, Locale locale) {} }}(5)Controller
@GetMapping(value = {"/index", "/"})public String index() { return "i18n";}(5)测试
访问模板,默认语言为中文:

点击英文链接切换语言为英文:

点击中文链接切换语言为中文:

常用工具类对象
之前在文中已经简单地总结了Thymeleaf中的工具类对象和它的作用。这里结合实例来总结一下常用工具类对象具体方法的使用,由于工具类对象较多,这里就总结Dates、Numbers和Strings的具体使用方法。至于其他对象的方法,可以参考官方文档。
(1)Dates
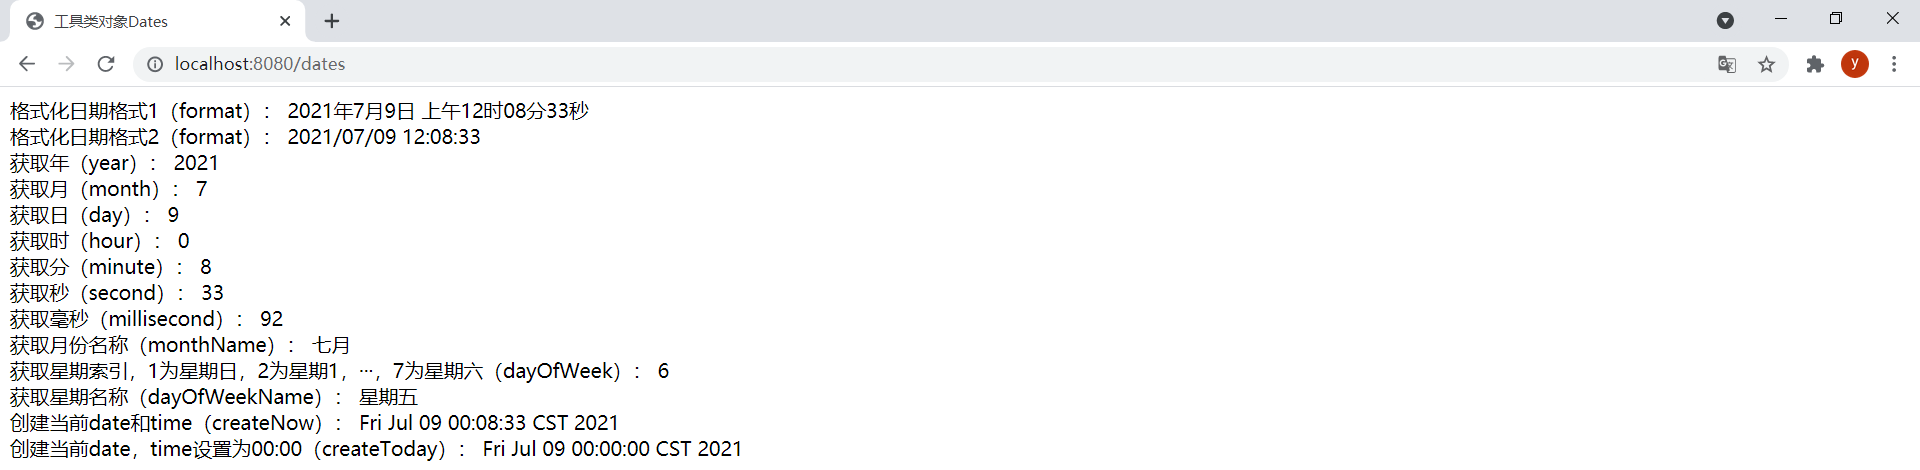
模板date.html如下:
<!DOCTYPE html><html lang="en" xmlns:th="http://www.thymeleaf.org"><head> <meta charset="UTF-8"> <title>工具类对象Dates</title></head><body> <div> <span>格式化日期格式1(format):</span> <span th:text="${#dates.format(date)}"></span> <br/> <span>格式化日期格式2(format):</span> <span th:text="${#dates.format(date, 'yyyy/MM/dd hh:mm:ss')}"></span> <br/> <span>获取年(year):</span> <span th:text="${#dates.year(date)}"></span> <br/> <span>获取月(month):</span> <span th:text="${#dates.month(date)}"></span> <br/> <span>获取日(day):</span> <span th:text="${#dates.day(date)}"></span> <br/> <span>获取时(hour):</span> <span th:text="${#dates.hour(date)}"></span> <br/> <span>获取分(minute):</span> <span th:text="${#dates.minute(date)}"></span> <br/> <span>获取秒(second):</span> <span th:text="${#dates.second(date)}"></span> <br/> <span>获取毫秒(millisecond):</span> <span th:text="${#dates.millisecond(date)}"></span> <br/> <span>获取月份名称(monthName):</span> <span th:text="${#dates.monthName(date)}"></span> <br/> <span>获取星期索引,1为星期日,2为星期1,···,7为星期六(dayOfWeek):</span> <span th:text="${#dates.dayOfWeek(date)}"></span> <br/> <span>获取星期名称(dayOfWeekName):</span> <span th:text="${#dates.dayOfWeekName(date)}"></span> <br/> <span>创建当前date和time(createNow):</span> <span th:text="${#dates.createNow()}"></span> <br/> <span>创建当前date,time设置为00:00(createToday):</span> <span th:text="${#dates.createToday()}"></span> </div></body></html>ThymeleafController中新增以下方法:
@GetMapping("/dates")public String dates(Model model) { model.addAttribute("date", new Date()); return "dates";}效果:
(2)Numbers
模板number.html如下:
<!DOCTYPE html><html lang="en" xmlns:th="http://www.thymeleaf.org"><head> <meta charset="UTF-8"> <title>工具类对象Numbers</title></head><body> <div> <span>整数格式化 - 设置最小整数位数为3(formatInteger):</span> <span th:text="${#numbers.formatInteger(num, 3)}"></span> <br/> <span>整数格式化 - 设置最小整数位数为6(formatInteger):</span> <span th:text="${#numbers.formatInteger(num, 6)}"></span> <br/> <span>整数格式化 - 设置千位分隔符为.(formatInteger):</span> <span th:text="${#numbers.formatInteger(num, 6, 'POINT')}"></span> <br/> <span>整数格式化 - 设置千位分隔符为,(formatInteger):</span> <span th:text="${#numbers.formatInteger(num, 6, 'COMMA')}"></span> <br/> <span>整数数组格式化(arrayFormatInteger):</span> <span th:each="element:${#numbers.arrayFormatInteger(nums, 6)}">[[${element}]] </span> <br/> <span>小数格式化 - 设置最小整数位数为5且精确保留3位小数位数(formatDecimal)</span> <span th:text="${#numbers.formatDecimal(num2, 5, 3)}"></span> <br/> <span>小数格式化 - 设置千位分隔符为.且小数点分隔符为,(formatDecimal)</span> <span th:text="${#numbers.formatDecimal(num2, 5, 'POINT', 3, 'COMMA')}"></span> <br/> <span>货币格式化(formatCurrency):</span> <span th:text="${#numbers.formatCurrency(num)}"></span> <br/> <span>百分比格式化 - 设置最小整数位数为2且精确保留3位小数(formatPercent):</span> <span th:text="${#numbers.formatPercent(0.25831694, 2, 3)}"></span> <br/> <span>创建整数数字序列 - 序列从1到10步长为3(sequence):</span> <span th:each="n:${#numbers.sequence(1, 10, 3)}">[[${n}]] </span> <br/> </div></body></html>ThymeleafController中新增以下方法:
@GetMapping("/numbers")public String numbers(Model model) { Integer[] numArray = {1000, 666, 88888}; model.addAttribute("num", 99999); model.addAttribute("num2", 66.6658932); model.addAttribute("nums", numArray); return "numbers";}效果:

(3)Strings
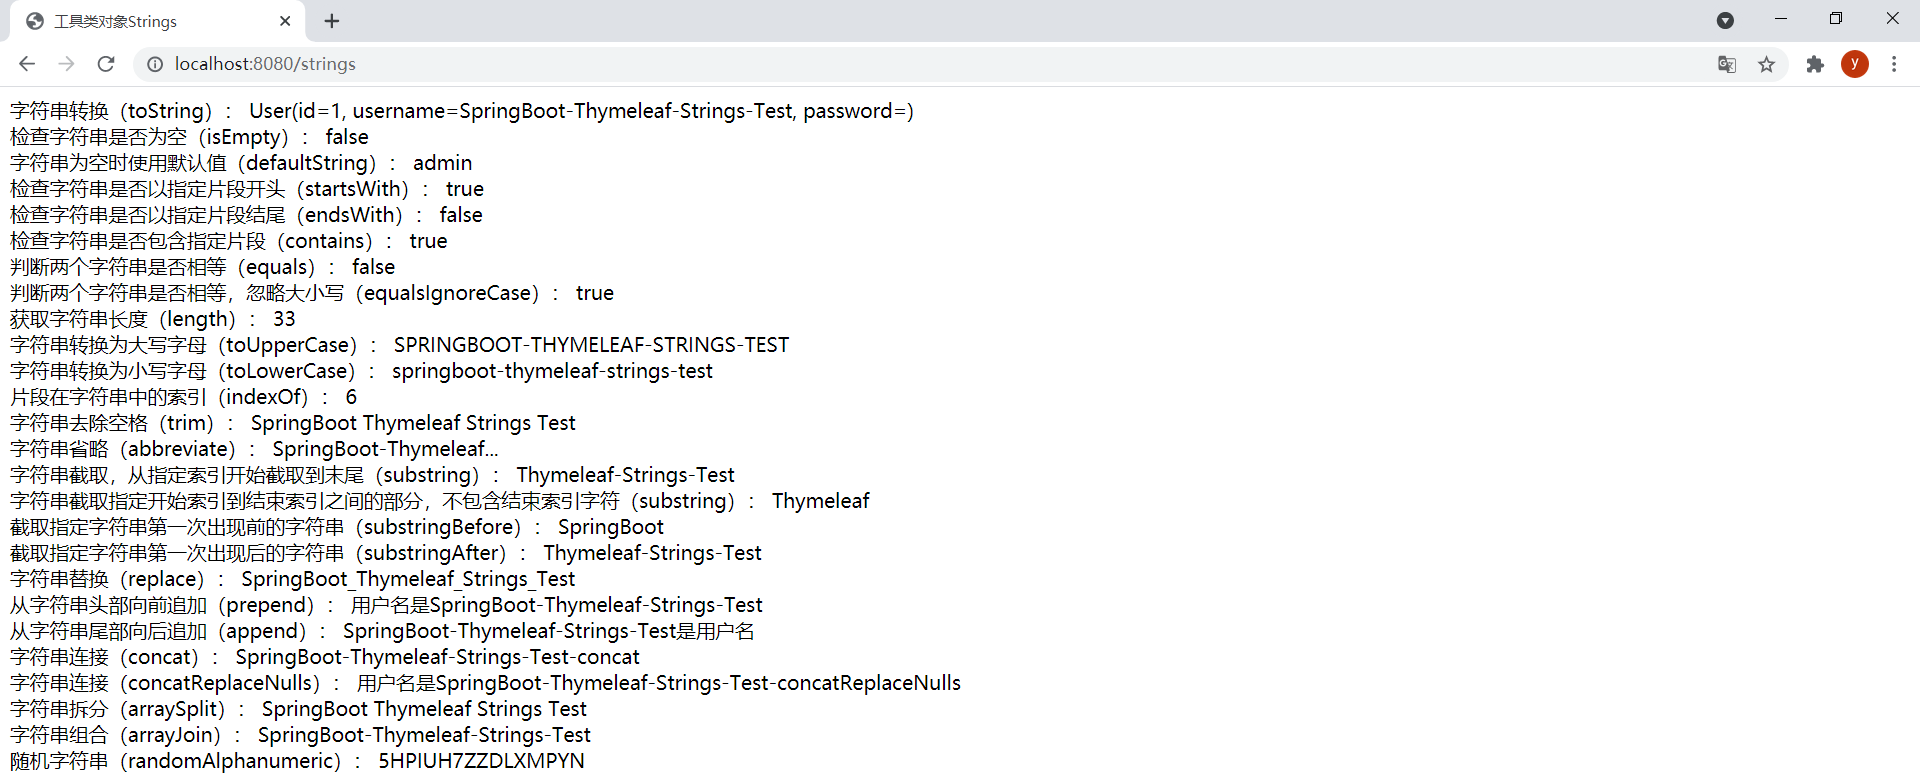
模板strings.html如下:
<!DOCTYPE html><html lang="en" xmlns:th="http://www.thymeleaf.org"><head> <meta charset="UTF-8"> <title>工具类对象Strings</title></head><body> <div> <span>字符串转换(toString):</span> <span th:text="${#strings.toString(user)}"></span> <br/> <span>检查字符串是否为空(isEmpty):</span> <span th:text="${#strings.isEmpty(user.username)}"></span> <br/> <span>字符串为空时使用默认值(defaultString):</span> <span th:text="${#strings.defaultString(user.password, 'admin')}"></span> <br/> <span>检查字符串是否以指定片段开头(startsWith):</span> <span th:text="${#strings.startsWith(user.username, 'Spring')}"></span> <br/> <span>检查字符串是否以指定片段结尾(endsWith):</span> <span th:text="${#strings.endsWith(user.username, 'test')}"></span> <br/> <span>检查字符串是否包含指定片段(contains):</span> <span th:text="${#strings.contains(user.username, 'Thymeleaf')}"></span> <br/> <span>判断两个字符串是否相等(equals):</span> <span th:text="${#strings.equals(user.username, str)}"></span> <br/> <span>判断两个字符串是否相等,忽略大小写(equalsIgnoreCase):</span> <span th:text="${#strings.equalsIgnoreCase(user.username, 'springboot-thymeleaf-strings-test')}"></span> <br/> <span>获取字符串长度(length):</span> <span th:text="${#strings.length(user.username)}"></span> <br/> <span>字符串转换为大写字母(toUpperCase):</span> <span th:text="${#strings.toUpperCase(user.username)}"></span> <br/> <span>字符串转换为小写字母(toLowerCase):</span> <span th:text="${#strings.toLowerCase(user.username)}"></span> <br/> <span>片段在字符串中的索引(indexOf):</span> <span th:text="${#strings.indexOf(user.username, 'Boot')}"></span> <br/> <span>字符串去除空格(trim):</span> <span th:text="${#strings.trim(str)}"></span> <br/> <span>字符串省略(abbreviate):</span> <span th:text="${#strings.abbreviate(user.username, 23)}"></span> <br/> <span>字符串截取,从指定索引开始截取到末尾(substring):</span> <span th:text="${#strings.substring(user.username, 11)}"></span> <br/> <span>字符串截取指定开始索引到结束索引之间的部分,不包含结束索引字符(substring):</span> <span th:text="${#strings.substring(user.username, 11, 20)}"></span> <br/> <span>截取指定字符串第一次出现前的字符串(substringBefore):</span> <span th:text="${#strings.substringBefore(user.username, '-')}"></span> <br/> <span>截取指定字符串第一次出现后的字符串(substringAfter):</span> <span th:text="${#strings.substringAfter(user.username, '-')}"></span> <br/> <span>字符串替换(replace):</span> <span th:text="${#strings.replace(user.username, '-', '_')}"></span> <br/> <span>从字符串头部向前追加(prepend):</span> <span th:text="${#strings.prepend(user.username, '用户名是')}"></span> <br/> <span>从字符串尾部向后追加(append):</span> <span th:text="${#strings.append(user.username, '是用户名')}"></span> <br/> <span>字符串连接(concat):</span> <span th:text="${#strings.concat(user.username, '-concat')}"></span> <br/> <span>字符串连接(concatReplaceNulls):</span> <span th:text="${#strings.concatReplaceNulls(user.username, '用户名是', null, '-concatReplaceNulls')}"></span> <br/> <span>字符串拆分(arraySplit):</span> <span th:each="element:${#strings.arraySplit(user.username, '-')}">[[${element}]] </span> <br/> <span>字符串组合(arrayJoin):</span> <span th:text="${#strings.arrayJoin(strs, '-')}"></span> <br/> <span>随机字符串(randomAlphanumeric):</span> <span th:text="${#strings.randomAlphanumeric(16)}"></span> </div></body></html>ThymeleafController中新增以下方法:
@GetMapping("/strings")public String strings(Model model) { model.addAttribute("user", new User(1L, "SpringBoot-Thymeleaf-Strings-Test", "")); model.addAttribute("str", "SpringBoot Thymeleaf Strings Test"); model.addAttribute("strs", new String[] {"SpringBoot", "Thymeleaf", "Strings", "Test"}); return "strings";}效果:
代码示例
GitHub:https://github.com/RtxTitanV/springboot-learning/tree/master/springboot2.x-learning/springboot-thymeleaf
Gitee:https://gitee.com/RtxTitanV/springboot-learning/tree/master/springboot2.x-learning/springboot-thymeleaf
到此,关于“SpringBoot2.x 集成 Thymeleaf的详细步骤”的学习就结束了,希望能够解决大家的疑惑。理论与实践的搭配能更好的帮助大家学习,快去试试吧!若想继续学习更多相关知识,请继续关注编程网网站,小编会继续努力为大家带来更多实用的文章!
--结束END--
本文标题: SpringBoot2.x 集成 Thymeleaf的详细步骤
本文链接: https://www.lsjlt.com/news/297931.html(转载时请注明来源链接)
有问题或投稿请发送至: 邮箱/279061341@qq.com QQ/279061341
下载Word文档到电脑,方便收藏和打印~
2024-05-21
2024-05-21
2024-05-21
2024-05-21
2024-05-21
2024-05-21
2024-05-21
2024-05-21
2024-05-21
2024-05-21
回答
回答
回答
回答
回答
回答
回答
回答
回答
回答


官方手机版

微信公众号

商务合作


0