这篇文章将为大家详细讲解有关如何封装Vue日历组件,小编觉得挺实用的,因此分享给大家做个参考,希望大家阅读完这篇文章后可以有所收获。具体内容如下图示封装的组件的代码如下<template> <div&
这篇文章将为大家详细讲解有关如何封装Vue日历组件,小编觉得挺实用的,因此分享给大家做个参考,希望大家阅读完这篇文章后可以有所收获。
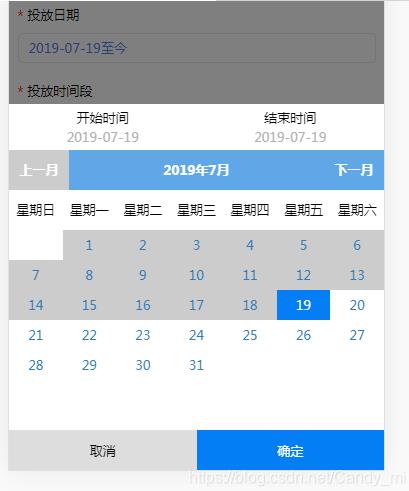
具体内容如下
图示
封装的组件的代码如下
<template> <div class="calendar"> <!-- 选择日历的弹出层 --> <div class="model_mask" v-show="showtimemask" @click="showmask1()"> </div> <div class="bouncedBox" v-show="showtimemask"> <div class="mobile-top"> <div class="sel-time"> <p>开始时间</p> <p class="start-date">{{starttime.substring(0,4)+'-'+starttime.substring(4,6)+'-'+starttime.substring(6,8)}} </p> </div> <div class="unsel-time"> <p>结束时间</p> <p class="end-date"> {{endtime==''?'请选择结束日期':endtime.substring(0,4)+'-'+endtime.substring(4,6)+'-'+endtime.substring(6,8)}}</p> </div> </div> <div class="title"> <div class="btn" @click.stop="last()" :class="(month<=nowmonth)&&(Year<=nowYear)?'noclick':'' ">上一月</div> <div class="text">{{Year}}年{{month}}月</div> <div class="btn" @click.stop="next()">下一月</div> </div> <div class="head"> <div class="days" v-for="(item,index) in ['星期日','星期一','星期二','星期三','星期四','星期五','星期六']" :key="index"> {{item}} </div> </div> <div class="wrap"> <div class="span" v-for="(item,index) in calendarList" :key="index" @click.stop="click(item.count)" :class="item==''?'kong' :item.count<nowtime?'noclick' :(item.count>=starttime&&item.count<=endtime)||item.count==starttime?'active':''"> {{item.value}} </div> </div> <div class="bottombtn"> <button class="cancle-btn" @click.stop='cancle()'>取消</button> <button class="sure-btn" @click.stop='firm()'>确定</button> </div> </div> </div></template> <script> export default { name: "Calendar", data() { return { showtimemask:false, Puton_time: '', //投放日期 默认今日 展示 Puton_Start:'', //为了保存投放开始结束的日期 用来点击取消按钮时初始化选中的值 Puton_End:'', nowtime: '', //当前日期的时间-----20190203格式 用于比较 clickitem: '', //保存每次点击的时间-----20190203格式 用于比较 clickcount: 0, //点击次数-------判断开始时间还是结束时间 starttime: '', //开始时间 数字 默认当天日期 endtime: '', //结束时间 数字 默认当天日期 Year: new Date().getFullYear(), //日历上的年份 ----动态改变的 month: new Date().getMonth() + 1, //日历上的月份 ---- 动态改变的 Day: new Date().getDate(), //日历上的天份 ----- 动态改变的 nowYear: new Date().getFullYear(), nowmonth: new Date().getMonth() + 1, nowDay: new Date().getDate(), calendarList: [], }; }, created() { //关于日历的操作开始 this.Draw(this.nowYear, this.nowmonth); let time_month = this.nowmonth; //现在的月份 let time_day = this.nowDay; //现在的天数 if (this.nowmonth < 10) { time_month = 0 + '' + this.nowmonth; } if (this.nowDay < 10) { time_day = 0 + '' + this.nowDay; } this.nowtime = this.nowYear + '' + time_month + '' + time_day; this.starttime = this.nowtime; this.endtime = this.nowtime; this.Puton_time = this.starttime.substring(0, 4) + '-' + this.starttime.substring(4, 6) + '-' + this.starttime .substring(6, 8) + '至今'; this.Puton_Start = this.nowtime, this.Puton_End = this.nowtime, this.$emit('str',this.Puton_time) //关于日历的操作结束 }, mounted() { }, methods: { showmask1() { if (this.showtimemask == true) { // this.showtimemask=false; //隐藏弹框 this.cancle(); } else { this.showtimemask = true; //显示弹框 } }, Draw: function (Year, Month) { //日期列表 var calendar = []; //用当月第一天在一周中的日期值作为当月离第一天的天数(获取当月第一天是周几) for (var i = 1, firstDay = new Date(Year, Month - 1, 1).getDay(); i <= firstDay; i++) { calendar.push(""); } //用当月最后一天在一个月中的日期值作为当月的天数 for (var i = 1, monthDay = new Date(Year, Month, 0).getDate(); i <= monthDay; i++) { let time_month = Month; let time_day = i; if (Month < 10) { time_month = 0 + '' + Month; } if (i < 10) { time_day = 0 + '' + i; } calendar.push({ value: i, count: Year + '' + time_month + '' + time_day }) } this.calendarList = calendar; console.log(calendar) }, last() { this.month--; if (this.month == 0) { this.month = 12; this.Year--; } this.Draw(this.Year, this.month); }, next() { this.month++; if (this.month == 13) { this.month = 1; this.Year++; } this.Draw(this.Year, this.month); }, click(item) { this.clickcount++; this.clickitem = item; //开始日期 if (this.clickcount % 2 == 1) { this.starttime = this.clickitem; this.endtime = '' } else { this.endtime = this.clickitem; if (this.starttime > this.endtime) { this.endtime = this.starttime; this.starttime = this.clickitem; } } }, firm() { this.showtimemask = false; //当选择的开始时间与结束时间相同时 显示为2019-07-19当天 if (this.starttime == this.endtime) { this.Puton_Start = this.starttime, this.Puton_End = this.endtime, this.Puton_time = this.starttime.substring(0, 4) + '-' + this.starttime.substring(4, 6) + '-' + this.starttime .substring(6, 8) + '当天'; this.$emit('str',this.Puton_time); //否则显示xxx 至 xxx } else { this.Puton_Start = this.starttime, this.Puton_End = this.endtime, this.Puton_time = this.starttime.substring(0, 4) + '-' + this.starttime.substring(4, 6) + '-' + this.starttime.substring(6, 8) + '至' + this.endtime.substring(0, 4) + '-' + this.endtime.substring(4, 6) + '-' + this.endtime.substring(6, 8); this.$emit('str',this.Puton_time) } }, // 取消按钮 cancle() { this.showtimemask = false; //当按取消按钮时 弹框中选中的区域等于上一次选中的区域 this.starttime = this.Puton_Start; this.endtime = this.Puton_End; // this.Puton_time = this.starttime.substring(0, 4) + '-' + this.starttime.substring(4, 6) + '-' + this.starttime // .substring(6, 8) + '至今'; // this.$emit('str',this.Puton_time) } } }; </script> <style scoped lang="sCSS"> @import "../common/common.css"; // 日历的样式 .model_mask { position: fixed; top: 0; bottom: 0; left: 0; right: 0; background: rgba($color: #000000, $alpha: 0.5); } .bouncedBox { position: fixed; background: #fff; bottom: 0; left: 0; right: 0; //开始结束日期的显示 .mobile-top { display: flex; flex-wrap: nowrap; background: #fff; padding: 0.1rem 0; .sel-time { text-align: center; width: 50%; // border-bottom: solid 2px #2a81e8; .start-date { color: #b1b1b1; margin-top: 0.05rem; } } .unsel-time { text-align: center; width: 50%; .end-date { color: #b1b1b1; margin-top: 0.05rem; } } } // 左右选择月份 显示当前年月 .title { width: 100%; height: 40px; background-color: #60a7e8; display: flex; flex-wrap: nowrap; text-align: center; color: #fff; font-weight: bold; line-height: 40px; .btn { width: 1.2rem; &.noclick { pointer-events: none; background: #ccc; } } .text { flex: 1; } } //表头 周1到周天的显示 .head { display: flex; flex-wrap: nowrap; text-align: center; height: 40px; line-height: 40px; .days { flex: 1; } } //日历表区域 .wrap { width: 7.5rem; height: auto; overflow: hidden; padding-bottom: 1rem; .span { width: 1.07142rem; height: 0.6rem; background: #fff; color: #337ab7; float: left; text-align: center; line-height: 0.6rem; &.active { background: #037ef5; color: #fff; } &.noclick { pointer-events: none; background: #ccc; } &.kong { background: #fff; pointer-events: none; } } } //底部按钮区域 .bottombtn { height: 40px; width: 100%; display: flex; flex-wrap: nowrap; button { flex: 1; } .sure-btn { background: #037ef5; color: #fff; } } } </style>import Calendar from './components/fz_zujian/Calendar.vue' //日历组件Vue.component('Calendar',Calendar)<div class="" @click="showmodel()">{{str}}</div> <Calendar ref="chi1" v-on:str="getChild"></Calendar> data() { return { str: '', } } showmodel(){ this.$refs.chi1.showmask1() }, getChild(val) { this.str = val },关于“如何封装vue日历组件”这篇文章就分享到这里了,希望以上内容可以对大家有一定的帮助,使各位可以学到更多知识,如果觉得文章不错,请把它分享出去让更多的人看到。
--结束END--
本文标题: 如何封装vue日历组件
本文链接: https://www.lsjlt.com/news/324232.html(转载时请注明来源链接)
有问题或投稿请发送至: 邮箱/279061341@qq.com QQ/279061341
下载Word文档到电脑,方便收藏和打印~
2024-05-05
2024-05-05
2024-05-05
2024-05-05
2024-05-05
2024-05-05
2024-05-05
2024-05-05
2024-05-05
2024-05-05
回答
回答
回答
回答
回答
回答
回答
回答
回答
回答


官方手机版

微信公众号

商务合作


0