这篇文章主要介绍“uniapp app人脸识别功能怎么实现”,在日常操作中,相信很多人在uniapp app人脸识别功能怎么实现问题上存在疑惑,小编查阅了各式资料,整理出简单好用的操作方法,希望对大家解答”uniapp&
这篇文章主要介绍“uniapp app人脸识别功能怎么实现”,在日常操作中,相信很多人在uniapp app人脸识别功能怎么实现问题上存在疑惑,小编查阅了各式资料,整理出简单好用的操作方法,希望对大家解答”uniapp app人脸识别功能怎么实现”的疑惑有所帮助!接下来,请跟着小编一起来学习吧!
由于 小程序端 有camera组件 直接就可以调起摄像头 但是 app端是不支持这个标签的 所以只能用其他的方法 使用 nVue 中 live-pusher 组件
子组件
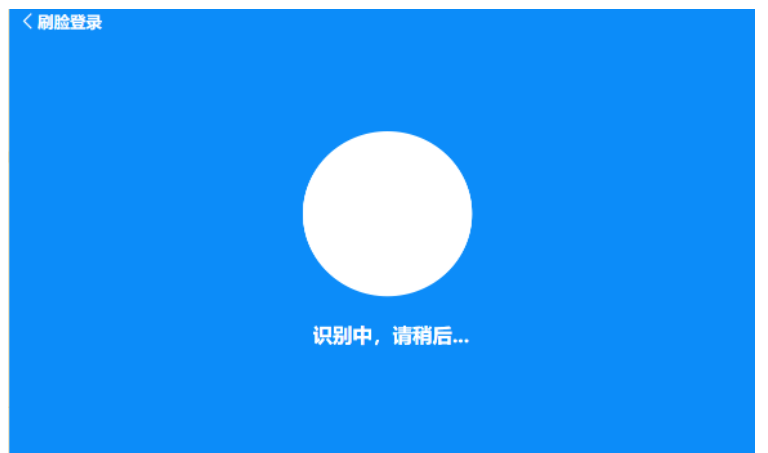
<template><div><div class="livefater"><div ><!-- orientation="horizontal" //设置垂直水平方向 --><live-pusher id='livePusher' ref="livePusher" class="livePusher" url=""mode="SD" :muted="true" :enable-camera="true" :auto-focus="true" :beauty="1" whiteness="2"aspect="1:1" @statechange="statechange" @netstatus="netstatus" @error="error"></live-pusher></div><cover-image src="/static/image/gai1.png" class="gaiimg"></cover-image></div><view class="message" ><text class="info">{{message}}</text></view></div></template> <script>export default {props: {time: {default: 5000,type: Number},message: {default: '识别中,请稍后...',type: String}},data() {return {}},mounted() { // 注意:需要在onReady中 或 onLoad 延时this.context = uni.createLivePusherContext("livePusher", this);var that = thisuni.getSystemInfo({success: function(e) {// 计算导航栏高度that.statusBar = e.statusBarHeight// #ifndef MP if (e.platfORM == 'Android') {that.CustomBar = e.statusBarHeight + 50} else {that.CustomBar = e.statusBarHeight + 45}console.log(that.statusBar)// #endif // #ifdef MP-WEIXIN let custom = wx.getMenuButtonBoundinGClientRect()that.CustomBar = custom.bottom + custom.top - e.statusBarHeight // #endif // #ifdef MP-ALIPAY that.CustomBar = e.statusBarHeight + e.titleBarHeight// #endif }})setTimeout(() => {this.startPreview()})},methods: {// 拍照事件snapshot: function() {var that = thisthis.context.snapshot({success: (e) => {console.log(e.message, '拍照信息');this.$emit('faceImg', e.message)}});},// 开启摄像头startPreview() {console.log("1")var that = thisthis.context.startPreview({success: (a) => {console.log("livePusher.startPreview:" + JSON.stringify(a));that.Timer = setInterval(function() {that.snapshot()}, that.time)},fail(err) {console.log(err);}});},},}</script> <style><style lang="less">page {background: #0c8cf9;} .u-navbar__content__left {display: flex !important;align-items: center;} .u_nav_slot {display: flex;align-items: center;flex-direction: row;color: rgba(0, 0, 0, 0.9);font-size: 14.4rpx;font-weight: 700; } .text {margin-left: 1rpx;color: #fff;font-size: 16rpx;} .box {z-index: 99;position: absolute;left: 35%;top: 25%;width: 250rpx;height: 250rpx;background: pink;} .message {flex: 1;justify-content: center;align-items: center;font-weight: 700;} .info {color: #fff !important;font-size: 20rpx;} .livePusher {width: 300px;height: 300px;} .livefater {display: -ms-flex;display: -WEBkit-flex;display: flex;justify-content: center;flex-direction: column;align-items: center;margin-top: 10rpx;margin-bottom: 50rpx;height: 350px;} .gaiimg {width: 300px;height: 300px;margin-top: -300px;}</style></style>由于 人脸一般是 原型 样式 但是默认的live-pusher 是正方形 而且层级是比较高的 其他普通元素标签是无法压住他的 但是 cover-imgae的图片是可以压上去的
父组件
<TestingFace :time="5000" @faceImg="faceImg" :message="message"></TestingFace>faceImg 就是子组件传过来的 图片 message 是传过去的内容 time是倒计时的拍照时间,具体内容可以根据内容去加逻辑 注意 子父组件都是 nvue
到此,关于“uniapp app人脸识别功能怎么实现”的学习就结束了,希望能够解决大家的疑惑。理论与实践的搭配能更好的帮助大家学习,快去试试吧!若想继续学习更多相关知识,请继续关注编程网网站,小编会继续努力为大家带来更多实用的文章!
--结束END--
本文标题: uniapp app人脸识别功能怎么实现
本文链接: https://www.lsjlt.com/news/328871.html(转载时请注明来源链接)
有问题或投稿请发送至: 邮箱/279061341@qq.com QQ/279061341
下载Word文档到电脑,方便收藏和打印~
2024-05-11
2024-05-11
2024-05-11
2024-05-11
2024-05-11
2024-05-11
2024-05-11
2024-05-11
2024-05-11
2024-05-11
回答
回答
回答
回答
回答
回答
回答
回答
回答
回答


官方手机版

微信公众号

商务合作


0