今天小编给大家分享一下Vue怎么使用pdf-lib实现为文件流添加水印并预览的相关知识点,内容详细,逻辑清晰,相信大部分人都还太了解这方面的知识,所以分享这篇文章给大家参考一下,希望大家阅读完这篇文章后有所收获,下面我们一起来了解一下吧。首
今天小编给大家分享一下Vue怎么使用pdf-lib实现为文件流添加水印并预览的相关知识点,内容详细,逻辑清晰,相信大部分人都还太了解这方面的知识,所以分享这篇文章给大家参考一下,希望大家阅读完这篇文章后有所收获,下面我们一起来了解一下吧。
首先预览pdf就很简单了,我们只需要通过window.URL.createObjectURL(new Blob(file))转为一个路径fileSrc后,再通过window.open(fileSrc)就可以了,window.open方法第二个参数默认就是打开一个新页签,这样就可以直接预览了,很方便!就是下面这样子:
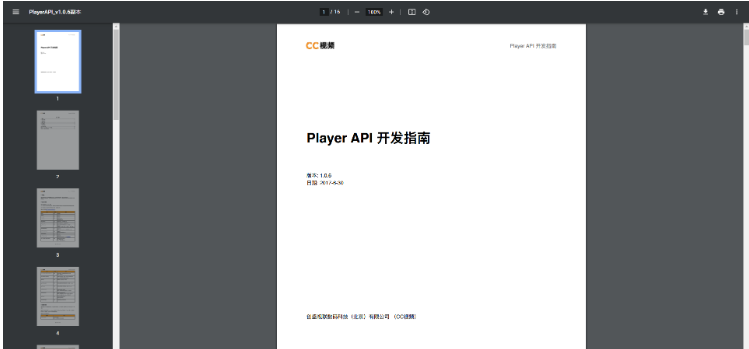
并且右上角自动给我们提供了下载、打印等功能。
但是要加上水印的话,可能会稍微复杂一点点,我也百度找了好多,发现好多都是在项目里直接预览的,也就是在当前页面或者一个div有个容器用来专门预览pdf的,然后水印的话也是appendChild到容器div中进行的。这不是我想要的,并且也跟我现在预览的方式不一样,所以我的思路就是如何给文件的那个二进制blob流上加上水印,这样预览的时候也是用这个文件流,以后不想预览了、直接下载也要水印也是很方便的。找来找去找到了pdf-lib库,然后就去https://www.npmjs.com/package/pdf-lib这里去看了下使用示例,看了两个例子,发现好像这个很合适哦,终于一波操作拿下了,这就是我想要的。
我这里添加水印共三种方式,第一种就是可以直接传入文本,将文本添加进去作为水印 ;第二种是将图片的ArrayBuffer传递进去,将图片作为水印;因为第一种方式直接传文本只能传英文,我传入汉字就报错了,npm官网好像也有写,这是不可避免的,所以才有了第三种方式,就是也是传入文本,不过我们通过canvas画出来,然后通过toDataURL转为base64路径,然后再通过XHR去加载该图片拿到图片的Blob,再调用Blob的arrayBuffer方法拿到buffer传递进去作为水印,其实第三种和第二种都是图片的形式,第三种会更灵活一些。下面上代码
npm i pdf-lib
//我的需求里只用到这么多就够了,其他的按需引入import { degrees, PDFDocument, rgb, StandardFonts } from 'pdf-lib';import { degrees, PDFDocument, rgb, StandardFonts } from 'pdf-lib'; // This should be a Uint8Array or ArrayBuffer// This data can be obtained in a number of different ways// If your running in a node environment, you could use fs.readFile()// In the browser, you could make a fetch() call and use res.arrayBuffer()const existingPdfBytes = ... // Load a PDFDocument from the existing PDF bytesconst pdfDoc = await PDFDocument.load(existingPdfBytes) // Embed the Helvetica fontconst helveticaFont = await pdfDoc.embedFont(StandardFonts.Helvetica) // Get the first page of the documentconst pages = pdfDoc.getPages()const firstPage = pages[0] // Get the width and height of the first pageconst { width, height } = firstPage.getSize() // Draw a string of text diaGonally across the first pagefirstPage.drawText('This text was added with javascript!', { x: 5, y: height / 2 + 300, size: 50, font: helveticaFont, color: rgb(0.95, 0.1, 0.1), rotate: degrees(-45),}) // Serialize the PDFDocument to bytes (a Uint8Array)const pdfBytes = await pdfDoc.save() // For example, `pdfBytes` can be:// • Written to a file in Node// • Downloaded from the browser// • Rendered in an <iframe>import { PDFDocument } from 'pdf-lib' // These should be Uint8Arrays or ArrayBuffers// This data can be obtained in a number of different ways// If your running in a Node environment, you could use fs.readFile()// In the browser, you could make a fetch() call and use res.arrayBuffer()const jpgImageBytes = ...const pngImageBytes = ... // Create a new PDFDocumentconst pdfDoc = await PDFDocument.create() // Embed the JPG image bytes and PNG image bytesconst jpgImage = await pdfDoc.embedJpg(jpgImageBytes)const pngImage = await pdfDoc.embedPng(pngImageBytes) // Get the width/height of the JPG image scaled down to 25% of its original sizeconst jpgDims = jpgImage.scale(0.25) // Get the width/height of the PNG image scaled down to 50% of its original sizeconst pngDims = pngImage.scale(0.5) // Add a blank page to the documentconst page = pdfDoc.addPage() // Draw the JPG image in the center of the pagepage.drawImage(jpgImage, { x: page.getWidth() / 2 - jpgDims.width / 2, y: page.getHeight() / 2 - jpgDims.height / 2, width: jpgDims.width, height: jpgDims.height,}) // Draw the PNG image near the lower right corner of the JPG imagepage.drawImage(pngImage, { x: page.getWidth() / 2 - pngDims.width / 2 + 75, y: page.getHeight() / 2 - pngDims.height, width: pngDims.width, height: pngDims.height,}) // Serialize the PDFDocument to bytes (a Uint8Array)const pdfBytes = await pdfDoc.save() // For example, `pdfBytes` can be:// • Written to a file in Node// • Downloaded from the browser// • Rendered in an <iframe>canvas那个也是用的这个这个通过图片添加水印
上面这些都是官网上给的一些示例,我当时看到上面这两个例子,灵感瞬间就来了,然后测试,测试成功没问题,就开始整理代码,封装。结合自己的业务需求和可以复用通用的思想进行封装。下面贴一下最终的成功
import { degrees, PDFDocument, rgb, StandardFonts } from 'pdf-lib';export default class PreviewPdf { constructor({ blob, docTitle, isAddWatermark = false, watermark: { type = 'text', text = 'WFT', image } }) { const _self = this if(!blob) { return console.error('[PDF Blob Is a required parameter]') } if(!isAddWatermark) { // 不添加水印 _self.preView(blob, docTitle) } else { let bytes,imageType if(type == 'image') { if(!image) { return console.error('["image" Is a required parameter]') } bytes = image.bytes imageType = image.imageType } const map = { 'text': _self.addTextWatermark.bind(_self), 'image': _self.addImageWatermark.bind(_self), 'canvas': _self.addCanvasWatermark.bind(_self) } blob.arrayBuffer().then(async buffer => { const existingPdfBytes = buffer const pdfDoc = await PDFDocument.load(existingPdfBytes) let params if(type == 'text') params = { pdfDoc, text, docTitle } if(type == 'image') params = { pdfDoc, bytes, imageType, docTitle } if(type == 'canvas') params = { pdfDoc, text, docTitle } map[type](params) }).catch(e => console.error('[Preview Pdf Error]:', e)) } } // 添加 Text 水印 async addTextWatermark({ pdfDoc, text, docTitle }) { // console.log(StandardFonts, 'StandardFonts-->>') // 字体 const helveticaFont = await pdfDoc.embedFont(StandardFonts.Helvetica) const pages = pdfDoc.getPages() for(let i = 0; i < pages.length; i++) { let page = pages[i] let { width, height } = page.getSize() for(let i = 0; i < 6; i++) { for(let j = 0; j < 6; j++) { page.drawText(text, { x: j * 100, y: height / 5 + i * 100, size: 30, font: helveticaFont, color: rgb(0.95, 0.1, 0.1), opacity: 0.2, rotate: degrees(-35), }) } } } // 序列化为字节 const pdfBytes = await pdfDoc.save() this.preView(pdfBytes, docTitle) } // 添加 image 水印 async addImageWatermark({ pdfDoc, bytes, imageType, docTitle }) { // 嵌入JPG图像字节和PNG图像字节 let image const maps = { 'jpg': pdfDoc.embedJpg.bind(pdfDoc), 'png': pdfDoc.embedPng.bind(pdfDoc) } image = await maps[imageType](bytes) // 将JPG图像的宽度/高度缩小到原始大小的50% const dims = image.scale(0.5) const pages = pdfDoc.getPages() for(let i = 0; i < pages.length; i++) { let page = pages[i] let { width, height } = page.getSize() for(let i = 0; i < 6; i++) { for(let j = 0; j < 6; j++) { page.drawImage(image, { x: width / 5 - dims.width / 2 + j * 100, y: height / 5 - dims.height / 2 + i * 100, width: dims.width, height: dims.height, rotate: degrees(-35) }) } } } // 序列化为字节 const pdfBytes = await pdfDoc.save() this.preView(pdfBytes, docTitle) } // 添加 canvas 水印 addCanvasWatermark({ pdfDoc, text, docTitle }) { // 旋转角度大小 const rotateAngle = Math.PI / 6; // labels是要显示的水印文字,垂直排列 let labels = new Array(); labels.push(text); const pages = pdfDoc.getPages() const size = pages[0].getSize() let pageWidth = size.width let pageHeight = size.height let canvas = document.createElement('canvas'); let canvasWidth = canvas.width = pageWidth; let canvasHeight = canvas.height = pageHeight; const context = canvas.getContext('2d'); context.font = "15px Arial"; // 先平移到画布中心 context.translate(pageWidth / 2, pageHeight / 2 - 250); // 在绕画布逆方向旋转30度 context.rotate(-rotateAngle); // 在还原画布的坐标中心 context.translate(-pageWidth / 2, -pageHeight / 2); // 获取文本的最大长度 let textWidth = Math.max(...labels.map(item => context.measureText(item).width)); let lineHeight = 15, fontHeight = 12, positionY, i i = 0, positionY = 0 while (positionY <= pageHeight) { positionY = positionY + lineHeight * 5 i++ } canvasWidth += Math.sin(rotateAngle) * (positionY + i * fontHeight) // 给canvas加上画布向左偏移的最大距离 canvasHeight = 2 * canvasHeight for (positionY = 0, i = 0; positionY <= canvasHeight; positionY = positionY + lineHeight * 5) { // 进行画布偏移是为了让画布旋转之后水印能够左对齐; context.translate(-(Math.sin(rotateAngle) * (positionY + i * fontHeight)), 0); for (let positionX = 0; positionX < canvasWidth; positionX += 2 * textWidth) { let spacing = 0; labels.forEach(item => { context.fillText(item, positionX, positionY + spacing); context.fillStyle = 'rgba(187, 187, 187, .8)'; // 字体颜色 spacing = spacing + lineHeight; }) } context.translate(Math.sin(rotateAngle) * (positionY + i * fontHeight), 0); context.restore(); i++ } // 图片的base64编码路径 let dataUrl = canvas.toDataURL('image/png'); // 使用Xhr请求获取图片Blob let xhr = new XMLHttpRequest(); xhr.open("get", dataUrl, true); xhr.responseType = "blob"; xhr.onload = res => { const imgBlob = res.target.response // 获取Blob图片Buffer imgBlob.arrayBuffer().then(async buffer => { const pngImage = await pdfDoc.embedPng(buffer) for(let i = 0; i < pages.length; i++) { pages[i].drawImage(pngImage) } // 序列化为字节 const pdfBytes = await pdfDoc.save() this.preView(pdfBytes, docTitle) }) } xhr.send(); } // 预览 preView(stream, docTitle) { const URL = window.URL || window.WEBkitURL; const href = URL.createObjectURL(new Blob([stream], { type: 'application/pdf;charset=utf-8' })) const wo = window.open(href) // 设置新打开的页签 document title let timer = setInterval(() => { if(wo.closed) { clearInterval(timer) } else { wo.document.title = docTitle } }, 500) }}我这里将上面文件放在src/utils下
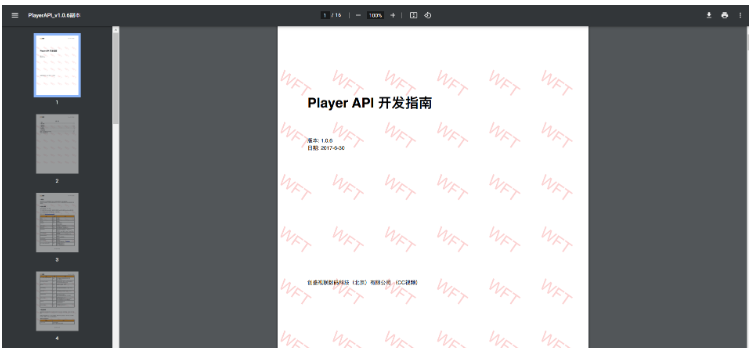
3.4.1 预览(添加文本水印)
代码:
// 引入import PreviewPdf from '@/utils/previewPdf' // script// 实例化进行添加水印 并预览// file.raw 是要预览的pdf文件流 Blobnew PreviewPdf({ blob: file.raw, docTitle: 'window.open docTitle', isAddWatermark: true, // 是否需要添加水印 watermark: { // watermark必填 里面可以不填 type: 'text', text: 'WFT' }})效果:
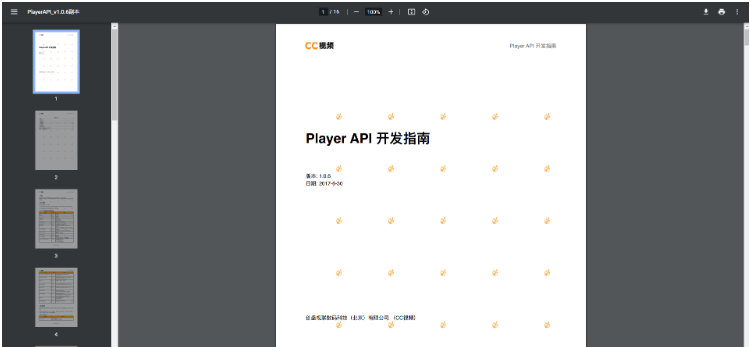
3.4.2 预览(添加图片水印)
代码:
// 引入import PreviewPdf from '@/utils/previewPdf' // scriptconst watermarkImage = require('@/assets/img/watermark.png') // 水印图片let xhr = new XMLHttpRequest();xhr.open("get", watermarkImage, true);xhr.responseType = "blob";xhr.onload = function (res) { const imgBlob = res.target.response // 水印图片的Blob流 imgBlob.arrayBuffer().then(buffer => { //get arraybuffer // 添加水印 预览 new PreviewPdf({ blob: file.raw, docTitle: file.name, isAddWatermark: true, watermark: { type: 'image', image: { bytes: buffer, imageType: 'png' } } }) })}xhr.send();效果:
3.4.3 预览(添加文本canvas绘制水印)
代码:
// 引入import PreviewPdf from '@/utils/previewPdf' // scriptnew PreviewPdf({ blob: file.raw, docTitle: file.name, isAddWatermark: true, watermark: { type: 'canvas', text: 'WFT-CANVAS' }})效果:

因为有些样式调的不太好,就我目前写的我更偏向使用canvas这个,当然都是可以使用的,样式都是可以调整的。
注意:里面的属性 isAddWatermark 设置为false或者不传该字段将不添加水印,还有watermark这个字段是必须的,穿个空对象也行像watermark:{}这样,因为我上面类中构造方法将参数结构了,可以按需调整。
整体的封装使用就是上面这样子了, 希望可以帮到有需要的伙伴~~~
再给大家一个直接往某个dom元素里面添加水印的方法
不传参数默认为整个body添加水印
function waterMark(text = 'WFT', dom = document.body) { if (document.getElementById('waterMark')) return // 旋转角度大小 var rotateAngle = Math.PI / 6; // labels是要显示的水印文字,垂直排列 var labels = new Array(); labels.push(text); let pageWidth = dom.clientWidth let pageHeight = dom.clientHeight let canvas = document.createElement('canvas'); let canvasWidth = canvas.width = pageWidth; let canvasHeight = canvas.height = pageHeight; var context = canvas.getContext('2d'); context.font = "15px Arial"; // 先平移到画布中心 context.translate(pageWidth / 2, pageHeight / 2 - 250); // 在绕画布逆方向旋转30度 context.rotate(-rotateAngle); // 在还原画布的坐标中心 context.translate(-pageWidth / 2, -pageHeight / 2); // 获取文本的最大长度 let textWidth = Math.max(...labels.map(item => context.measureText(item).width)); let lineHeight = 15, fontHeight = 12, positionY, i i = 0, positionY = 0 while (positionY <= pageHeight) { positionY = positionY + lineHeight * 5 i++ } canvasWidth += Math.sin(rotateAngle) * (positionY + i * fontHeight) // 给canvas加上画布向左偏移的最大距离 canvasHeight = 2 * canvasHeight for (positionY = 0, i = 0; positionY <= canvasHeight; positionY = positionY + lineHeight * 5) { // 进行画布偏移是为了让画布旋转之后水印能够左对齐; context.translate(-(Math.sin(rotateAngle) * (positionY + i * fontHeight)), 0); for (let positionX = 0; positionX < canvasWidth; positionX += 2 * textWidth) { let spacing = 0; labels.forEach(item => { context.fillText(item, positionX, positionY + spacing); spacing = spacing + lineHeight; }) } context.translate(Math.sin(rotateAngle) * (positionY + i * fontHeight), 0); context.restore(); i++ } let dataUrl = canvas.toDataURL('image/png'); let waterMarkPage = document.createElement('div'); waterMarkPage.id = "waterMark" let style = waterMarkPage.style; style.position = 'fixed'; style.overflow = "hidden"; style.left = 0; style.top = 0; style.opacity = '0.4'; style.background = "url(" + dataUrl + ")"; style.zIndex = 999; style.pointerEvents = "none"; style.width = '100%'; style.height = '100vh'; dom.appendChild(waterMarkPage);}以上就是“Vue怎么使用pdf-lib实现为文件流添加水印并预览”这篇文章的所有内容,感谢各位的阅读!相信大家阅读完这篇文章都有很大的收获,小编每天都会为大家更新不同的知识,如果还想学习更多的知识,请关注编程网精选频道。
--结束END--
本文标题: Vue怎么使用pdf-lib实现为文件流添加水印并预览
本文链接: https://www.lsjlt.com/news/351765.html(转载时请注明来源链接)
有问题或投稿请发送至: 邮箱/279061341@qq.com QQ/279061341
下载Word文档到电脑,方便收藏和打印~
2024-05-11
2024-05-11
2024-05-11
2024-05-11
2024-05-11
2024-05-11
2024-05-11
2024-05-11
2024-05-11
2024-05-11
回答
回答
回答
回答
回答
回答
回答
回答
回答
回答


官方手机版

微信公众号

商务合作


0