本篇内容介绍了“Vue2和vue3中常用组件通信方法有哪些”的有关知识,在实际案例的操作过程中,不少人都会遇到这样的困境,接下来就让小编带领大家学习一下如何处理这些情况吧!希望大家仔细阅读,能够学有所成!Vue3 组件通信方式props$e
本篇内容介绍了“Vue2和vue3中常用组件通信方法有哪些”的有关知识,在实际案例的操作过程中,不少人都会遇到这样的困境,接下来就让小编带领大家学习一下如何处理这些情况吧!希望大家仔细阅读,能够学有所成!
props
$emit
expose / ref
$attrs
v-model
provide / inject
Vuex
mitt
用 props 传数据给子组件有两种方法,如下
方法一,setup() 方法写法
// Parent.vue 传送<child :msg1="msg1" :msg2="msg2"></child><script>import child from "./child.vue"import { ref, Reactive } from "vue"export default { data(){ return { msg1:"这是传级子组件的信息1" } }, setup(){ // 创建一个响应式数据 // 写法一 适用于基础类型 ref 还有其他用处,下面章节有介绍 const msg2 = ref("这是传级子组件的信息2") // 写法二 适用于复杂类型,如数组、对象 const msg2 = reactive(["这是传级子组件的信息2"]) return { msg2 } }}</script>// Child.vue 接收<script>export default { props: ["msg1", "msg2"],// 如果这行不写,下面就接收不到 setup(props) { console.log(props) // { msg1:"这是传给子组件的信息1", msg2:"这是传给子组件的信息2" } },}</script>方法二,setup 语法糖
// Parent.vue 传送<child :msg2="msg2"></child><script setup> import child from "./child.vue" import { ref, reactive } from "vue" const msg2 = ref("这是传给子组件的信息2") // 或者复杂类型 const msg2 = reactive(["这是传级子组件的信息2"])</script>// Child.vue 接收<script setup> // 不需要引入 直接使用 // import { defineProps } from "vue" const props = defineProps({ // 写法一 msg2: String // 写法二 msg2:{ type:String, default:"" } }) console.log(props) // { msg2:"这是传级子组件的信息2" }</script>注意:
如果父组件是setup(),子组件setup 语法糖写法的话,是接收不到父组件里 data 的属性,只能接收到父组件里 setup 函数里传的属性
如果父组件是setup 语法糖写法,子组件setup()方法写法,可以通过 props 接收到 data 和 setup 函数里的属性,但是子组件要是在 setup 里接收,同样只能接收到父组件中 setup 函数里的属性,接收不到 data 里的属性
官方也说了,既然用了 3,就不要写 2 了,所以不推荐setup()方法写法。下面的例子,一律只用语法糖的写法
// Child.vue 派发<template> // 写法一 <button @click="emit('myClick')">按钮</buttom> // 写法二 <button @click="handleClick">按钮</buttom></template><script setup> // 方法一 适用于Vue3.2版本 不需要引入 // import { defineEmits } from "vue" // 对应写法一 const emit = defineEmits(["myClick","myClick2"]) // 对应写法二 const handleClick = ()=>{ emit("myClick", "这是发送给父组件的信息") } // 方法二 不适用于 Vue3.2版本,该版本 useContext()已废弃 import { useContext } from "vue" const { emit } = useContext() const handleClick = ()=>{ emit("myClick", "这是发送给父组件的信息") }</script>// Parent.vue 响应<template> <child @myClick="onMyClick"></child></template><script setup> import child from "./child.vue" const onMyClick = (msg) => { console.log(msg) // 这是父组件收到的信息 }</script>父组件获取子组件的属性或者调用子组件方法
// Child.vue<script setup> // 方法一 不适用于Vue3.2版本,该版本 useContext()已废弃 import { useContext } from "vue" const ctx = useContext() // 对外暴露属性方法等都可以 ctx.expose({ childName: "这是子组件的属性", someMethod(){ console.log("这是子组件的方法") } }) // 方法二 适用于Vue3.2版本, 不需要引入 // import { defineExpose } from "vue" defineExpose({ childName: "这是子组件的属性", someMethod(){ console.log("这是子组件的方法") } })</script>// Parent.vue 注意 ref="comp"<template> <child ref="comp"></child> <button @click="handlerClick">按钮</button></template><script setup> import child from "./child.vue" import { ref } from "vue" const comp = ref(null) const handlerClick = () => { console.log(comp.value.childName) // 获取子组件对外暴露的属性 comp.value.someMethod() // 调用子组件对外暴露的方法 }</script>attrs:包含父作用域里除 class 和 style 除外的非 props 属性集合
// Parent.vue 传送<child :msg1="msg1" :msg2="msg2" title="3333"></child><script setup> import child from "./child.vue" import { ref, reactive } from "vue" const msg1 = ref("1111") const msg2 = ref("2222")</script>// Child.vue 接收<script setup> import { defineProps, useContext, useAttrs } from "vue" // 3.2版本不需要引入 defineProps,直接用 const props = defineProps({ msg1: String }) // 方法一 不适用于 Vue3.2版本,该版本 useContext()已废弃 const ctx = useContext() // 如果没有用 props 接收 msg1 的话就是 { msg1: "1111", msg2:"2222", title: "3333" } console.log(ctx.attrs) // { msg2:"2222", title: "3333" } // 方法二 适用于 Vue3.2版本 const attrs = useAttrs() console.log(attrs) // { msg2:"2222", title: "3333" }</script>可以支持多个数据双向绑定
// Parent.vue<child v-model:key="key" v-model:value="value"></child><script setup> import child from "./child.vue" import { ref, reactive } from "vue" const key = ref("1111") const value = ref("2222")</script>// Child.vue<template> <button @click="handlerClick">按钮</button></template><script setup> // 方法一 不适用于 Vue3.2版本,该版本 useContext()已废弃 import { useContext } from "vue" const { emit } = useContext() // 方法二 适用于 Vue3.2版本,不需要引入 // import { defineEmits } from "vue" const emit = defineEmits(["key","value"]) // 用法 const handlerClick = () => { emit("update:key", "新的key") emit("update:value", "新的value") }</script>provide / inject 为依赖注入
provide:可以让我们指定想要提供给后代组件的数据或
inject:在任何后代组件中接收想要添加在这个组件上的数据,不管组件嵌套多深都可以直接拿来用
// Parent.vue<script setup> import { provide } from "vue" provide("name", "沐华")</script>// Child.vue<script setup> import { inject } from "vue" const name = inject("name") console.log(name) // 沐华</script>// store/index.jsimport { createStore } from "vuex"export default createStore({ state:{ count: 1 }, getters:{ getCount: state => state.count }, mutations:{ add(state){ state.count++ } }})// main.jsimport { createApp } from "vue"import App from "./App.vue"import store from "./store"createApp(App).use(store).mount("#app")// Page.vue// 方法一 直接使用<template> <div>{{ $store.state.count }}</div> <button @click="$store.commit('add')">按钮</button></template>// 方法二 获取<script setup> import { useStore, computed } from "vuex" const store = useStore() console.log(store.state.count) // 1 const count = computed(()=>store.state.count) // 响应式,会随着vuex数据改变而改变 console.log(count) // 1 </script>Vue3 中没有了 EventBus 跨组件通信,但是现在有了一个替代的方案 mitt.js,原理还是 EventBus
先安装 npm i mitt -S
然后像以前封装 bus 一样,封装一下
mitt.jsimport mitt from 'mitt'const mitt = mitt()export default mitt然后两个组件之间通信的使用
// 组件 A<script setup>import mitt from './mitt'const handleClick = () => { mitt.emit('handleChange')}</script>// 组件 B <script setup>import mitt from './mitt'import { onUnmounted } from 'vue'const someMethed = () => { ... }mitt.on('handleChange',someMethed)onUnmounted(()=>{ mitt.off('handleChange',someMethed)})</script>Vue2.x 组件通信共有12种
props
$emit / v-on
.sync
v-model
ref
$children / $parent
$attrs / $listeners
provide / inject
EventBus
Vuex
$root
slot
父子组件通信可以用:
props
$emit / v-on
$attrs / $listeners
ref
.sync
v-model
$children / $parent
兄弟组件通信可以用:
EventBus
Vuex
$parent
跨层级组件通信可以用:
provide/inject
EventBus
Vuex
$attrs / $listeners
$root
下面把每一种组件通信方式的写法一一列出
父组件向子组件传送数据,这应该是最常用的方式了
子组件接收到数据之后,不能直接修改父组件的数据。会报错,所以当父组件重新渲染时,数据会被覆盖。如果子组件内要修改的话推荐使用 computed
// Parent.vue 传送<template> <child :msg="msg"></child></template>// Child.vue 接收export default { // 写法一 用数组接收 props:['msg'], // 写法二 用对象接收,可以限定接收的数据类型、设置默认值、验证等 props:{ msg:{ type:String, default:'这是默认数据' } }, mounted(){ console.log(this.msg) },}可以帮我们实现父组件向子组件传递的数据 的双向绑定,所以子组件接收到数据后可以直接修改,并且会同时修改父组件的数据
// Parent.vue<template> <child :page.sync="page"></child></template><script>export default { data(){ return { page:1 } }}// Child.vueexport default { props:["page"], computed(){ // 当我们在子组件里修改 currentPage 时,父组件的 page 也会随之改变 currentPage { get(){ return this.page }, set(newVal){ this.$emit("update:page", newVal) } } }}</script>和 .sync 类似,可以实现将父组件传给子组件的数据为双向绑定,子组件通过 $emit 修改父组件的数据
// Parent.vue<template> <child v-model="value"></child></template><script>export default { data(){ return { value:1 } }}// Child.vue<template> <input :value="value" @input="handlerChange"></template>export default { props:["value"], // 可以修改事件名,默认为 input model:{ // prop:'value', // 上面传的是value这里可以不写,如果属性名不是value就要写 event:"updateValue" }, methods:{ handlerChange(e){ this.$emit("input", e.target.value) // 如果有上面的重命名就是这样 this.$emit("updateValue", e.target.value) } }}</script>ref 如果在普通的DOM元素上,引用指向的就是该DOM元素;
如果在子组件上,引用的指向就是子组件实例,然后父组件就可以通过 ref 主动获取子组件的属性或者调用子组件的方法
// Child.vueexport default { data(){ return { name:"沐华" } }, methods:{ someMethod(msg){ console.log(msg) } }}// Parent.vue<template> <child ref="child"></child></template><script>export default { mounted(){ const child = this.$refs.child console.log(child.name) // 沐华 child.someMethod("调用了子组件的方法") }}</script>子组件通过派发事件的方式给父组件数据,或者触发父组件更新等操作
// Child.vue 派发export default { data(){ return { msg: "这是发给父组件的信息" } }, methods: { handleClick(){ this.$emit("sendMsg",this.msg) } },}// Parent.vue 响应<template> <child v-on:sendMsg="getChildMsg"></child> // 或 简写 <child @sendMsg="getChildMsg"></child></template>export default { methods:{ getChildMsg(msg){ console.log(msg) // 这是父组件接收到的消息 } }}多层嵌套组件传递数据时,如果只是传递数据,而不做中间处理的话就可以用这个,比如父组件向孙子组件传递数据时
$attrs:包含父作用域里除 class 和 style 除外的非 props 属性集合。通过 this.$attrs 获取父作用域中所有符合条件的属性集合,然后还要继续传给子组件内部的其他组件,就可以通过 v-bind="$attrs"
$listeners:包含父作用域里 .native 除外的监听事件集合。如果还要继续传给子组件内部的其他组件,就可以通过 v-on="$linteners"
使用方式是相同的
// Parent.vue<template> <child :name="name" title="1111" ></child></templateexport default{ data(){ return { name:"沐华" } }}// Child.vue<template> // 继续传给孙子组件 <sun-child v-bind="$attrs"></sun-child></template>export default{ props:["name"], // 这里可以接收,也可以不接收 mounted(){ // 如果props接收了name 就是 { title:1111 },否则就是{ name:"沐华", title:1111 } console.log(this.$attrs) }}$children:获取到一个包含所有子组件(不包含孙子组件)的 VueComponent 对象数组,可以直接拿到子组件中所有数据和方法等
$parent:获取到一个父节点的 VueComponent 对象,同样包含父节点中所有数据和方法等
// Parent.vueexport default{ mounted(){ this.$children[0].someMethod() // 调用第一个子组件的方法 this.$children[0].name // 获取第一个子组件中的属性 }}// Child.vueexport default{ mounted(){ this.$parent.someMethod() // 调用父组件的方法 this.$parent.name // 获取父组件中的属性 }}provide / inject 为依赖注入,说是不推荐直接用于应用程序代码中,但是在一些插件或组件库里却是被常用,所以我觉得用也没啥,还挺好用的
provide:可以让我们指定想要提供给后代组件的数据或方法
inject:在任何后代组件中接收想要添加在这个组件上的数据或方法,不管组件嵌套多深都可以直接拿来用
要注意的是 provide 和 inject 传递的数据不是响应式的,也就是说用 inject 接收来数据后,provide 里的数据改变了,后代组件中的数据不会改变,除非传入的就是一个可监听的对象
所以建议还是传递一些常量或者方法
// 父组件export default{ // 方法一 不能获取 this.xxx,只能传写死的 provide:{ name:"沐华", }, // 方法二 可以获取 this.xxx provide(){ return { name:"沐华", msg: this.msg // data 中的属性 someMethod:this.someMethod // methods 中的方法 } }, methods:{ someMethod(){ console.log("这是注入的方法") } }}// 后代组件export default{ inject:["name","msg","someMethod"], mounted(){ console.log(this.msg) // 这里拿到的属性不是响应式的,如果需要拿到最新的,可以在下面的方法中返回 this.someMethod() }}EventBus 是中央事件总线,不管是父子组件,兄弟组件,跨层级组件等都可以使用它完成通信操作
定义方式有三种
// 方法一// 抽离成一个单独的 js 文件 Bus.js ,然后在需要的地方引入// Bus.jsimport Vue from "vue"export default new Vue()// 方法二 直接挂载到全局// main.jsimport Vue from "vue"Vue.prototype.$bus = new Vue()// 方法三 注入到 Vue 根对象上// main.jsimport Vue from "vue"new Vue({ el:"#app", data:{ Bus: new Vue() }})使用如下,以方法一按需引入为例
// 在需要向外部发送自定义事件的组件内<template> <button @click="handlerClick">按钮</button></template>import Bus from "./Bus.js"export default{ methods:{ handlerClick(){ // 自定义事件名 sendMsg Bus.$emit("sendMsg", "这是要向外部发送的数据") } }}// 在需要接收外部事件的组件内import Bus from "./Bus.js"export default{ mounted(){ // 监听事件的触发 Bus.$on("sendMsg", data => { console.log("这是接收到的数据:", data) }) }, beforeDestroy(){ // 取消监听 Bus.$off("sendMsg") }}Vuex 是状态管理器,集中式存储管理所有组件的状态。这一块内容过长,如果基础不熟的话可以看这个Vuex,然后大致用法如下
比如创建这样的文件结构
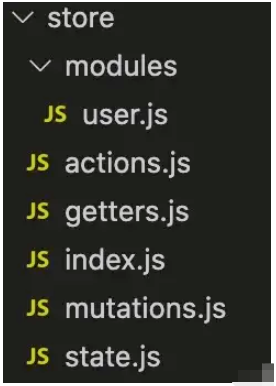
index.js 里内容如下
import Vue from 'vue'import Vuex from 'vuex'import getters from './getters'import actions from './actions'import mutations from './mutations'import state from './state'import user from './modules/user'Vue.use(Vuex)const store = new Vuex.Store({ modules: { user }, getters, actions, mutations, state})export default store然后在 main.js 引入
import Vue from "vue"import store from "./store"new Vue({ el:"#app", store, render: h => h(App)})然后在需要的使用组件里
import { mapGetters, mapMutations } from "vuex"export default{ computed:{ // 方式一 然后通过 this.属性名就可以用了 ...mapGetters(["引入getters.js里属性1","属性2"]) // 方式二 ...mapGetters("user", ["user模块里的属性1","属性2"]) }, methods:{ // 方式一 然后通过 this.属性名就可以用了 ...mapMutations(["引入mutations.js里的方法1","方法2"]) // 方式二 ...mapMutations("user",["引入user模块里的方法1","方法2"]) }}// 或者也可以这样获取this.$store.state.xxxthis.$store.state.user.xxx$root 可以拿到 App.vue 里的数据和方法
就是把子组件的数据通过插槽的方式传给父组件使用,然后再插回来
// Child.vue<template> <div> <slot :user="user"></slot> </div></template>export default{ data(){ return { user:{ name:"沐华" } } }}// Parent.vue<template> <div> <child v-slot="slotProps"> {{ slotProps.user.name }} </child> </div></template>“Vue2和Vue3中常用组件通信方法有哪些”的内容就介绍到这里了,感谢大家的阅读。如果想了解更多行业相关的知识可以关注编程网网站,小编将为大家输出更多高质量的实用文章!
--结束END--
本文标题: Vue2和Vue3中常用组件通信方法有哪些
本文链接: https://www.lsjlt.com/news/356426.html(转载时请注明来源链接)
有问题或投稿请发送至: 邮箱/279061341@qq.com QQ/279061341
下载Word文档到电脑,方便收藏和打印~
2024-05-16
2024-05-16
2024-05-16
2024-05-16
2024-05-16
2024-05-16
2024-05-16
2024-05-16
2024-05-16
2024-05-16
回答
回答
回答
回答
回答
回答
回答
回答
回答
回答


官方手机版

微信公众号

商务合作


0