目录 前言 一、安装php7.4 二、安装swoole 4.8.12 三、安装Composer 四、创建Hyperf项目 五、安装Redis 7.0.7 六、安装Mysql8 七、安装Nginx 1.22.1 八、安装
目录
最近在学习Hyperf,使用了Centos7系统来做服务器,这里记录一下环境的搭建步骤,以便以后重装系统
yum install epel-release
yum -y install yum-utils
yum -y install https://rpms.remirepo.net/enterprise/remi-release-7.rpm
yum repolist all |grep php
yum-config-manager --enable remi-php74
yum -y install php php-cli php-fpm php-Mysqlnd php-zip php-devel php-gd php-mcrypt php-mbstring php-curl php-xml php-pear php-bcmath php-JSON php-Redis php-calendar php-bcmath php-Sockets php-session php-snmp
php -v
php -m
wget Https://GitHub.com/swoole/swoole-src/arcHive/refs/tags/v4.8.12.tar.gz
phpize
#查看php-config路径 替换下面的–with-php-config路径
whereis php-config
./configure --enable-openssl --enable-swoole --with-php-config=/usr/bin/php-config
make && make install
php --ri swoole 检查是否成功
yum install -y ca-certificates
php -r "copy('https://install.phpcomposer.com/installer', 'composer-setup.php');"
php composer-setup.php
php -r "unlink('composer-setup.php');"
mv composer.phar /usr/bin/composer
composer config -g repo.packaGISt composer https://mirrors.aliyun.com/composer/
composer -v
composer create-project hyperf/hyperf-skeleton 项目名称
wget https://github.com/redis/redis/archive/7.0.7.tar.gz
tar zxvf 7.0.7.tar.gz
cd redis-7.0.7
make
make install PREFIX=/usr/local/redis
cp redis.conf /usr/local/redis/bin/
vim /usr/local/redis/bin/redis.conf
------------------------------------------------------
#不限IP,将bind 127.0.0.1修改成0.0.0.0即可
#requirepass 设置密码,去掉#注释,并把后面的密码设置成需要的密码
deamonize no改为yes(以守护线程运行)
------------------------------------------------------
vim /etc/systemd/system/redis.service
------------------------------------------------------
[Unit]
Description=redis-server
After=network.target
[Service]
Type=forking
ExecStart=/usr/local/redis/bin/redis-server /usr/local/redis/bin/redis.conf
PrivateTmp=true
[Install]
WantedBy=multi-user.target
------------------------------------------------------
service redis start/restart/stop
#设置开机启动
#方式一:
chkconfig --add redis //开启自启动
chkconfig redis off //关闭自启动
chkconfig --del redis //删除自启动
#方式二:
systemctl enable redis
ps aux | grep redis
netstat -lntp
#wget https://cdn.mysql.com//Downloads/MySQL-8.0/mysql-8.0.31-1.el7.x86_64.rpm-bundle.tar
yum -y install yum-utils
wget https://repo.mysql.com/mysql80-commUnity-release-el7-7.noarch.rpm
rpm -Uvh mysql80-community-release-el7-7.noarch.rpm
yum repolist all | grep mysql
yum-config-manager --enable mysql80-community/x86_64
yum -y install mysql-community-server
service mysqld start
cat /var/log/mysqld.log | grep passWord #查看初始登录密码
mysql -uroot -p
------------------------------------------------------------------------------------
# 修改初始密码
use mysql;
set global validate_password.policy=LOW;
select host,user,plugin,authentication_string from user;
alter user 'root'@'localhost' IDENTIFIED WITH mysql_native_password BY '您的密码';
update user set Host='%' where user='root';
grant all privileges on *.* to 'root'@'%';
flush privileges;
下载Nginx稳定版 http://nginx.org/download/nginx-1.22.1.tar.gz
tar -zxvf nginx-1.22.1.tar.gz
cd nginx-1.22.1
./configure --prefix=/usr/local/nginx --with-http_stub_status_module --with-http_ssl_module
make && make install
cd /usr/lib/systemd/system #创建Nginx服务
vim nginx.service
--------------------------------------------------
[Unit]
Description=nginx
After=network.target
[Service]
Type=forking
ExecStart=/usr/local/nginx/sbin/nginx
ExecReload=/usr/local/nginx/sbin/nginx -s reload
ExecStop=/usr/local/nginx/sbin/nginx -s quit
PrivateTmp=true
[Install]
WantedBy=multi-user.target
--------------------------------------------------
service nginx start/stop/restart
ps -ef|grep nginx
systemctl enable nginx.service #设置开机自动启动
systemctl disable nginx.service #关闭开机自动启动
cd /usr/local/nginx/conf
vim nginx.conf #这里修改nginx的配置
官网:Node.js
wget https://nodejs.org/dist/v16.9.1/node-v16.9.1-linux-x64.tar.gz
tar -xf node-v16.9.1-linux-x64.tar.gz
mv node-v16.9.1-linux-x64 /usr/local/nodejs
# 建立node软链接
ln -s -f /usr/local/nodejs/bin/node /usr/local/bin
# 建立npm 软链接
ln -s -f /usr/local/nodejs/bin/npm /usr/local/bin
npm config set registry http://npmmirror.com/
node -v
npm -v
# 设置国内淘宝镜像源
composer config -g repo.packagist composer https://mirrors.aliyun.com/composer/
composer self-update
# 升级npm
npm install -g npm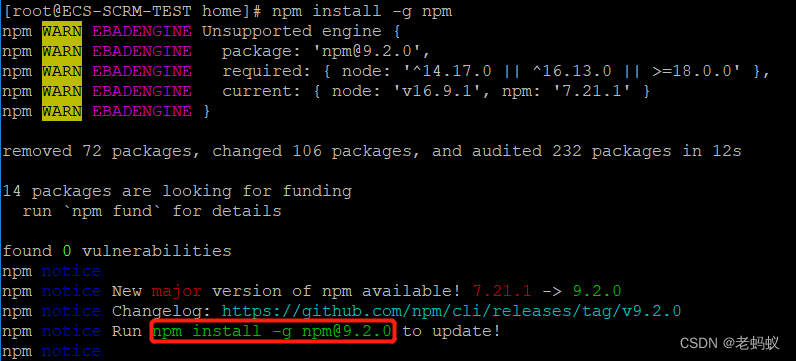
如图,根据最后提示的命令升级npm
npm install -g yarn
ln -s -f /usr/local/nodejs/bin/yarn /usr/local/bin
wget https://gcc.gnu.org/pub/gcc/infrastructure/gmp-6.2.1.tar.bz2
tar -xf gmp-6.2.1.tar.bz2
cd gmp-6.2.1
./configure
make
make check
make install
wget https://gcc.gnu.org/pub/gcc/infrastructure/mpfr-4.1.0.tar.bz2
tar -xf mpfr-4.1.0.tar.bz2
cd mpfr-4.1.0
./configure
make
make install
wget https://gcc.gnu.org/pub/gcc/infrastructure/mpc-1.2.1.tar.gz
tar -xf mpfr-4.1.0.tar.bz2
cd mpfr-4.1.0
./configure
make
make install
yum -y update
wget https://ftp.gnu.org/gnu/make/make-4.4.tar.gz
tar -xf make-4.4.tar.gz
cd make-4.4
./configure
make & make install
ln -s -f /usr/local/bin/make /usr/bin/make
make -v
安装gcc前,请先执行9、10、11的安装
yum -y update
yum -y install gmp mpfr mpc isl bzip2
wget https://ftp.gnu.org/gnu/gcc/gcc-12.2.0/gcc-12.2.0.tar.gz
tar -xf gcc-12.2.0.tar.gz
cd gcc-11.2.0
mkdir build
cd build
../configure --prefix=/usr/local -enable-checking=release -enable-languages=c,c++ -disable-multilib
make -j 4 #这个时间要等很久,后面的4为cpu核心数
make install
gcc -v
如果在make的过程中,出现如下图中 libmpfr.so.6: cannot open shared object file的错误![]()
请执行以下命令,没有则飘过。
cp /usr/local/lib/libmpfr.so.6.1.0 /usr/lib64
ln -s -f /usr/lib64/libmpfr.so.6.1.0 /usr/lib64/libmpfr.so.6
wget http://www.ffmpeg.org/releases/ffmpeg-4.4.3.tar.gz
tar -xf ffmpeg-4.4.3.tar.gz
cd ffmpeg-4.4.3
./configure --prefix=/usr/local/ffmpeg
make && make install
ln -s -f /usr/local/ffmpeg/bin/ffmpeg /usr/bin
ln -s -f /usr/local/ffmpeg/bin/ffprobe /usr/bin
来源地址:https://blog.csdn.net/hehe_ant/article/details/128478037
--结束END--
本文标题: centos7 搭建Php开发环境常用软件安装步骤
本文链接: https://www.lsjlt.com/news/385640.html(转载时请注明来源链接)
有问题或投稿请发送至: 邮箱/279061341@qq.com QQ/279061341
下载Word文档到电脑,方便收藏和打印~
2024-02-29
2024-02-29
2024-02-29
2024-02-29
2024-02-29
2024-02-29
2024-02-29
2024-02-29
2024-02-29
2024-02-29
回答
回答
回答
回答
回答
回答
回答
回答
回答
回答


官方手机版

微信公众号

商务合作


0