centos7.3搭建LNMP并部署wordpress站点一、拓扑图 二、准备工作: 1.三台独立主机(虚拟机)
centos7.3搭建LNMP并部署wordpress站点
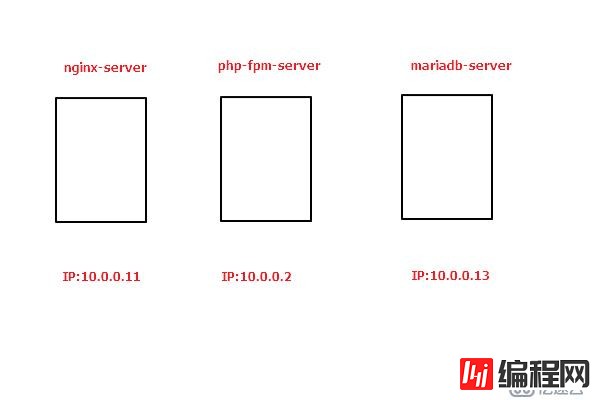
一、拓扑图
二、准备工作:
1.三台独立主机(虚拟机)
Nginx:10.0.0.11
PHP-fpm:10.0.0.2
mariadb:10.0.0.13
准备好yum环境(推荐阿里云yum源,请百度搜索)
2.相关的软件包准备
10.0.0.11(nginx)
yum install nginx -y
10.0.0.2(php-fpm)
yum install php-fpm php-Mysql php-mbstring php-mcrypt php-xcache -y
10.0.0.13(mariadb)
yum install mariadb-server -y
三、搭建步骤
1.nginx主机操作
1.安装
yum install nginx -y2.配置nginx支持反向代理php-fpm
vi /etc/nginx/conf.d/huwho.conf
    server {
        listen 80;
        server_name www.huwho.com;    #WEB站点域名
        index index.php index.html index.htm;
        #定义一个nginx的web站点,放置web静态资源
        location / {
        root /web/www;
        index index.html index.htm index.php;
        }
        #定义一个web状态页
        location /status {
        stub_status;
        }
        #pass the PHP scripts to FastCGI server listening on 10.0.0.2:9000
        #反向代理php,放置web动态资源
        location ~* \.php$ {
        root /web/www/php;                #php的站点根目录
        fastcgi_pass 10.0.0.2:9000;        #fastcgi的地址
        fastcgi_index index.php;
        fastcgi_param SCRIPT_FILENAME /web/www/php/$fastcgi_script_name;
        include fastcgi_params;
        }
    }
3.创建相应的目录
mkdir /web/www/ -pv
echo nginx web test >> /web/www/4.启动nginx服务并测试
systemctl start nginx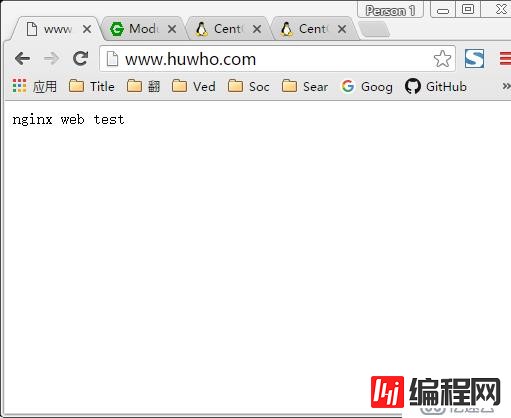
2.php-fpm主机操作
1.安装
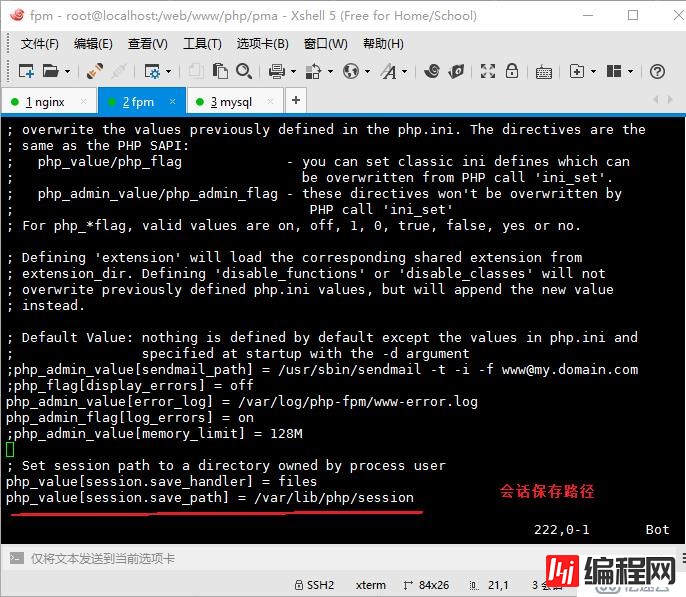
yum install php-fpm php-mysql php-mbstring php-mcrypt php-xcache -y2.php-fpm配置文件修改
修改图中三处位置
vi /etc/php-fpm.d/www.conf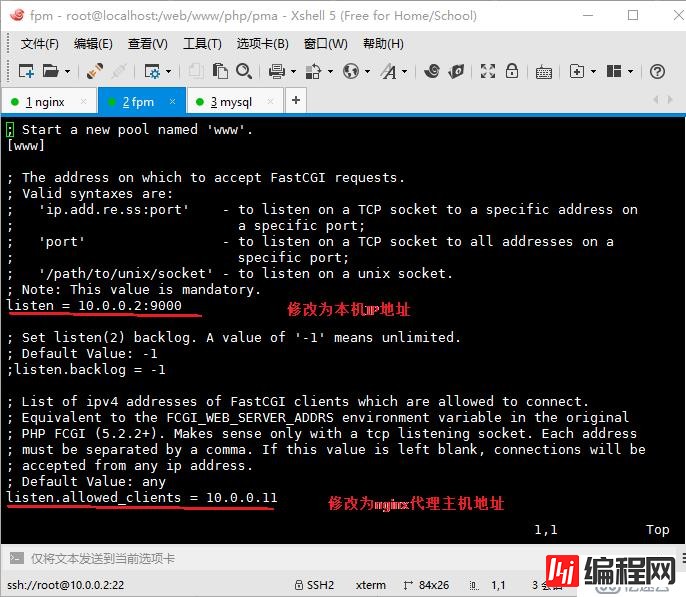
3.启动php-fpm服务
systemctl start php-fpm
[root@localhost ~]# ss -tln
State Recv-Q Send-Q Local Address:Port Peer Address:Port
LISTEN 0 128 *:111 *:*
LISTEN 0 5 192.168.122.1:53 *:*
LISTEN 0 128 *:22 *:*
LISTEN 0 128 127.0.0.1:631 *:*
LISTEN 0 100 127.0.0.1:25 *:*
LISTEN 0 128 10.0.0.2:9000 *:*
LISTEN 0 128 :::111 :::*
LISTEN 0 128 :::22 :::*
LISTEN 0 128 ::1:631 :::*
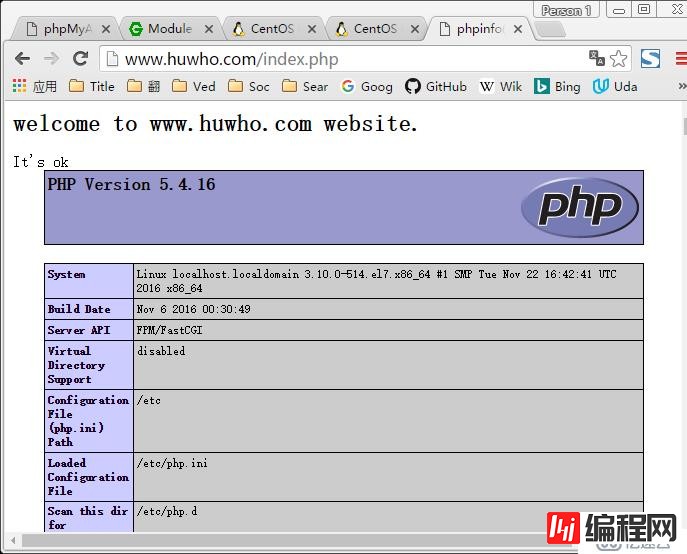
LISTEN 0 100 ::1:25 :::*4.创建动态资源目录,以及一个index.php文件做测试
mkdir /web/www/php -pv
cd /web/www/php
vi index.php
<h2>welcome to www.huwho.com website.</h2>
<?php
$conn=mysql_connect('10.0.0.13','jerry','123456');
if($conn)
echo "It's ok";
else
echo "bad";
phpinfo();
?> 
3.mysql主机操作
1.安装
yum install mariadb-server -y2.mysql配置文件修改
vi /etc/my.cnf.d/server.cnf
# this is only for the mysqld standalone daemon
[mysqld]
skip_name_resolve=ON
innodb_file_per_table=ON3.安全加固
mysql_secure_installation4.建立一个用户以及数据库
grant all on Wordpress.* to 'jerry'@'10.0.%.%' identified by '123456';4.安装phpMyAddmin数据库管理工具(php-fpm主机中操作)
1.下载phpMyAdmin-4.0.10.20-all-languages.tar.gz
下载地址https://www.phpmyadmin.net/
2.解压
tar -xf phpMyAdmin-4.0.10.20-all-languages.tar.gz3.创建软链接(因为名字太长)
ln -sv phpMyAdmin-4.0.10.20-all-languages.tar.gz pma4.更改名字
    cd pma
    cp config.sample.inc.php config.inc.php
5.编辑配置文件
修改图中两处信息
第一处为随机加入字符,加密作用
第二处为加入数据库ip地址
vi config.inc.php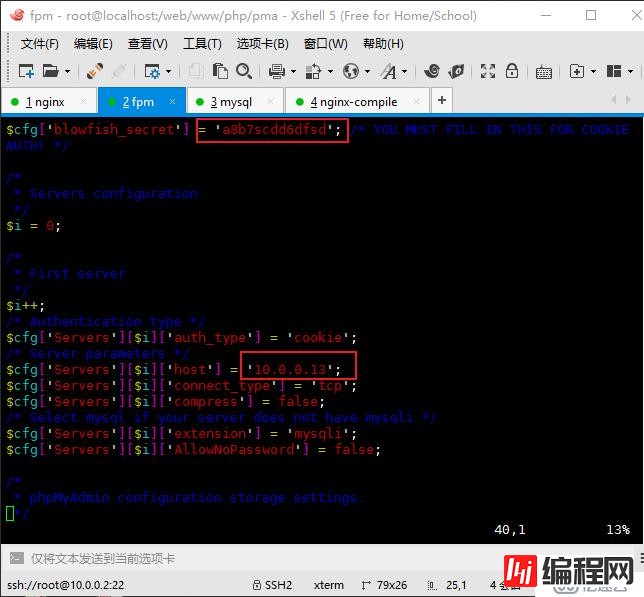
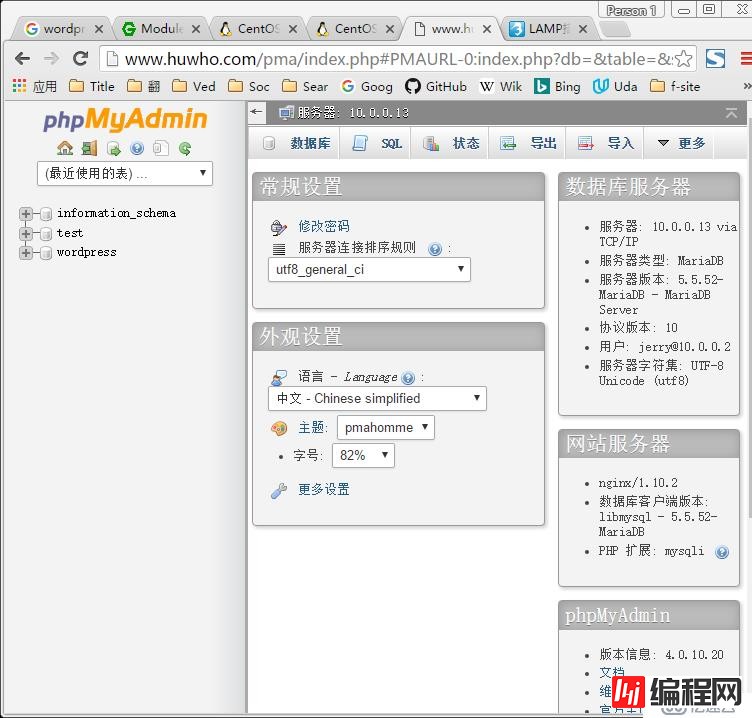
6.测试
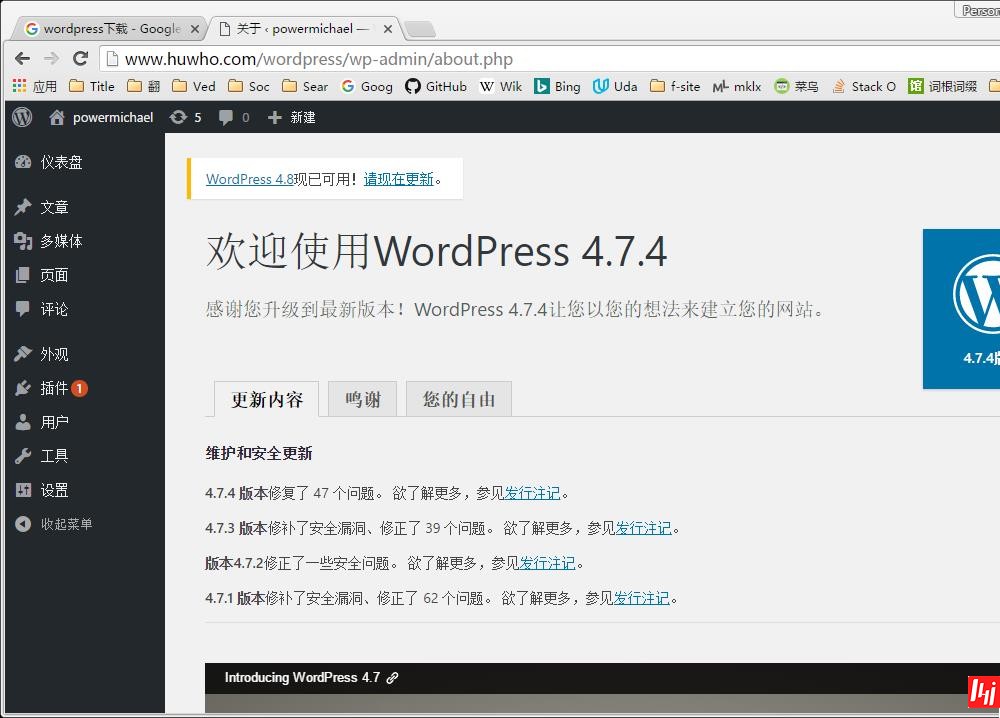
5.安装wordpress
1.准备工作
下载wordpress(Https://wordpress.org/download/)
nginx主机以及php主机都要安装wordpress以及进行下面的操作。解压文件分别放在对应的站点目录中。
nginx站点目录:/web/www php-fpm站点目录:/web/www/php
2.解压wordpress
tar -xvf wordpress-4.7.4-zh_CN.tar.gz3.修改配置文件
修改图中四处信息,分别为:数据库名称,用户名,密码,以及数据库主机ip地址
cd wordpress/
cp wp-config-sample.php wp-config.php
vi wp-config.php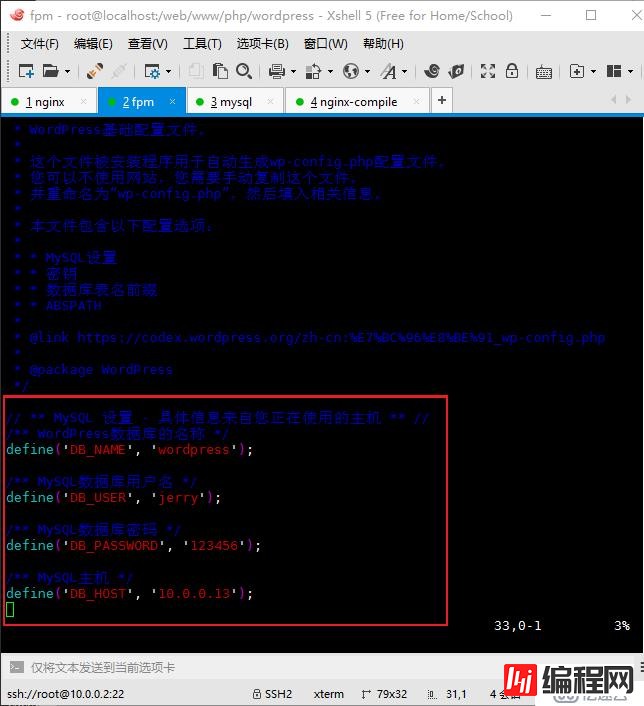
4.测试页面
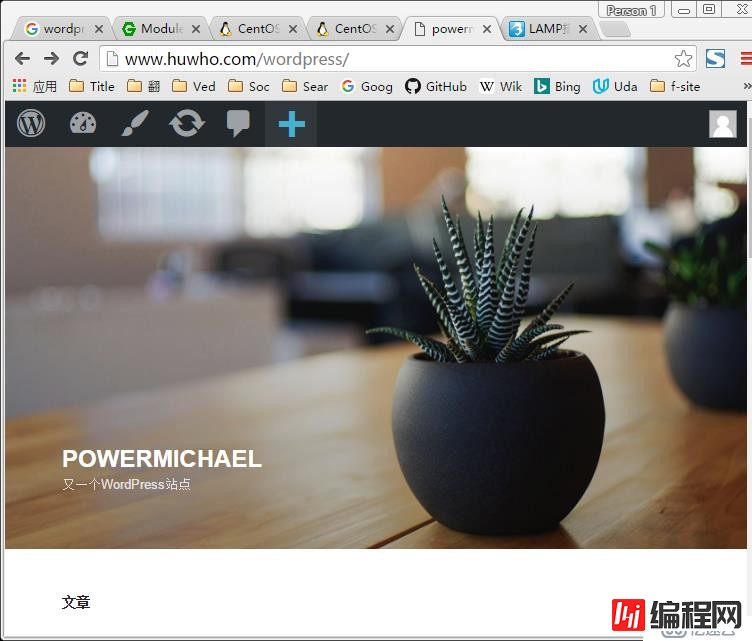
--结束END--
本文标题: centos7.3搭建LNMP并部署wordpress站点
本文链接: https://www.lsjlt.com/news/39769.html(转载时请注明来源链接)
有问题或投稿请发送至: 邮箱/279061341@qq.com QQ/279061341
下载Word文档到电脑,方便收藏和打印~
2024-02-29
2024-02-29
2024-02-27
2023-10-27
2023-10-26
2023-10-25
2023-10-21
2023-10-21
2023-10-18
2023-10-12
回答
回答
回答
回答
回答
回答
回答
回答
回答
回答


官方手机版

微信公众号

商务合作


0