文章目录 一、Nginx 下载二、部署步骤三、演示修改 Nginx 配置,修改端口号四、使用 Nginx 转发访问后端服务五、Nginx 常用命令 一、Nginx 下载 从官网中下载 n
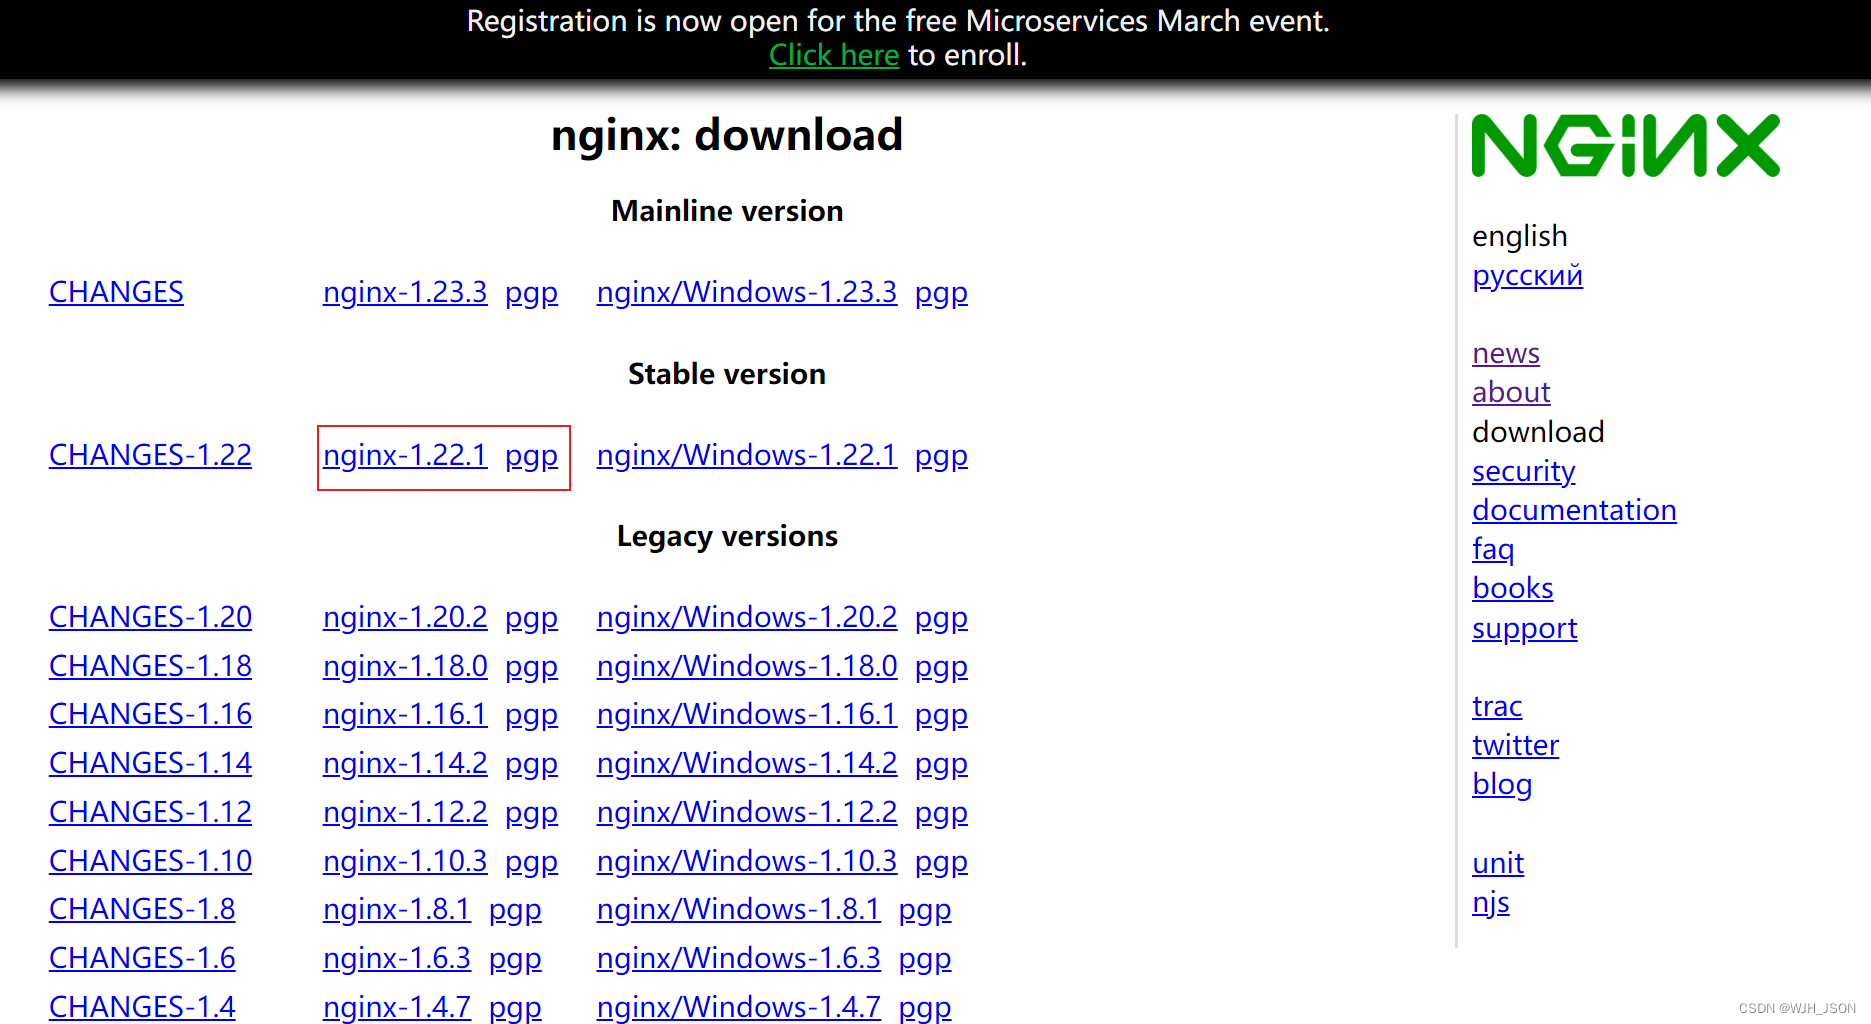
从官网中下载 nginx 压缩包到本地(Http://nginx.org/en/download.html)
[root@iZwz9cwntagbp2m20emj0qZ local]# mkdir nginx [root@iZwz9cwntagbp2m20emj0qZ local]# ls aeGIS app bin etc games include lib lib64 libexec nginx sbin share src[root@iZwz9cwntagbp2m20emj0qZ nginx]# ls nginx-1.22.1.tar.gz [root@iZwz9cwntagbp2m20emj0qZ nginx]# tar -zxvf nginx-1.22.1.tar.gz nginx-1.22.1/ nginx-1.22.1/auto/ ......[root@iZwz9cwntagbp2m20emj0qZ nginx]# ls nginx-1.22.1 nginx-1.22.1.tar.gz[root@iZwz9cwntagbp2m20emj0qZ /]# cd usr/local/nginx/nginx-1.22.1/ [root@iZwz9cwntagbp2m20emj0qZ nginx-1.22.1]# ls auto CHANGES CHANGES.ru conf configure contrib html LICENSE Makefile man objs README src [root@iZwz9cwntagbp2m20emj0qZ nginx-1.22.1]# ./configure①如果报错执行yum -y install pcre-devel // 安装pore
②如果再次报错执行 yum -y install openssl openssl-devel //安装openssl
[root@iZwz9cwntagbp2m20emj0qZ nginx-1.22.1]# make[root@iZwz9cwntagbp2m20emj0qZ nginx-1.22.1]# make install[root@iZwz9cwntagbp2m20emj0qZ nginx-1.22.1]# whereis nginx nginx: /usr/local/nginx[root@iZwz9cwntagbp2m20emj0qZ /]# cd usr/local/nginx/ [root@iZwz9cwntagbp2m20emj0qZ nginx]# ll total 1092 drwx------ 2 nobody root 4096 Mar 14 11:39 client_body_temp drwxr-xr-x 2 root root 4096 Mar 14 14:31 conf drwx------ 2 nobody root 4096 Mar 14 11:39 fastcgi_temp drwxr-xr-x 2 root root 4096 Mar 14 11:37 html drwxr-xr-x 2 root root 4096 Mar 14 14:37 logs drwxr-xr-x 9 1001 1001 4096 Mar 14 11:33 nginx-1.22.1 -rw-r--r-- 1 root root 1073948 Mar 14 11:19 nginx-1.22.1.tar.gz drwx------ 2 nobody root 4096 Mar 14 11:39 proxy_temp drwxr-xr-x 2 root root 4096 Mar 14 11:37 sbin drwx------ 2 nobody root 4096 Mar 14 11:39 scgi_temp drwx------ 2 nobody root 4096 Mar 14 11:39 uwsgi_temp[root@iZwz9cwntagbp2m20emj0qZ nginx]# cd sbin/[root@iZwz9cwntagbp2m20emj0qZ sbin]# ./nginx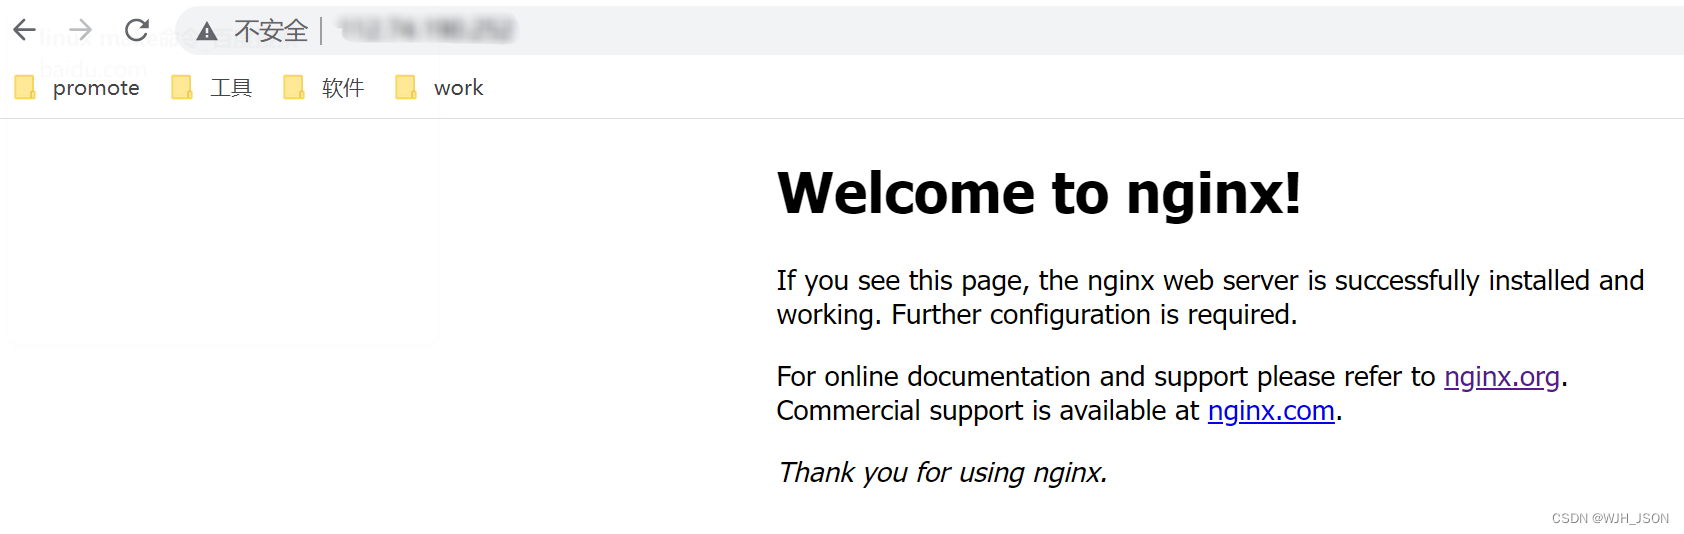
[root@iZwz9cwntagbp2m20emj0qZ /]# cd usr/local/nginx/nginx-1.22.1/conf/ [root@iZwz9cwntagbp2m20emj0qZ conf]# ll total 40 -rw-r--r-- 1 1001 1001 1077 Oct 19 16:02 fastcgi.conf -rw-r--r-- 1 1001 1001 1007 Oct 19 16:02 fastcgi_params -rw-r--r-- 1 1001 1001 2837 Oct 19 16:02 koi-utf -rw-r--r-- 1 1001 1001 2223 Oct 19 16:02 koi-win -rw-r--r-- 1 1001 1001 5349 Oct 19 16:02 mime.types -rw-r--r-- 1 1001 1001 2656 Oct 19 16:02 nginx.conf -rw-r--r-- 1 1001 1001 636 Oct 19 16:02 scgi_params -rw-r--r-- 1 1001 1001 664 Oct 19 16:02 uwsgi_params -rw-r--r-- 1 1001 1001 3610 Oct 19 16:02 win-utf [root@iZwz9cwntagbp2m20emj0qZ conf]# vim nginx.conf修改监听端口为666
server { listen 666; server_name localhost;} 保存并退出:esc -> shift + : -> wq
3. 重新加载 nginx.conf 配置文件
[root@iZwz9cwntagbp2m20emj0qZ /]# cd usr/local/nginx/sbin/ [root@iZwz9cwntagbp2m20emj0qZ sbin]# ll total 3804 -rwxr-xr-x 1 root root 3892016 Mar 14 11:37 nginx [root@iZwz9cwntagbp2m20emj0qZ sbin]# ./nginx -s reload
[root@iZwz9cwntagbp2m20emj0qZ /]# cd usr/local/app/ [root@iZwz9cwntagbp2m20emj0qZ app]# ll total 16160-rw-r--r-- 1 root root 16546230 Mar 14 14:23 SpringBoot-0.0.1-SNAPSHOT.jar [root@iZwz9cwntagbp2m20emj0qZ app]# java -jar springboot-0.0.1-SNAPSHOT.jar . ____ _ __ _ _ /\\ / ___'_ __ _ _(_)_ __ __ _ \ \ \ \ ( ( )\___ | '_ | '_| | '_ \/ _` | \ \ \ \ \\/ ___)| |_)| | | | | || (_| | ) ) ) ) ' |____| .__|_| |_|_| |_\__, | / / / / =========|_|==============|___/=/_/_/_/:: Spring Boot :: (v2.3.6.RELEASE) 2023-03-14 20:05:22.440 INFO 30885 --- [ main] c.JSON.springboot.SpringbootApplication : Starting SpringbootApplication v0.0.1-SNAPSHOT on iZwz9cwntagbp2m20emj0qZ with PID 30885 (/usr/local/app/springboot-0.0.1-SNAPSHOT.jar started by root in /usr/local/app) 2023-03-14 20:05:22.454 INFO 30885 --- [ main] c.json.springboot.SpringbootApplication : No active profile set, falling back to default profiles: default 2023-03-14 20:05:24.718 INFO 30885 --- [ main] o.s.b.w.embedded.Tomcat.TomcatWEBServer : Tomcat initialized with port(s): 666 (http) 2023-03-14 20:05:24.747 INFO 30885 --- [ main] o.apache.catalina.core.StandardService : Starting service [Tomcat] 2023-03-14 20:05:24.748 INFO 30885 --- [ main] org.apache.catalina.core.StandardEngine : Starting Servlet engine: [Apache Tomcat/9.0.39] 2023-03-14 20:05:24.891 INFO 30885 --- [ main] o.a.c.c.C.[Tomcat].[localhost].[/json] : Initializing Spring embedded WebApplicationContext2023-03-14 20:05:24.892 INFO 30885 --- [ main] w.s.c.ServletWebServerApplicationContext : Root WebApplicationContext: initialization completed in 2320 ms 2023-03-14 20:05:25.793 INFO 30885 --- [ main] o.s.s.concurrent.ThreadPoolTaskExecutor : Initializing ExecutorService 'applicationTaskExecutor' 2023-03-14 20:05:26.188 INFO 30885 --- [ main] o.s.b.w.embedded.tomcat.TomcatWebServer : Tomcat started on port(s): 666 (http) with context path '/json' 2023-03-14 20:05:26.219 INFO 30885 --- [ main] c.json.springboot.SpringbootApplication : Started SpringbootApplication in 4.683 seconds (JVM running for 5.522) 2023-03-14 20:06:06.170 INFO 30885 --- [-NIO-666-exec-4] o.a.c.c.C.[Tomcat].[localhost].[/json] : Initializing Spring DispatcherServlet 'dispatcherServlet' 2023-03-14 20:06:06.170 INFO 30885 --- [-nio-666-exec-4] o.s.web.servlet.DispatcherServlet : Initializing Servlet 'dispatcherServlet' 2023-03-14 20:06:06.187 INFO 30885 --- [-nio-666-exec-4] o.s.web.servlet.DispatcherServlet : Completed initialization in 17 ms在浏览器中测试访问接口

在 nginx.conf 文件中配置 location
[root@iZwz9cwntagbp2m20emj0qZ ~]# cd / [root@iZwz9cwntagbp2m20emj0qZ /]# cd usr/local/nginx/nginx-1.22.1/conf/ [root@iZwz9cwntagbp2m20emj0qZ conf]# vim nginx.confserver { listen 80; server_name localhost; location /json/ { proxy_pass http://112.74.190.252:666/json/; }}[root@iZwz9cwntagbp2m20emj0qZ /]# cd usr/local/nginx/sbin/ [root@iZwz9cwntagbp2m20emj0qZ sbin]# lltotal 3804 -rwxr-xr-x 1 root root 3892016 Mar 14 11:37 nginx [root@iZwz9cwntagbp2m20emj0qZ sbin]# ./nginx -s reload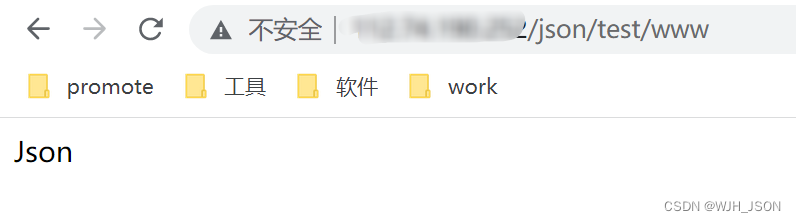
[root@iZwz9cwntagbp2m20emj0qZ /]# whereis nginx nginx: /usr/local/nginx[root@iZwz9cwntagbp2m20emj0qZ /]# cd usr/local/nginx/sbin/ [root@iZwz9cwntagbp2m20emj0qZ sbin]# ./nginx[root@iZwz9cwntagbp2m20emj0qZ /]# cd usr/local/nginx/sbin/ [root@iZwz9cwntagbp2m20emj0qZ sbin]# ./nginx -s stop[root@iZwz9cwntagbp2m20emj0qZ /]# cd usr/local/nginx/sbin/ [root@iZwz9cwntagbp2m20emj0qZ sbin]# ./nginx -s quit [root@iZwz9cwntagbp2m20emj0qZ /]# cd usr/local/nginx/sbin/ [root@iZwz9cwntagbp2m20emj0qZ sbin]# ./nginx -s reload (注意:Nginx 启动、停止、退出、重新加载命令都需要在 sbin 目录下执行)
[root@iZwz9cwntagbp2m20emj0qZ /]# cd usr/local/nginx/sbin/ [root@iZwz9cwntagbp2m20emj0qZ sbin]# ./nginx [root@iZwz9cwntagbp2m20emj0qZ sbin]# ps aux|grep nginxroot 30537 0.0 0.0 20576 624 ? Ss 16:41 0:00 nginx: master process ./nginx nobody 30538 0.0 0.0 21020 1320 ? S 16:41 0:00 nginx: worker process root 30542 0.0 0.0 112812 980 pts/0 S+ 16:41 0:00 grep --color=auto nginx来源地址:https://blog.csdn.net/WJH_JSON/article/details/129539291
--结束END--
本文标题: Linux 部署 Nginx
本文链接: https://www.lsjlt.com/news/413657.html(转载时请注明来源链接)
有问题或投稿请发送至: 邮箱/279061341@qq.com QQ/279061341
下载Word文档到电脑,方便收藏和打印~
2024-03-01
2024-03-01
2024-03-01
2024-03-01
2024-03-01
2024-02-29
2024-02-29
2024-02-29
2024-02-29
2024-02-29
回答
回答
回答
回答
回答
回答
回答
回答
回答
回答


官方手机版

微信公众号

商务合作


0